Full Farmhouse Tour Before and After
A farmhouse tour has been on my list of things to share for a while, and today, the wait is over!
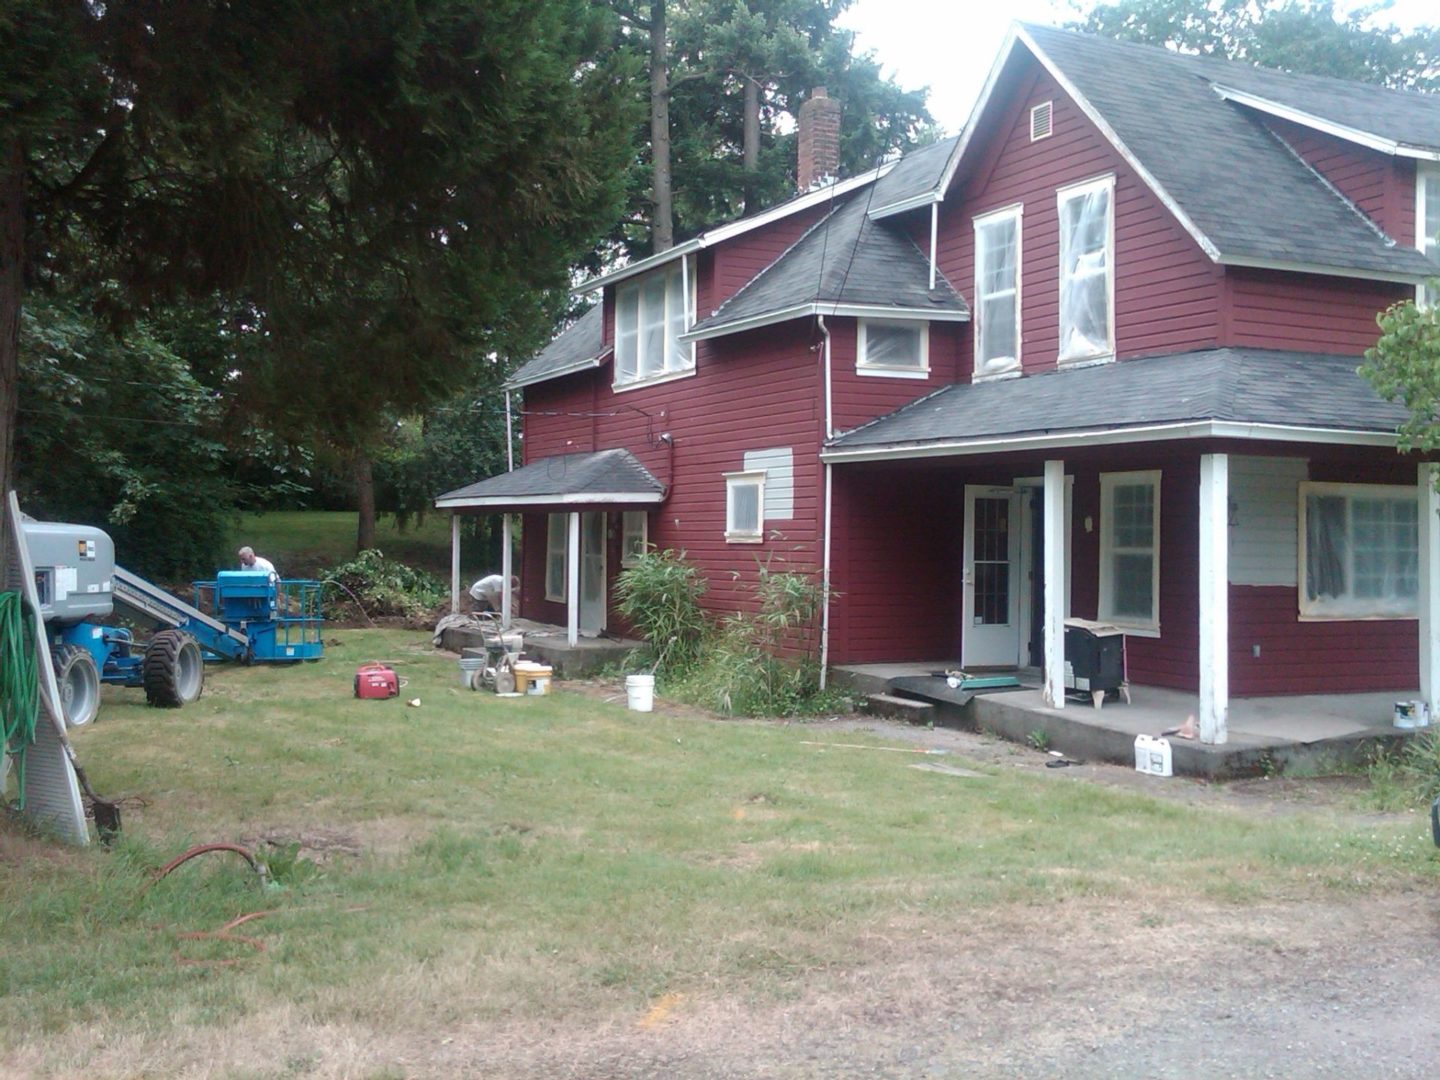
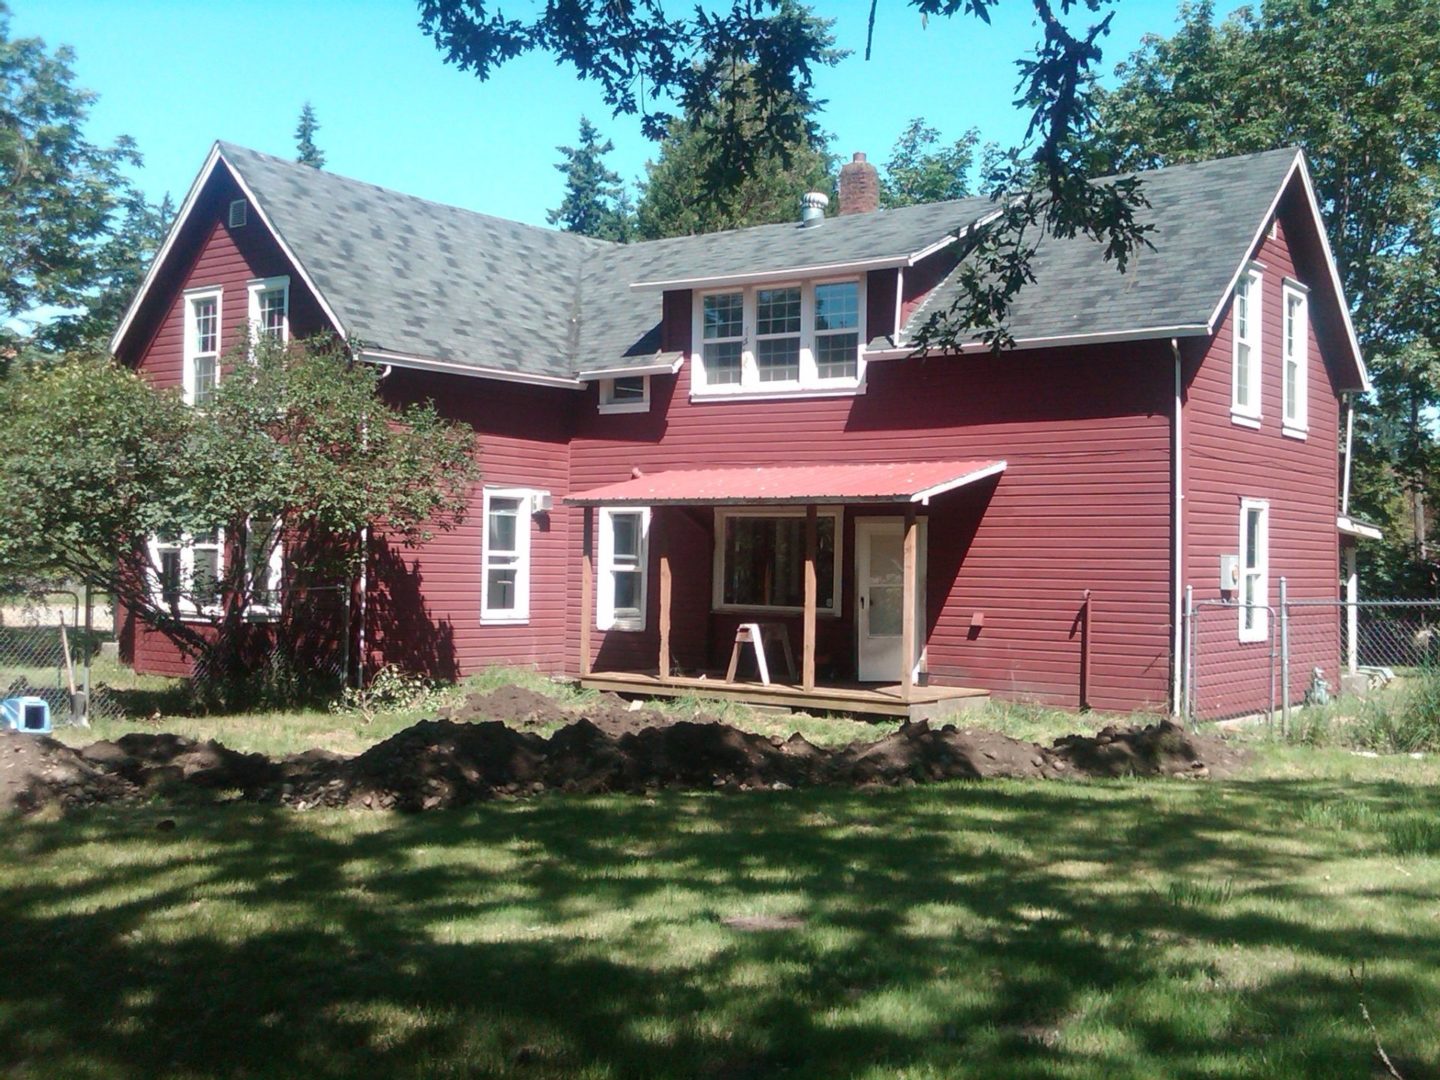
When we bought our 1906 farmhouse we knew it would be a labor of love and a lot of work to restore some of the original charm and beauty.
We’ve gotten a lot of our projects completed and I’m so excited to share them with you now as part of our farmhouse tour! Where possible, I’ll link all related blog posts for the tutorials and details if you’d like to try some of these yourself!
Grab a warm drink and settle in for a sweet walk down memory-lane!
Don’t Miss Out | The Elite Decorating Academy
If, while you’re going through this tour you start to wonder why I made certain decisions that I did, or how I knew to DIY or style things a specific way, you’ll be glad to know that I share an abundance of my Interior Design knowledge (from both my schooling and working in the field for 20 years) in my Elite Decorating Academy!
I’ll keep this plug short and sweet, because I know you’re excited to dive into the tour, but when you’re ready you can learn more at elitedecoratingacademy.com!
Ready for the Farmhouse Tour? Let’s Start in the Living Room.
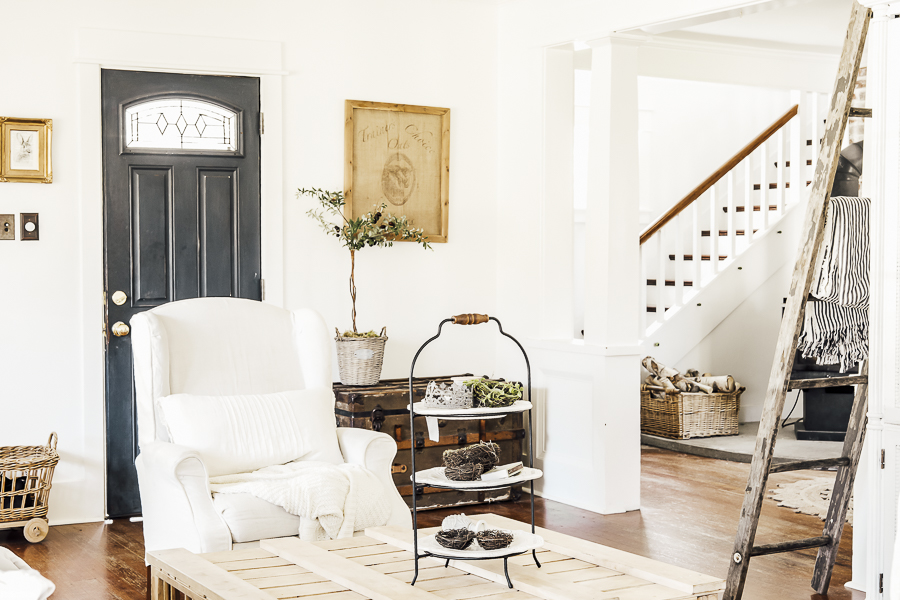
Walking in through the front door we step right into the living room.
We use a basket to keep our shoes together and out of the walkway, and a tall cabinet with KVARNVIK lidded storage boxes from IKEA for office supplies. I love that these bins keep things close by for when they’re needed, but put away out of sight the rest of the time!
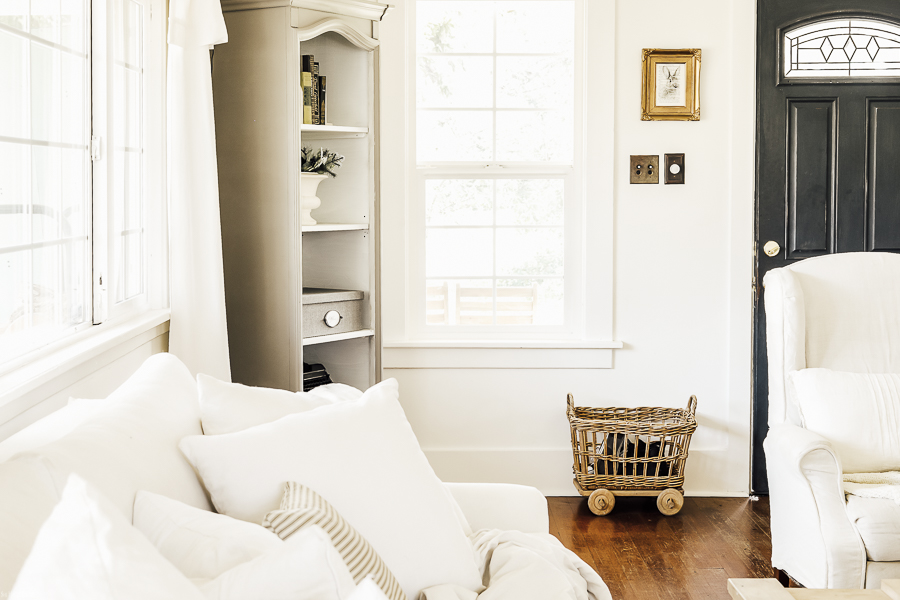
Our living room window treatments are actually just bleached drop cloths hung up on curtain clips! I love how simple and inexpensive they were to create, and the beauty they add to our room.
The couch is the FARLOV sofa from IKEA. Not only does it have a single cushion style that is reminiscent of actual vintage pieces, but it also has removable slipcovers that are easy to wash – a must in a home with a dog and 4 teenagers!
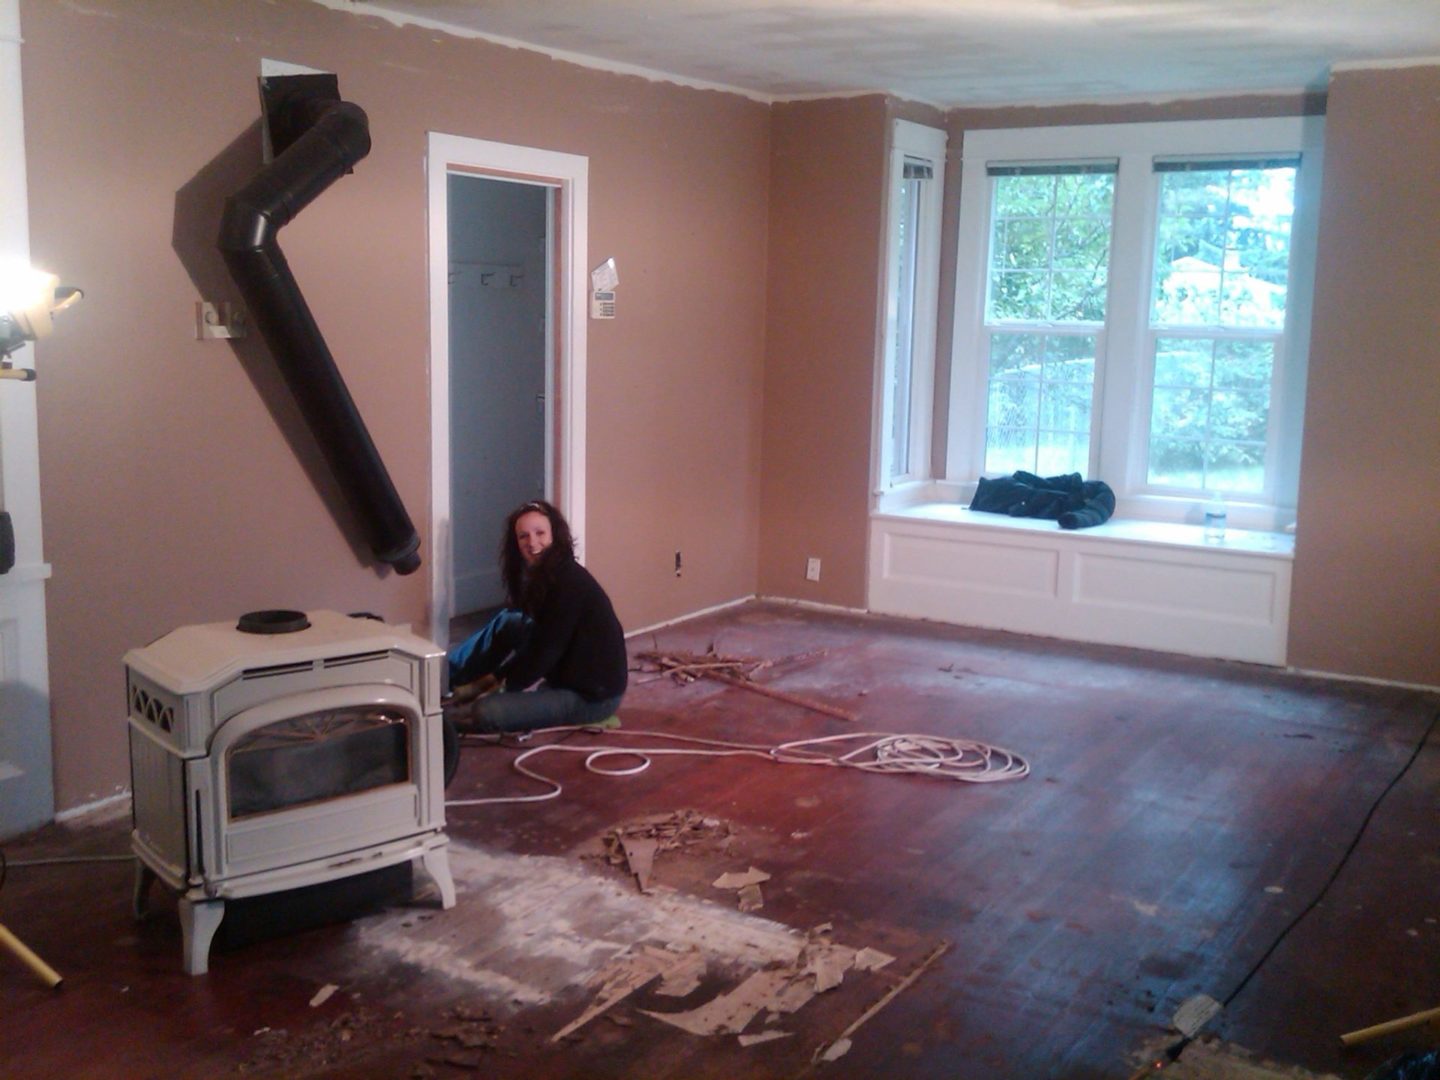
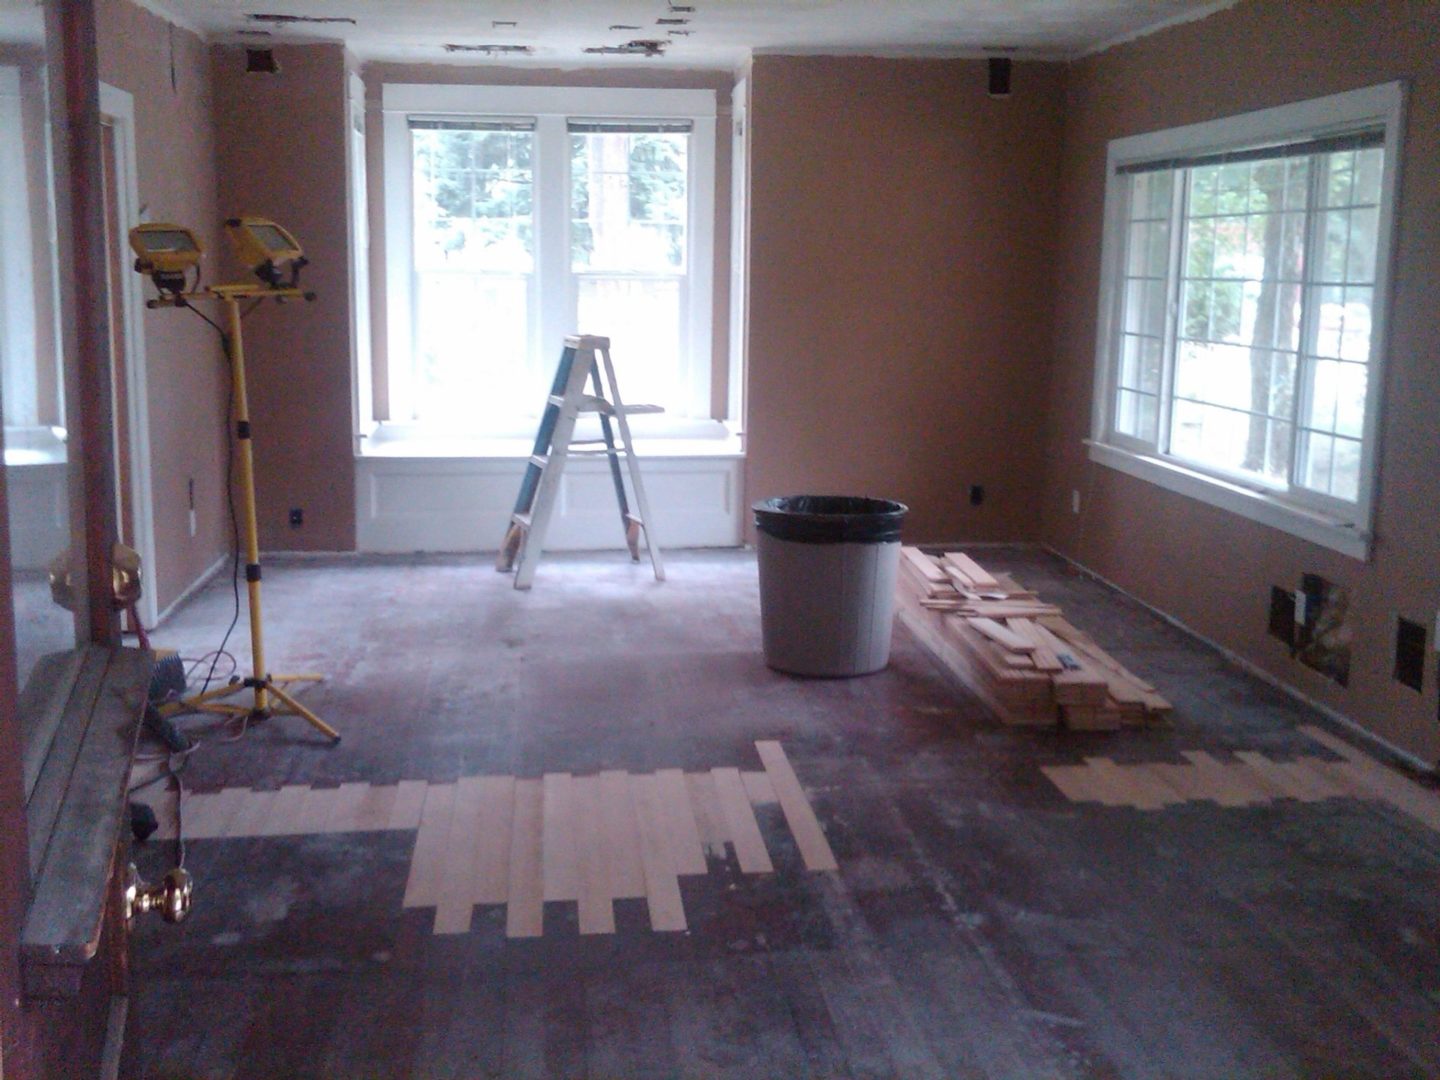
Since moving in we have replaced all the lighting, removed a chimney, and restored the original 1906 fir floors in this room.
The window seat on the wall opposite our front door caught my eye immediately as we were looking at this home for the first time. The addition of a custom, homemade French mattress cushion has made this spot even more special.
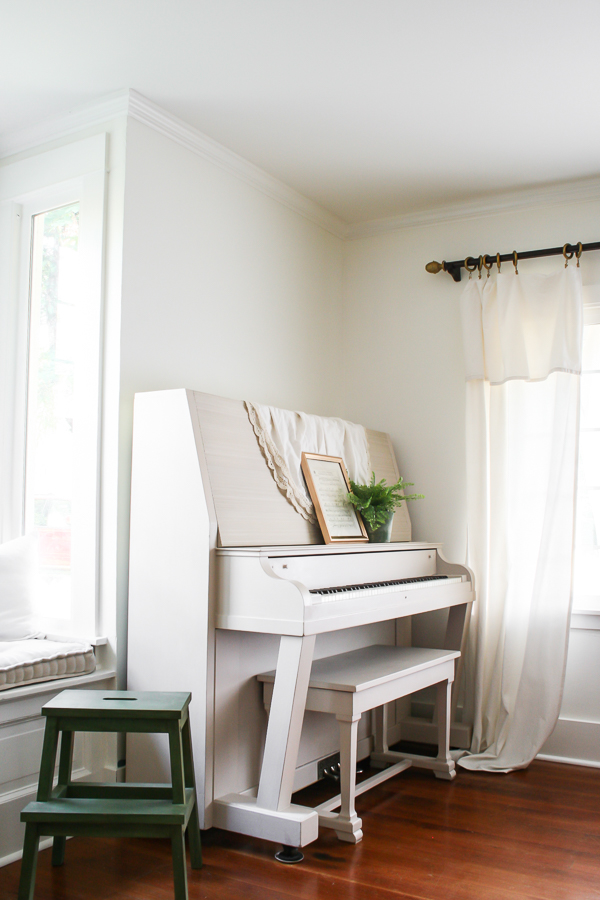
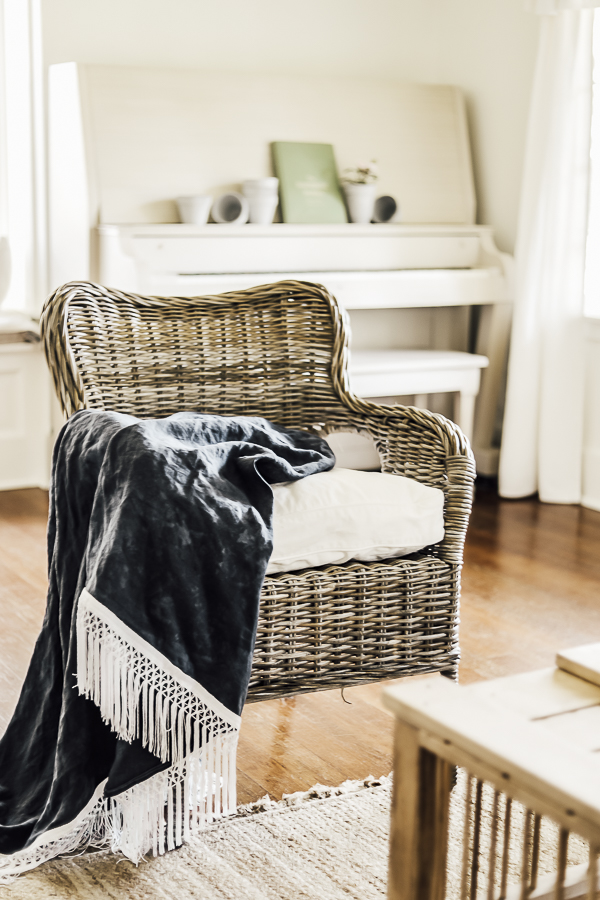
Our piano is from 1903 and was my Grandmother’s! A few years back we painted it with milk paint to match the theme and look of our room.
Previously it had been yellow, and before that, at least 2 other colors! I know painting pianos can be a little controversial, but I was in good company following in my Grandmother’s footsteps.
In front of our couch, we have a cute chicken crate coffee table that was designed in homage to the fact that this farmhouse was originally part of a chicken farm! We flipped a $9 coffee table over and added additional pieces to create the “crate” look.
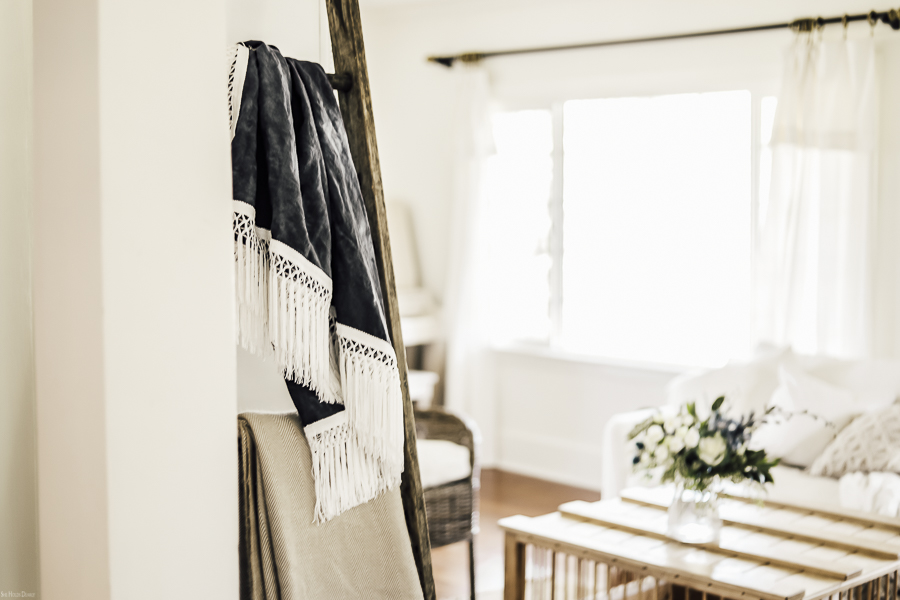
Across the room, we have an old rustic ladder that was found on the property that works beautifully and functionally showcases our blankets.
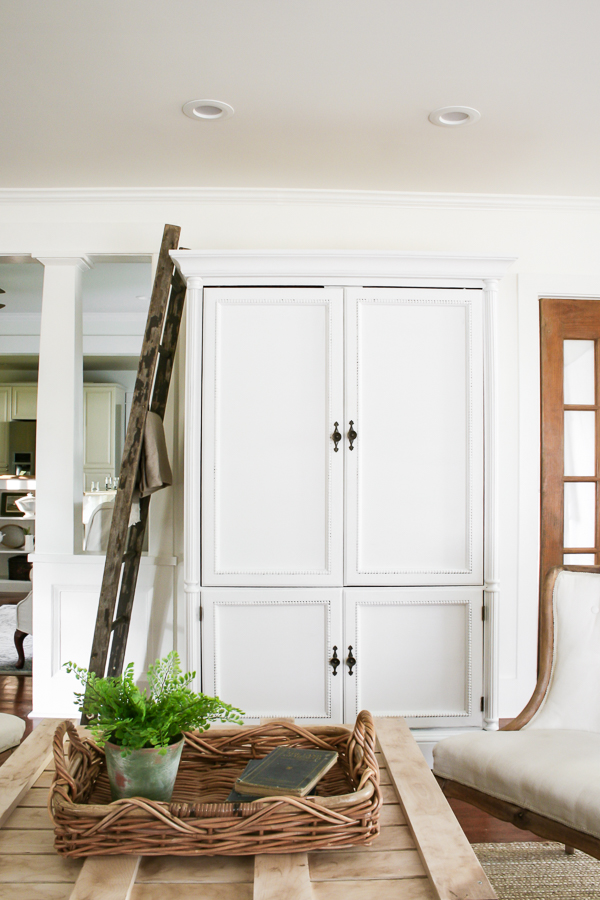
Our entertainment center & all that accompanies it are inside a chalk painted armoire from Craigslist, and a small dresser, also from Craigslist holds our LEGOS.
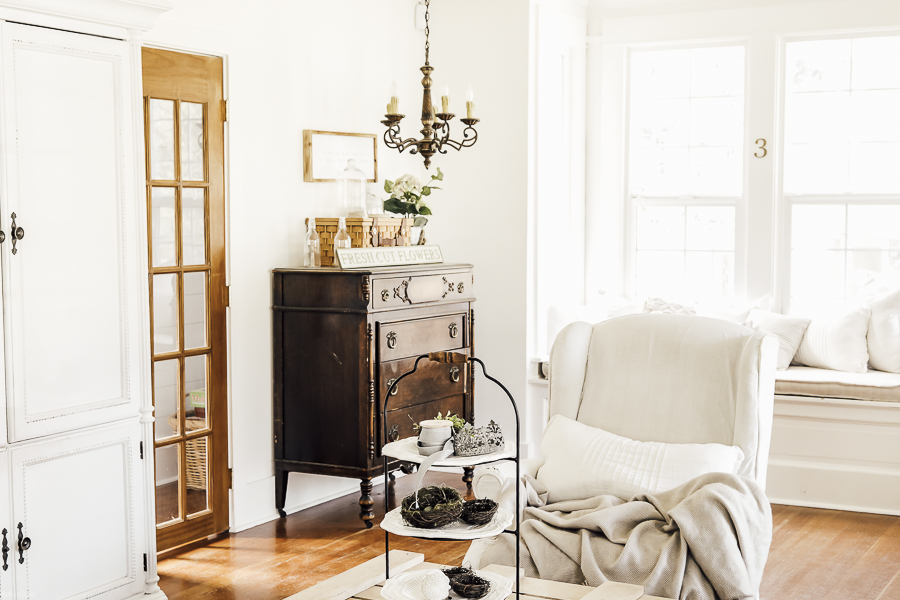
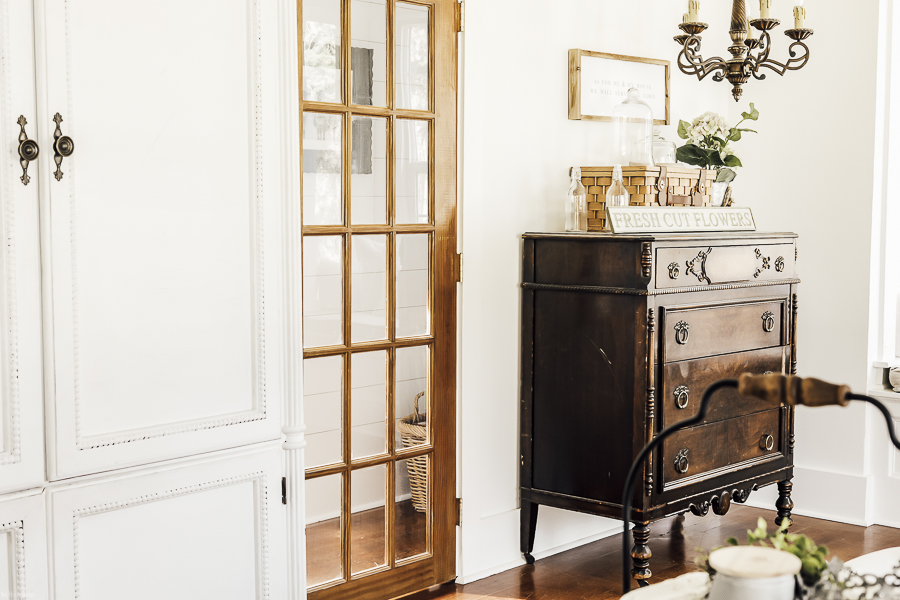
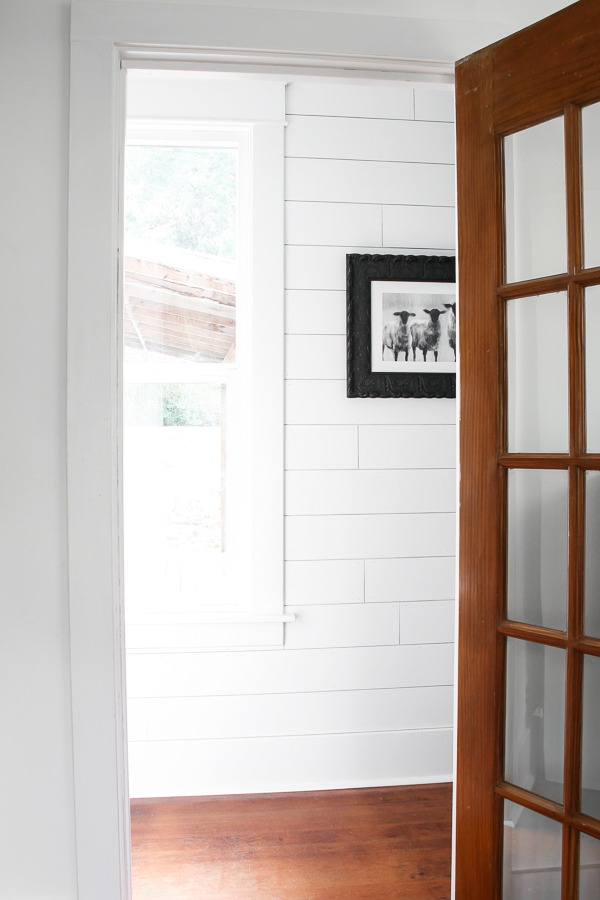
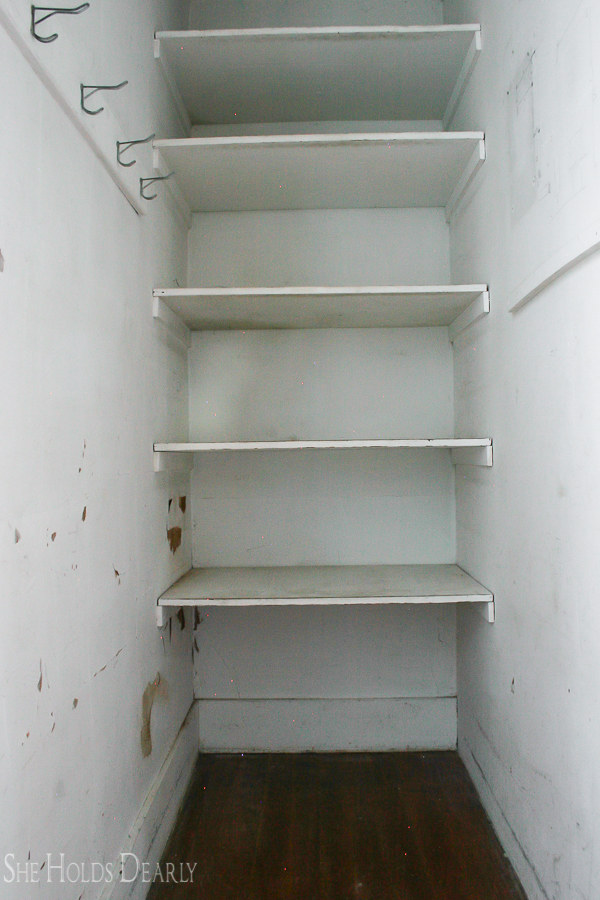
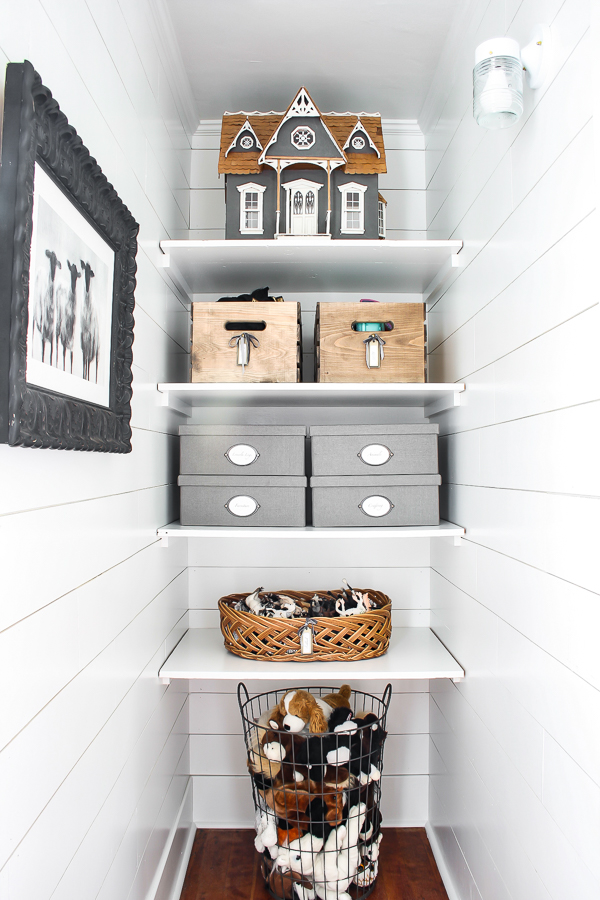
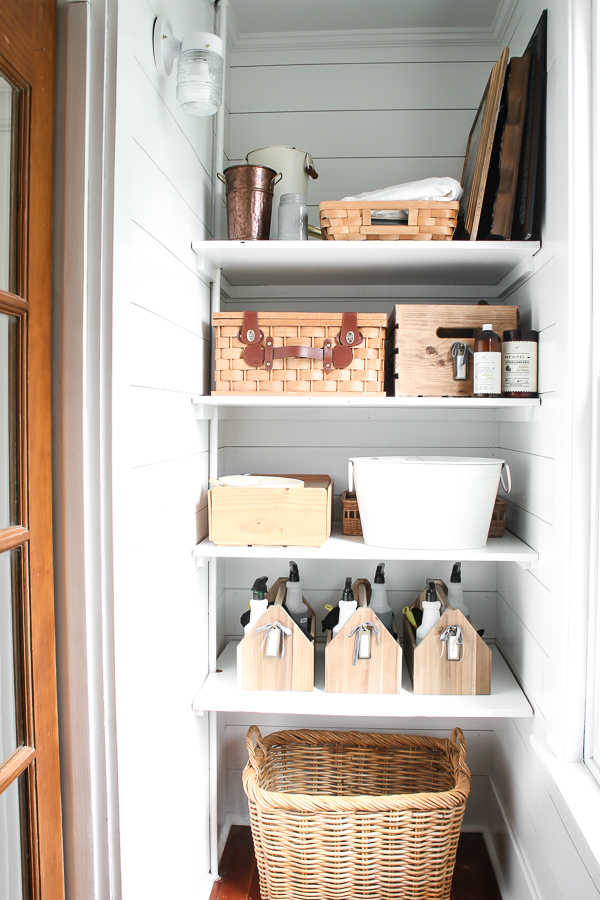
If you peek through the small French door in the corner, you’ll find our only closet storage area on the main floor! A few years back we completed the closet makeover to turn it into the functional and lovely space it is today! Shiplap, new lighting, and organized storage bins go a long way to finish a space!
Next, the Fireside Room…
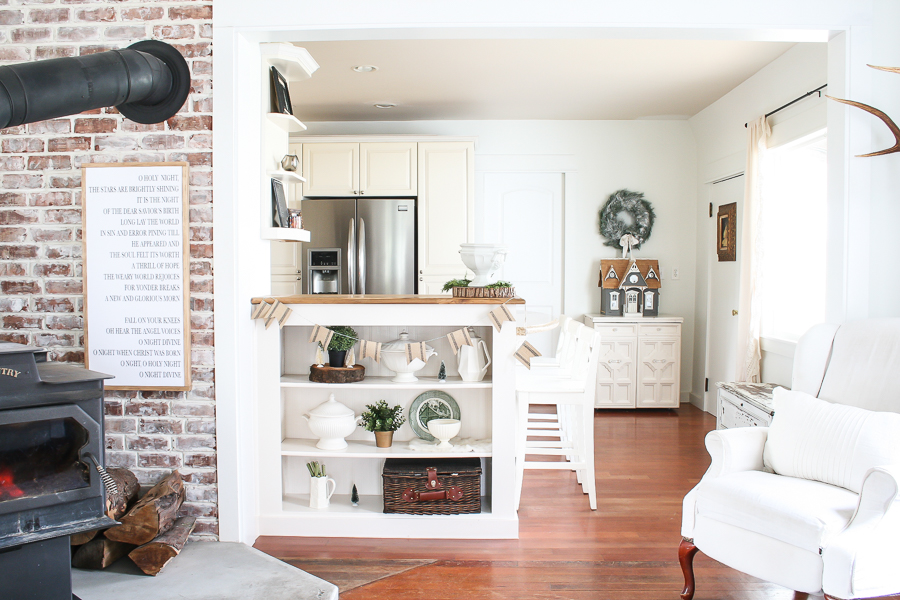
When you turn left immediately through the front door you head into the fireside room. We refinished the original fir floors in this room as well, and added new lighting. I’m not typically a fan of ceiling fans, but we’ve found that in this room, it’s an essential way to help distribute the heat from our wood stove.
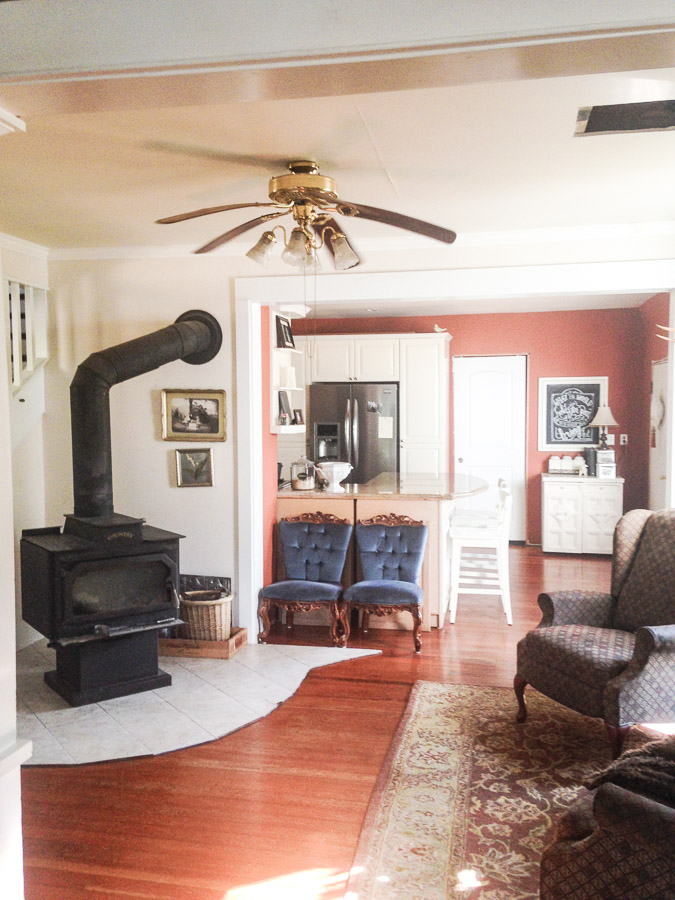
Behind the wood stove, we added a faux brick wall, and underneath, we laid a DIY concrete hearth. We stamped “Est 1906” into the concrete in the corner to add some vintage charm.
*This post contains affiliate links to products I know &/or love.
In front of the hearth, currently is a beautiful jute rug that I got from World Market – it’s still in stock, and at a great price!
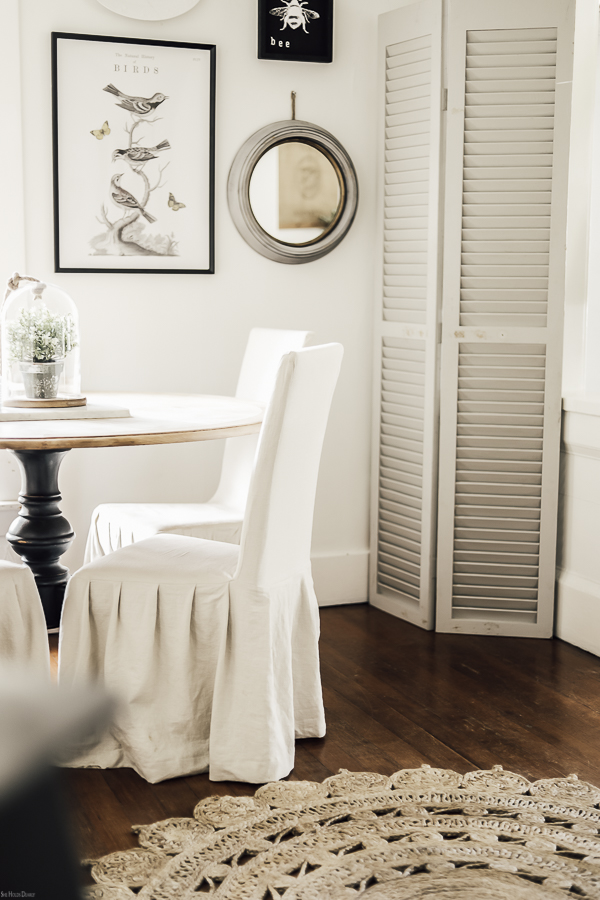
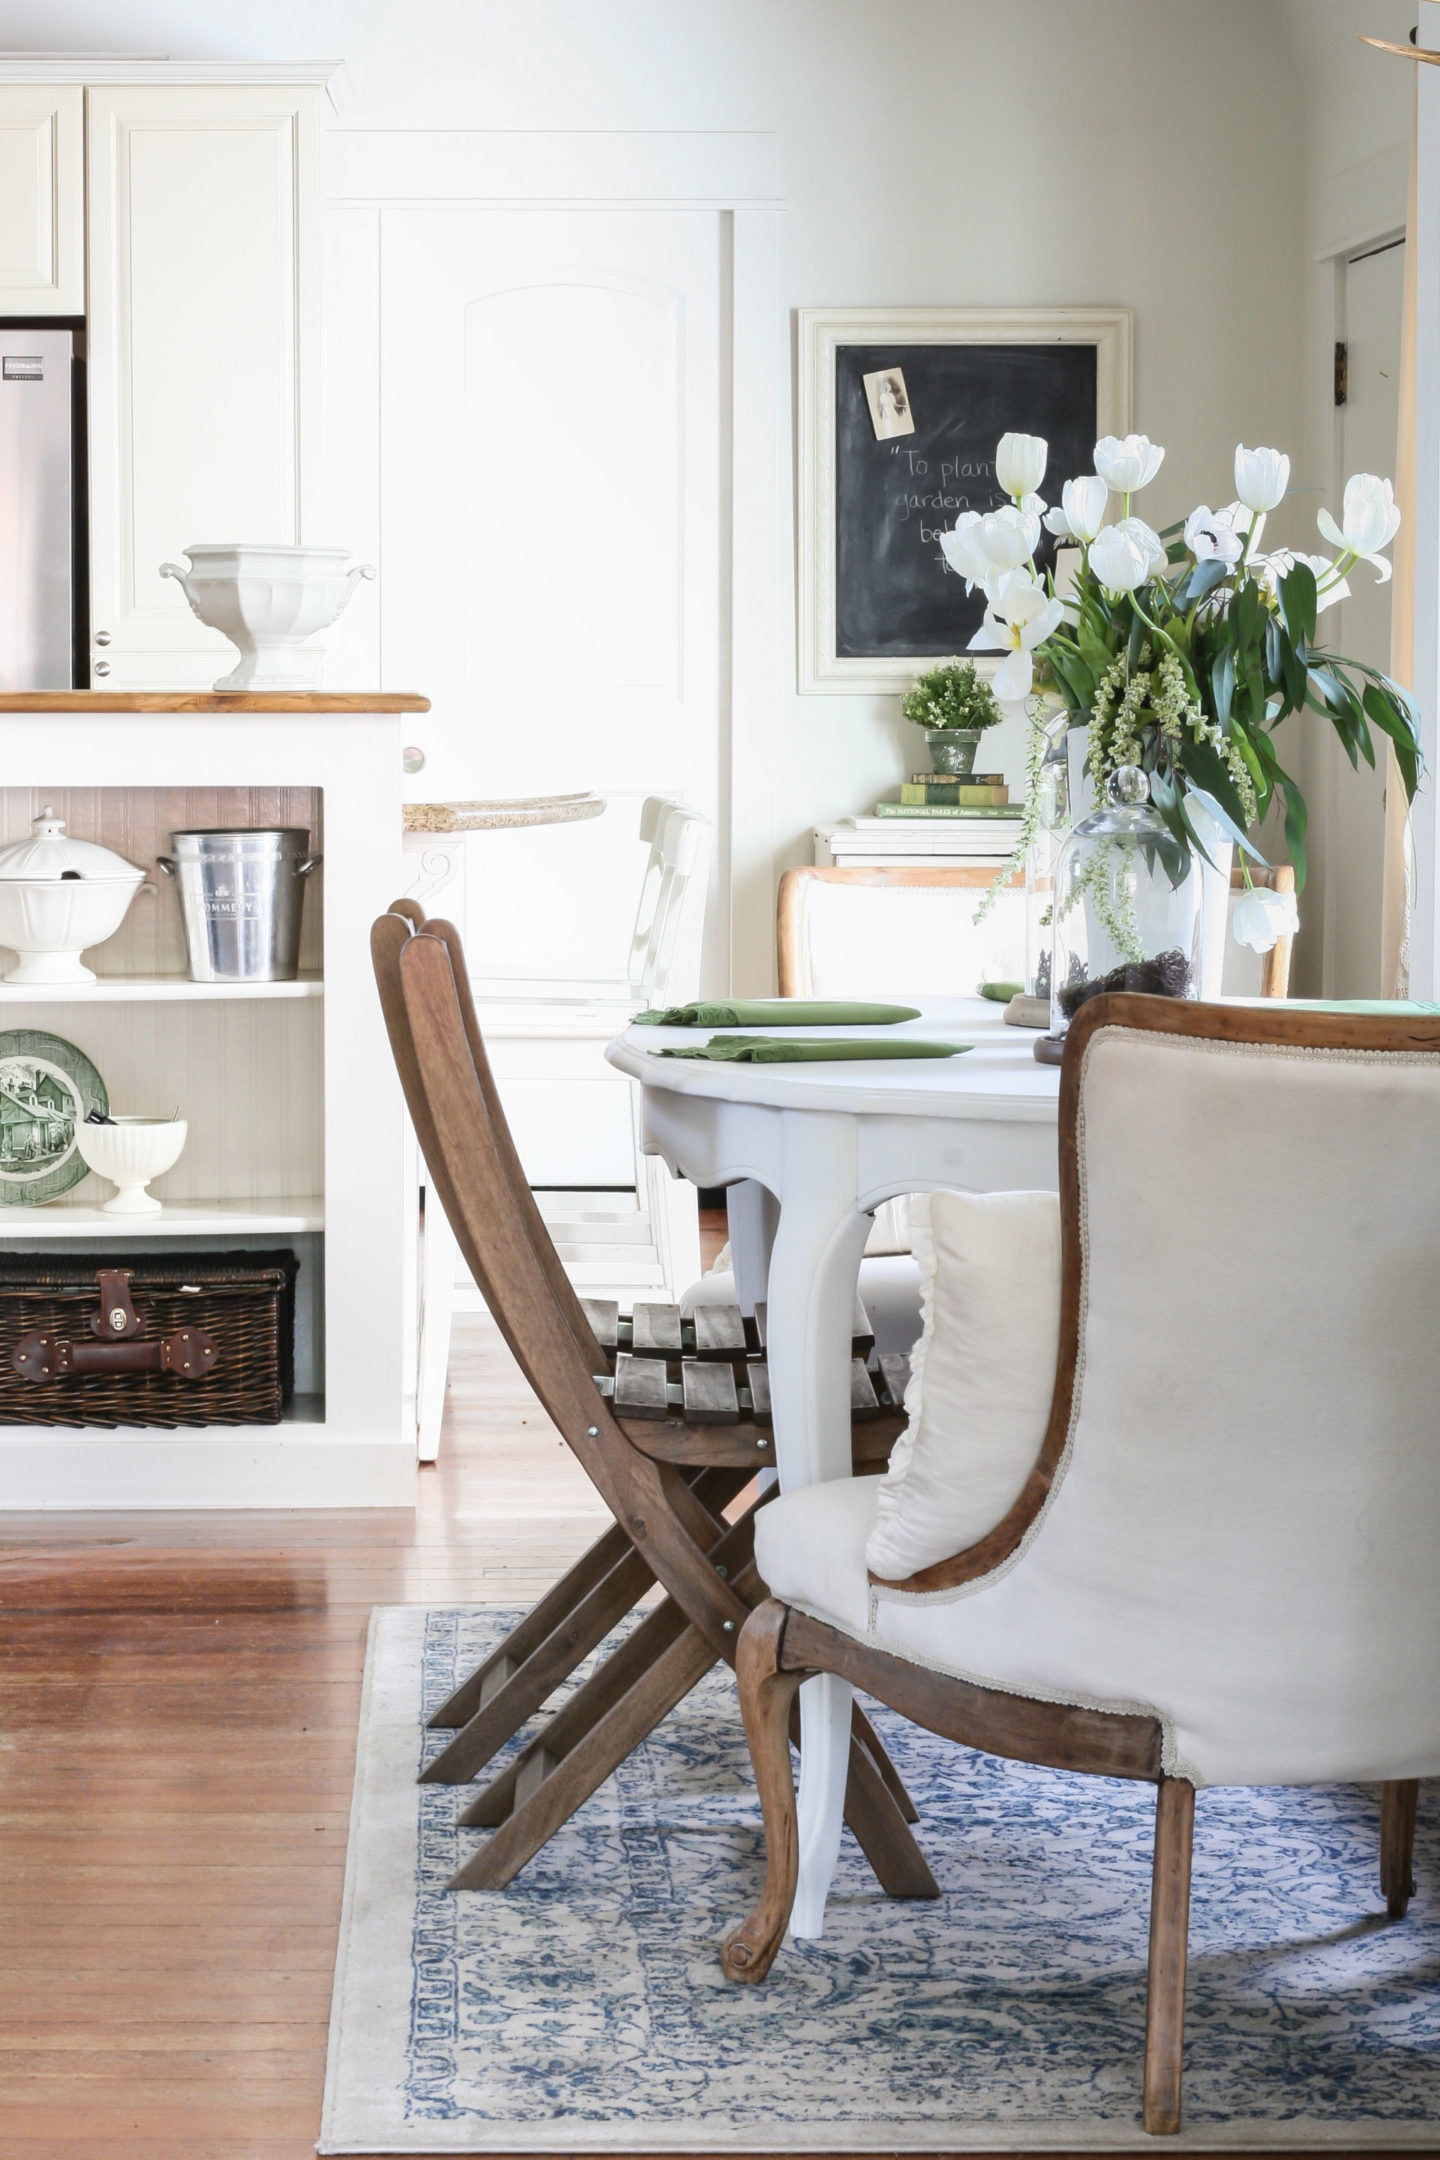
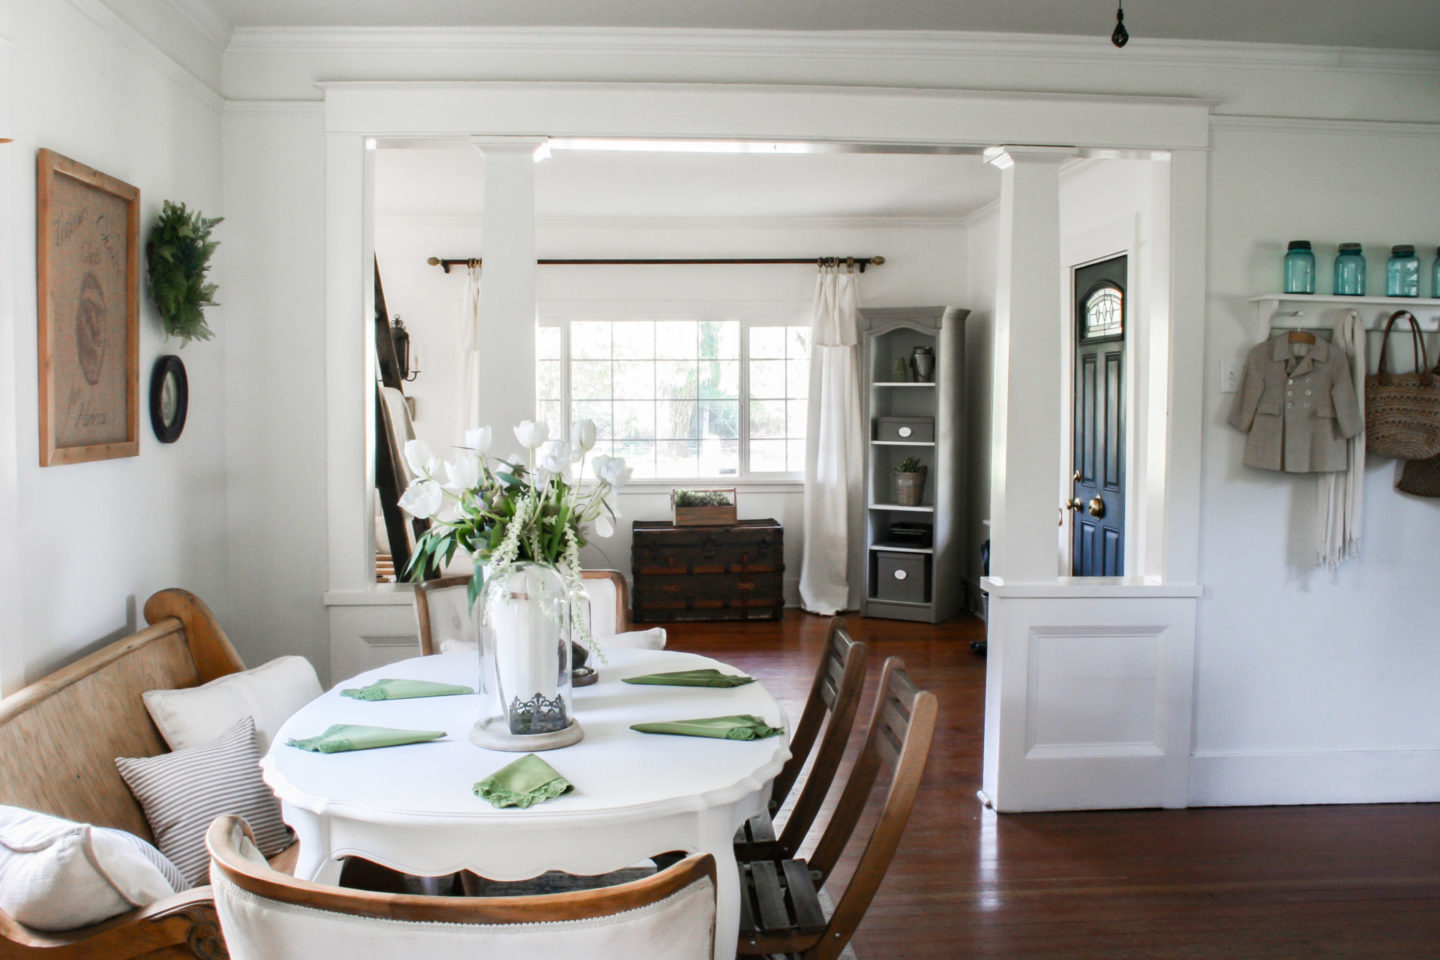
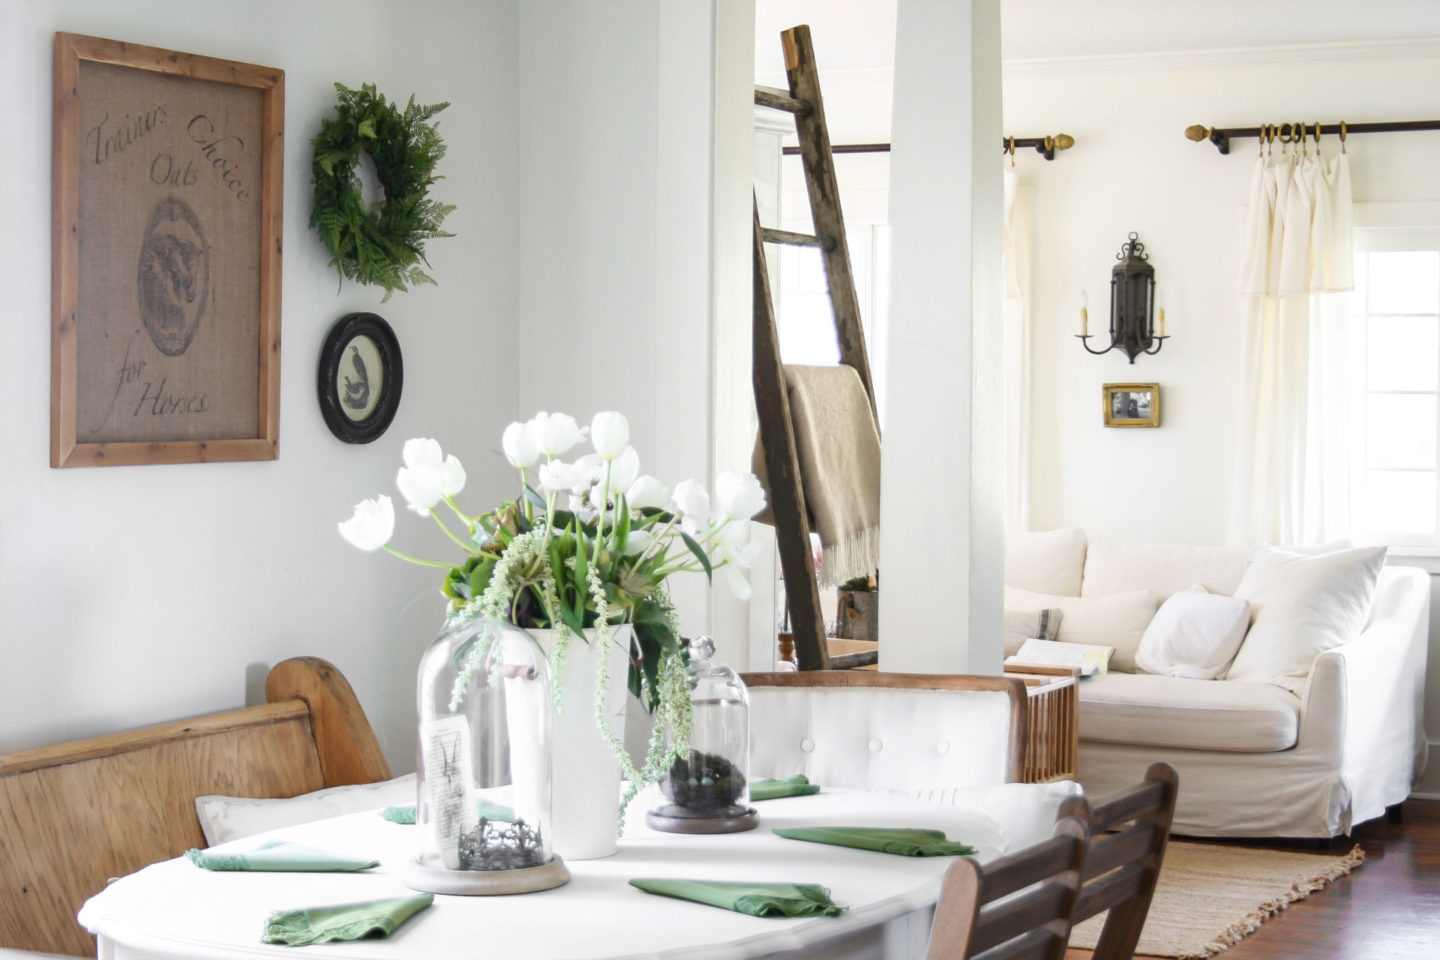
Across from the woodstove is our pedestal table and chairs covered in DIY no pattern slip covers. Covers like these are great beginning projects for even a novice sewer! And they can make simple or dare I say it -ugly- chairs fit your space!
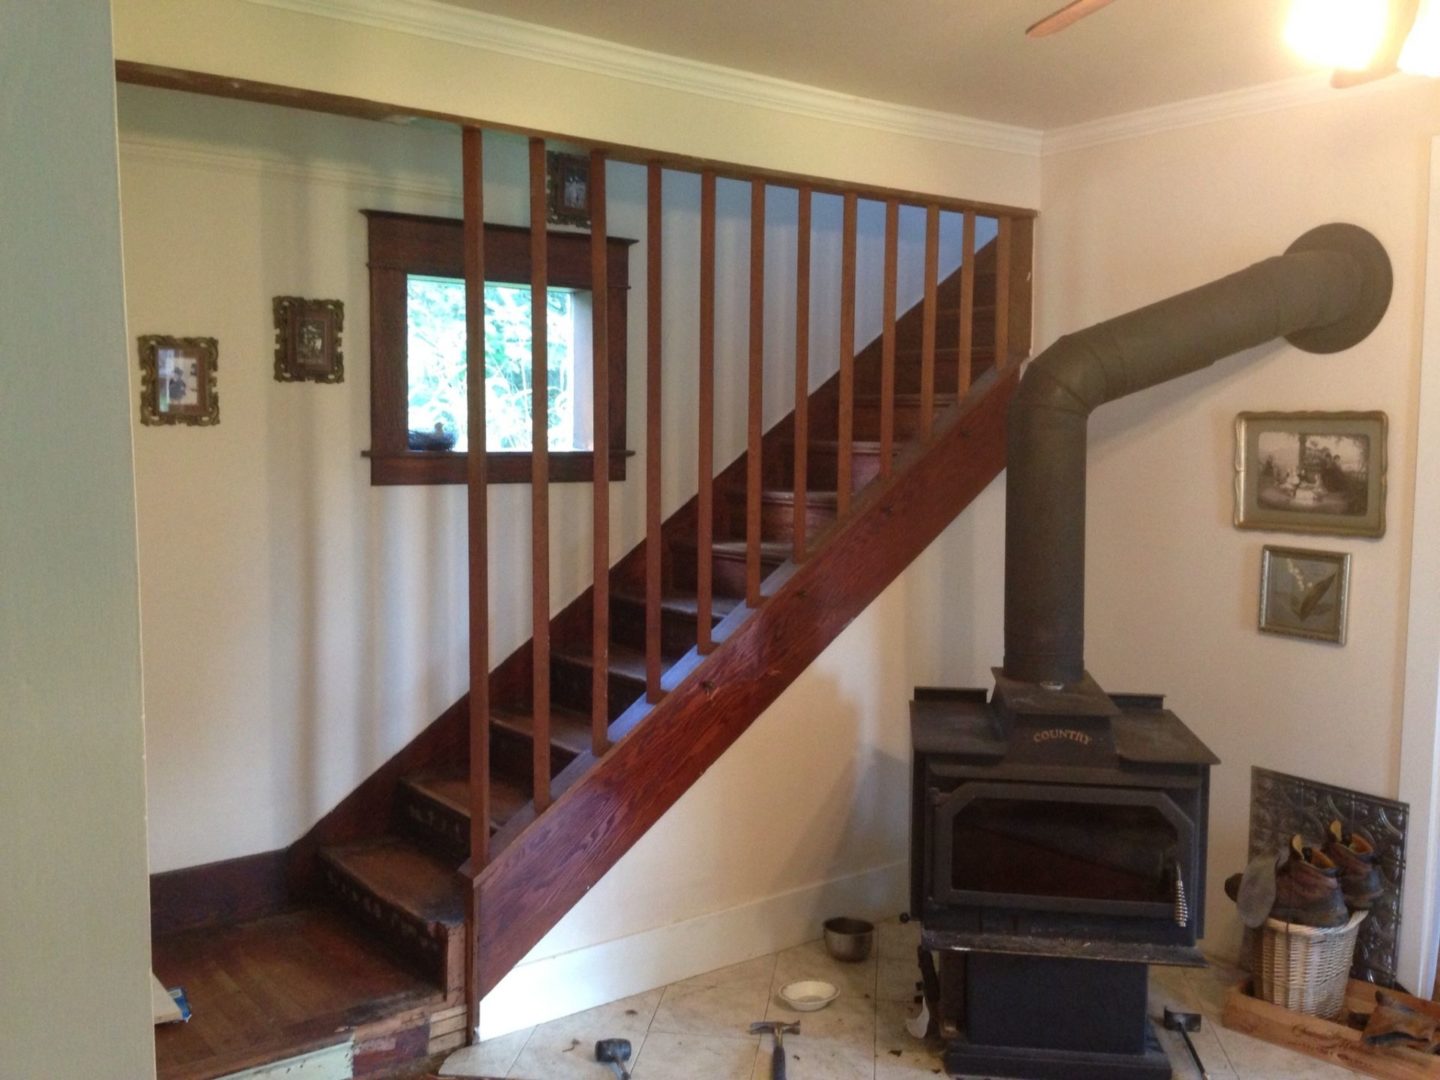
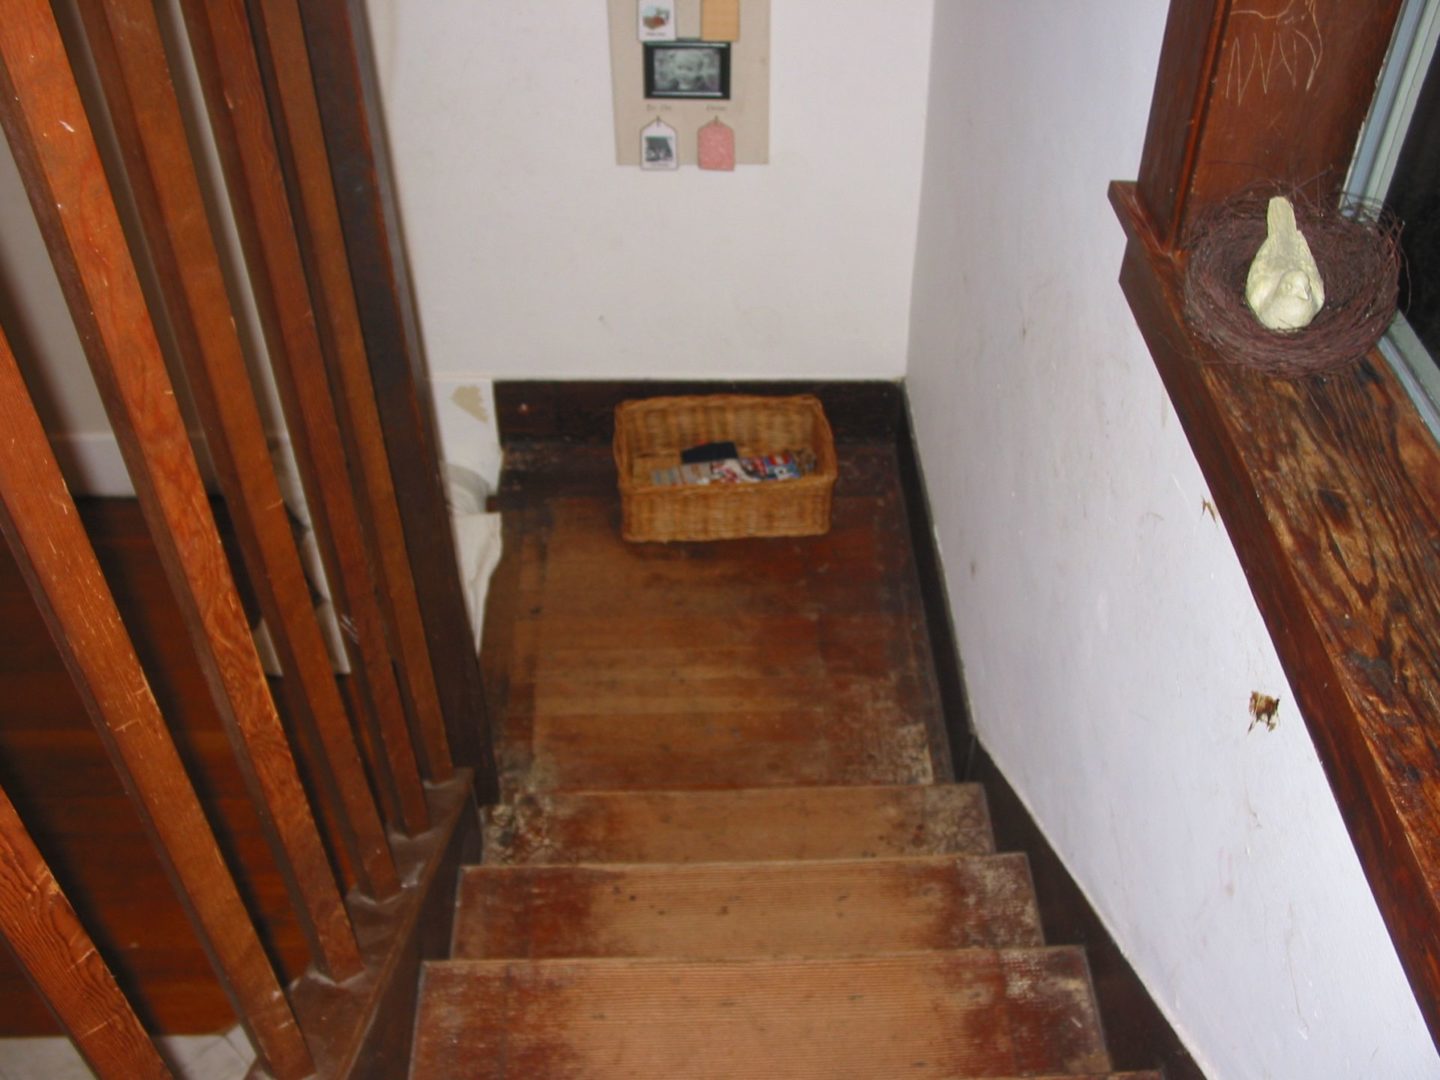
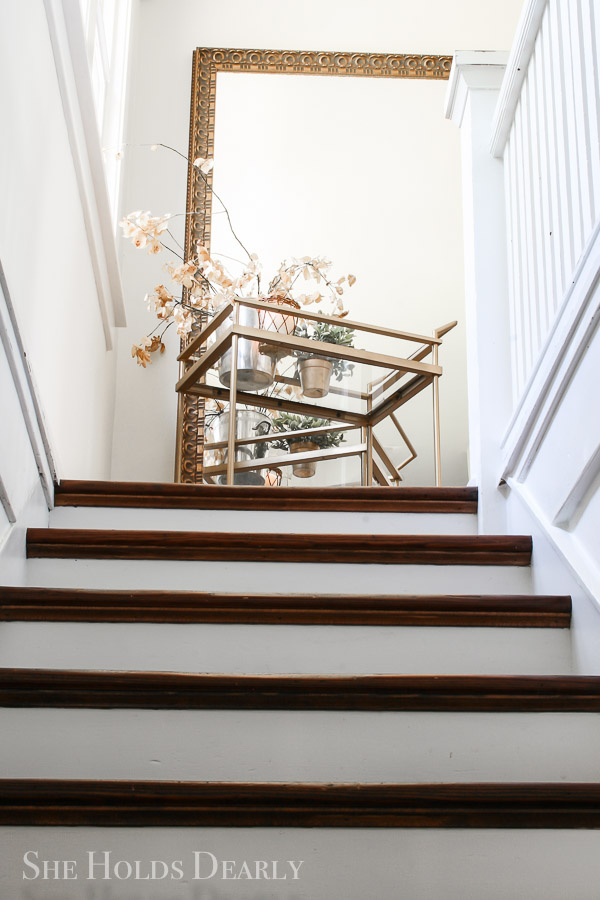
Next to the woodstove is the stairwell leading to the upstairs. When we moved in there were “prison bar” rails that went from the stair ledge up to the ceiling. We removed those, replaced them with a half rail, and a new charming newel post. Lastly, we refinished the old wood stairs themselves that had previously been carpeted and very worn.
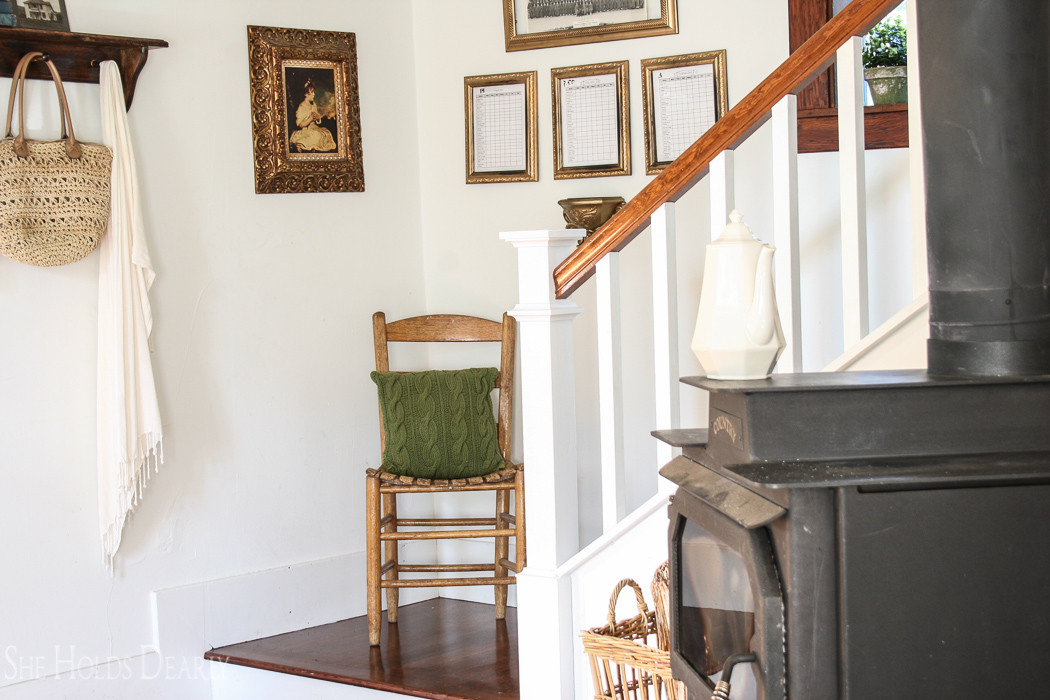
At the bottom of the staircase, we have a garage sale toy box find that I painted white and store my fire-making supplies in (gloves, kindling, and paper). Easy access from the wood stove without looking cluttered – my favorite.
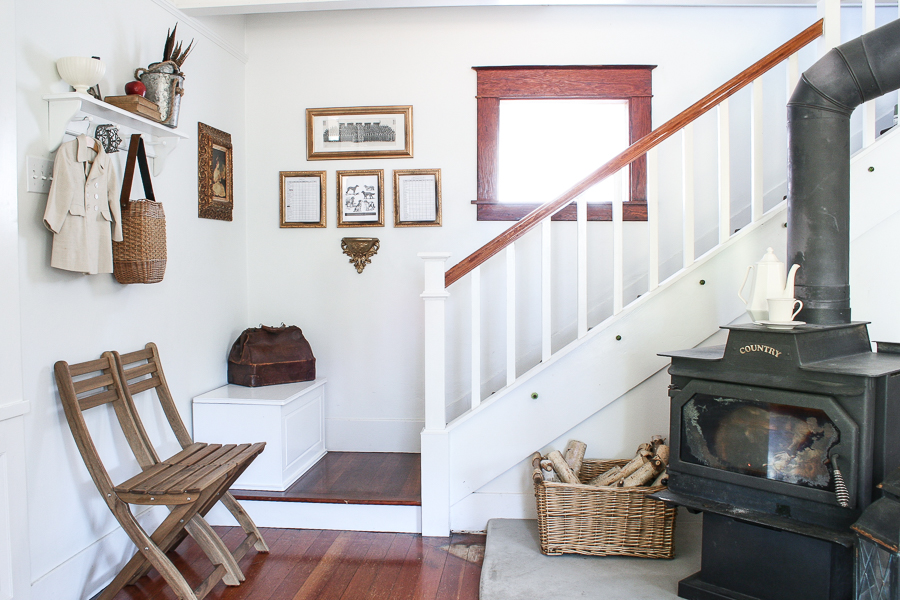
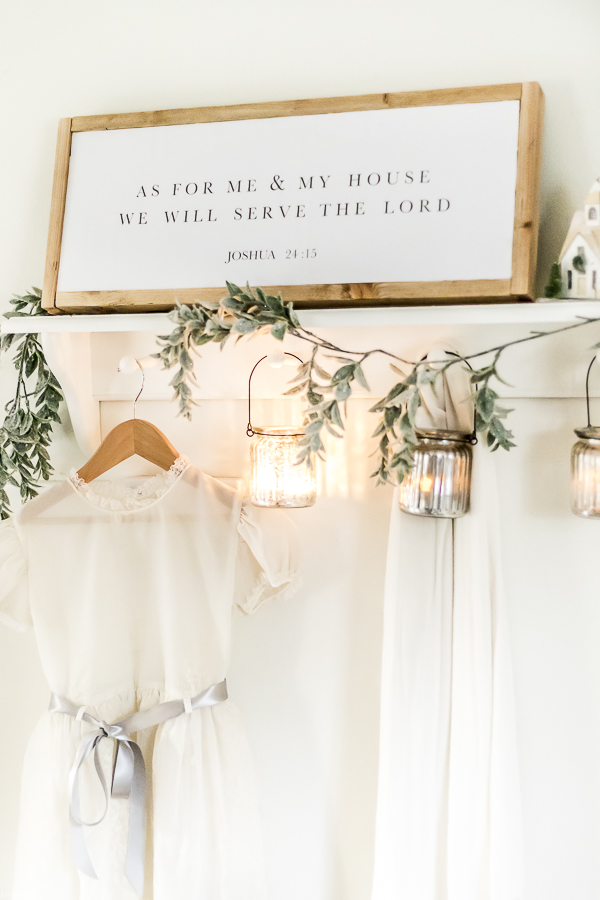
Above the fire supply box, we have a cute shelf with space to showcase hanging decor. On top of the shelf is a DIY sign with the verse from Joshua 24:15 – “As for me and my house, we will serve the Lord”. The tutorial and free printable for you to make your own can be found at the above link!
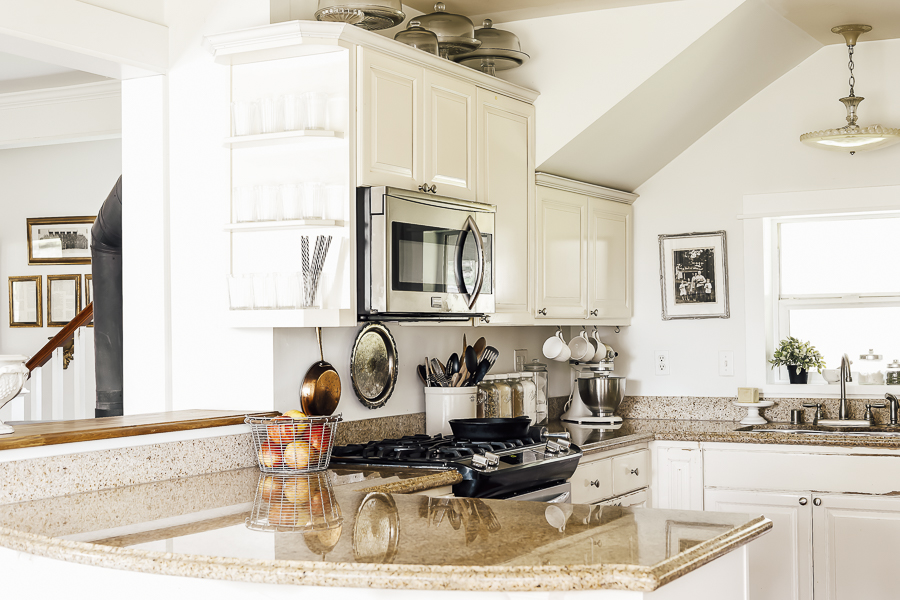
The Heart of Every Home – The Kitchen.
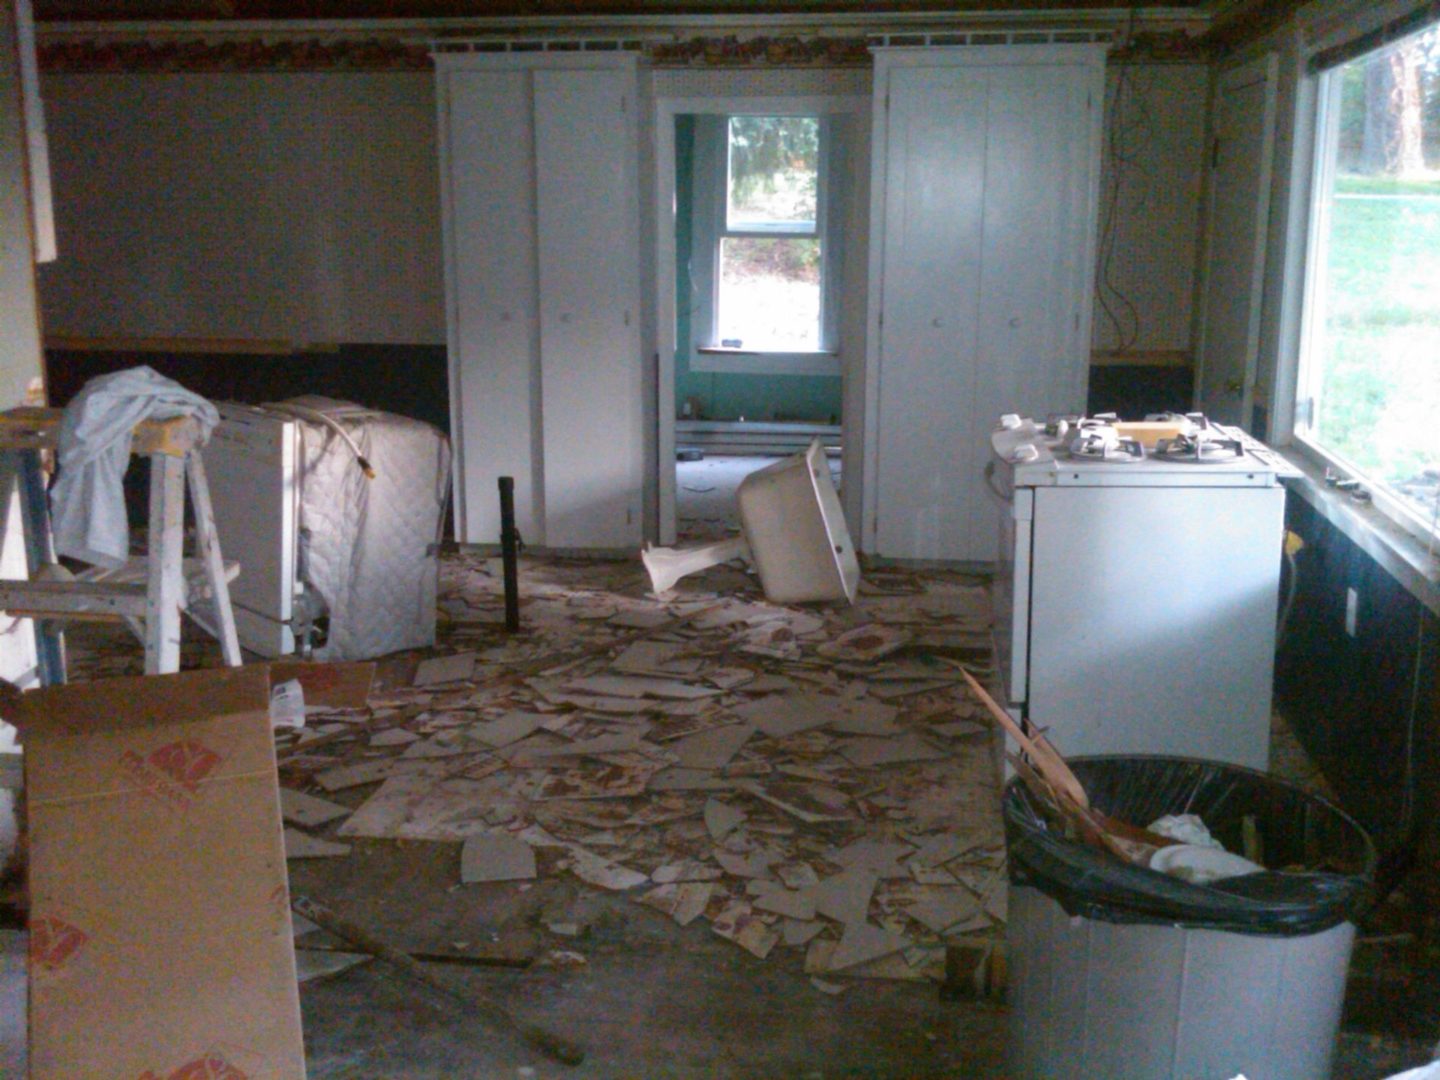
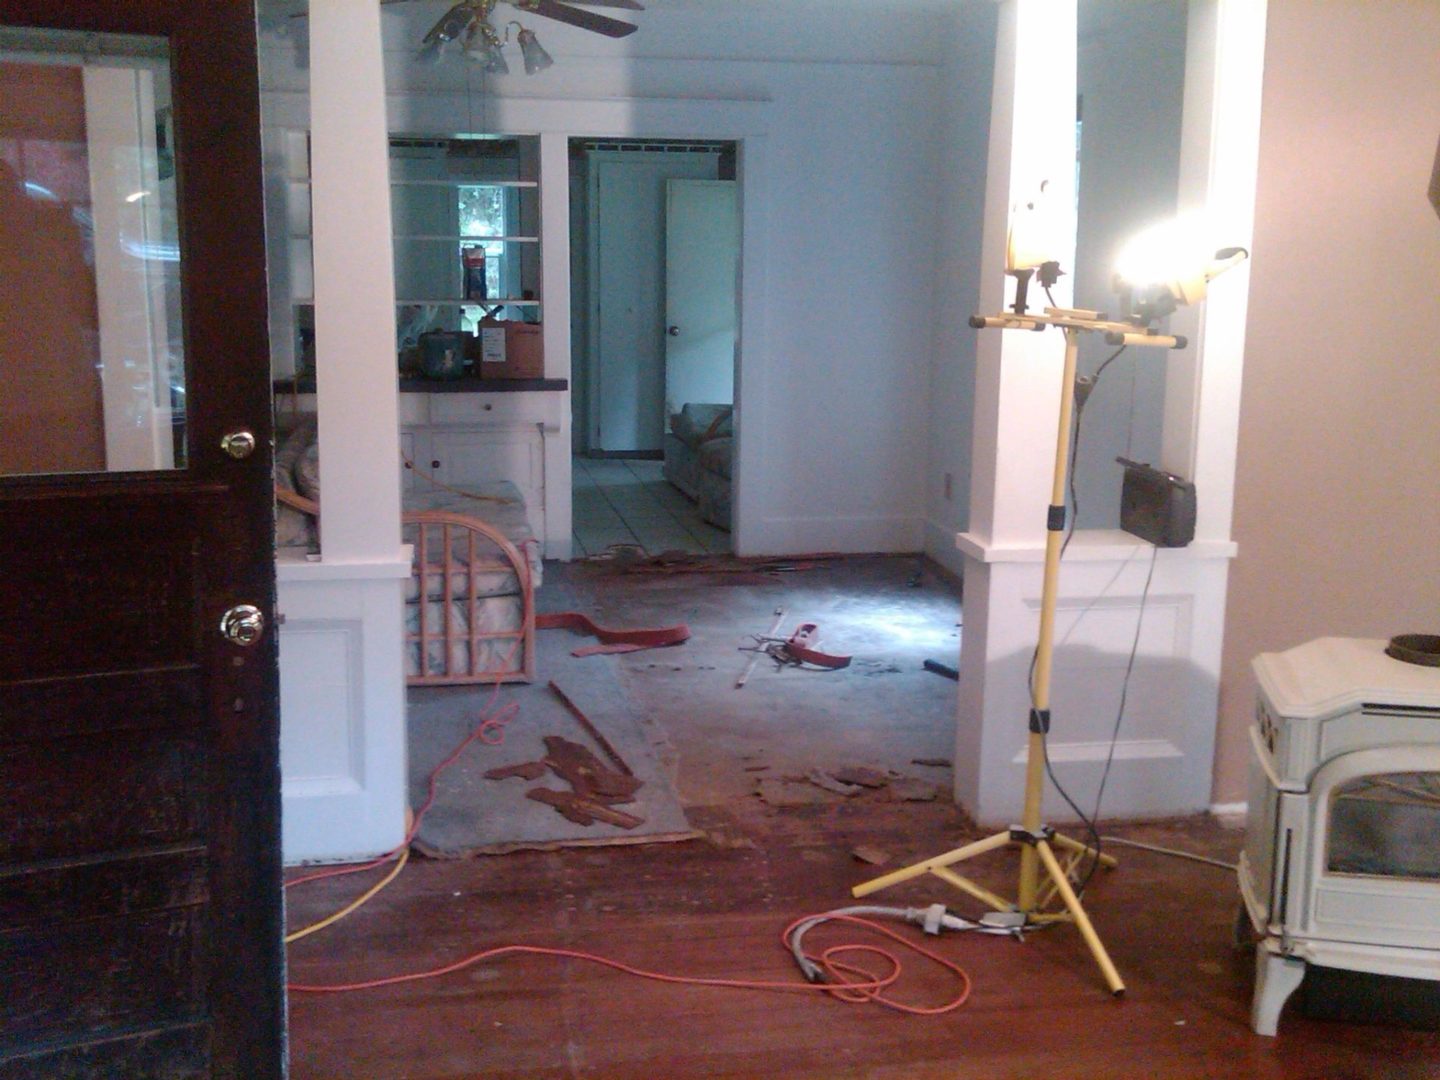
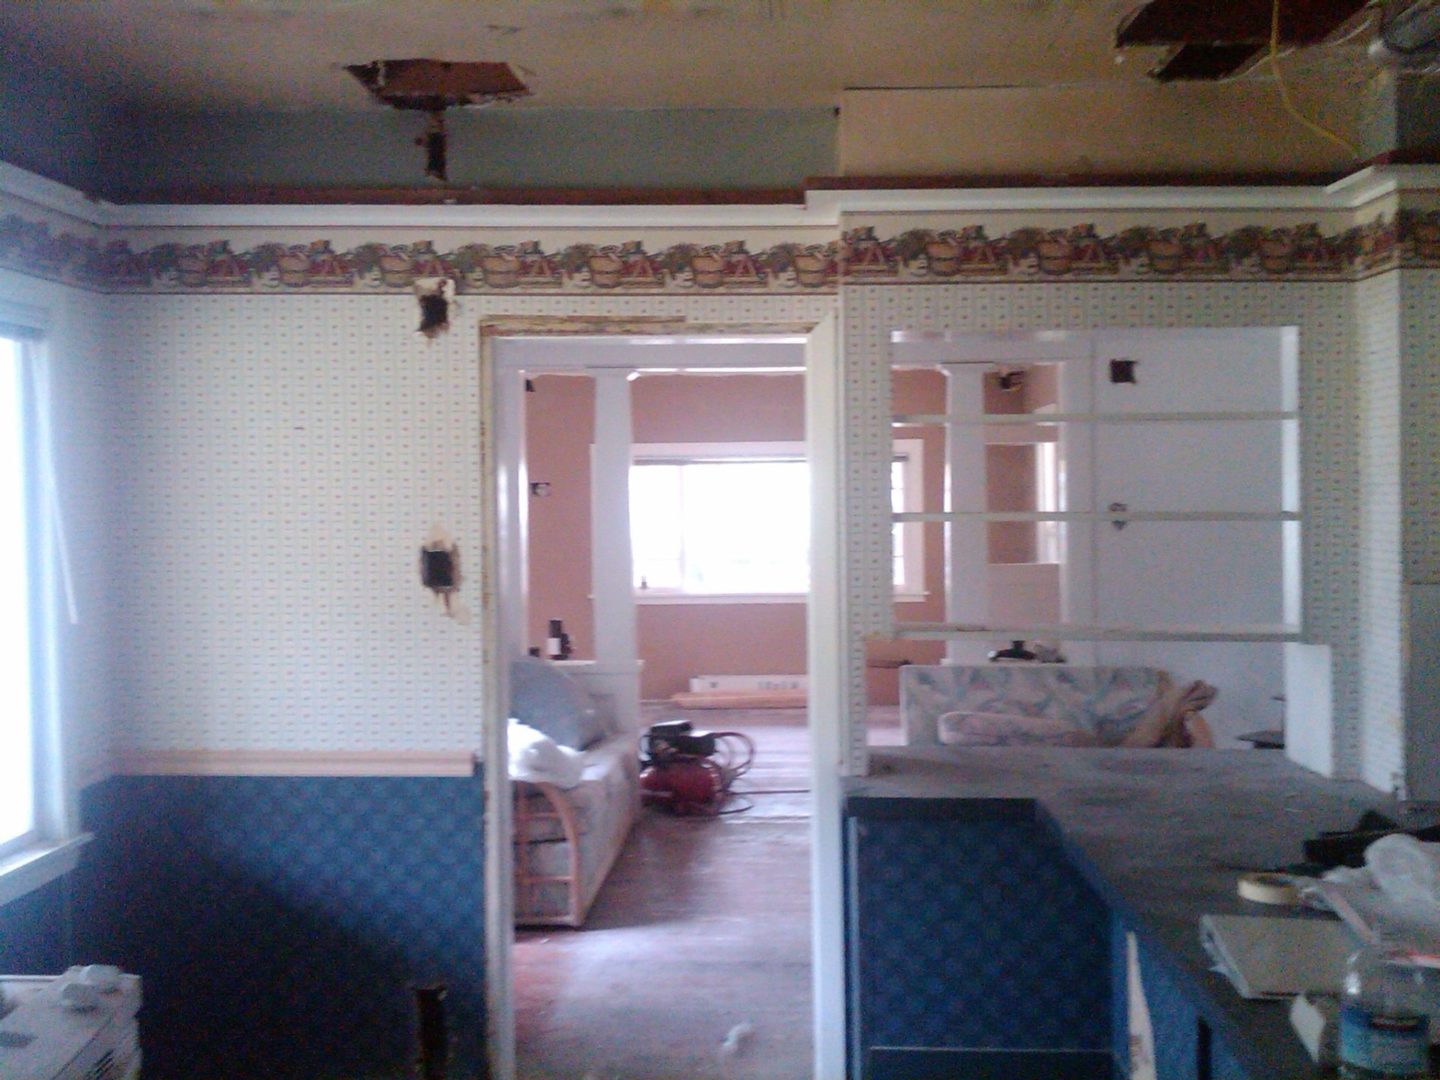
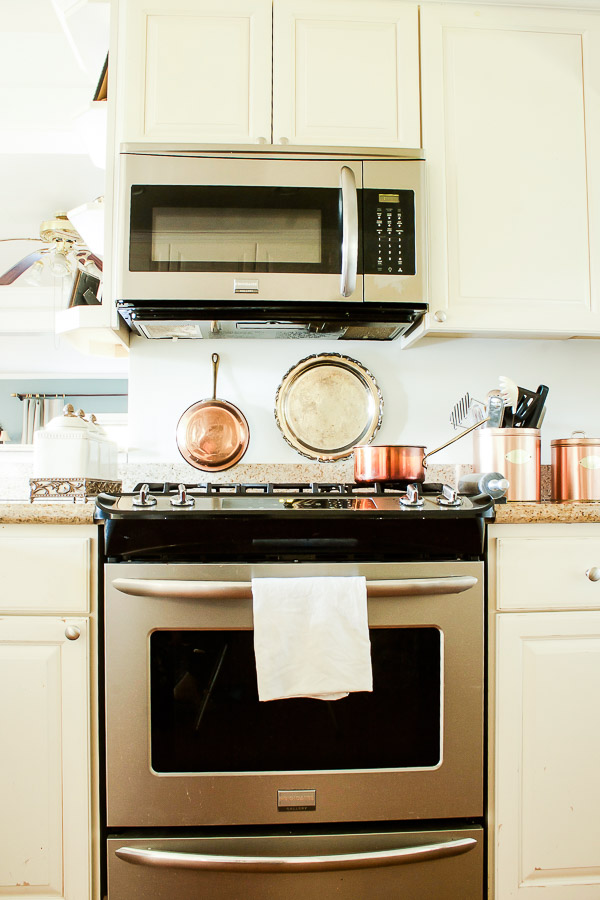
The transformation in the kitchen was probably one of the most impressive.
We needed to gut almost the entire room and made big changes like opening up the wall between the kitchen and the fireside room which was previously just a single doorway.
We also had to stabilize the foundation, and for a while that meant we had a 3-foot change in elevation that required us to walk across a wooden “plank” to get from the kitchen through the laundry room back to the powder room.
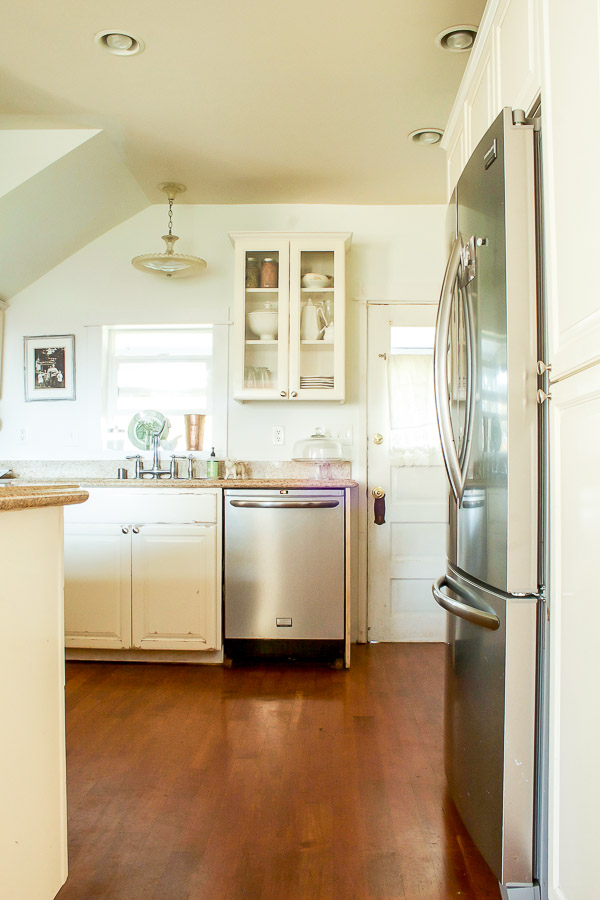
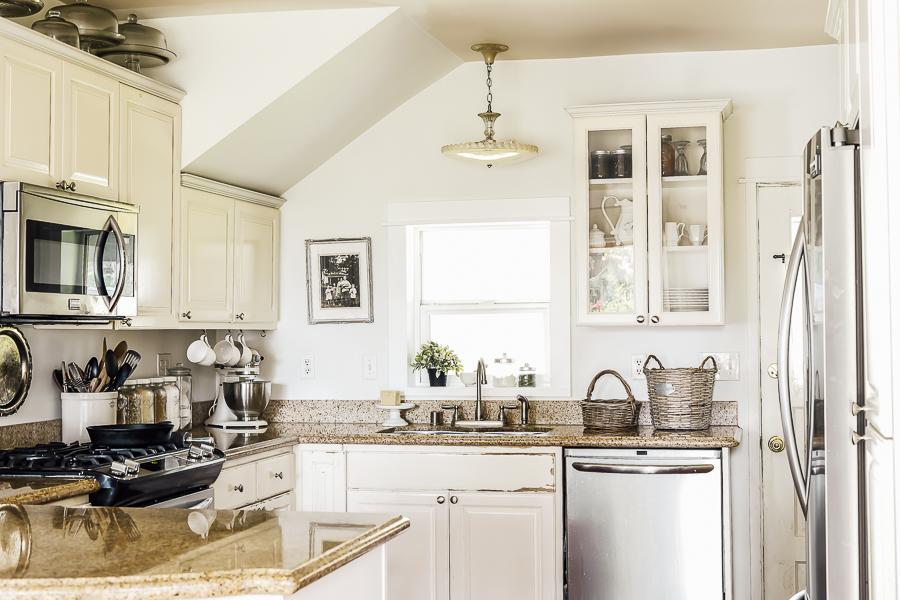
One of my favorite things about the kitchen is the dual porches! To the right is our chicken porch, which is aptly named since it leads right to where we keep the chickens. And to the left, the kitchen porch that leads out toward the garden!
*July 2020 Update – We did a quick porch refresh on our Kitchen porch, and have been enjoying it so much more since!**
I’m a fan of non-traditional storage like the chippy wood trunk that stores all of my painting and upholstery supplies and tools and a small wooden cabinet that houses my sewing machine.
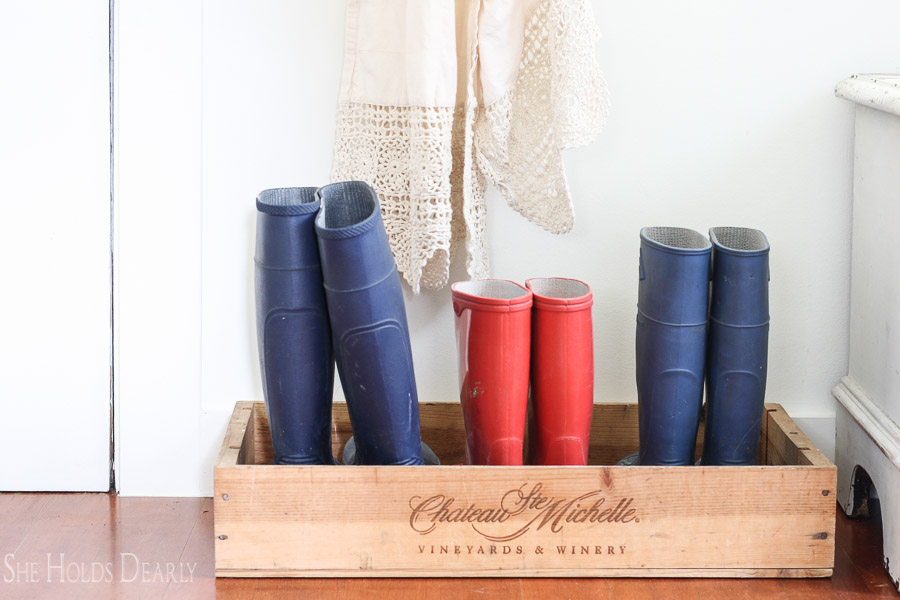
Near the door we have a $1 wine crate I found at a yard sale that we use to store boots. It has done wonders to keep mud off the floors!
We store our root veggies in an open wooden crate that is decorative and a little rustic while still being functional.
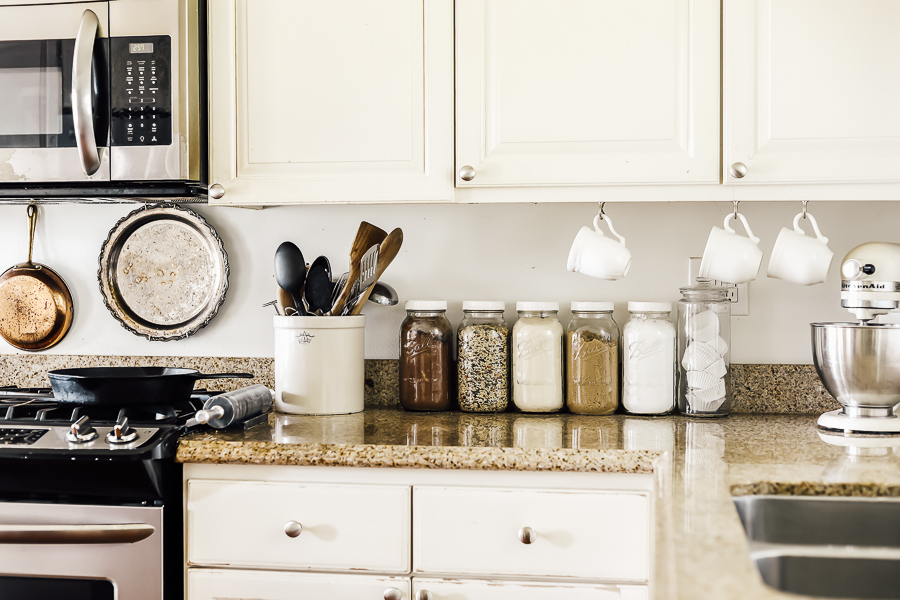
Dry goods like rice, flour, and sugar are stored in regular 1/2 gallon glass mason jars with white plastic lids I found on Amazon. This makes them easy to access while also fitting in nicely with the rest of the kitchen decor.
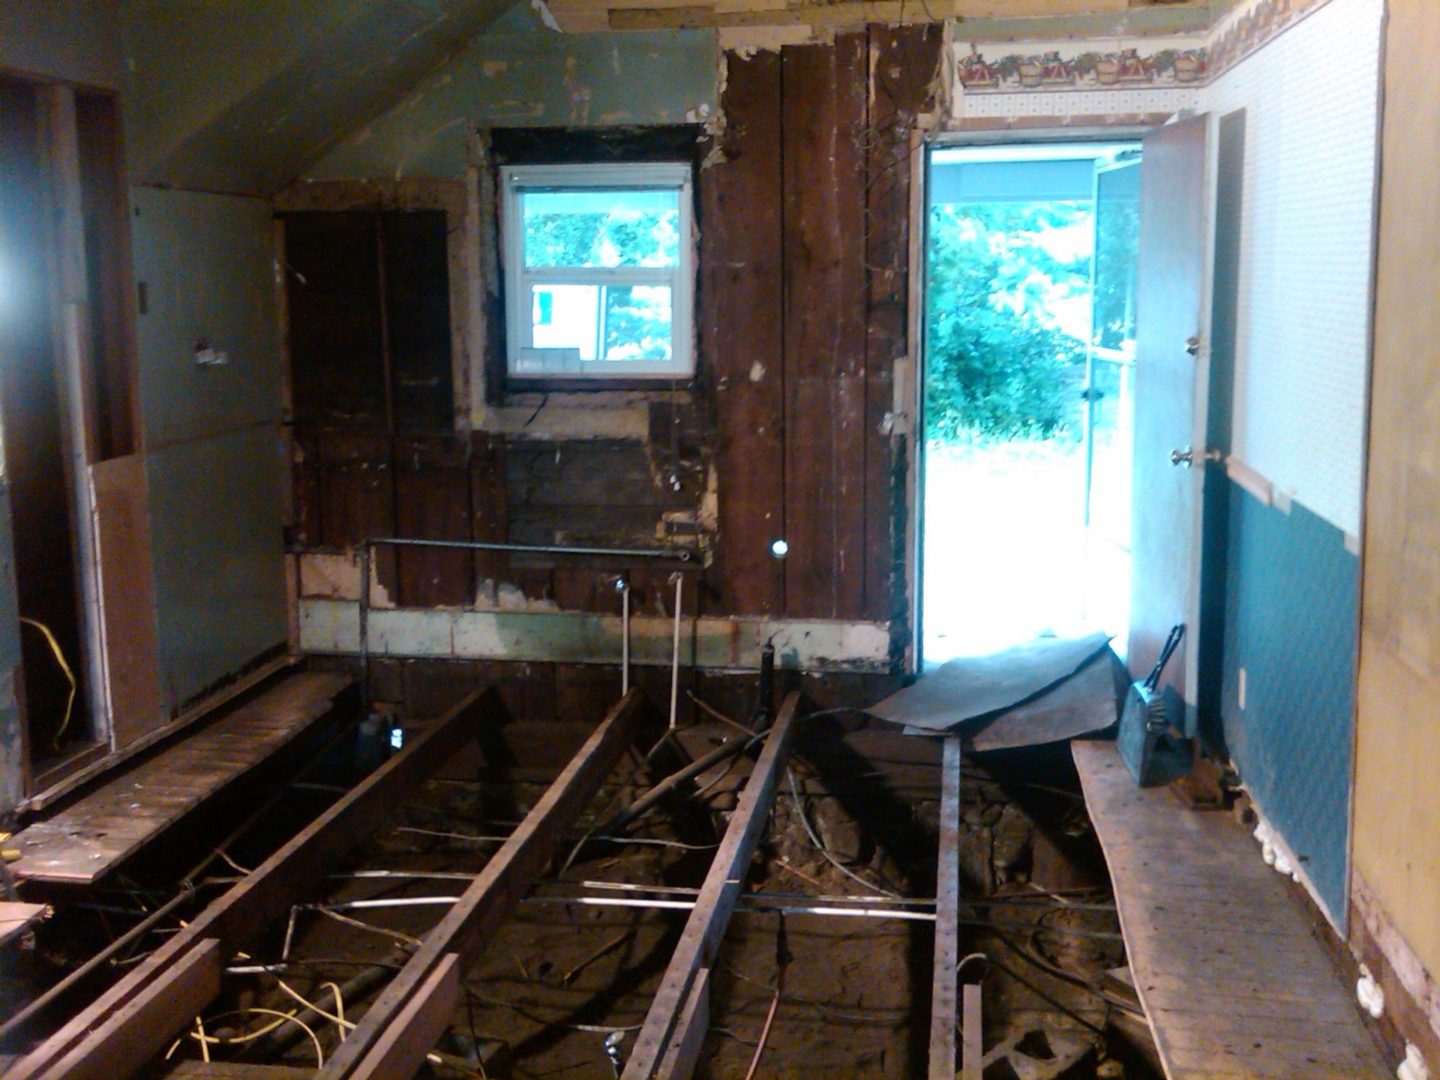
We ended up needing to replace the floor in the kitchen and both bathrooms, so we special ordered planks that would match the width of the original fir floors throughout the rest of the house.
The Main Floor Powder Room.
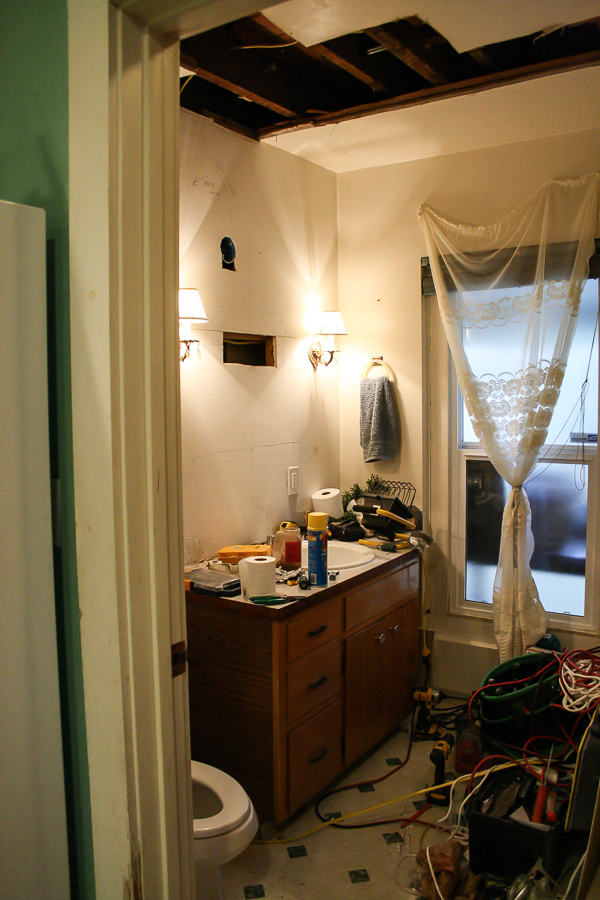
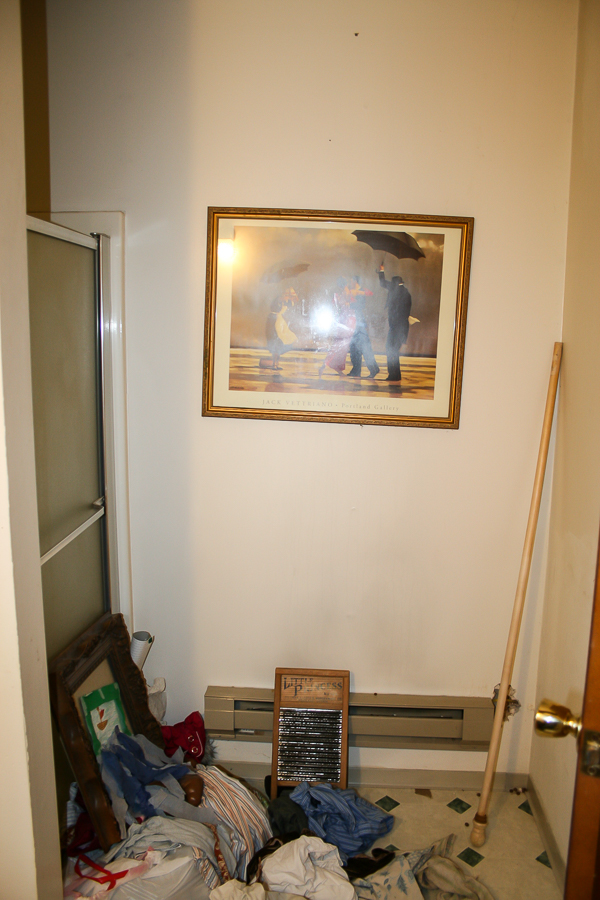
If you head through the unfinished laundry room, you’ll find the main floor powder room. This room was not functional for years! There was a big section of ceiling that was cut out and the running joke was that you might see a raccoon living up there while using the bathroom or shower.
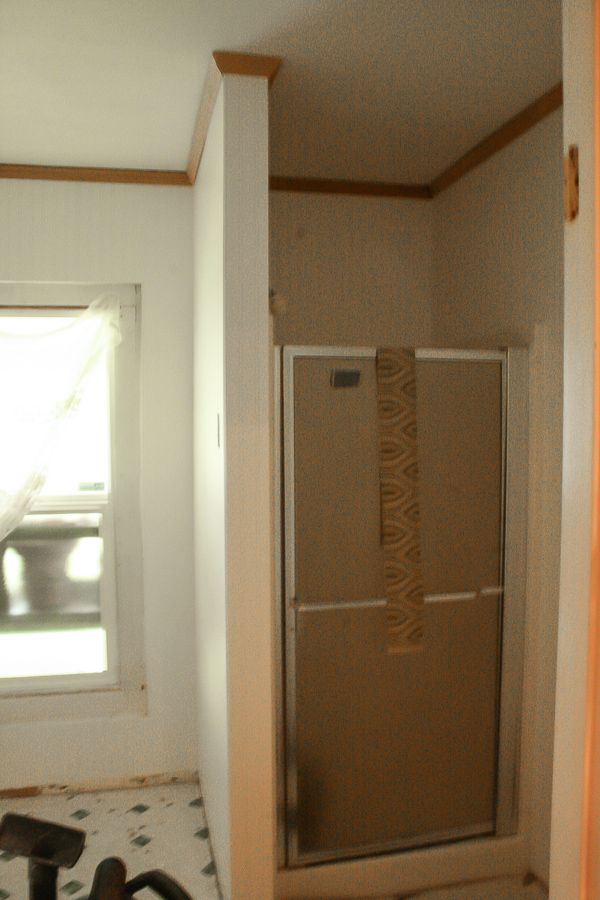
Needless to say, everyone was quite pleased once we finished the renovations. After replacing the floor and finishing the ceiling and walls, we installed a textured beadboard wallpaper that I am head over heels for! It cost about $100 to do the entire room, and it has held up phenomenally even with moisture in the room from the shower – which was a slight concern at the beginning but thankfully hasn’t been a problem at all!
The vanity is made from an Eastlake dresser we found on Craigslist. We added a marble top and cut out a hole for a tiny sink – which we fortunately also were able to find on craigslist! We special ordered the marble backsplash to match.

This has become one of my favorite pieces in the whole house!
We found a large mirror for over the vanity, also from craigslist, and some light sconces from eBay.
In an effort to help keep a vintage feel in the bathroom, I have chosen not to install typical toilet paper holders on the walls. Instead, I came up with the idea of a small half-round shelf and bracket that keeps the toilet paper close at hand while not diminishing the charm of the room!
We have a small bamboo table that I got for $2 at a garage sale that holds some of our extra bathroom supplies.
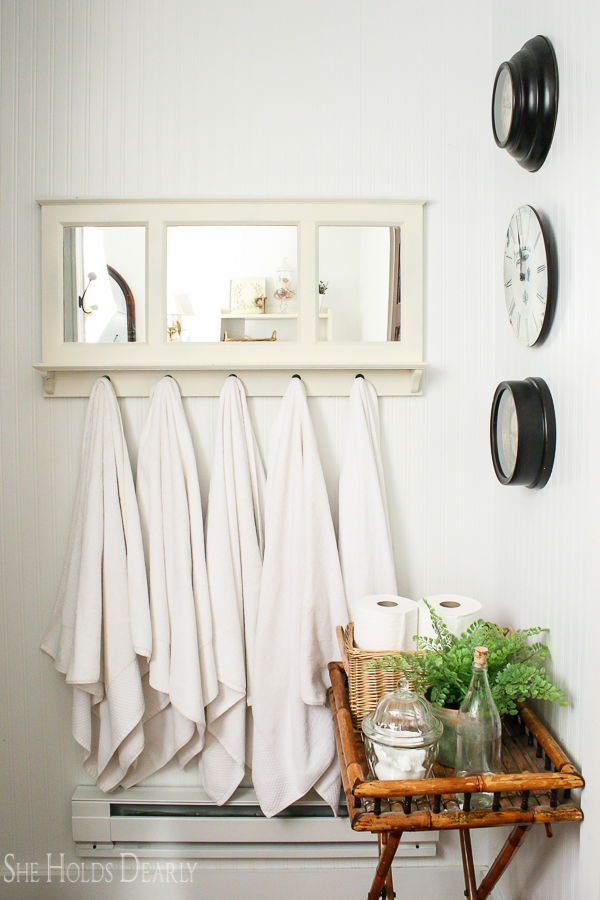
The wall above that table is a pretty skinny section, which can typically be tricky to decorate. I had the idea of hanging 3 clocks vertically, and they turned out to be a cute solution for the space! They were $1 each at different garage sales.
We also have a pub mirror from Goodwill that I painted white. We use this to hang our bath towels.
You can see the full reveal of our downstairs powder room for more details, if you like.
And that is the end of the downstairs portion of our farmhouse tour!
Continuing our Farmhouse Tour – We Head Upstairs.
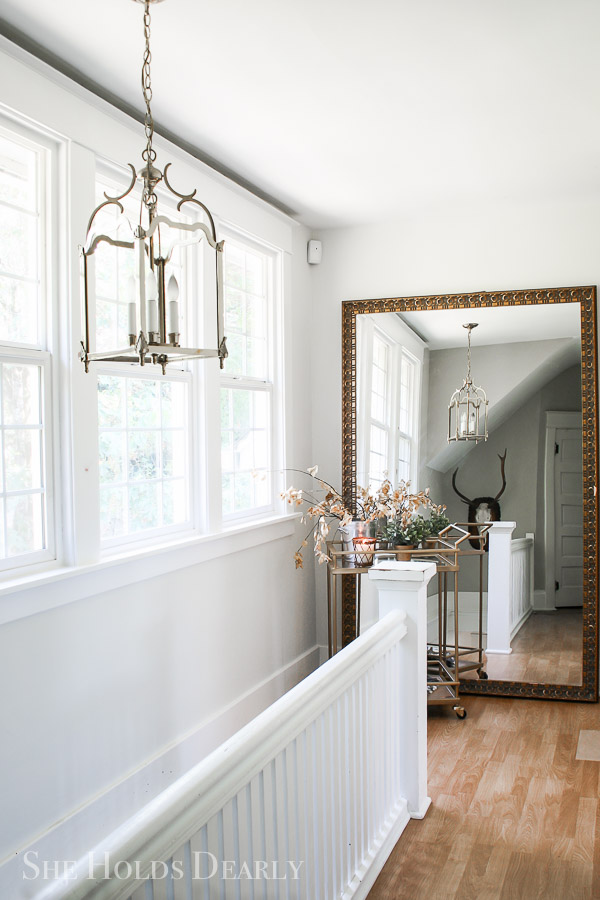
At the top of our stairs we have a large Ballard Designs mirror that I love! It bounces light off the window and helps make the whole stairway and hallway brighter.
We also found this on Craigslist, and the memory of us picking it up is just 100% reminiscent of many a second-hand/DIY furniture experience. We drove to Seattle and walked up to the 3rd story of a condo building. Then as we tried to scoot the mirror back down the stairs, we realized that it just wasn’t going to happen without more help…
So what did we do? We started knocking on the doors of random condo neighbors asking for help. Luckily a few were willing!
Once back on the ground floor we loaded it up in the back of our pick-up truck and made the drive home. We got our fair share of funny and horrified looks from people on the freeway, certain we were about to break this big mirror into thousands of pieces.
We got it home and at one point I remember telling my husband “…even if we need a crane to come in through the window to get this thing upstairs…” Miraculously – they did get it up the stairs and into place, and they didn’t even need a crane to do it!
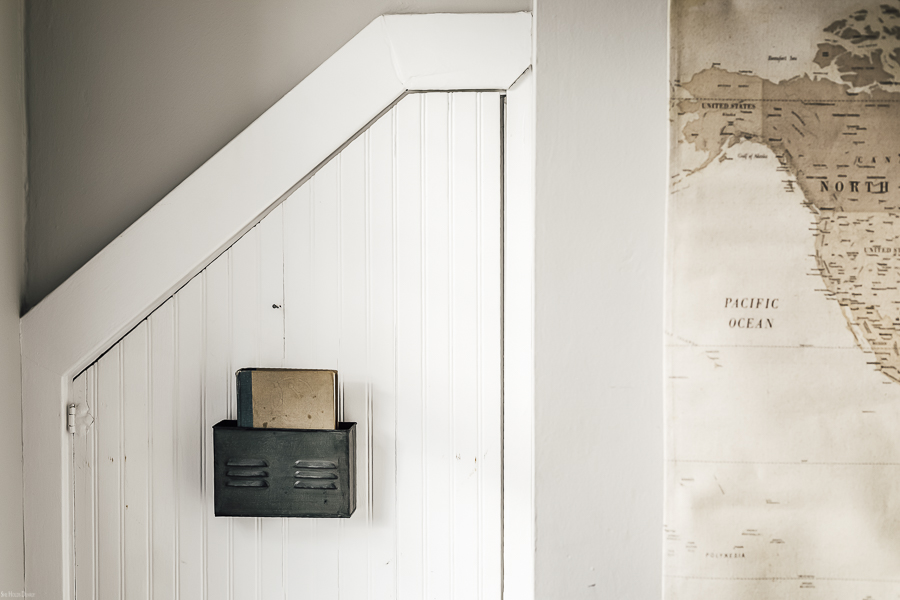
Another part of the hallway upstairs that I adore is the character in all the ceiling lines. It was another one of the amazing selling points for me as we walked through this home during our original farmhouse tour.
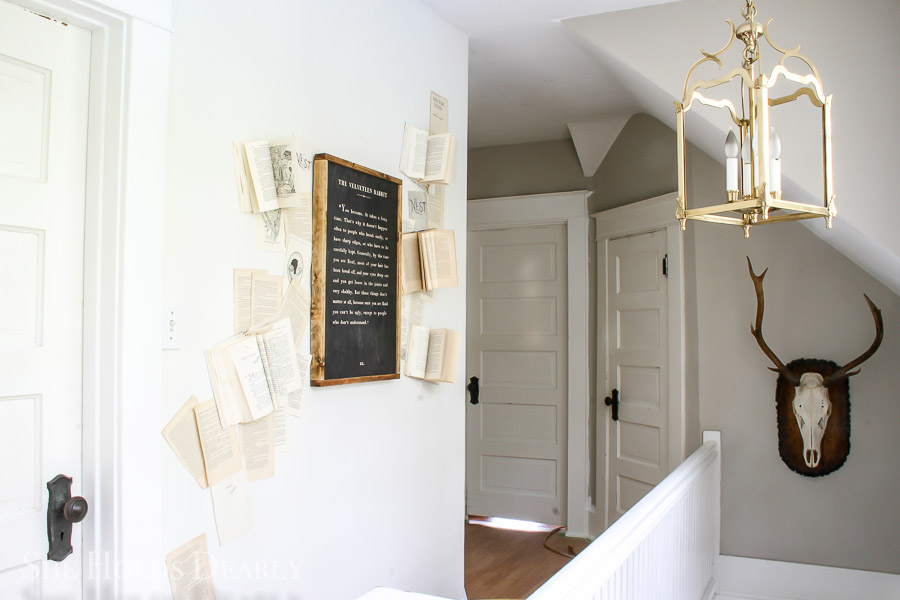
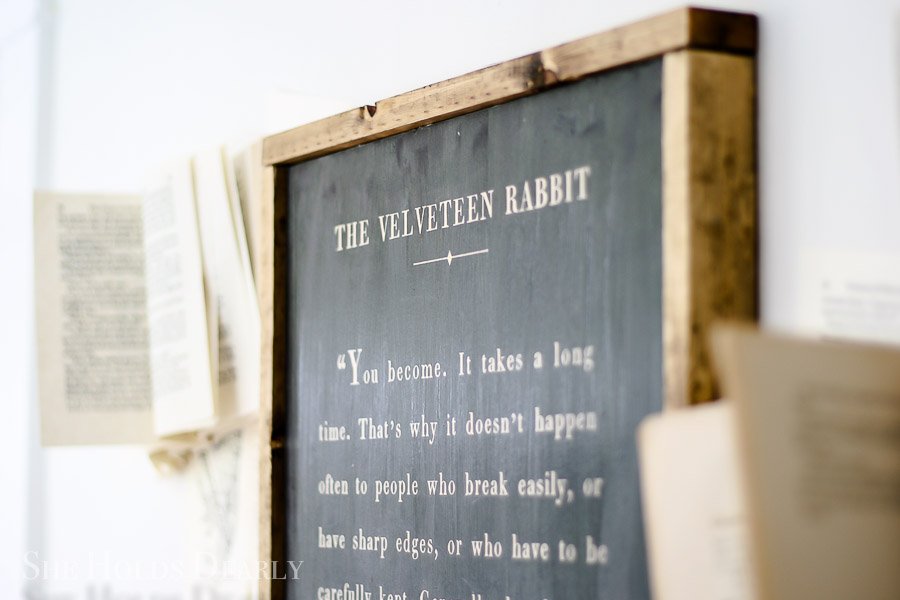
In our upstairs hallway, I used a free printable from Pinterest for a beautiful “Velveteen Rabit” poster that I mounted and surrounded with a DIY book page wall.
Our Farmhouse Tour Continues – Bedrooms
The first bedroom we come to is “the girls’ room”. This room used to be two rooms, one for the girls to share, and one that was our school room. But now all 3 girls share the room and the “school room” has been phased out now that two are in college!
A few years back the homeschool room was a really beautiful, pottery barn-esque room with tons of built-in storage – a homeschool mom’s dream! This house having a homeschool room was one of my top 4 selling points for this home!
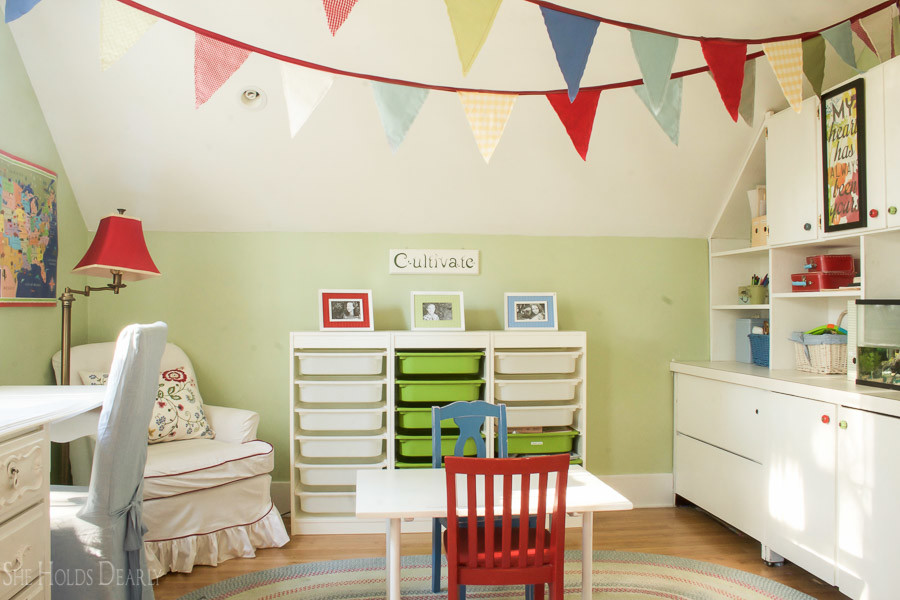
The girls’ room was originally decorated in a very sweet “princess” theme, which you can partially see still remains, but as my girls have gotten older, they’ve evolved and taken ownership of their space.
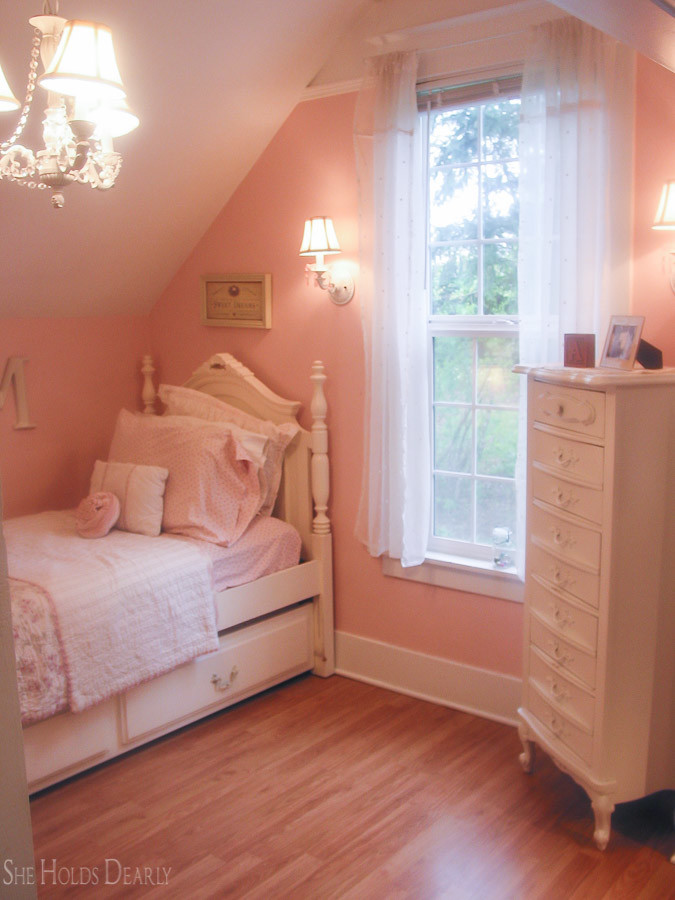
As for furniture pieces in the room, the twin bed has a 3rd bed trundled below, and the other is nestled over in the “suite” that used to be the homeschool room. The desk was found for $20 on Craigslist, and we were happy to find a tall slender dresser (sometimes called a lingerie chest) that matched.
Dirty clothes are collected in DIY laundry hampers made from fencing wire, and a wooden base with casters. They’re lined with a king-size pillowcase. Super easy to make, and absolutely adorable!
It’s not very on theme as part of our farmhouse tour, but we recently acquired a large upholstered cat tower in an effort to reduce scratching and damage to vintage pieces of furniture around the house! The girls made room for it in their room and it seems to be helping so far.
I recently did a more grown-up makeover of my son’s room – and you can imagine the difference between right when I finished, and the reality of it having been lived in for a few months now. I’m honestly a little nervous to even attempt to open the closet!
When we first moved in, I decorated his room in a blue, kind of patriotic theme.
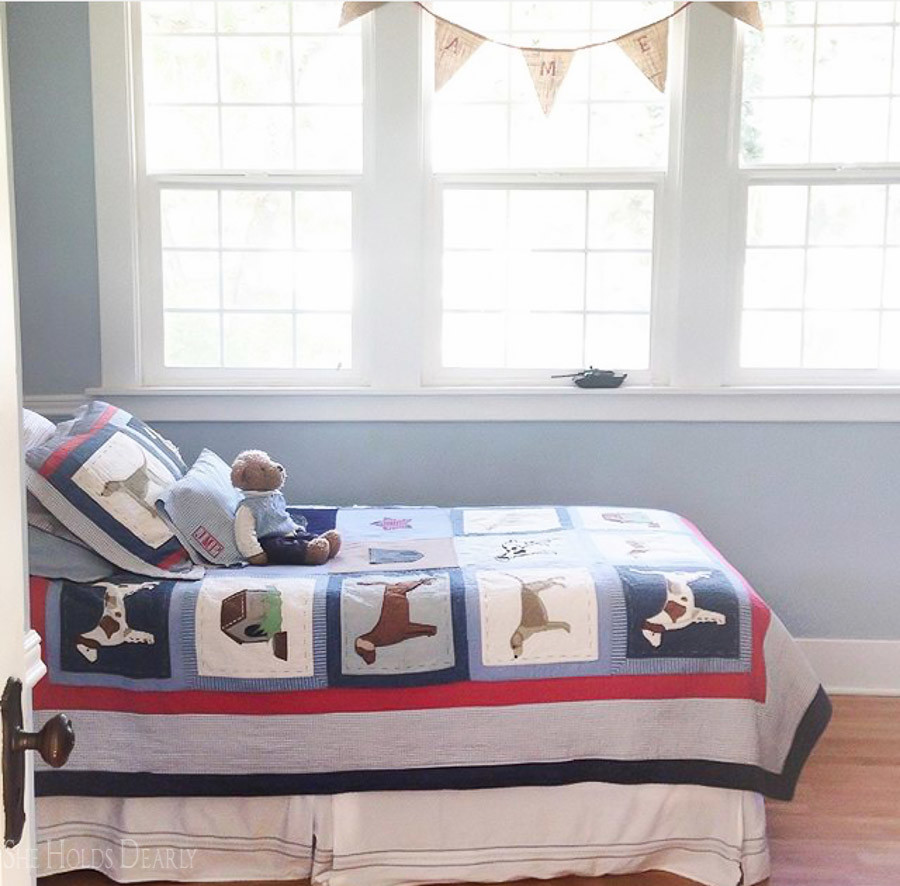
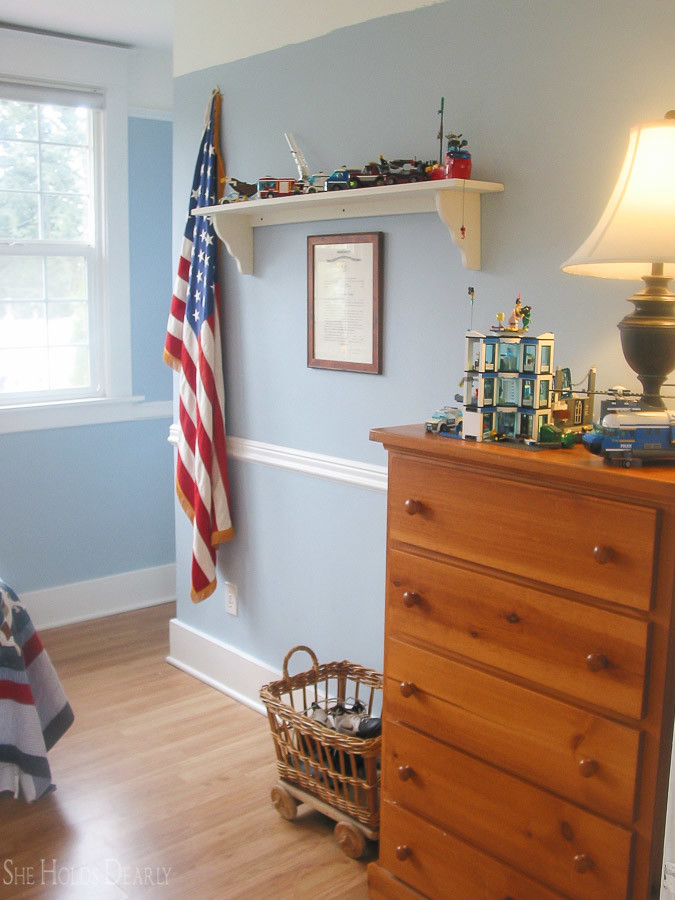
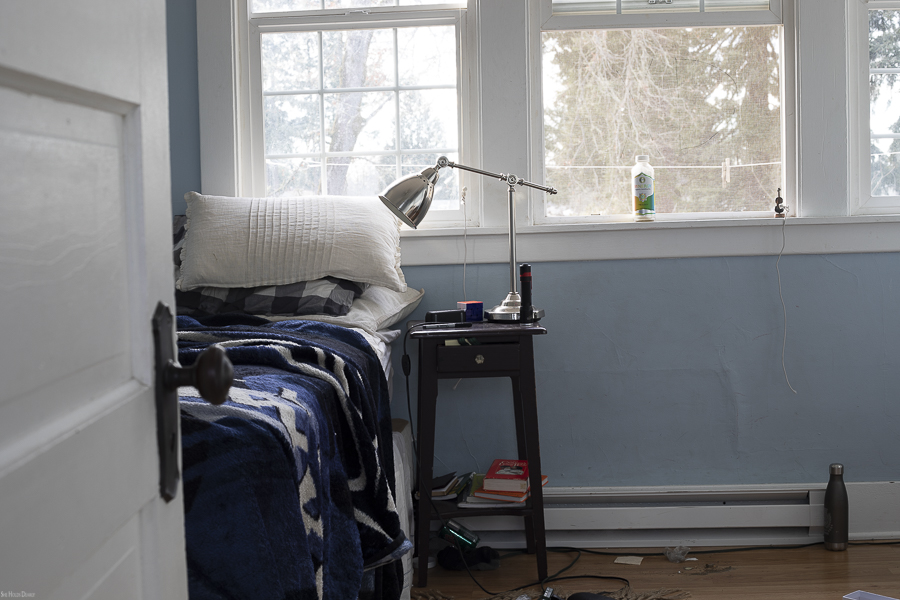
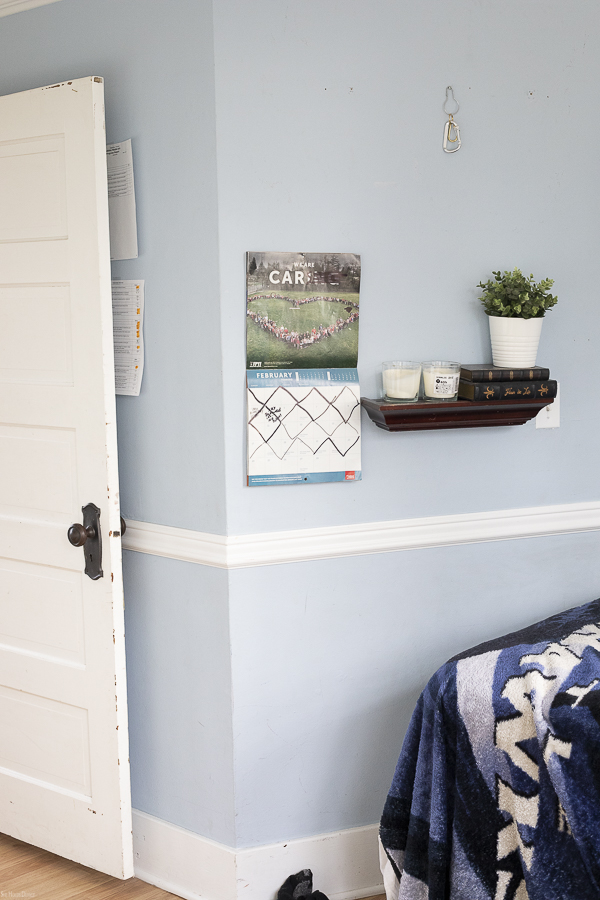
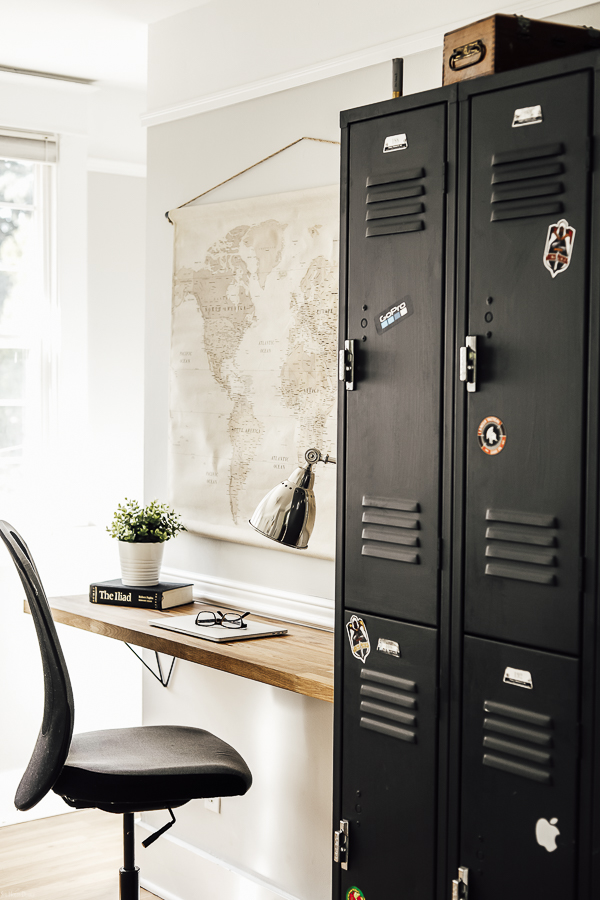
It had aged with him to a point, but now that he’s 16, it felt time for a change to this more mature and industrial feel.
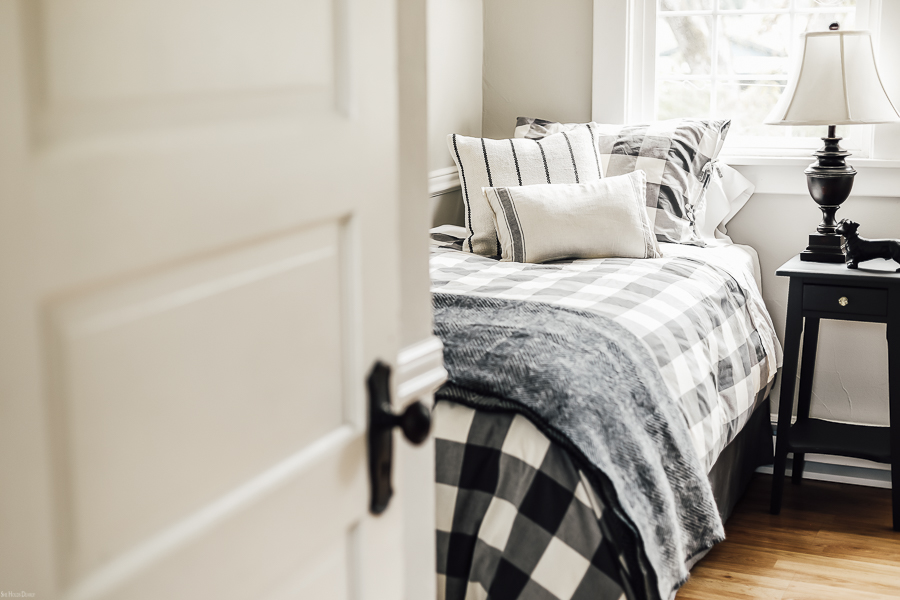
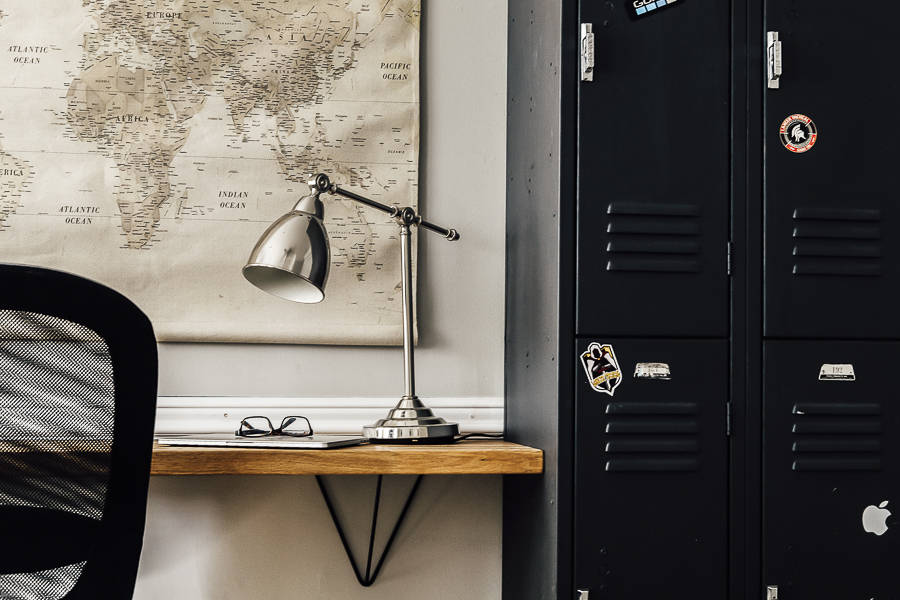
Some of our favorite details of his new room are these lockers – that we painted with Fusion Mineral paint in the color, Ash! And we also made a simple bar desk for him to be able to do his homework on.
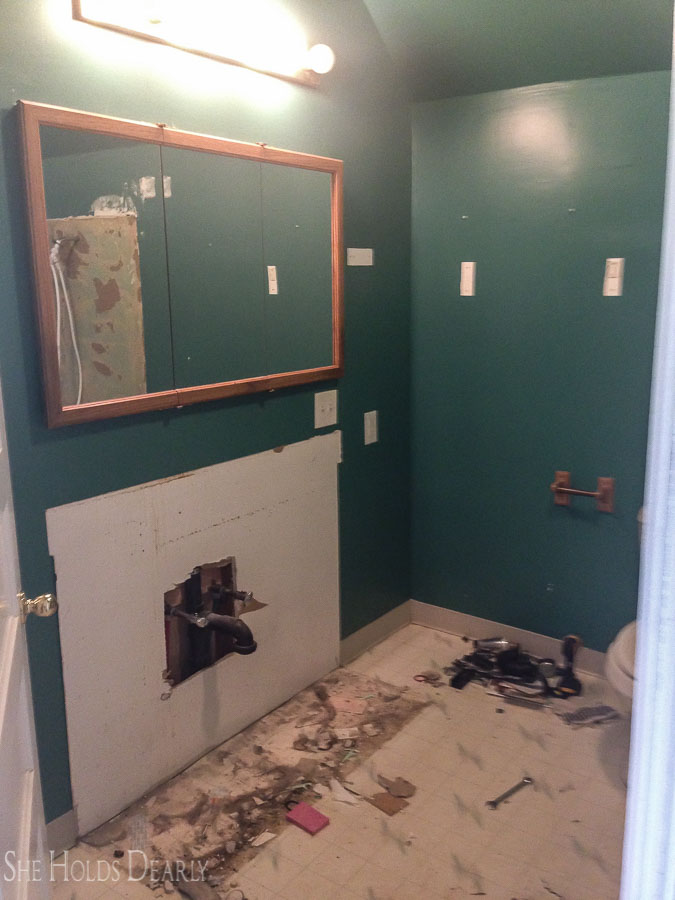
Moving On To The Upstairs Bathroom…
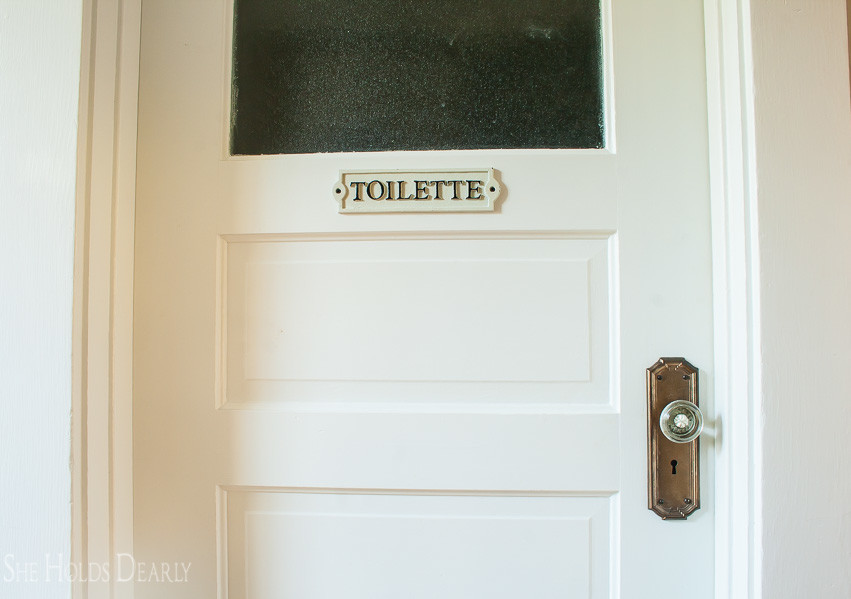
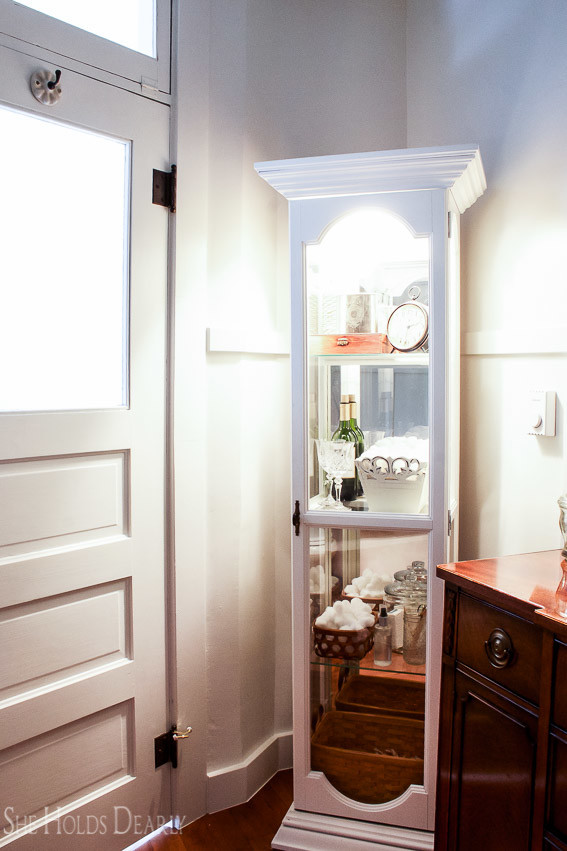
Our upstairs bathroom has a transom (a hinged window above the door) that I absolutely love! The door itself has a frosted glass panel on the top half and we added a cute “toilette” sign underneath.
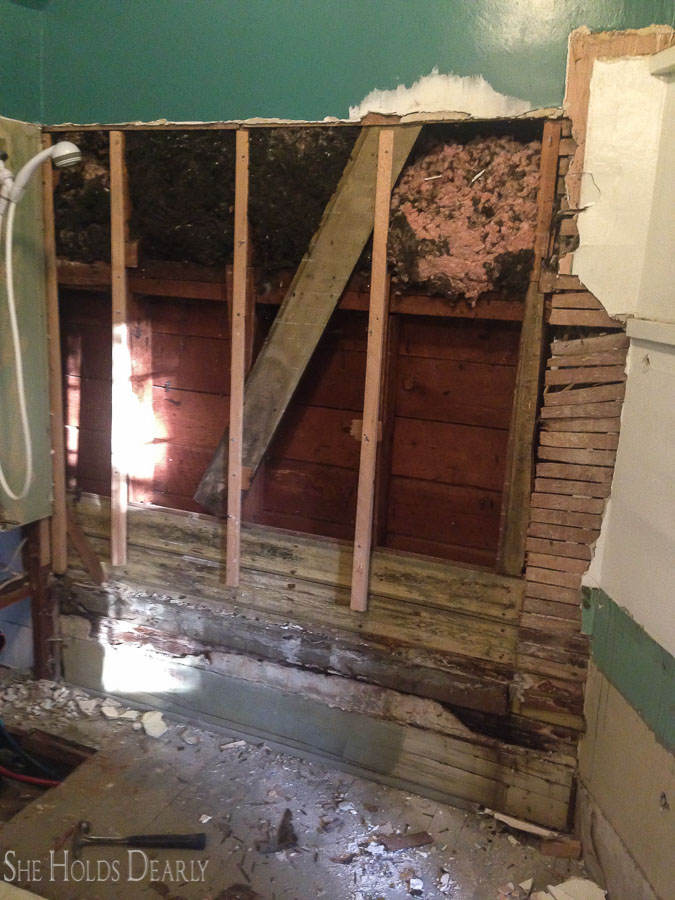
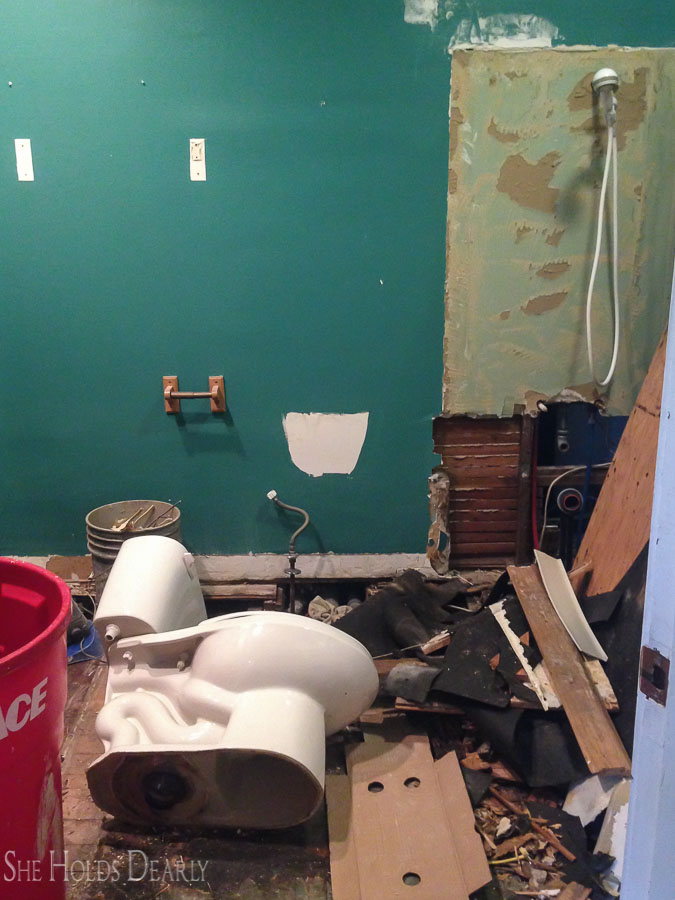
Before we fixed it up, this room was a true disaster! There was a horrible old tub that was practically falling through the floor, and it didn’t even have functional knobs. We used pliers to turn the water on and off.
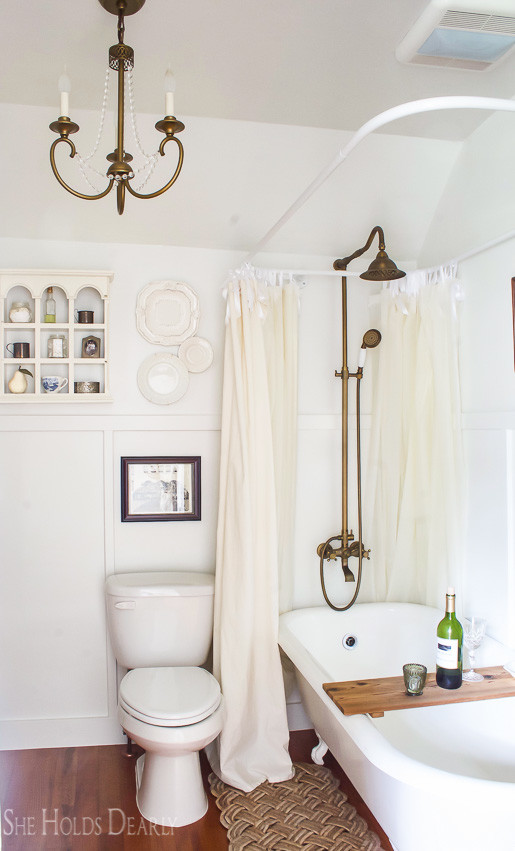
You can imagine how nice it was after we were able to rip all that out and replace it with a lovely claw foot tub we were given by some friends. We refinished the tub before moving it inside, but then it was damaged a few years ago during my DIY drop cloth bleaching project. So this tub has yet another re-finish awaiting it sometime in the future.
Other projects we completed in the bathroom were adding can lights, installing batten boards for the walls, and hanging a pretty chandelier.
We also made a second bathroom vanity out of another dresser from Craigslist. On top of this one, we did a strong clear coat finish to help it stand up against any water damage. The sink we installed was also from Craigslist, and we finished it off with a mirror from eBay.
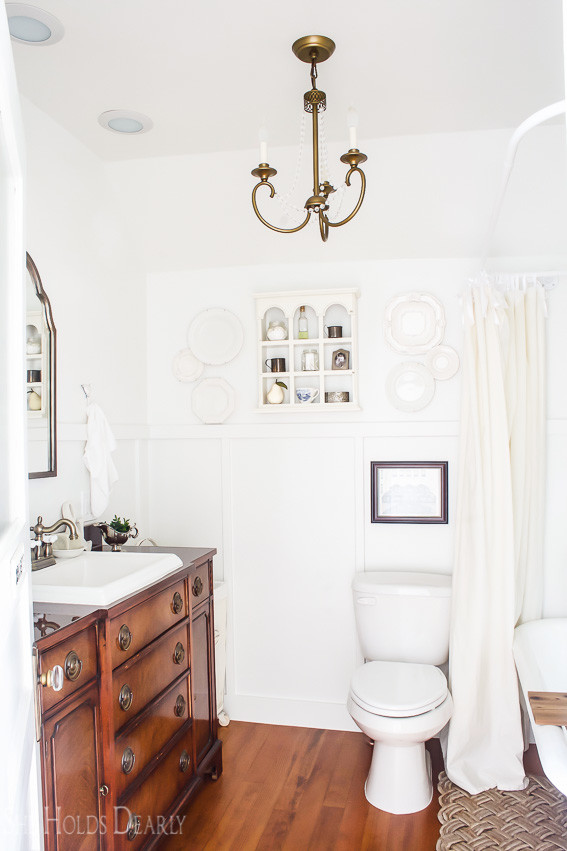
I know you might not think of plates as being a bathroom decoration, but we went with it in this room, and I am so pleased with how they look!
In one very oddly shaped corner, we have a curio cabinet that used to hold my Grandmother’s dolls that we painted white. It fits well in the space, holding extra bathroom supplies and looking mighty cute while doing it.
Last But Not Least, The Master Bedroom!
What farmhouse tour would be complete without a tour of the master bedroom?
Originally, what is now our master bedroom would have been two smaller rooms, a bedroom, and the mother’s sewing room. Back in the early 1900s when the house was made, being able to say you had a large number of bedrooms was a status symbol and could make you sound wealthier than you truly were.
Before we even moved in the two smaller rooms were transformed into one larger room, probably around the 1950s.
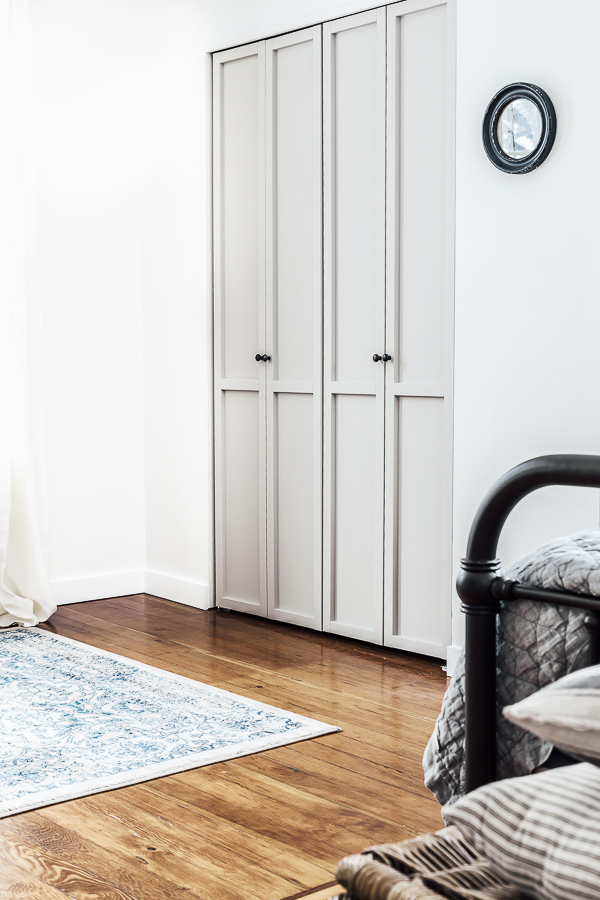
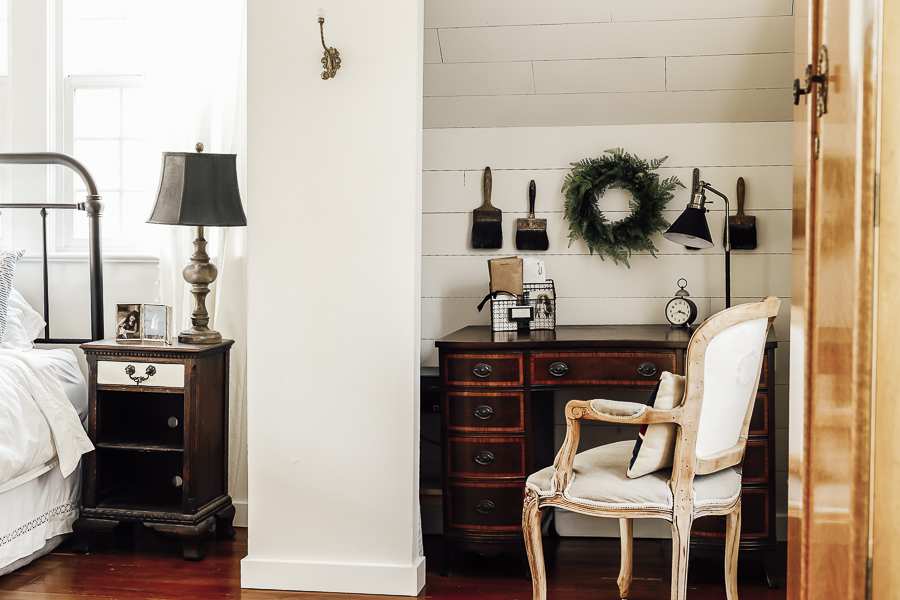
Some of the benefits of having a combined room are the extra space and that we also ended up with 3 closets! Two of which we use for clothes and added shaker-style bi-fold doors onto, and one that we have converted into an office space for me. More on that in a few minutes!
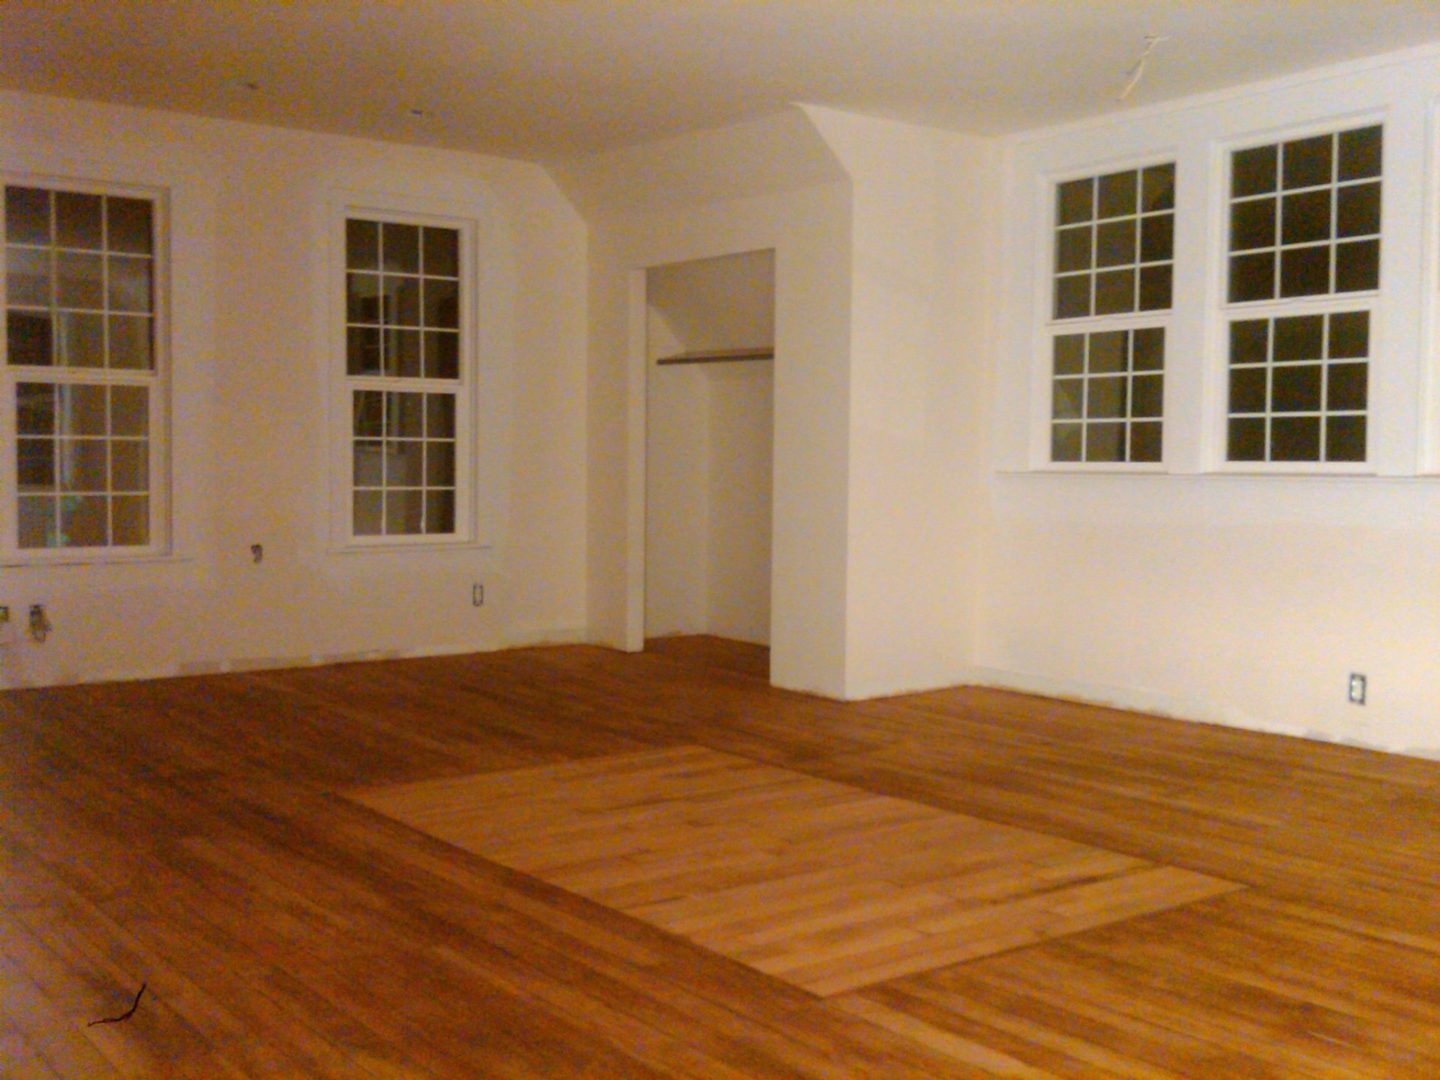
One of the bigger projects for this room was ripping up the carpet, chipping away an old chimney, and and needing to remove a large rotten section of the floor and patch it with new wood. We completed that and added a small inlay for the border to help it look more intentional.

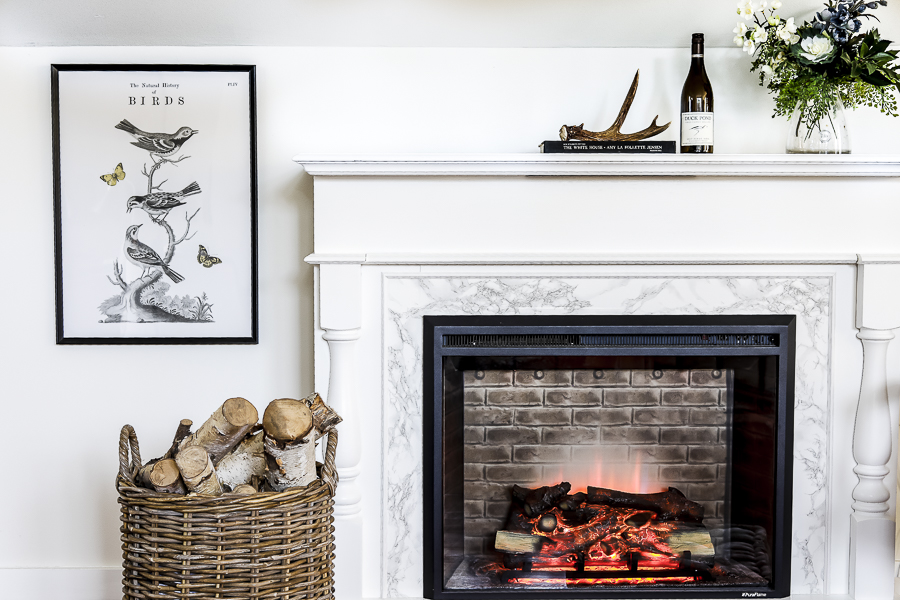
A more recent project has been the addition of our electric fireplace and upgrading of the mantle. I have one or two small touches that I would still like to finish on the mantle, but it’s getting close to being completed!
** June 2020 Update: Fireplace is completed!**
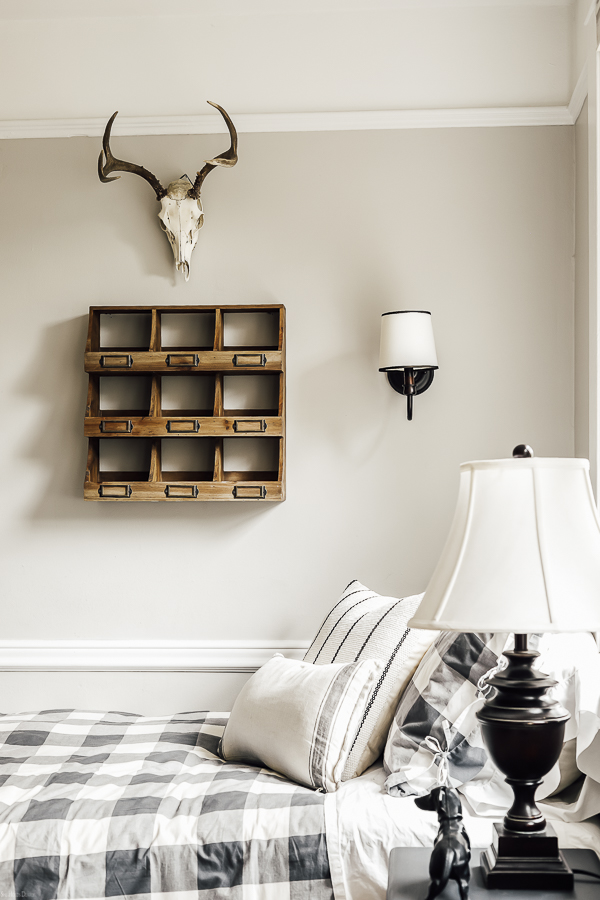
Across at the end of the room is a nightstand that was originally from Craigslist, but with a little DIY, turned into this beautiful faux card catalog for our seating area. !
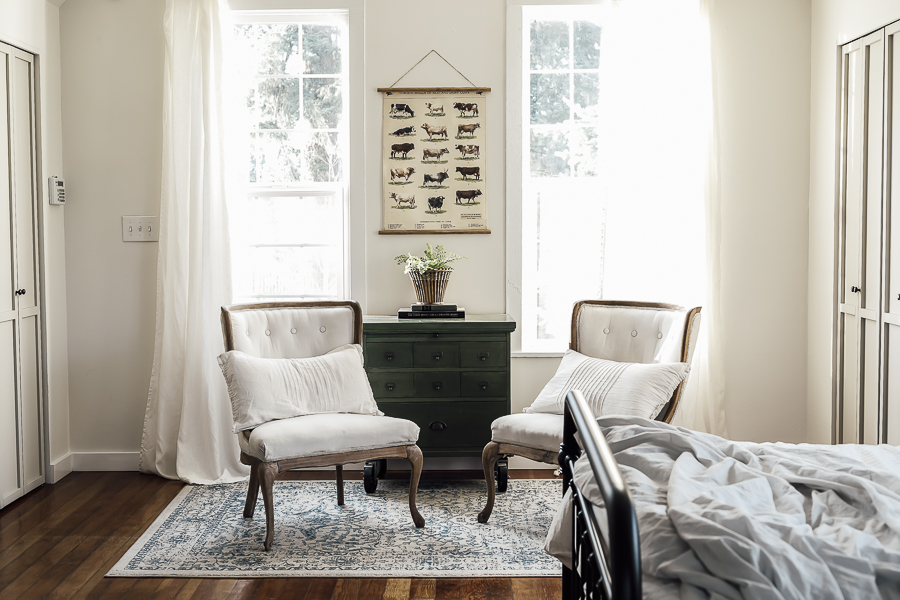
On either side of the card catalog, I have two chairs that I found at a garage sale. Believe it or not, they were the first furniture pieces I bought and then finally restored, and they hooked my interest in doing it again and again!
Above the seating area is a cute wall hanging that is made out of wrapping paper! This easy vintage wall hanging tutorial can be used to transform any number of printed goods into beautiful wall hangings. They cost about $10 to make, and are great gift ideas – especially since there is no limit to the things you can hang this way!
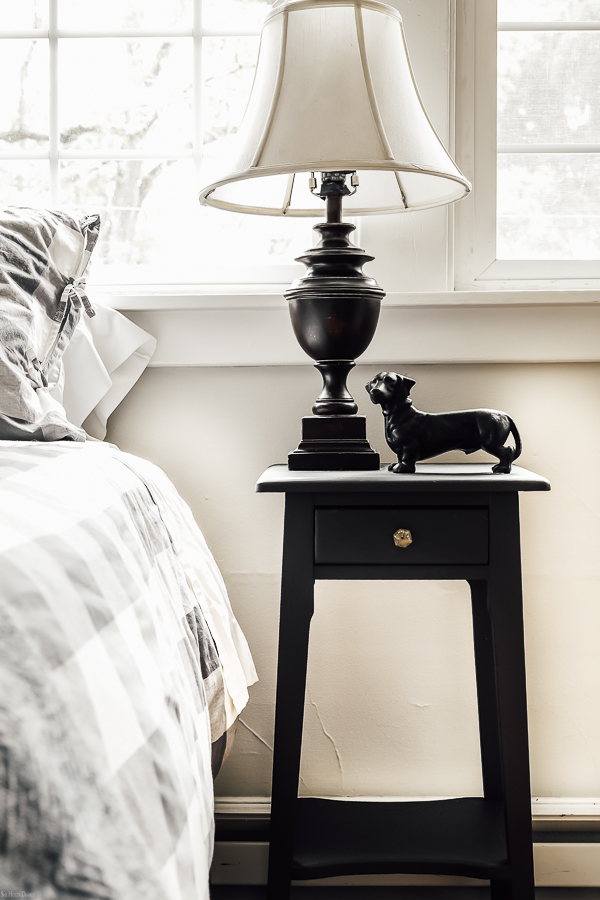
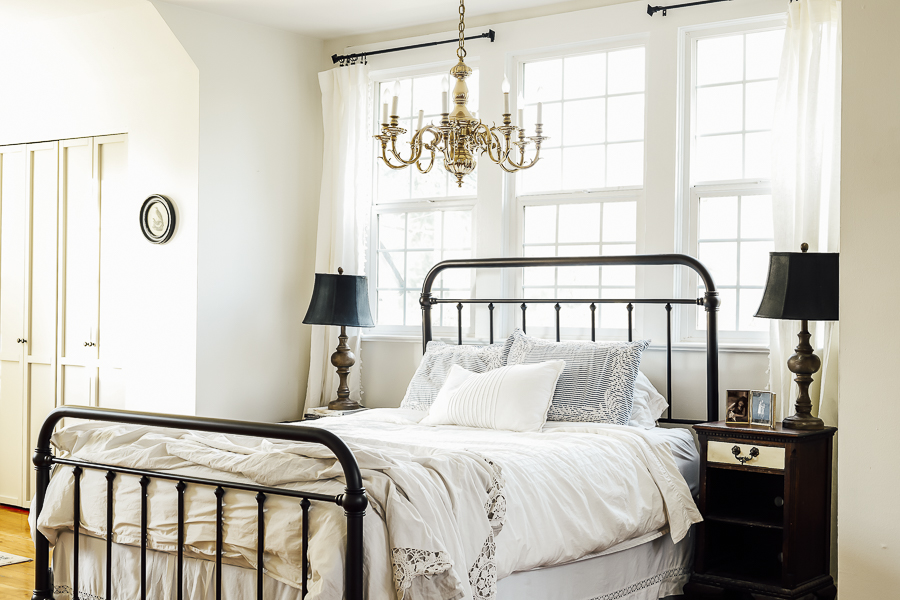
On either side of the bed, I have lamps that I got for $7/together that I painted to look like they had real wooden bases, with dyed shades – which I will be sharing a blog post on soon!
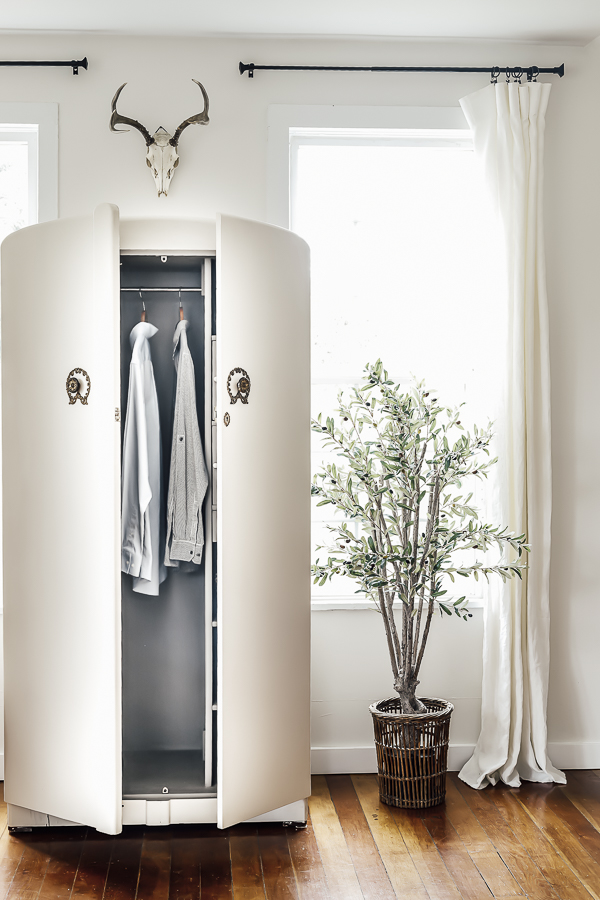
Near the door to our room, we have our recently finished upcycled armoire! We got this piece from my husband’s grandma and gave it new life with some fresh chalk paint.
A brand new addition to our room is these matching distressed rugs. I’m not certain yet how I feel about the blue – but they’re kind of growing on me. What do you think about them?
I mentioned it briefly above, but we transformed our 3rd closet into an office space for me. We added shiplap on the interior walls, found the perfect desk, and I had a refinished French chair that was just right to finish it off.
**November 2020 Update: The Master Bedroom is officially finished! Here’s the reveal post.**
And That Concludes Our Farmhouse Tour.
Thank you for following along on this look back through years of hard work and fun DIY projects. I know some of these before and after shots are really fun for others to see, but I’m realizing that they’re actually a great reminder to me of how far we’ve come!
Sometimes it’s so easy to get caught up in the things that are still waiting to be finished (like the laundry room and the porches), but taking a moment to look back and appreciate the work and celebrate what has been accomplished is a welcome change!
Thank you for coming along on our farmhouse tour and for celebrating these big and little improvements with us!
I’m always available to answer any questions you might have. You can complete the form HERE.
If you’re looking for more interior design inspiration, join my Behind the Scenes group for live Zoom sessions, discussion with other interior designers, a women’s Bible study, and more!
And don’t forget to save your spot as a student in my Elite Decorating Academy!
Pin This Farmhouse Tour For Later

Warmly,


