Simple Mantel Makeover by Adding Trim Molding
Here are three simple mantel makeover ideas to dress up your fireplace or decorative mantel.
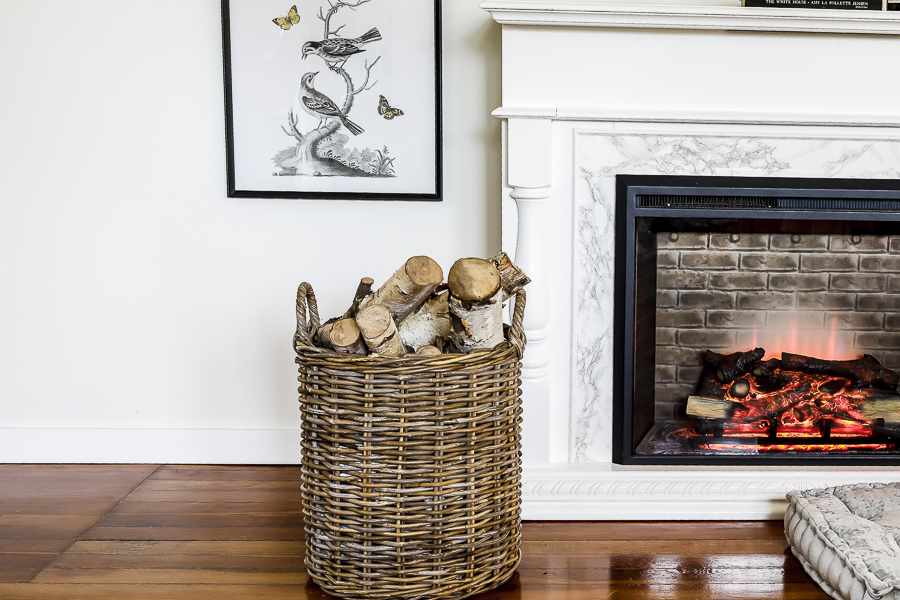
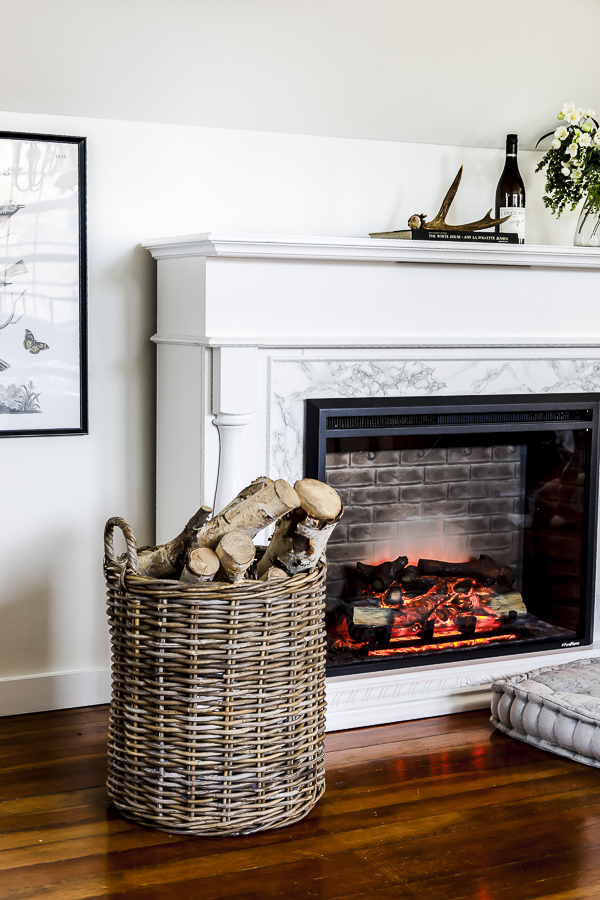
In a previous post I shared how we changed this Craigslist mantel and added an electric fireplace.
But then as we were living in the space for a while I felt like I wanted some more interest on the face of this mantel.
I’ve got three ideas that I wanna show you today and there may be more in the future. So stay tuned.
I found that I kept over decorating the space because I was trying to make it feel more finished and have more depth. What I really need to do is just figure out what it is that I don’t like about this mantel and address those issues.
So we will be tackling that today.
I’m thinking that corbels or maybe a little wooden appliqué would be pretty on the top section. So, really, this may be only part one of the Simple Mantel Makeover.
I know what I want to do on the lower section so I’m going to go forward and just share with you that. I also think it’s important to model for you the importance of progressing on your projects even when you don’t have the final look finished.
Rarely do I have everything figured out. There’s a lot of faith in decorating.
It’s important to keep taking the next step and then see what doors open from there.
It may even turn out that I don’t need anything. I tend to over focus on areas and overthink my ideas.
In the end I only need to implement about 90% of my initial ideas.
Come to find out- its very finished looking, so that’s good that I don’t need to generally go and make all of my ideas come to fruition
We will see what happens with this simple mantel makeover.
Simple Mantel Makeover:
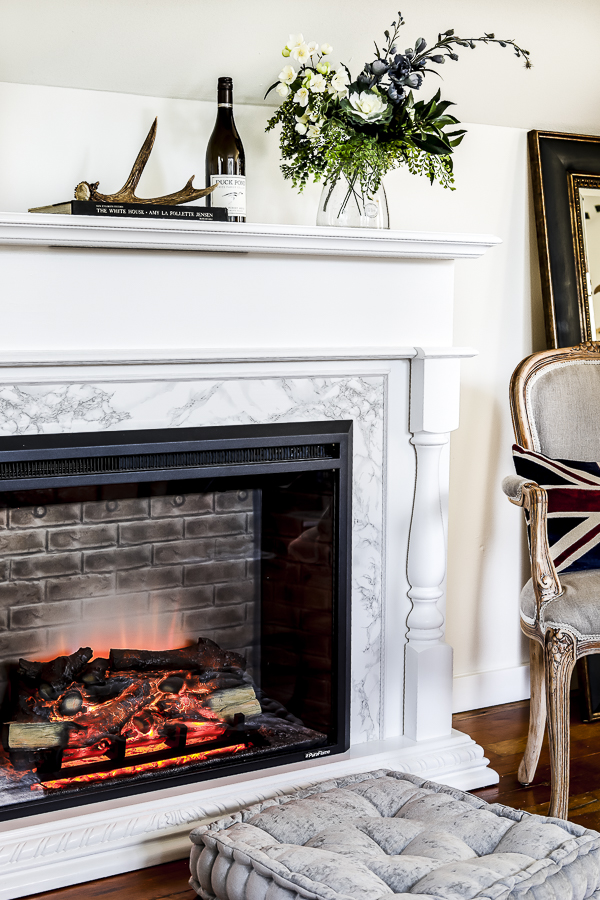
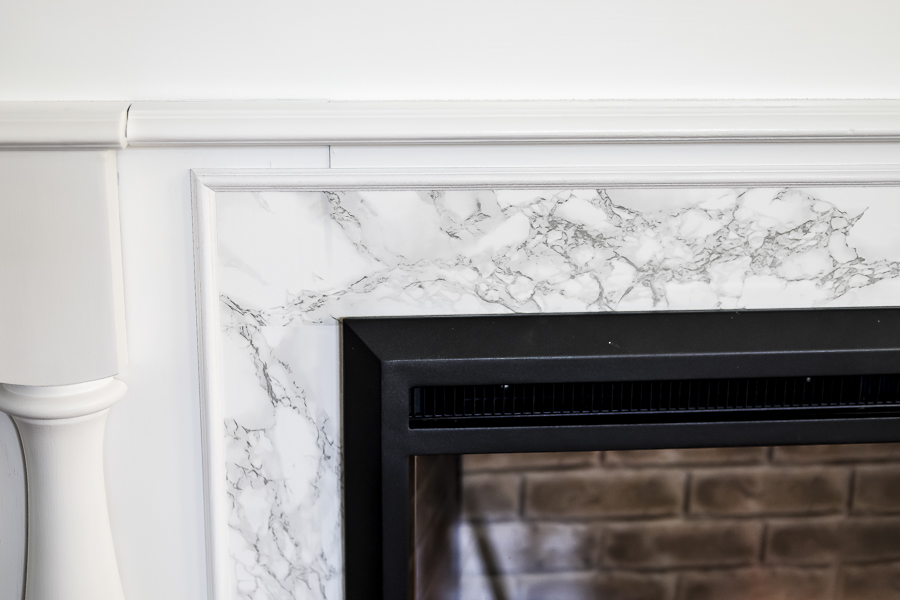
**I do want to mention that this first idea is not going to work on a real fireplace. It will work if you have an electric fireplace or if you have just a decorative mantel. That is because your real fireplace, whether it is gas, wood or pellet is going to melt this marble contact paper that I want to show you.
Supplies
*This post contains affiliate links to products I know &/or love.
For this project you will need. . .
- marble contact paper
- scissors
- measuring tape
- pen
- half round wooden trim- I suggest alder or something of similar value. Home Depot sells this trim in 40 inch sections for only a few dollars.
- large half round balusters– meant for kitchen islands
- razor blade
- masking tape
- level
- air compressor
- nail gun
- pin nailer
- 23 gauge pin nails
- spackle
- caulk
- touchup paint – I’m using the Magnolia Trim & Cabinetry paint
- compound miter saw
[show_shopthepost_widget id=”3888875″]
Tutorial
- The first simple mantel makeover trick I want to show you is using faux mobile contact paper. Please note, not all contact paper is created equal. I had to order four different types before I got the one that I felt like had a true, pure white undertone and didn’t look fake. That link is listed above.
- I decided to go ahead and measure out 4 inches all the way around from the opening on my mantel. This is going to directly frame the fireplace insert. I love this trick because I’m always wanting to change things up. So low commitment products are the way to go! Paint, contact paper, fabric and second hand items are all good for this lifestyle. If I were to purchase real marble and install this, in 5 to 10 years I probably would want to try something else and then just feel guilty about wasting good marble. If you’re really into DIY decorating, be careful to not spend too much on any one product.
- Mark and cut as you are studying the back, not the front. On the back of contact paper there are some really helpful lines and graphs to help you with the measuring. I very much depend on these when I’m cutting contact paper!
- For easy installation take one strip at a time. Open the shortest edge about 1 inch all the way across and begin your installation.
- Lay that little one inch section exactly in place where you want to start and then begin using both hands to apply the contact paper. See the video if this is not making sense.
- One hand is going to smooth the top of the contact paper while the other hand is going to be reaching behind and slowly peeling the backing off as you go.
- Once you have designed your layout and cut your wood pieces to the correct sizes, this is the time to paint. I ended up using three coats of paint to get a nice smooth look.
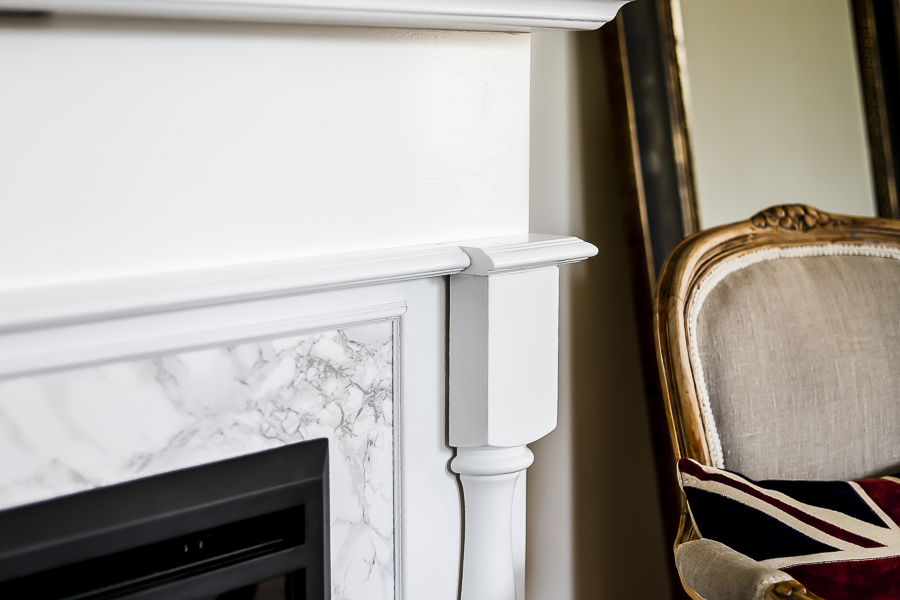
- Once everything is dry, you can begin to install your little half round pieces.
- I find it best to not do one piece at a time but to put everything up exactly the way you want it and tape it in place with a masking tape. You really want those 45° angle corners to match up perfectly. And I also was wanting to keep an eye on the edges of that contact paper and make sure that it was actually covered by my trimwork.
- Using the pin nailer, we installed the small trim, adding pins in inconspicuous areas.
- Using the finish nailer, we installed the large half round balusters from the top and then angled the nails down on each side for the bottom installation. In order to get a little bit more vintage look, I decided to pull the balusters forward to sit off the face as much as I could before they look like they were falling off. I used a spacer to ensure that the space was exactly even at the top and the bottom. It ended up just being a scrap piece of foam core. But it worked just fine.
- We used the nail set to sink each of the nails and pins down below the surface of the wood.
- Then we just spackled those holes and touched them up with paint.
- Finally, I caulked the top and bottom of those large balusters to give a really finished look.
And that is all for now with our mantel. Whew!
Thanks for following along in this journey and all the ups and downs of making decisions as we remodel our 1906 farmhouse.
Pin This Simple Mantel Makeover for later


