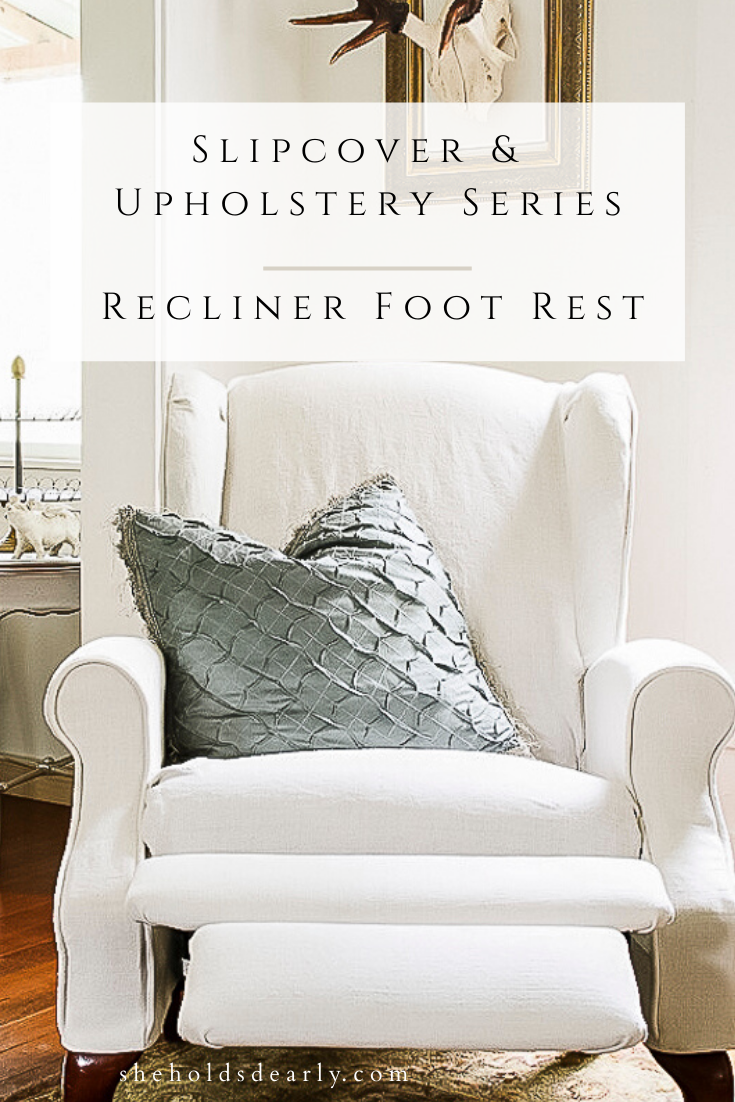
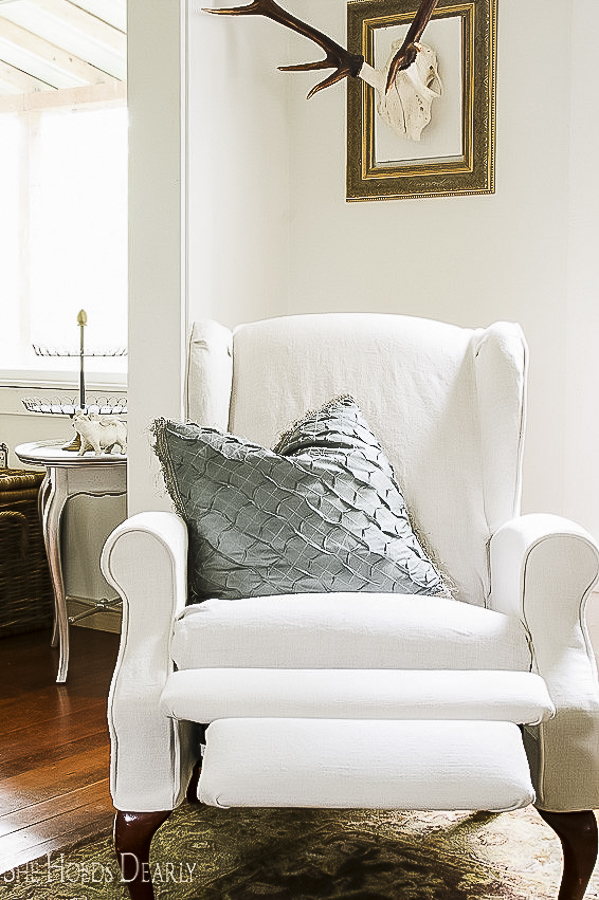
Recliner Foot Rest |Slipcover & Upholstery Series
As part of my slipcover & upholstery series, today I’m going to share how to re-cover your recliner footrest.
I think of this as upholstery 101 because this same technique will also work well for other simple projects with the same basic structure of :a board with a piece of foam for the cushion, covered by your chosen material.
Some other examples of good items to start with are stools, dining room chair pads and benches.
Associated posts in the Slipcover & Upholstery Series include:
- Create Custom Piping
- How to Replace the Old Foam in Your Recliner
- DIY Slipcovers with Piping
- DIY Recliner Slipcover
Fabric Choices:
Before I jump into the tutorial, I want to share some recommendations for my favorite fabrics to use when slip-covering and upholstering.
When you’re replacing something what will see high use, like a dining room chair; and especially if you have young children, I really recommend oil-cloth!
Oil-cloth is a durable and waterproof option due to the tight-weave of the cotton and the treatment (with boiled linseed oil) that creates an almost plastic finish.
This translates into it being easy to clean and maintain which equals a longer useful life!
Modern designers have been using oil cloth more recently and it can be found in really cute designs and styles.
Personally I love Joanna Gaines’ line that shows up in the Summer as part of her Hearth and Hand collection at Target.
They’re sold as table cloths – but you and I both know that beautiful large cuts of cloth can be transformed into a host of other things.
Now if your project doesn’t need to stand up against the myriad of messes that come along with young children at the dinner table, you have even more options for fabric!
Fabric Snobs of the World: Unite!
I’ve realized about myself that my standard for fabric is higher than my standards for other things that serve a purpose to be looked at versus used or touched.
So DIY projects that will hang on the wall might just need to end up “looking nice”, but fabric needs to FEEL nice and be really made of a nice and durable quality.
I’m definitely one of the people at fabric stores who needs to touch all of the options – I want to feel the texture and weight, see how it drapes and how it recovers when stretched.
I think the jury is still out about how the employees at my local fabric stores feel about me – and people like me! (I know I can’t be the only one!)
Fabric Choices Continued:
I would say the number one mistake someone can make when selecting fabric for an upholstery or slipcover project is picking material that is too light.
I don’t mean light as in just the color choice, but too thin or loosely woven.
Fabrics that are too lightweight often:
- Don’t cover the material underneath well (and you’ll see the shadow of the material coming through)
- Wear out more easily
- Are prone to tearing and Ripping
- Can’t withstand being washed or cleaned
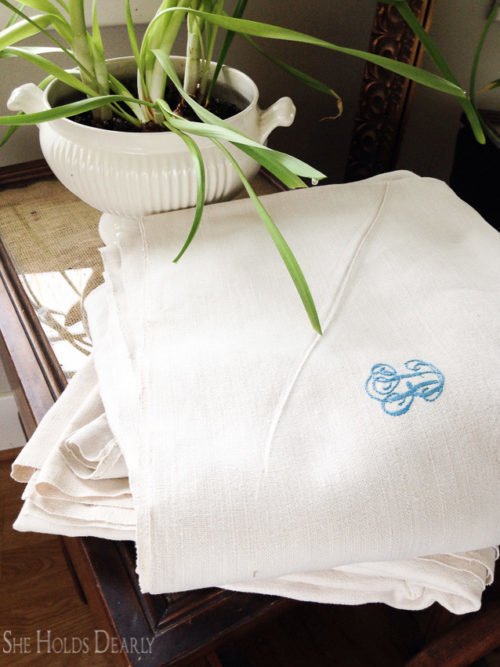
My favorite heavier weight material to use for these types of projects is hemp sheets!
I’ve had the most luck finding them on ebay and the price ranges from $55-$110 per sheet.
(For an idea of how many you might need, it takes about 1 & 1/2 sheets to recover an entire recliner.)
In addition to their quality, I really love the history that they hold.
They were handwoven during the winter in France and were used as real bed sheets.
As material, they’ve got a nice tight weave, knubby character, they’re buttery soft, and they’re cool to the touch!
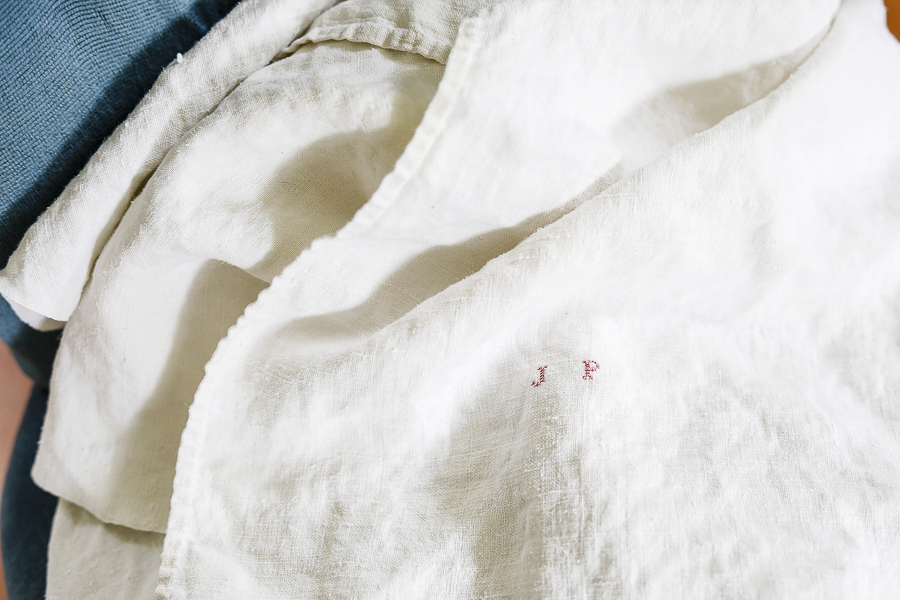
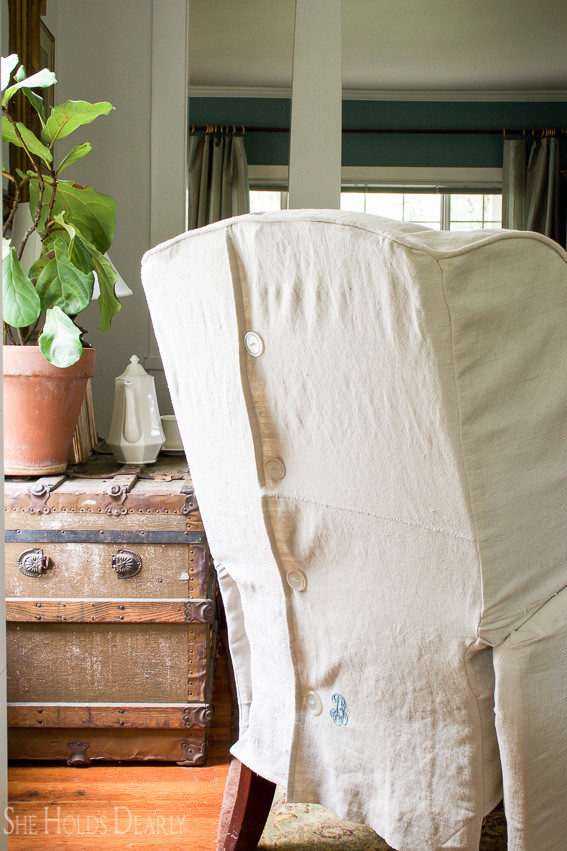
They also often have monograms included from the maker! I love working those into my designs whenever possible.
I also love that these hemp sheets aren’t pure white – because those would certainly be harder to keep clean with a family that includes 4 teenagers and pets!
The color and texture of the sheets is more of an “oatmeal” which makes it more forgiving and does extend the life!
When you’re searching for hemp sheets, make sure to get ones marked “medium weight” if the plan is to use them for slipcovers or upholstery.
You’ll also find “light weight” which fall into the category above as being too light to work well for these types of projects.
There are also “heavy weight” options. I’ve found they’re too coarse and they fray easily, both things which make them unsuitable for slipcovers or upholstery.
Now, it’s pretty obvious that I love hemp sheets and that I consider them highly recommended for this work, but they aren’t without their flaws! Here are a couple of things I don’t love about them:
- They almost always have a seam down the middle because they are pieced together. You can work around the seam when cutting your pieces, OR you can work the seam into your design, but just be careful to use it to your benefit on straight pattern pieces instead of around any curves.
- The price is a little high – especially for a thrifting DIY type of gal like myself. But I do think paying a little more for the historical value of items can be worth it in some cases.
- They can be hard to find.
Often times with true vintage items we balance the cons against the rich character and history and see where we end up!
If the history isn’t an important factor for you, there are comparable fabrics you can get more easily online or at your local fabric stores that don’t have the same cons listed above.
- Duck Cloth – Approximately $10/yard. Comes in a variety of solid colors.
- Linen – Usually about $15/yard, but can be found on sale or purchased with coupons for even more savings.
- Denim – About $16/yd. Don’t worry, blue isn’t your only option! Denim fabric can be found in all sorts of colors and designs now!
And now, here’s the slipcover & upholstery series tutorial: upholstery 101!
How To Re-Cover your Recliner Footstool:
*This post contains affiliate links to products I know &/or love.
Supplies:
- Material (add a few inches to each side of your measurement to ensure you have enough to fold and stple.)
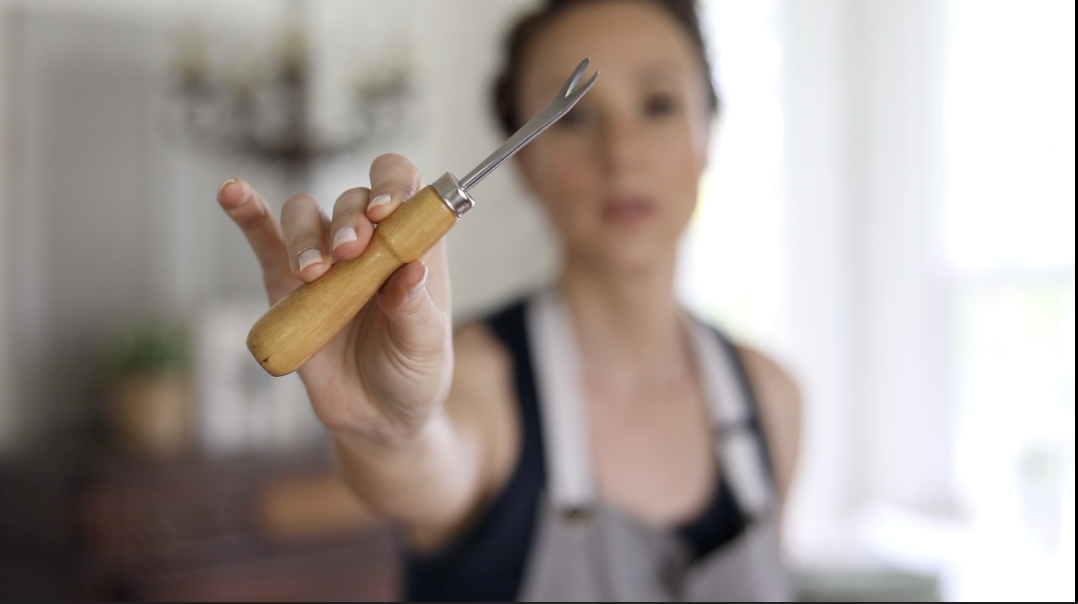
- Staple Remover or flat-head screw driver
- Needle Nose Pliers
- Batting Gloves (your hands will thank you)
- Staple Gun – either manual or pneumatic
- Staples
- Air Compressor
- Scissors
The Slipcover & Upholstery Series Process:
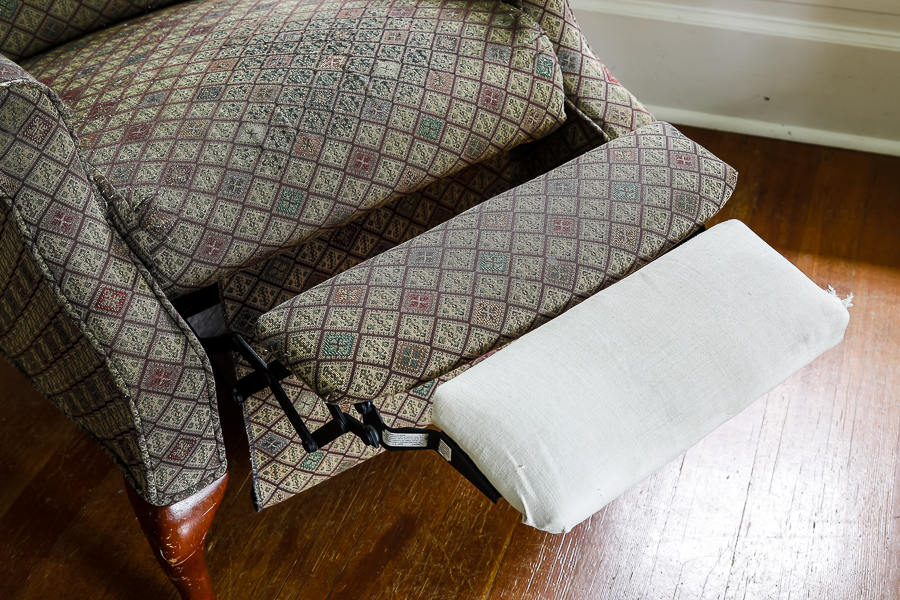
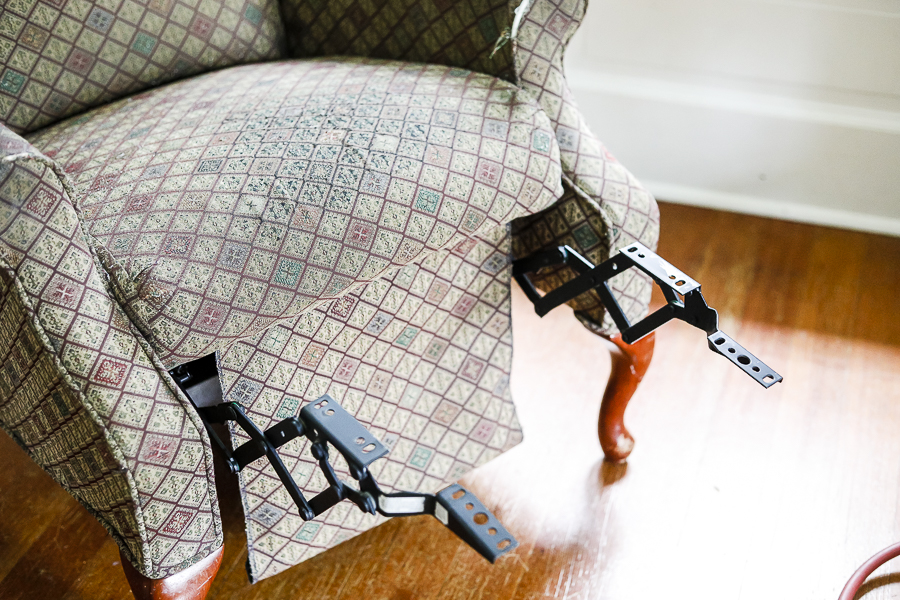
Step One | Remove the foot rest (or chair pad) from the chair body/chair legs.
Usually if you flip your item upside down you will find a few screws holding the pad in place.
Tip: Make sure to keep track of your screws so you can reattach the piece when finished! A small bowl or zipped bag works great.
Step Two | Remove the old fabric by pulling the old staples.
Using the staple remover tool and gloves makes this process much easier!
Step Three | Measure & cut your fabric.
Make sure to cut your fabric generously so you are left with a few inches overlap on each side to fold over the pad and staple.
Step Four | Staple the 4 sides of your fabric onto your chair pad & board.
Choose your starting side and staple it down.
Then do the side opposite your first side making sure to pull out any slack for a nice tight cover.
Do the 2 ends next, leaving the corners for last.

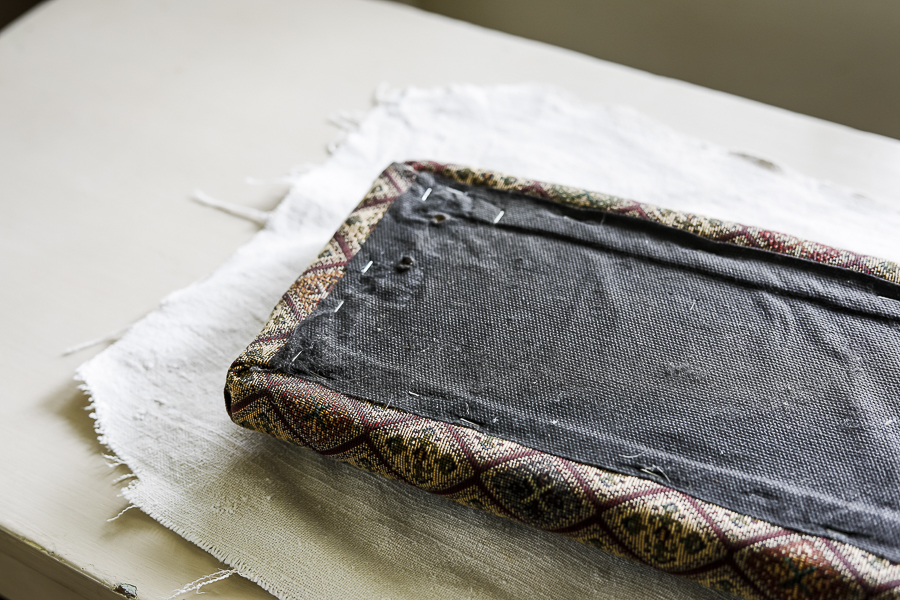
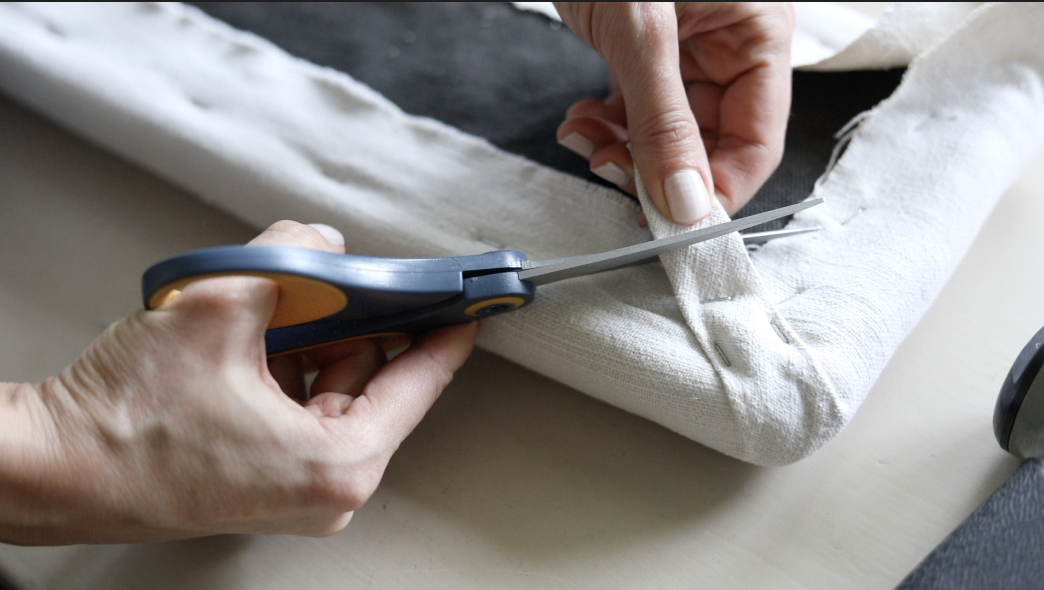
Step Five | Staple the corners of your fabric down last after cutting away excess fabric.
Gently pull and staple the fabric into a 45 degree “mitered” corner at the first layer of fabric.
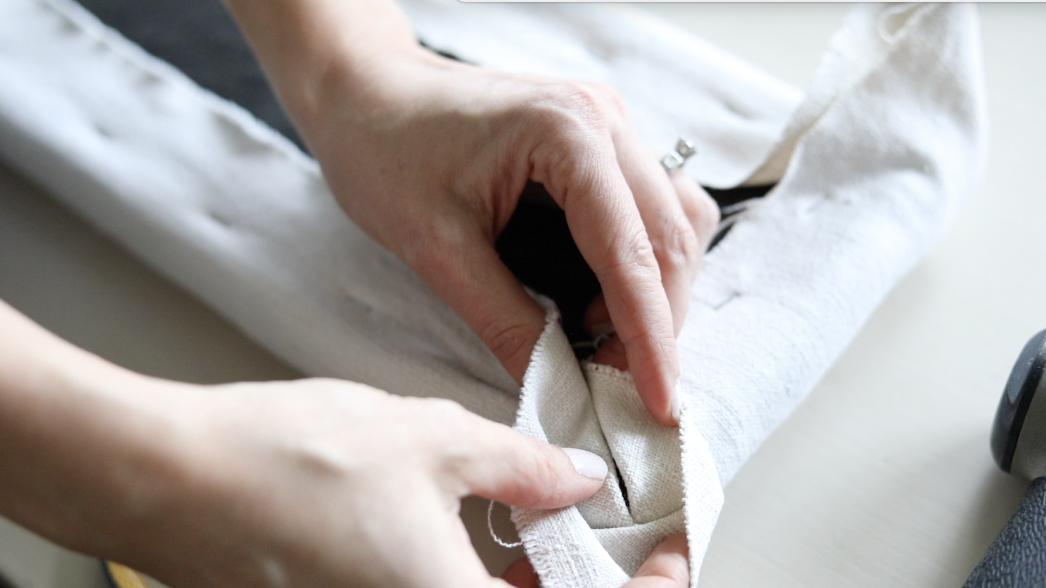
Trim away the excess triangle of fabric leaving about 1/2″ allowance from the staple.
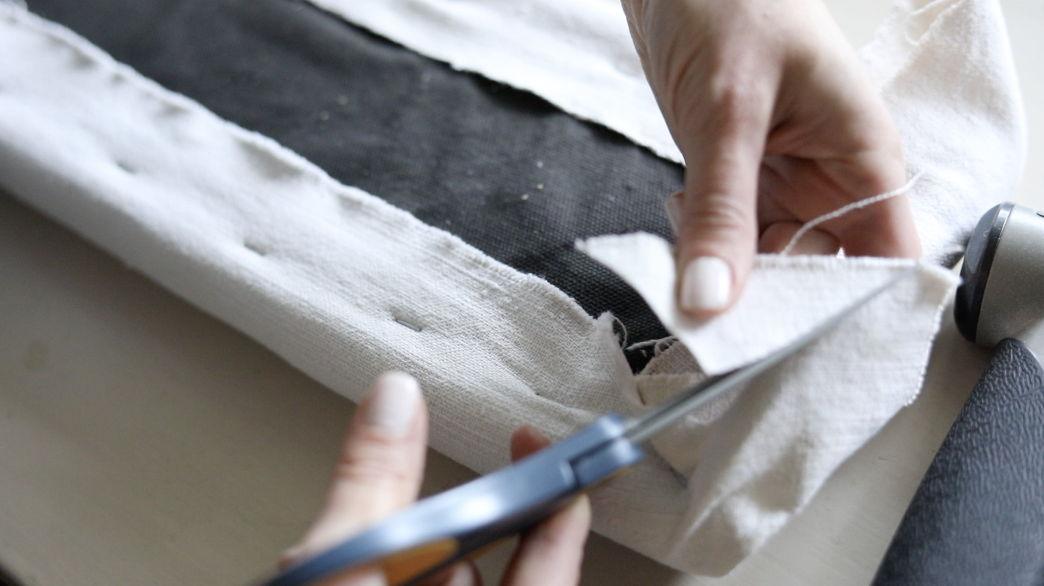
This will reduce a lot of the bulk and create a smoother corner!

Staple the corner down and cut the bulk off the tail.
That’s it!
Flip your pad back over and screw it back into the base of your chair.
You’re finished!
Here are a couple related posts if you’re on an upholstery kick:
- How to Clean White Upholstery Furniture
- French Mattress Cushion Tutorial
- Reupholstering an Antique Chair
- French Chair Makeover
- Ordering Custom Slipcovers
- How to Slipcover a Recliner
- Farmhouse Style Dog Bed Tutorial
- Add Zipper to a Pillow in 10 Minutes
- No Pattern DIY Slipcover Tutorial
- Antique Hemp Sheets
- DIY Slipcovers with Piping
- DIY Recliner Slipcover
Plus the rest of the posts in the slipcover & upholstery series listed above!
Pin this Slipcover & Upholstery Series Tutorial for Later: