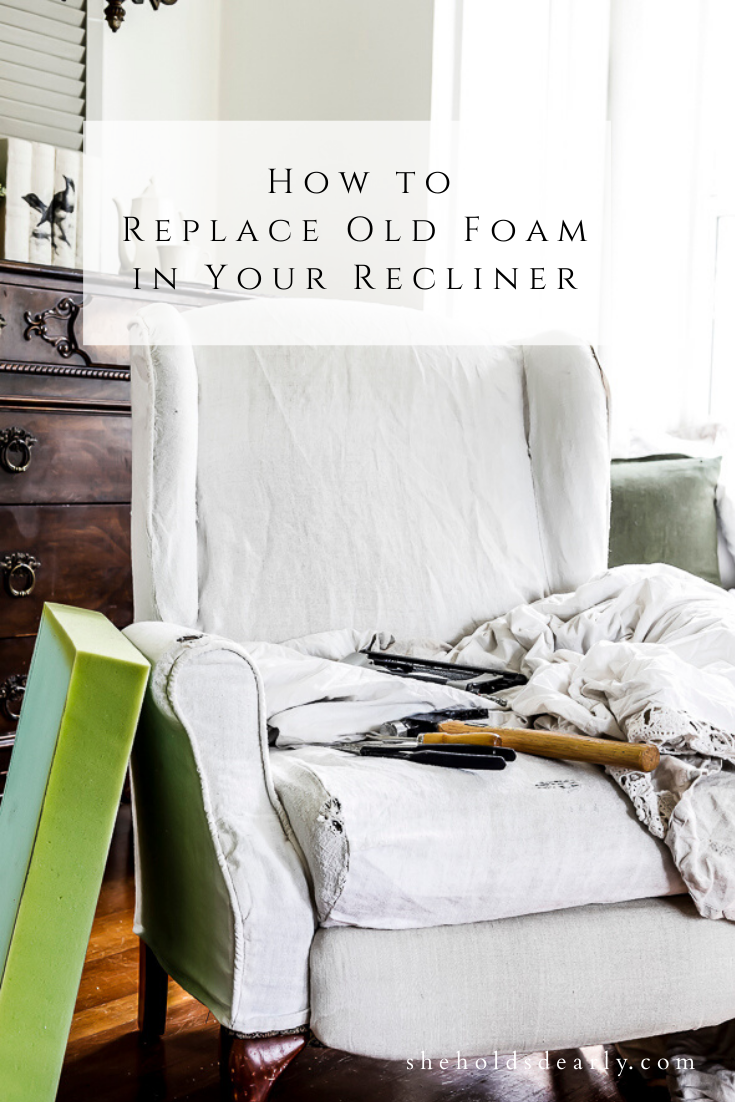
How to Replace the Old Foam in Your Recliner |Slipcover & Upholstery Series
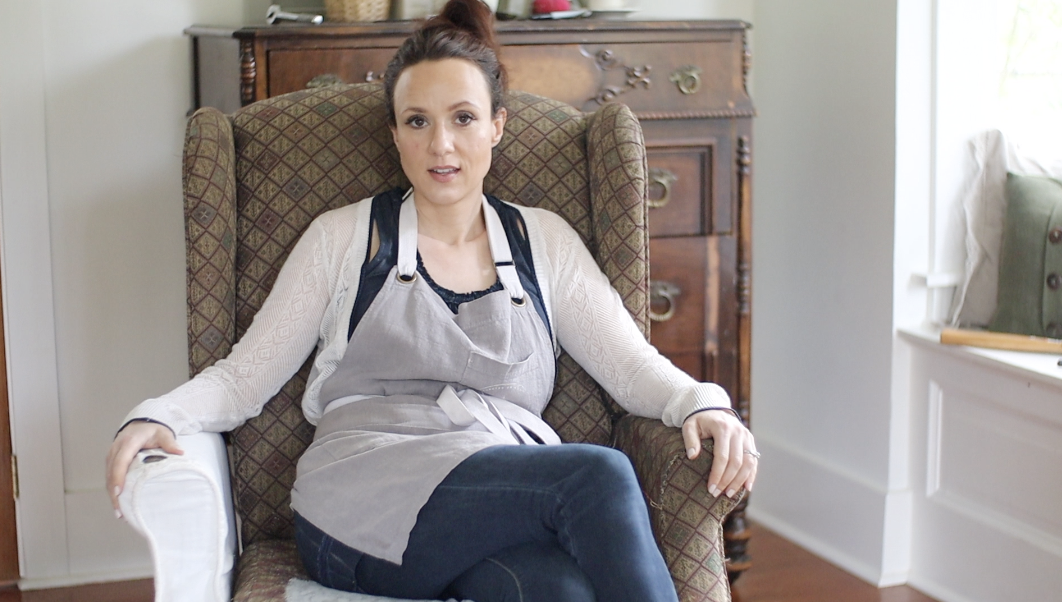
If you find that you need to replace the old foam in your recliner, you may, like I did, realize there aren’t a ton of resources out there about it! I’m hoping this post will help give you the information and confidence to give it a try!
Years ago, we were gifted these recliners, which are now easily over 20 years old!
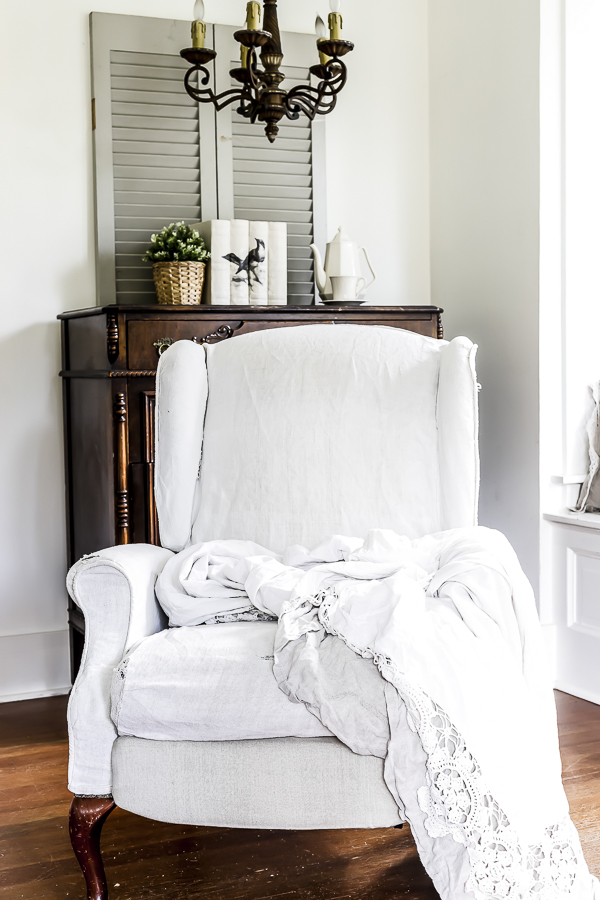
I like the style and the size, but the material didn’t fit very well into my decor at the time, so four years ago I made custom DIY recliner slip covers, which have honestly done a fairly good job standing up to the test of time!
The cushions of the chairs, however – haven’t been quite as fortunate.
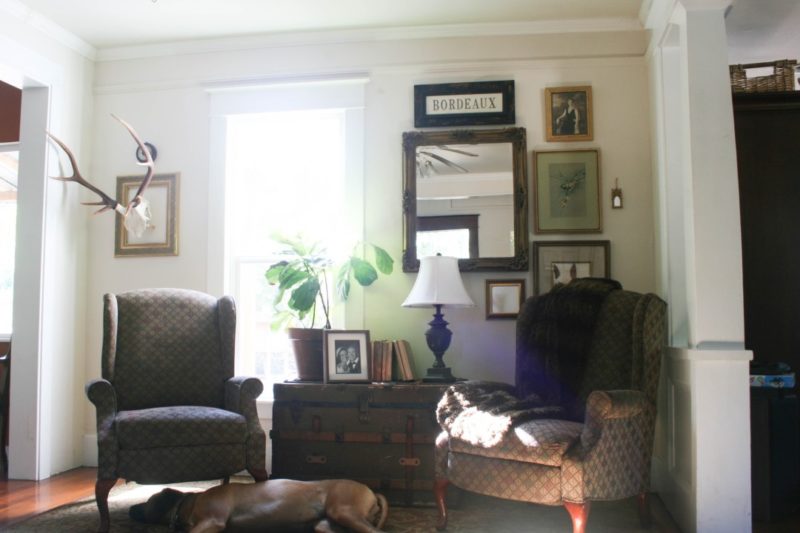
While the frame and body of the chairs were both in good shape, the cushions were starting to be really uncomfortable and I really needed to replace the old foam.

I figured that though we weren’t exactly sure what we were doing as we headed into the project, we couldn’t end up too bad off since the chairs have already served a pretty useful life.
If the project went sideways, it wouldn’t be a big loss. But if it went well, we could get another few years out of them before calling them done!
I’m certainly not the most construction savvy – so I was glad my husband Colby was able to join me for the more technical aspects of this project!

*This post contains affiliate links to products I know &/or love.
“Get it Done” Collaboration:
Before I jump in to the process of replacing the recliner foam, I wanted to share about a neat collaboration I’m part of called the “Get it Done” challenge.
It was put together by Nicole Northgarden, and includes a whole playlist of fellow DIYers and creators working on tackling those projects that have been hanging out on our to-do lists for longer than we’d like!
I hope you check out those projects if you have a minute and get inspired to get something done on your pending list as well!
I’d love to hear about it in the comments if you do.
Now, back to business!
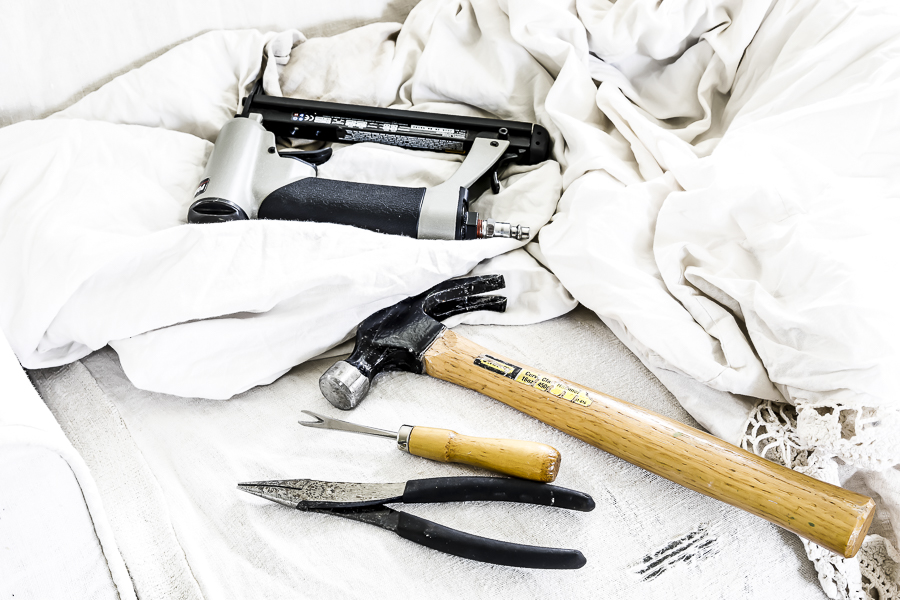
Supplies You’ll Need:
- Ratchet Set
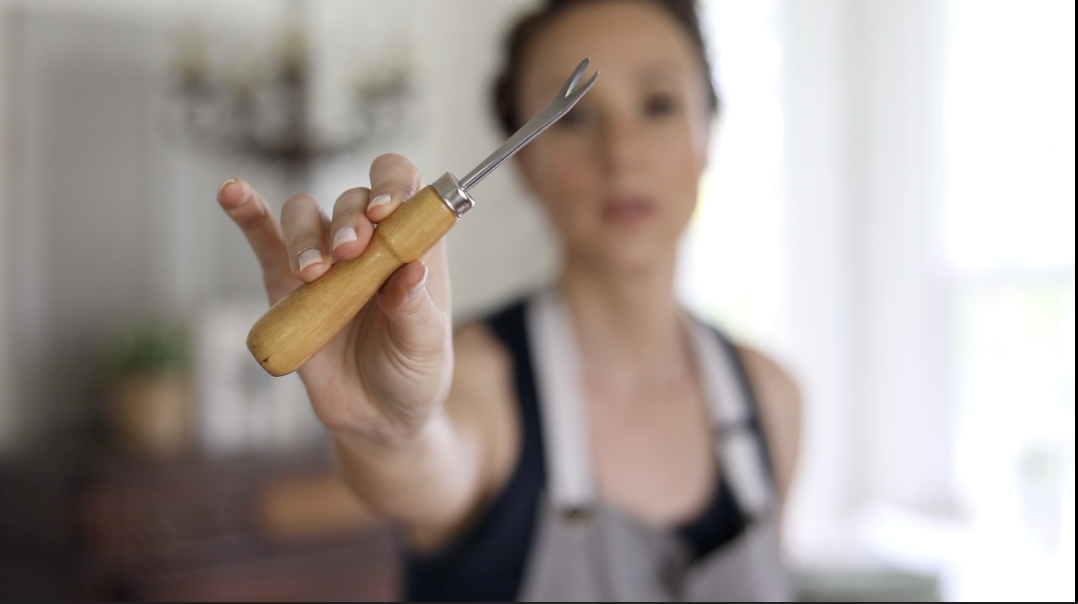
- Staple Remover Tool
- Needle Nose Pliers
- Batting Gloves
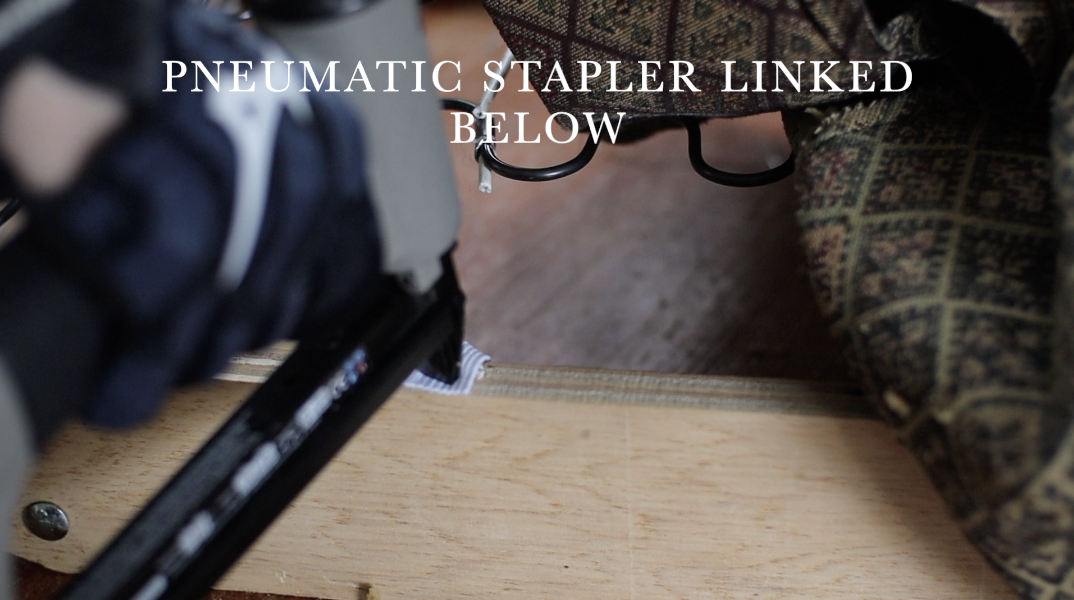
- Stapler
- Staples
- Air Compressor
- Foam (available on Ebay or Amazon)
- Electric Knife
- Elastic (if applicable)
- Duct Tape (if applicable)
Disassembling the Recliner:
Tip: Take pictures (or video) as you go, documenting each of the different steps so that you can look back on them when you’re reassembling your chair if you get stuck!
Flip the chair over and use a ratchet set to remove the seat of the chair.
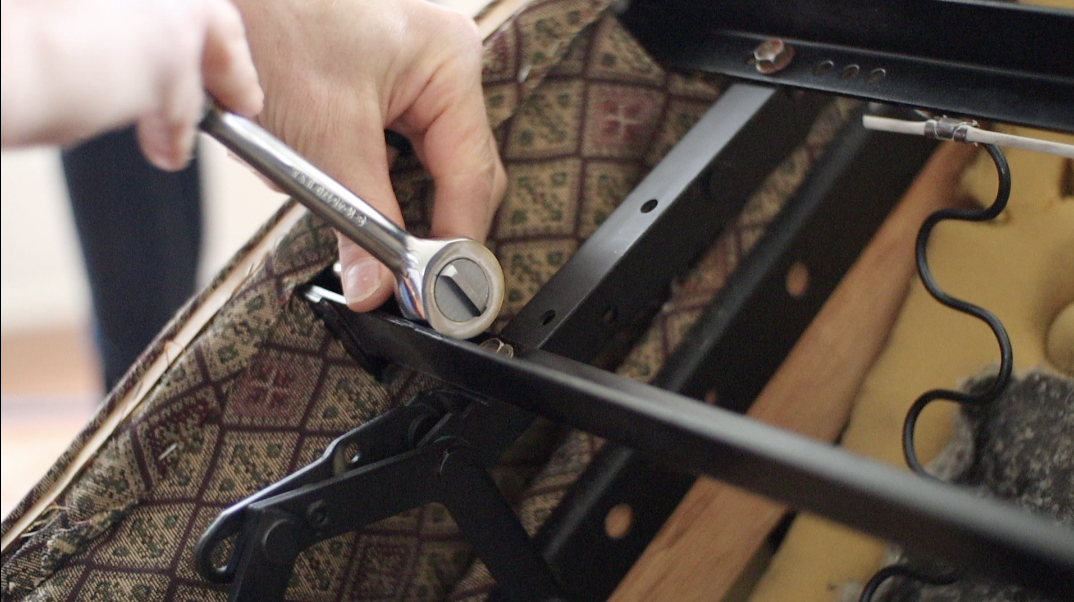
Colby shared this tip: Loosely re-thread fasteners back into the places you removed them from to keep track of all the parts you need to re-assemble the chair! You don’t want to be left with a lost bolt and a sagging footrest.
We also found that having the footrest left in the recoiled position helped keep it from snapping on us while we worked.
Our chair is a little different from some in that the chair back and the chair seat are all 1 connected piece.
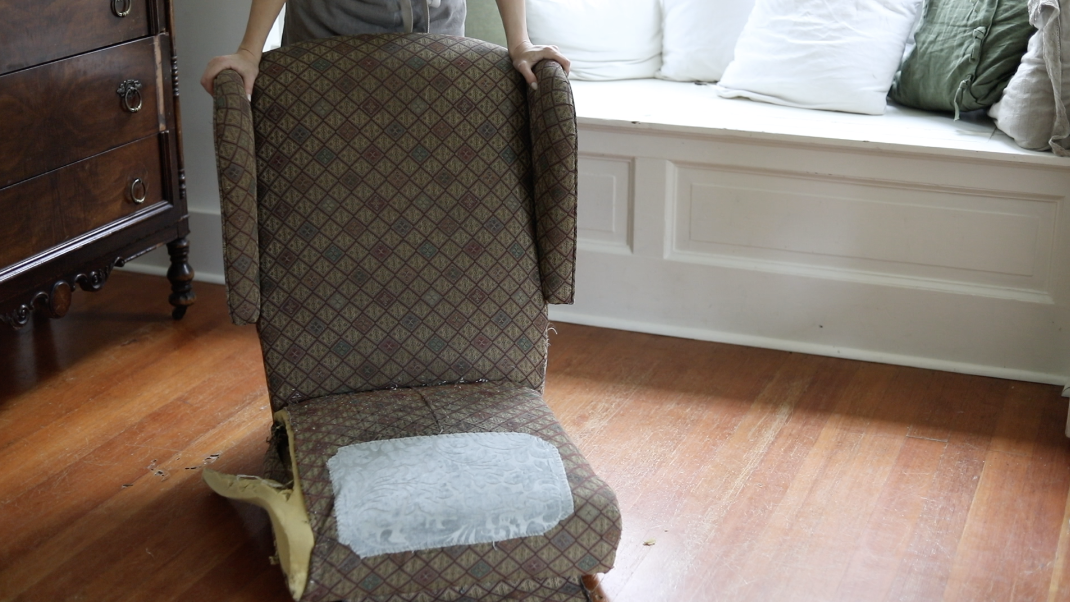
Once we removed that from the base and the arms, I was able to flip the chair over and get a better look at what I would need to do to remove the fabric and replace the old foam.
In order to remove the fabric, I used batting gloves (seems funny, but they help!) my staple removing tool, and needle nose pliers.
This little tool really helps the process along!
My recliner is old enough that some of the staples were just breaking apart as I pulled them. When that happened, I used the needle nose pliers to grab the smaller remaining pieces.
Tip: Try to work backwards of how the chair was assembled when removing the fabric to make sure you get all the staples removed! For instance, corners are usually stapled on last, so you should try to remove those first.
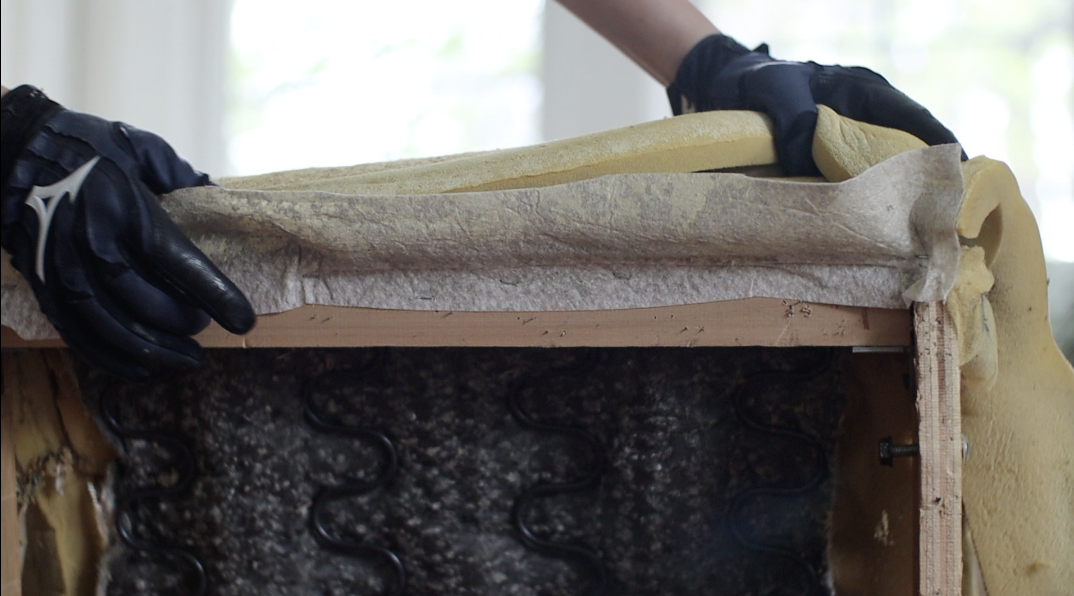
Once you get the fabric and foam removed, you should be able to see if there are additional items inside the chair that need to be replaced.
In our chair there were pieces of elastic that had originally been strung side to side above the springs. They were all broken and torn, so I went ahead and replaced those while I had the chair apart.
Our pneumatic stapler & portable air compressor came in handy for another project!
Time to Replace the Old Foam:
Once the chair was taken apart and the new elastic was added in – it was time for the fresh piece of foam! You can get upholstery foam from Amazon, Ebay, or at Joanns, or other local fabric/craft stores.
I went with 3″ foam from Joanns for this project. Make sure you have your measurements with you when you head to the store or order online. Both the depth/height of the foam and the width and length!
Tip: Keep new upholstery foam away from dogs who like to nestle into cozy things for their bed. We learned that the hard way!
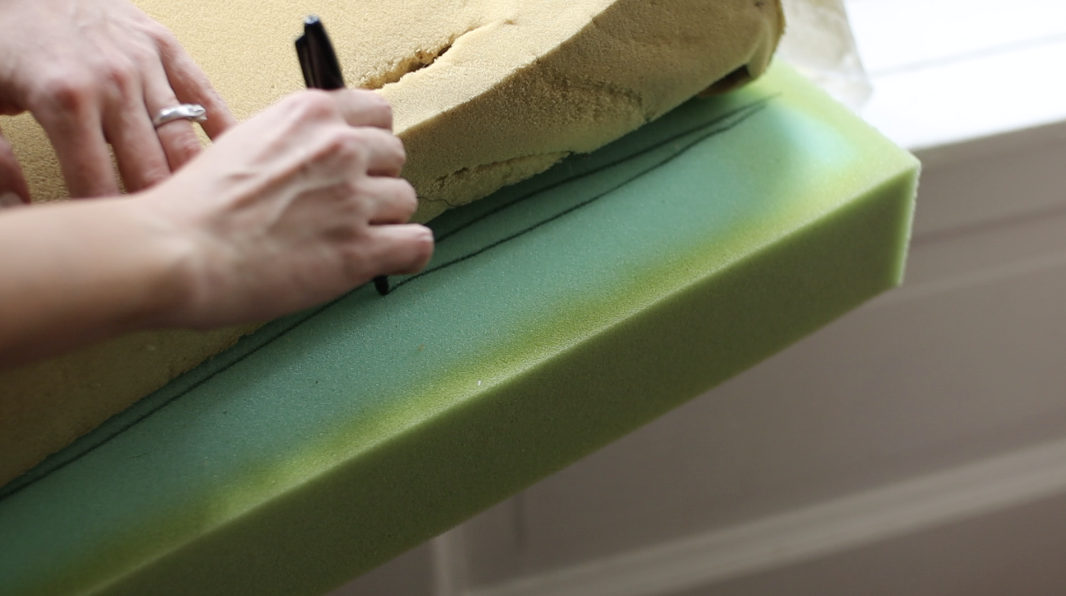
Next, trace around your old foam piece onto your new foam to give yourself a cut-line to follow. I recommend using an electric knife to cut your foam, but a serrated knife will work in a pinch.
(I had to run next door to borrow my friend’s serrated knife for this project!)
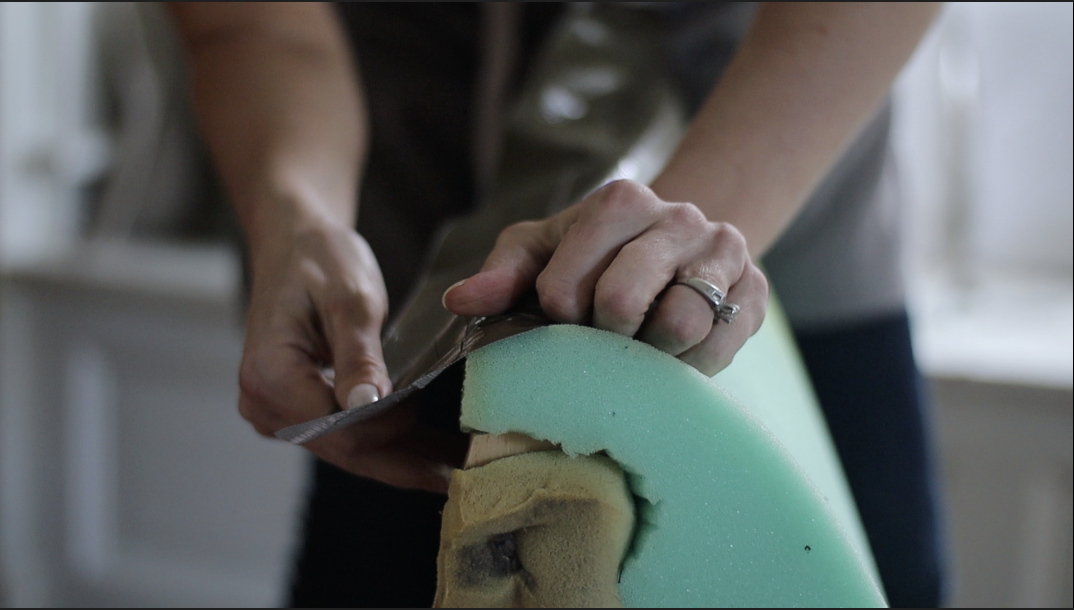
The trickiest part of creating this new foam seat was re-creating the “bull nose” feature at the front of the cushion.
The original foam folded over to give a little padding at the edge of the chair – right where the back of your knees would hit. It was attached with a strip of some kind of felted fabric or fabric tape.
What I ended up doing was cutting a slight curve out of the bottom portion of my new foam to enable me to fold it down over the edge slightly.
I wasn’t sure what their exact product was, so I used duct tape to hold the front of the foam in place until I could get it fully secured as I stapled the fabric to the frame.
**Update June 2020 ** I share a little bit more about this in detail in my blog post, DIY Slipcovers with Piping, but I realized after living with the chair for a while, that I really should have re-cut a new piece of foam long enough to make a true bull-nose for this section. Learn from my mistake & make sure to include that folded-down area in your measurements.
I’m not sure yet if I’ll end up replacing it or not – that will depend on how it looks after I finish the entire slipcover. **
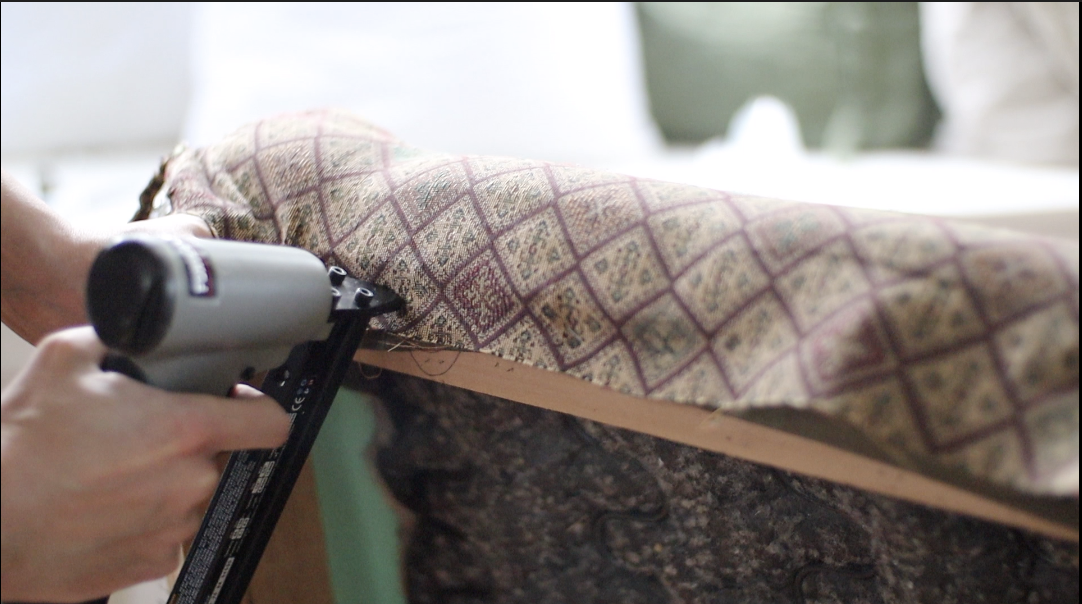
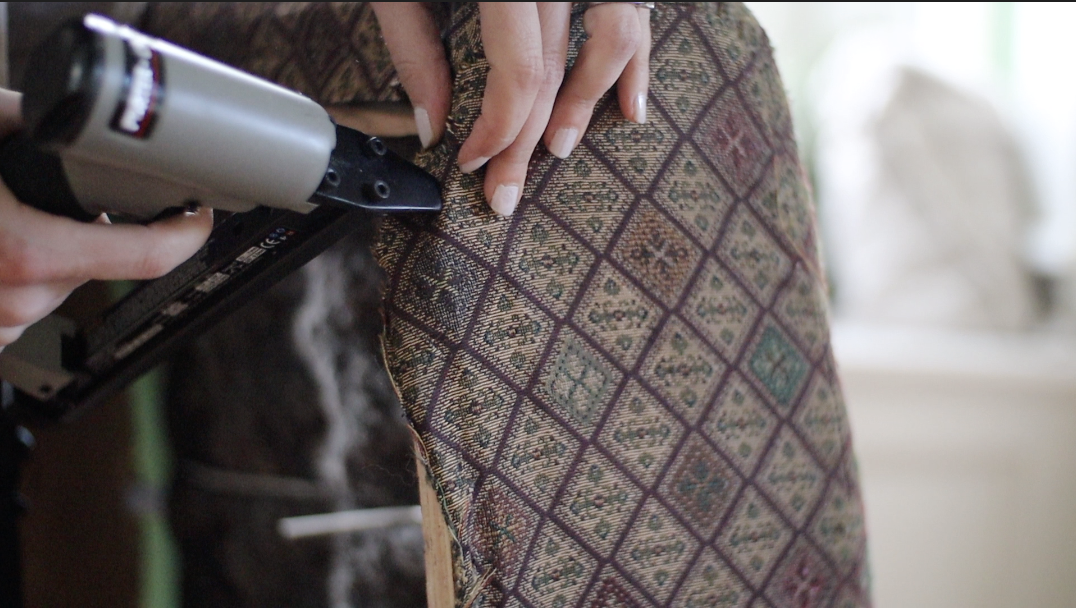
Once the foam was in place, I pulled the original fabric back over and stapled it all back in place.
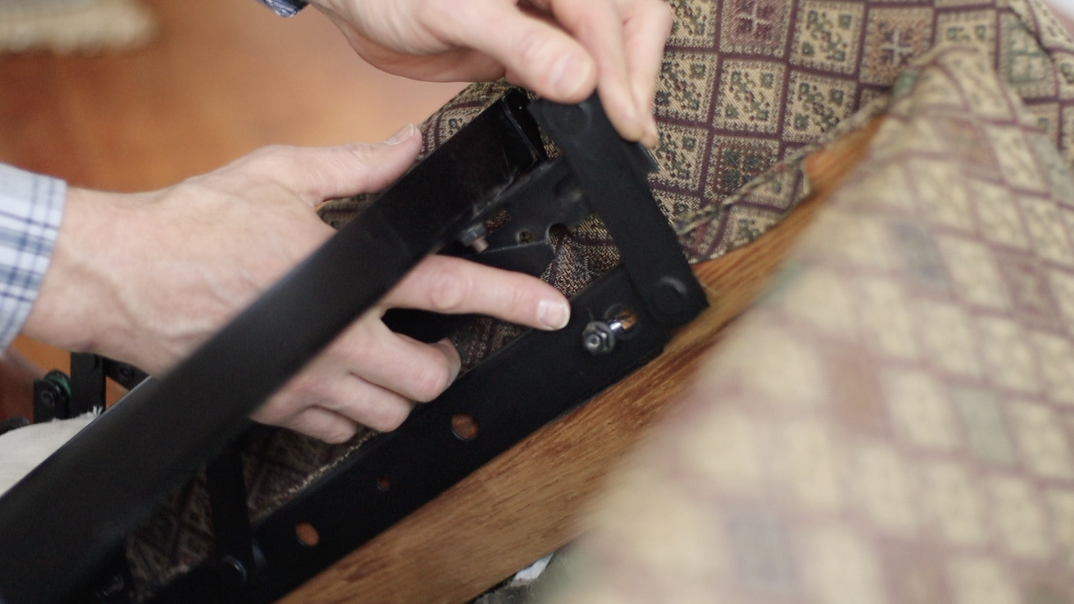
Reassembling the Recliner:
Next, we put the chair seat and back together with the frame.
Tip from Colby: Be mindful to make sure you’re settling the pieces back into their original positions. You can usually see the “scars” where the screws and bolts need to be set back into.
[show_shopthepost_widget id=”4011776″]
The Moment of Truth:
After getting it reassembled and flipped back over, I got to try the real test: sitting in it.
It was much more comfortable and supportive than before!
Now, you know my DIY brain saw that success and started to dream about all the other things I could do to this chair to make it perfect – mainly thinking of replacing the back cushion foam and reupholstering the entire thing…
But since we’re not hoping to keep this chair forever, and are instead happy with maybe 5 more years of use, I decided against going all out.
I have, however, decided to re-create my slipcovers. You can see the other posts in this Slipcover and Upholstery Series here:
Pin this for Tutorial on How To Replace Old Foam for later:
If you’re looking for something to do in your spare time – here’s a fun little quiz you can take called: What kind of DIY Decorator are You?
Until next time,


