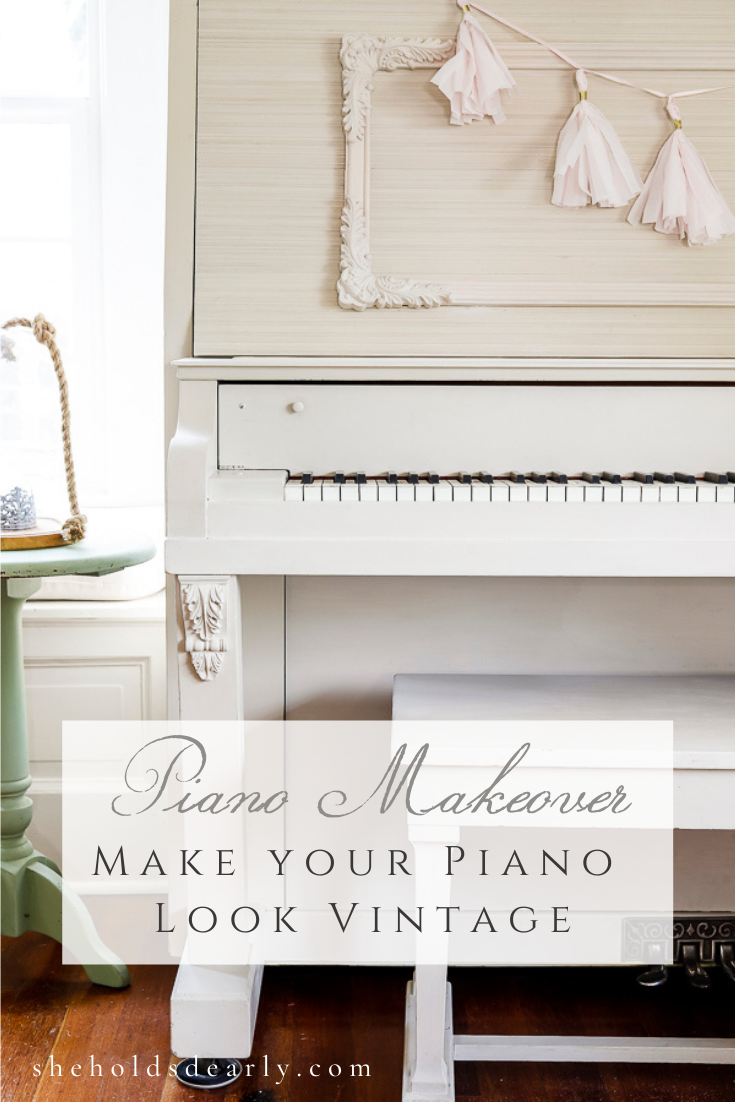
Piano Makeover Hack
The piano makeover you’ve been hearing about is here!
This is the second post in my series about making your furniture look vintage, (click HERE for post number one) which is all about taking furniture pieces you already have (or that you find second hand, or even new) and making them look like they’re from a French flea market or a vintage barn.
In this post I’m sharing a hack for making over a piece of furniture with another technique for adding on to what you already have to amp up the vintage vibe that we all love so much.
That brings me back to my piano!
Last year I shared a post with some of my plans to take our living room towards a more English Cottage feel, and then a few months after that I shared an update with some of the progress we had made, and a few questions lingering in my mind still at that time.
The majority of the responses I received between keeping my Grandfather’s piano, or changing out to the more period appropriate piano from the Swanson family said that the sentimental aspect of my Grandfathers piano was worth holding on to.
I tend to agree!
Since my original post about changing the living room, I’ve updated:
And now it was the piano’s turn!
The Piano’s History:
When I received this piano from my Grandfather it was painted yellow with a green glaze. I still am not exactly sure who painted it or when, but I knew it wasn’t exactly the look I was going for in our house.
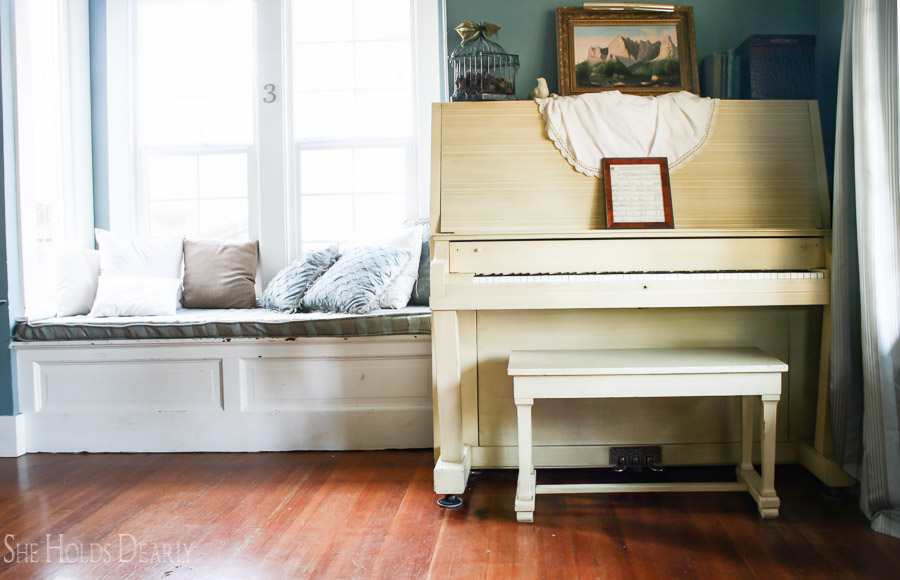
Flash forward to 2017 when I painted it with milk paint to arrive at the pretty color it’s been ever since.
I am adding a lot of blue into the living room right now, and I toyed around with also re-painting the piano in a shade of blue.
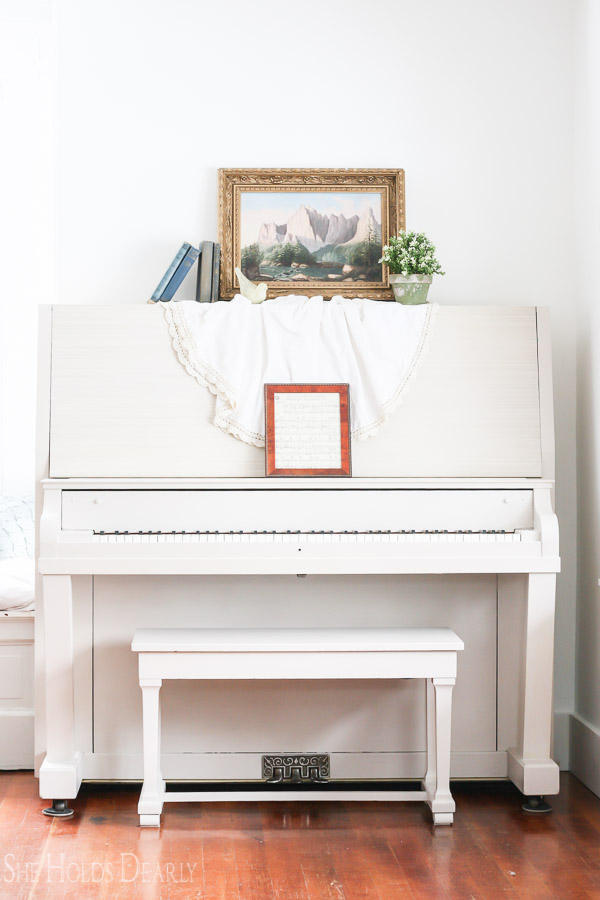
As I thought more about it, though, I realized that I really do love the color still, because it’s soft while still making a statement.
And I especially enjoy that it makes a great neutral backdrop for all the decor that I style on it throughout the year.
So I knew the color was staying, but I did want to add some character!
This post contains affiliate links to products I know &/or love.
A Success Story:
My plan was to add wooden appliques to the piano, and I had confidence that it would work well because I have a really good example of just that upstairs in our master bedroom.
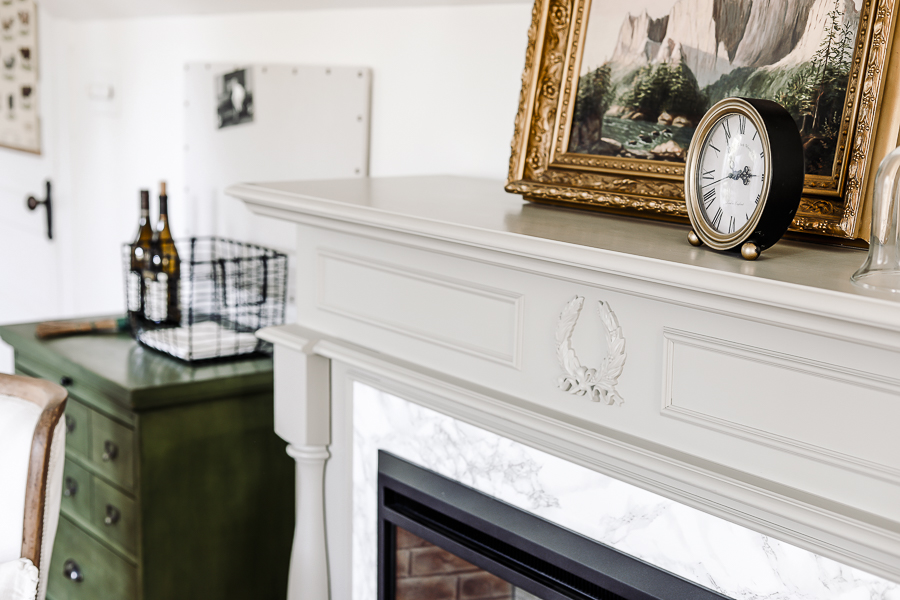
We took this mantle from Craigslist…
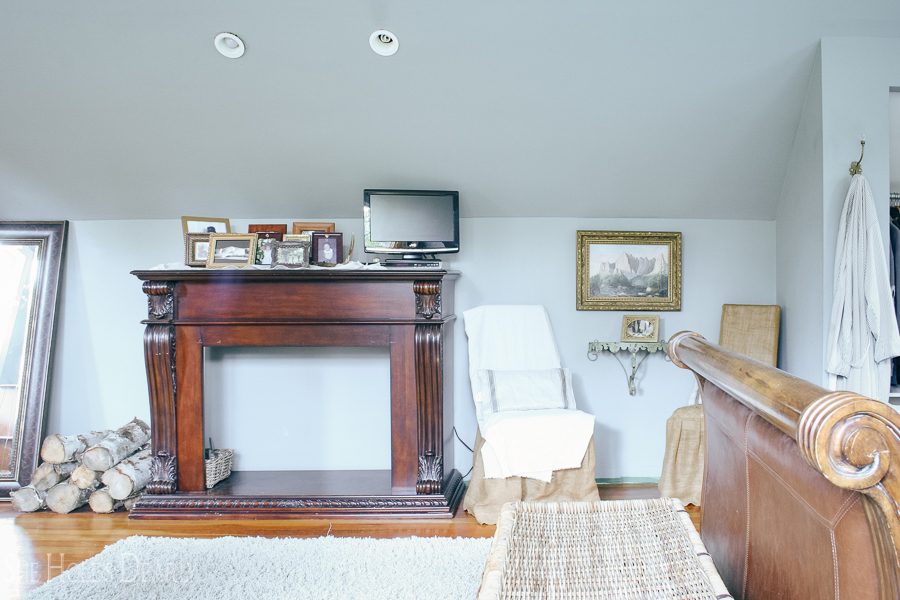
…and gave it some lovely vintage French style with paint, a wooden wreath applique and picture molding.
You can see the full history and process in these posts:
The Details:
Though I have loved the color these past few years, the piano itself is very simple with very straight lines. It has an almost mid-century-modern feel, which isn’t at all like the old English Cottage look I’m going for.
I was aiming for a combination of rustic elegance and knew dressing up the piano with some appliques would be just what it needed.
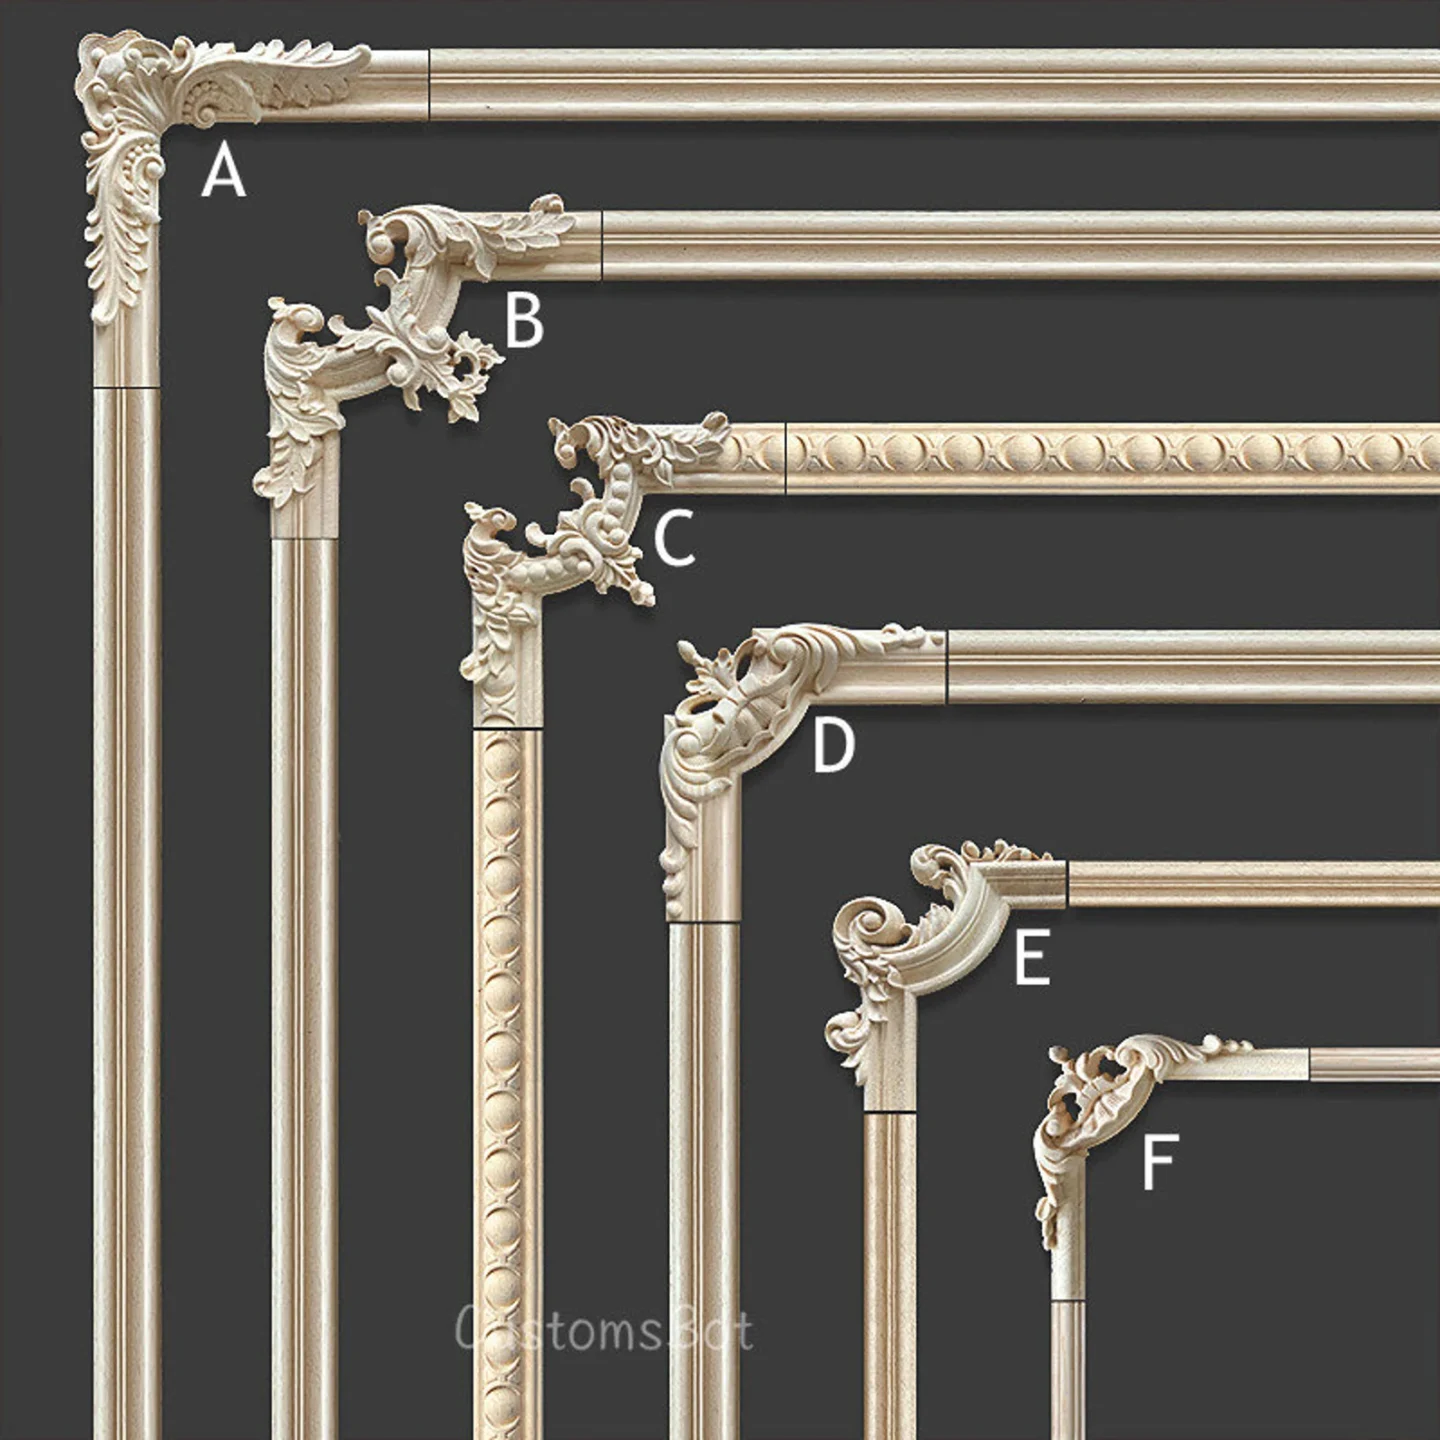
I am really impressed by the variety and selection of wooden appliques you can find online! I found birds, wreaths, baskets, frames and filigrees. It’s amazing what you can find to dress up your furniture pieces!
[show_shopthepost_widget id=”4699850″]
There’s even a company called IOD where you can order and make your own appliques from clay! It’s so impressive what can we can create now!
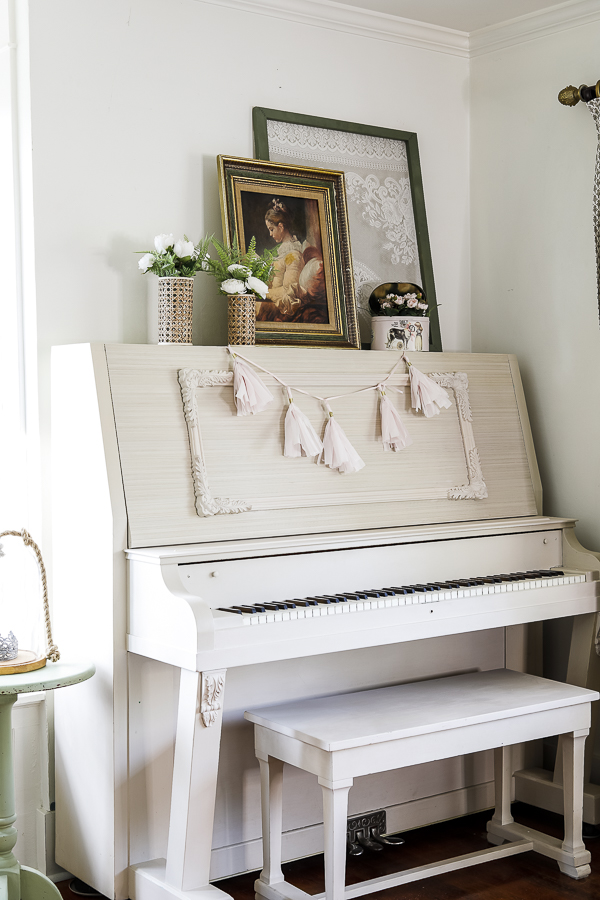
I bought the applique trim pieces we needed for the top section of the piano from Etsy. I measured them before I ordered, for scale, and we were able to custom cut the lengths to fit, but I have this concern that they might actually still be a bit too large for the piece.
They give me a little bit of a Disney princess feel, like they’re a potentially over the top.
I’d love to hear your feedback about the final result! Do you like way they look, or would you have me try again with different appliques?
I figure if all else fails, I can easily try again with a more simple picture molding!
The Piano Makeover Process:
Let’s jump in, shall we?
Here are the items you’ll need for this project:
- Trim Pieces (I found some on both Etsy and Amazon (Square carving, Filagree, 4 Corner Frame, and square carved leaf pattern)
- Corbels
- Nail Set Tool (this helps sink your pin nails into your trim piece if they aren’t flush or buried)
- Brad Nailer & Air Compressor
- Milk Paint Marzipan & Trophy
- Annie Sloan Clear Wax
- 220 Grit Sandpaper
- Bondo Glazing & Spot Putty
The Steps:
Step One | Measure and cut down your wooden applique or trim pieces as necessary.
We cut our trim pieces to length, and also modified the corbel that I had chosen to add to the piano leg. The top of the corbel was too bulky and stuck out from the edge of the piano, so I simply used a saw to cut that top section off.
Step Two | Sand any rough edges on your pieces with your sandpaper.
Step Three | Paint your trim pieces.
I had created a custom color with Miss Mustard Seed’s Marzipan & Trophy when I originally painted the piano, so I re-created that by mixing the same quantities for these trim pieces:
It really doesn’t seem like the trophy would cause much of a difference, but I love that it gives just the slightest grey undertone.

When you’re working with milk paint, it starts as a powder, and you mix equal parts dry powder with water. I use a mason jar to mix it up for a few minutes, and then let it sit for about 10 minutes for the water to absorb and the bubbles from mixing to dissipate.
If you’ve never painted with milk paint before, the texture is very un-like latex paint, almost more like pancake batter! So do not be alarmed.
Once it had “rested” for 10 minutes I got to work painting all of the visible areas of the trim pieces, and I touched up the piano while I had the paint mixed.
Once everything was dry I gave the trim pieces a light sanding and rubbed on some clear coat wax as a protective layer.
Step Four | Attach the Trim Pieces
I used my pneumatic brad nailer to attach each piece. On some of the more uneven surfaces, the nails did not sink fully flush with the wood, so I used our nail set tool to carefully push them into the wood until they were flush or even slightly sunken in.
Step Five | Prep Surfaces for Final Coat of Paint
Once the nails were sufficiently hidden, I went over each remaining hole with a tiny bit of bondo “glazing and spot putty“. This is a neat product that allows you to sand and sculpt the areas you’re working with so that you don’t lose the intricate angles and details on your trim pieces.
After applying that and sanding down the excess, I gave all of the necessary spots one final coat of paint and sealed with the same clear coat wax.

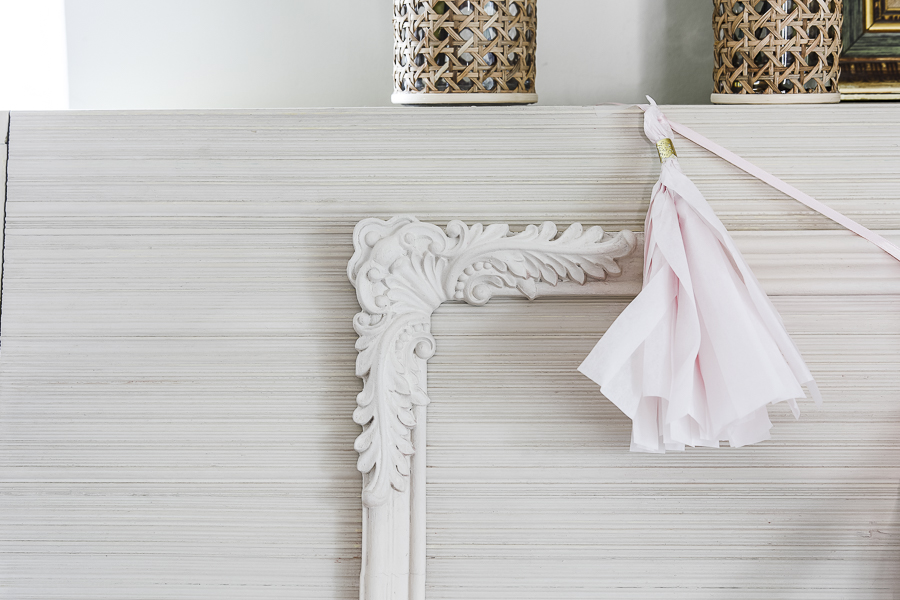
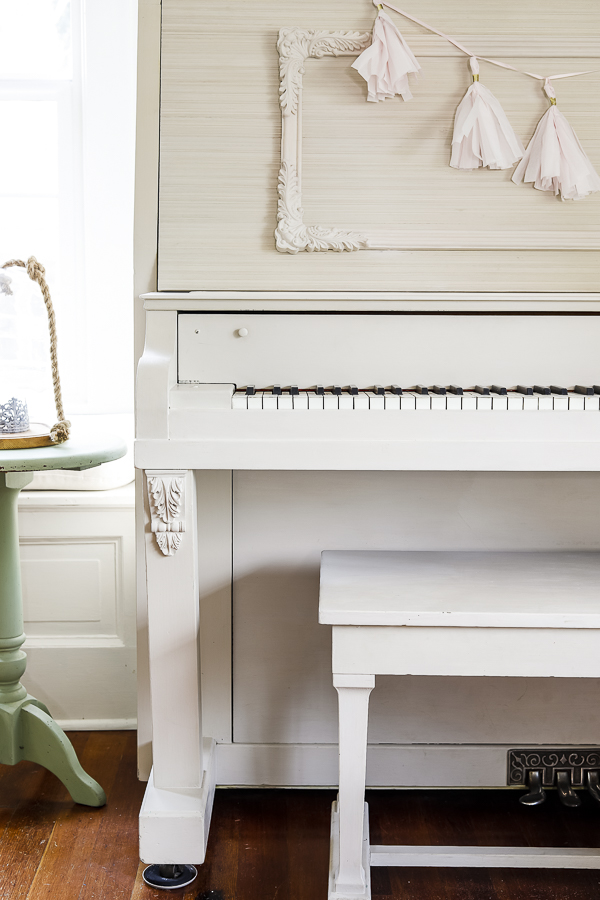
I love how the these details turned out, and I am glad that I still have a lovely backdrop that can be changed with the seasons, just with a little bit more of a feminine detail.
It brings the piano back closer to a 1906 feel, and that’s something that’s always on my mind in this house.
Thank you for following along, and I’d love to hear your thoughts about the final look!