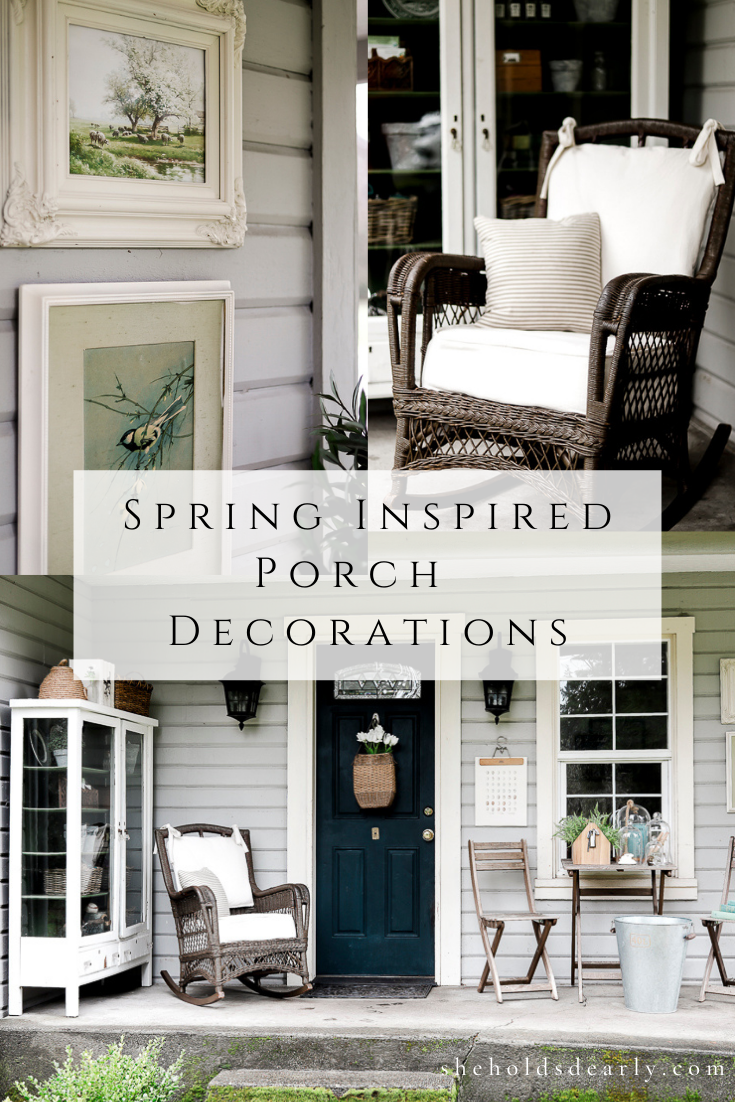
8 Spring Inspired Porch Decorations
Today I have 8 Spring inspired porch decorations just perfect for getting your home ready to welcome the new season!
If you’ve been around a while, you’ll know I love to thrift, and if you’re here reading this, I can guess it’s a safe bet that you do, too!
Most of these items I’ll be listing below are ones that I thrifted myself, or that I know you could have pretty good success finding yourselves if you keep your eyes out!
I’m excited to share my list of finds, how I get them ready to fit as part of MY decor, and finally, how they’re styled up on my two porches!
Let’s jump right in!
*This post contains affiliate links to products I know &/or love.
Eight Spring Inspired Porch Decorations:
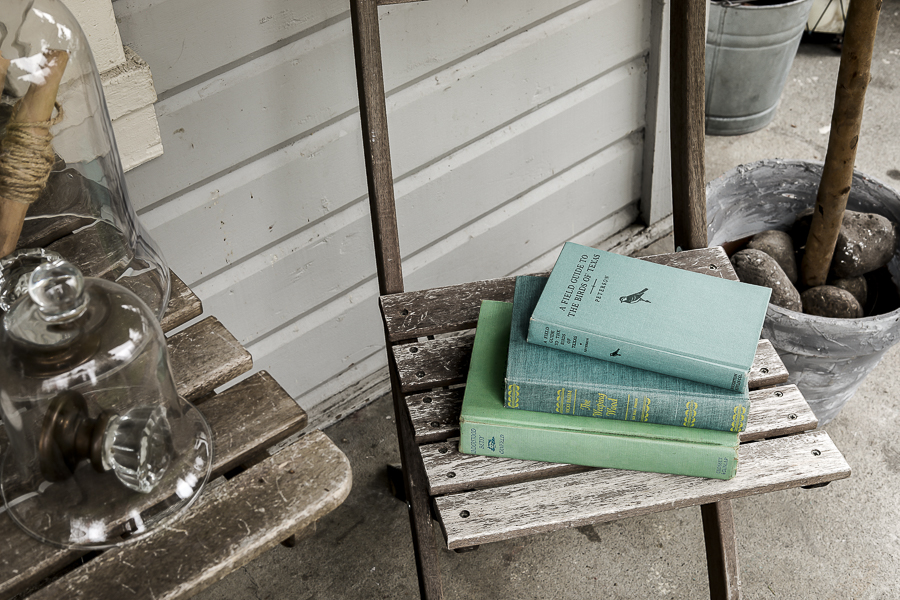
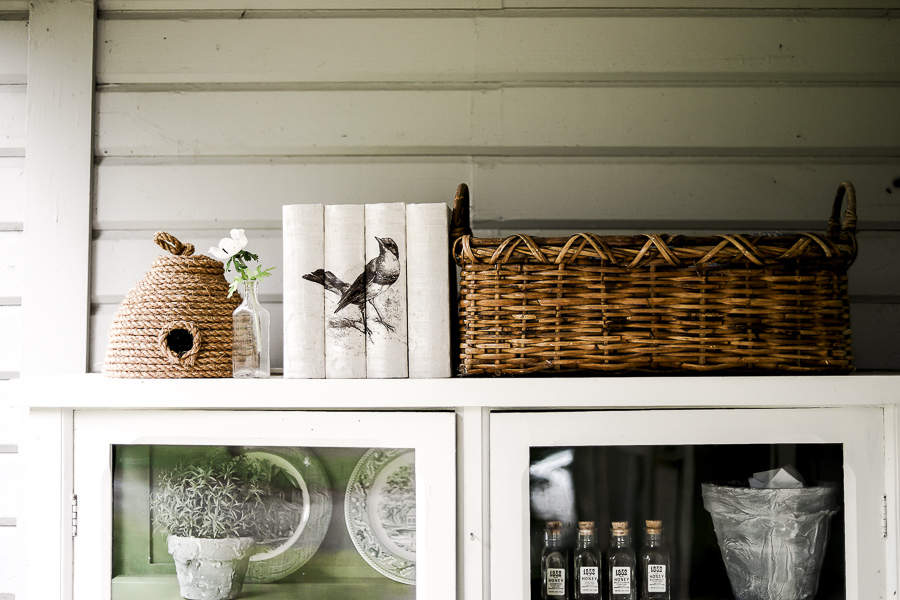
Item Number One | A robin’s egg blue linen book
I found a beautiful blue book for only $0.50 and this is actually something I really enjoy about doing seasonal decorating – You get a chance to incorporate colors that might not have a place in your decor all year round, but they can work well for a season!
I like this color well enough, but it just doesn’t typically match what I have going on, so it will make it’s debut in my Spring inspired porches this year as an incorporated accent color! I often pull out a selection of green books for Spring, and I think this will look lovely with them!
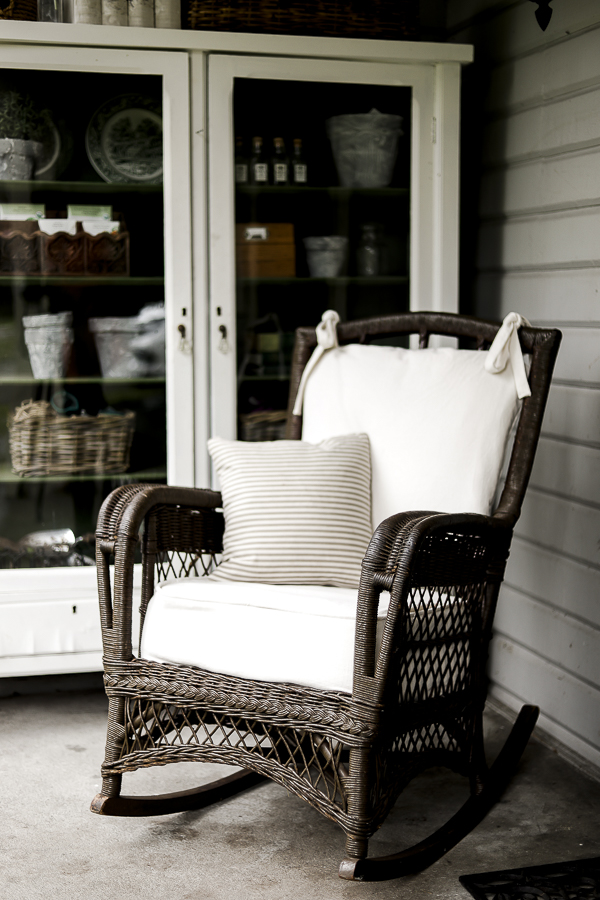
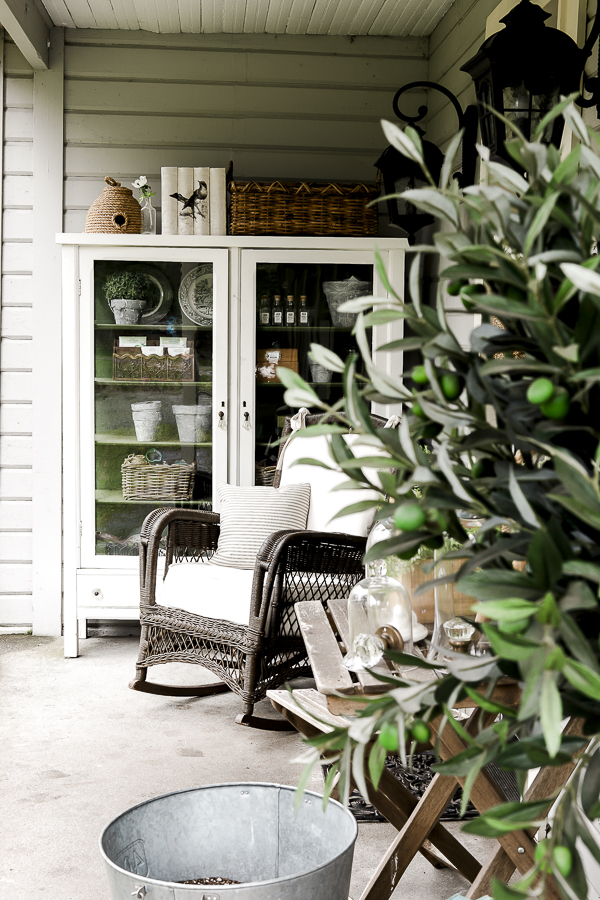
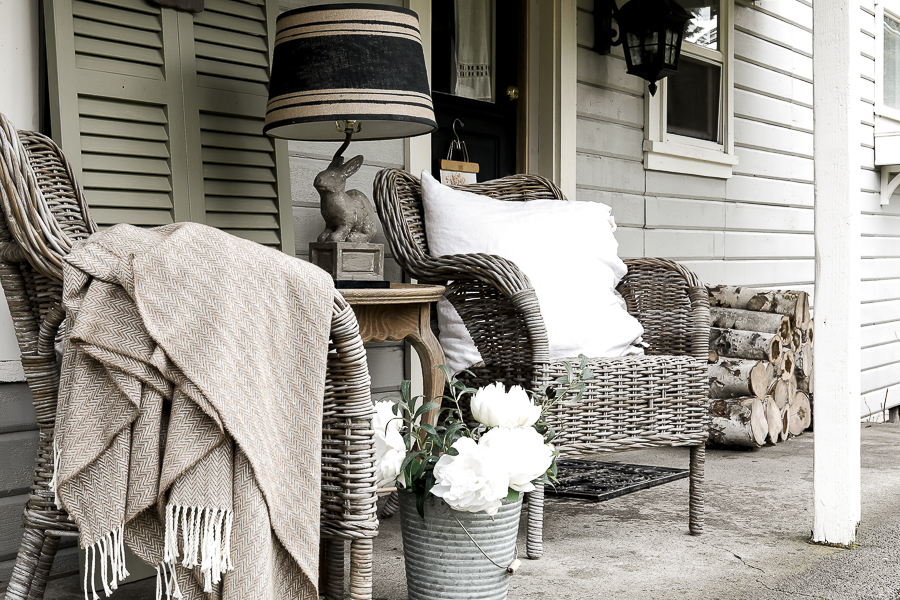
Item Number Two | A wicker rocking chair
I found this chair last Fall at my favorite thrift store in Snohomish, Washington while shopping with my Behind the Scenes gals! I noticed that the wicker had some damage along one side of the arm rest, but figured that I would be able to take care of that pretty easily, and I knew I could tackle the upholstery side (since the bright “Vintage”, but not in a good way, floral was certainly not going to stick around.)
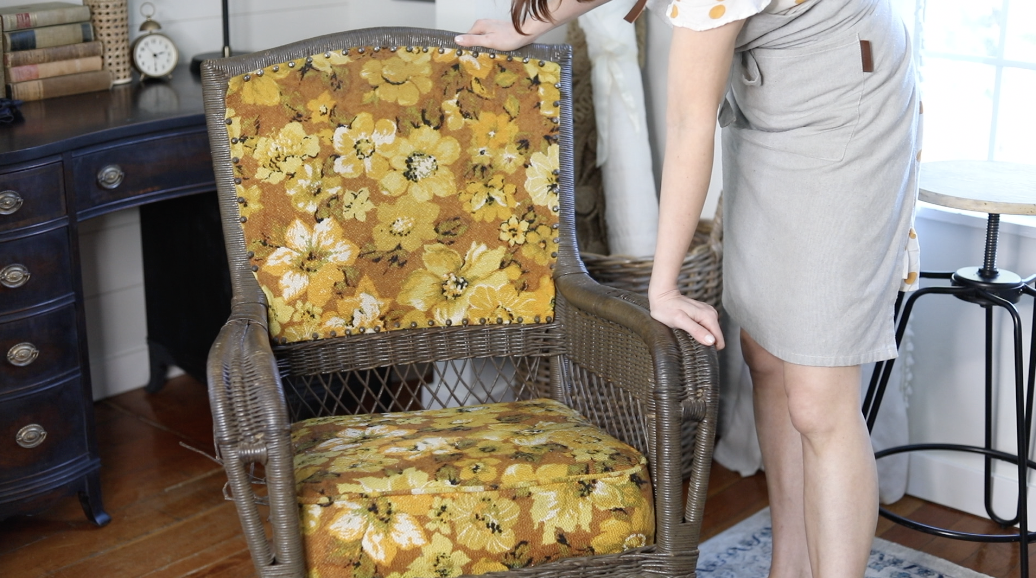
Knowing what I was and was not willing to do to fix this up, I decided that I would be willing to pay $60 for this chair.
I always recommend having your limit in mind before you attempt to do any bartering. It helps keep you from getting caught up in the emotion of a “bidding war” during the back and forth!
I asked the gentleman who owns the store what he would like for it, and after thinking a bit, he said $50. Sold!
We loaded it up and it’s been in my bedroom near our fireplace for the past few months waiting to be refinished.
I’ve been quite impressed at the comfort level and coziness it offers! I’ve found myself sitting there often this Winter having conversations with my husband!
Now it will finally LOOK the part after I’m finished with it.
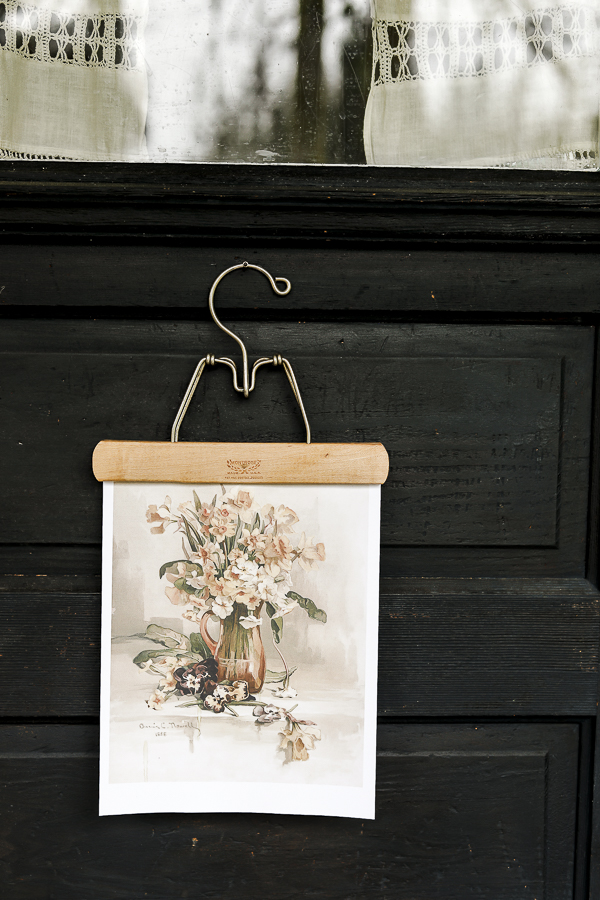
Item Number Three | Wooden Pants Hangers
I wouldn’t say you need a ton of these, but keep your eye out for these wooden pants hangers when at garage sales and thrift stores and pick up 2-3!
I found these at a garage sale for $1 each.
My plan is to use them for hanging art prints!
More about that later…
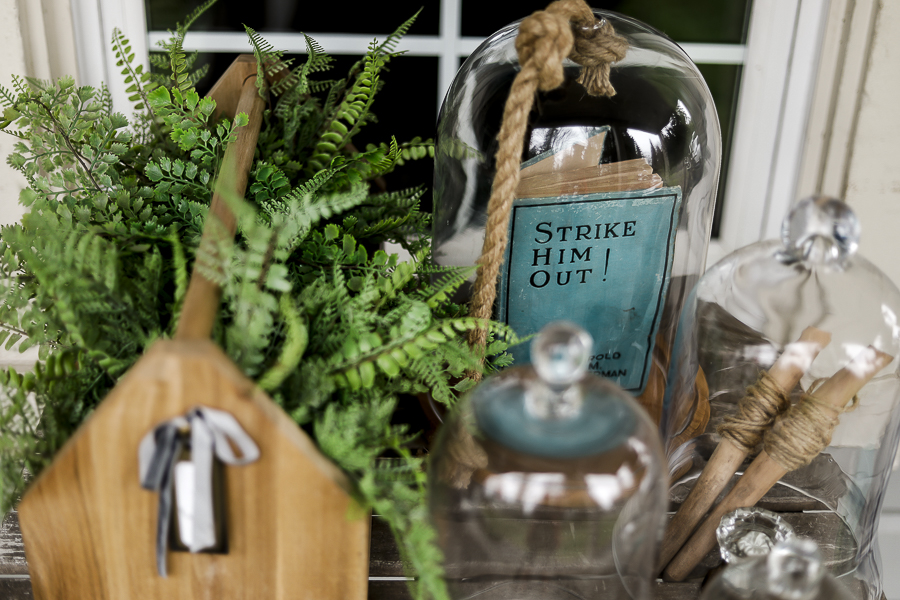
Item Number Four | Glass Cloches
I have an unofficial rule that if I see a glass cloche in good shape and for a good price, I snatch it up. I found a great one recently for $7, so naturally, it joined my collection!
I know many of you might agree that you don’t NEED a new collection of any kind, but if you were to happen to start one, I don’t think you can go wrong with glass cloches. These are pretty fun to find at thrift stores and garage saling, but you can also find them on Amazon.
Especially as part of a vintage spring inspired porch vignette.
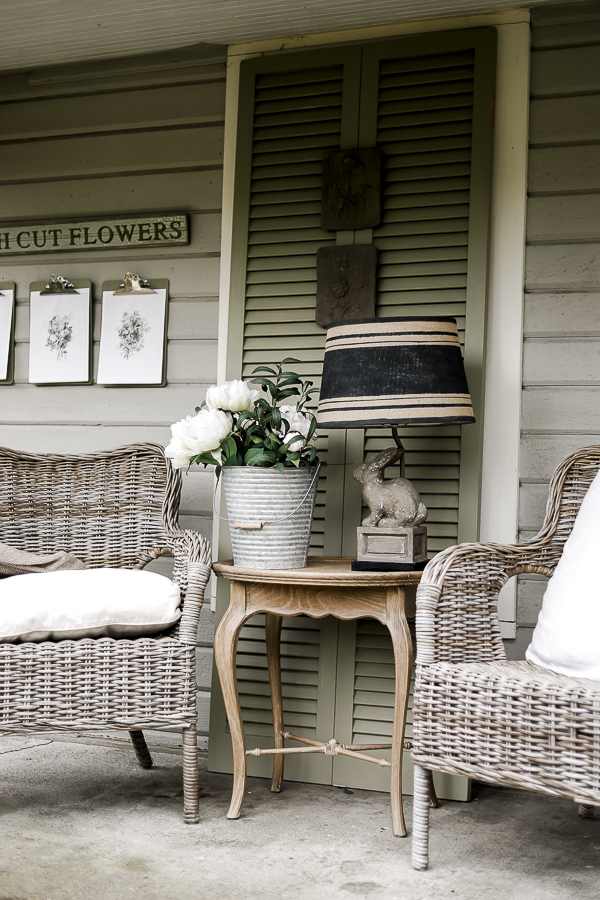
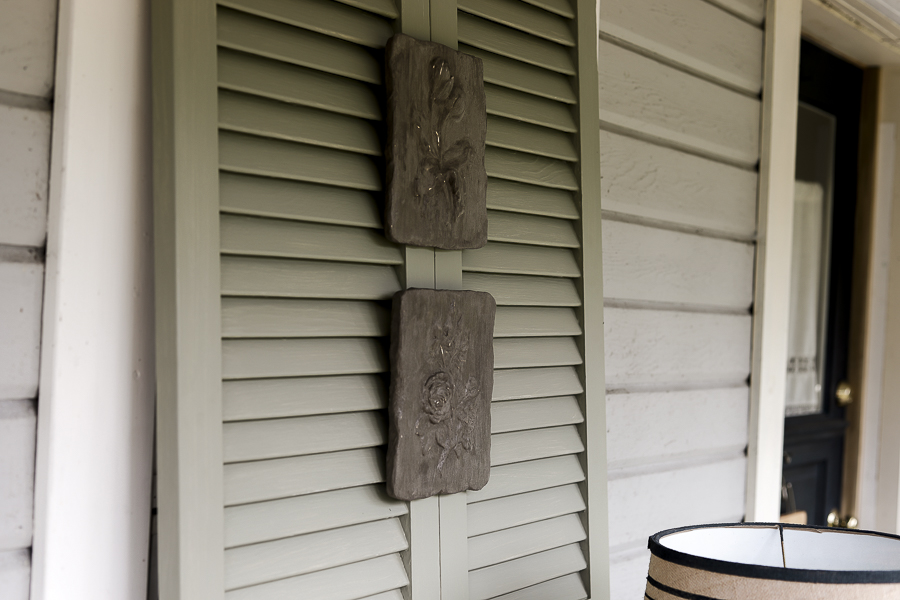
Item Number Five | Bi-Fold Door
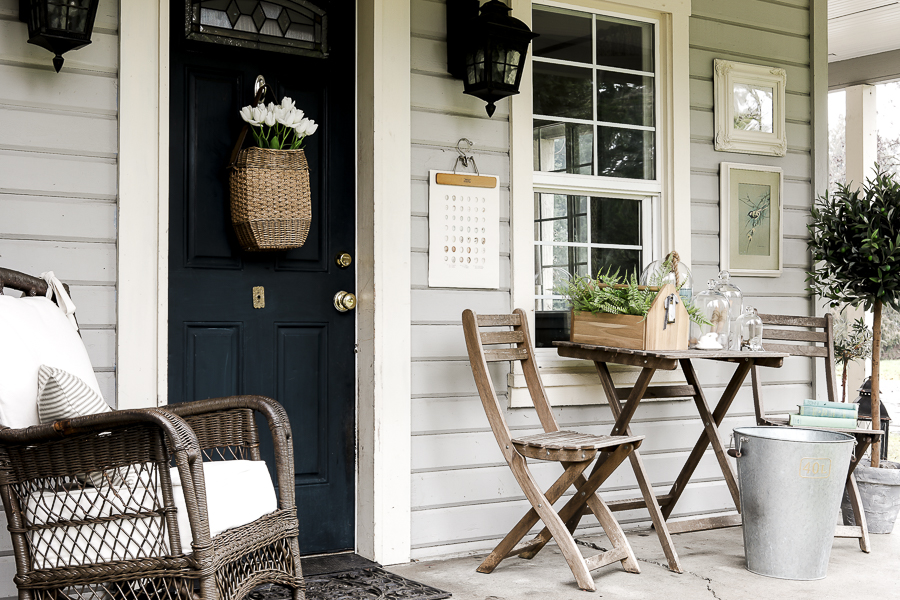
I got this bi-fold door for $30 at a Salvadge yard, and it makes the very best large scale background piece! They’re great for a whole host of decorating tasks.
I have liked the color, but I think it’s time for a new spring look this season.
If the idea of a bi-fold door doesn’t really seem to fit your theme, think of it instead as a set of big shutters – they’re much more English cottage, that way!
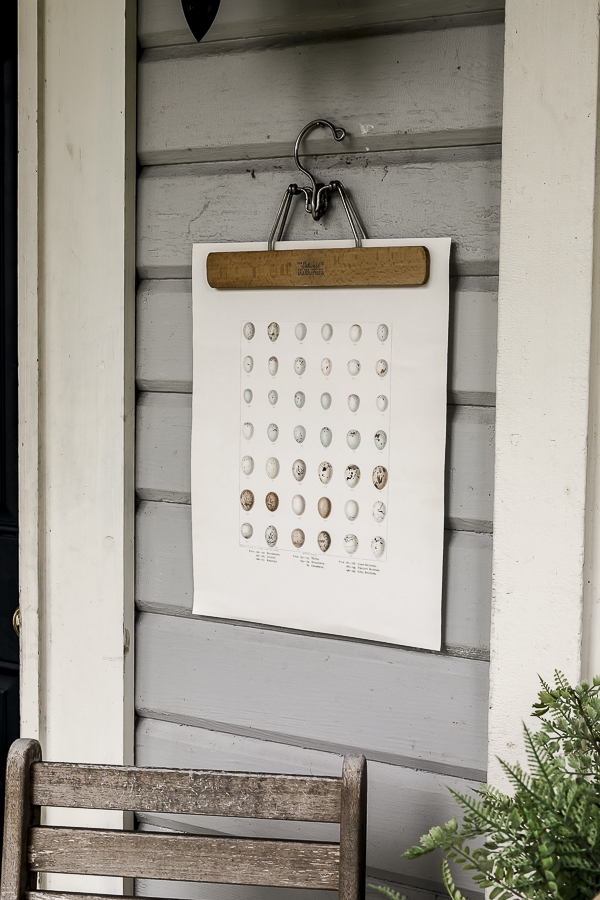
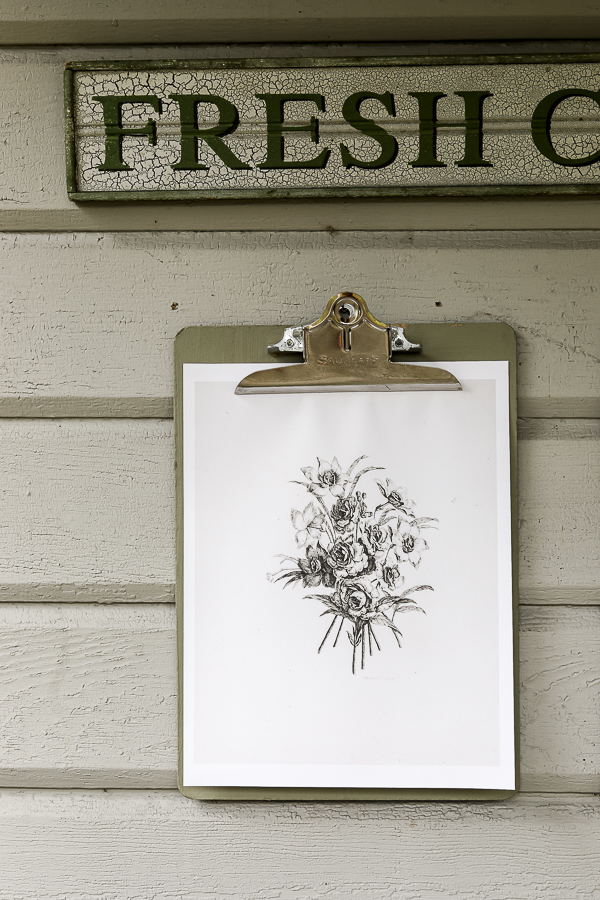
Item Number Six | Clipboards
This is another item that is readily available at thrift stores and garage sales, usually for no more than $1 a piece!
I’m going to use mine this year to display some art work!
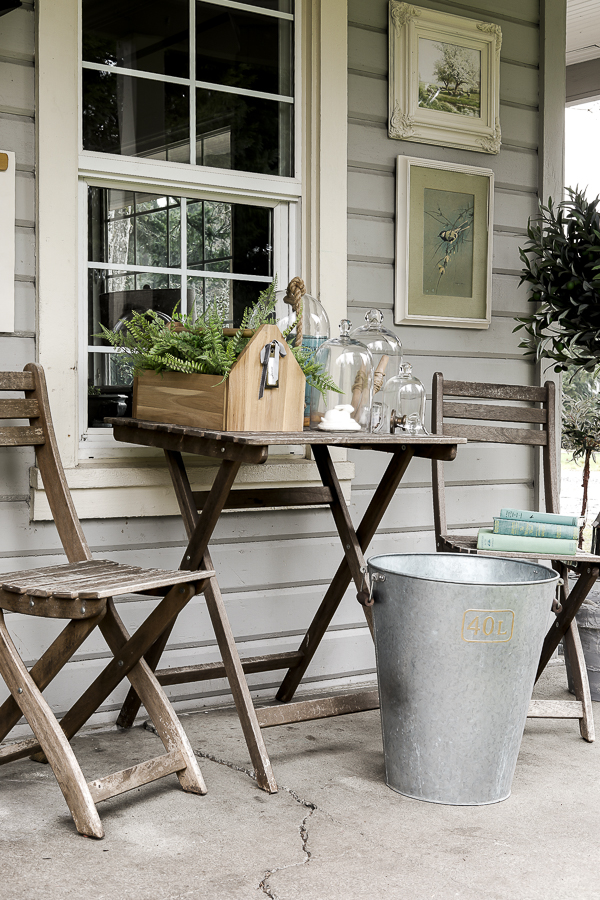
Item Number Seven | Wooden Toolbox or Crate
I didn’t actually thrift this toolbox, it was purchased years ago for $10 from IKEA. It’s since been discontinued, but you might be able to find the exact one on websites like Ebay or Poshmark, or similar ones on Etsy, otherwise you can keep your eye open for any kind of wooden box or crate to use for the same purpose I’m going to use mine for on my porch.
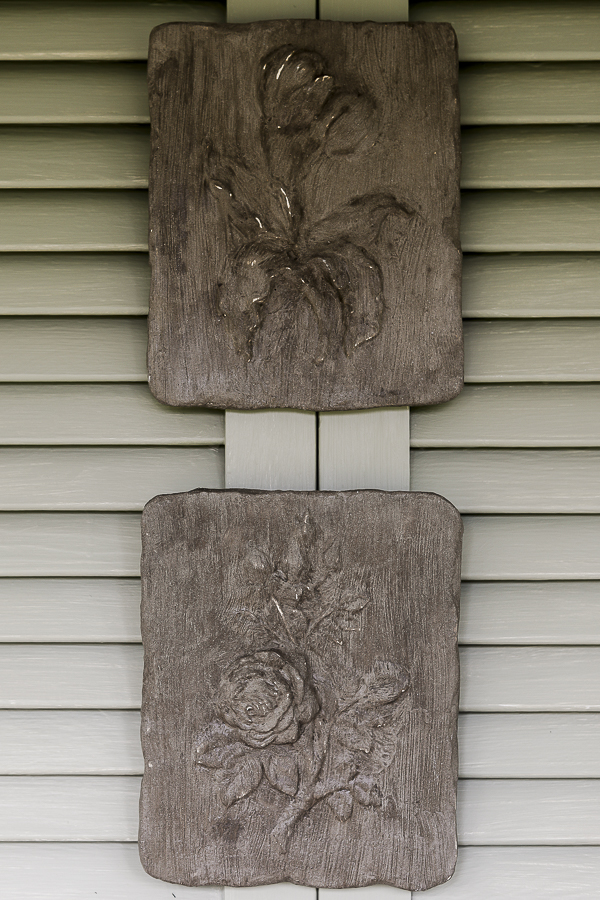
Item Number Eight | Floral Plaster Reliefs
I found two of these floral plaster reliefs (similar styles linked) at a local thrift store called Deseret Industries for $1 each. I have a fun idea in mind to make them look a little more vintage and European.
Updating Some of My Finds:
Some of the items I had found didn’t need any updating, like the robin’s egg book.
I’ll share how I prepped the others now!
The Wicker Rocking Chair
There were 7 pieces of damaged wicker along the side of the arm rest on this chair, and a little bit of damage along the top of the arm rest with the smaller pieces.
We’ve been using it as-is for the past few months, and I’ve simply covered the damage with a throw blanket until now.
Upon closer review, I realized that the 7 larger pieces could actually be carefully thread back into the woven pattern on the chair side. That was easy to do and didn’t much time, or require the use of any tools.
The smaller pieces on the top that couldn’t be woven back in to anything else I as able to simply glue down!
Then I had two decisions to make:
- Do I change the color of the chair frame?
- What color should I do for the cushions?
After living with the existing chocolate brown of the chair frame, it actually grew on me and I decided to keep it!
For the cushions, I chose to use some of my leftover drop cloth curtain material that I had on hand since changing out my living room curtains to my new pinch pleat style. If I would not have already had this material on hand, I would certainly have gotten some more of my favorite Linen from Joann. ( I like the color “natural” or “white”.)
The first thing I had to do before starting the upholstery was to take the chair apart methodically to see what I was working with. I used my trusty staple remover tool, and my handy batting gloves (pardon the pun) to protect my fingers.
I already knew the seat cushion was comfortable and I just wanted to create a piped cover for that.
The drop cloth material that I chose to use works well for slipcovers as a single layer, but for this application I chose to double it up to make sure that none of the old yellow material showed through.
The back fabric was originally upholstered and stapled on from the front and the back. As I removed it I realized I would need to either replace both sides with new fabric, or come up with another option.
What I ended up doing was creating a stand alone back cushion with the batting that was in the chair, and added tie straps to be attached to the chair that way.
I won’t go into the specific details about creating the slipcovered seat cushion or the back cushion, because I have an entire Slip Cover and Upholstery series I’ll link here for your reference if you’d like to know more!
Slipcover & Upholstery Series:
- Playlist for All Videos on YouTube
- Create Custom Piping | A versatile and easy to master skill that can be used for slipcovers, pillows and more!
- How to Replace the Foam in a Recliner | Knowing how to replace one broken or worn part of an otherwise good piece of furniture really helps you get the value out of each item you own.
- Recliner Foot Rest / Upholstery 101 | This one is a great resource for upholstering all sorts of beginner friendly items like benches, dining room chairs, and stools.
- DIY Slipcovers with Piping |Once you’ve mastered how to make your own piping – adding it into a DIY slipcover really isn’t much more work! But the final result is elevated and has much more structure. Totally worth it! This tutorial is a good basic introduction into any piece of furniture with arms like couches or sectionals.
The pants hangers were great the way they were, I simply needed some cute artwork to add to them!
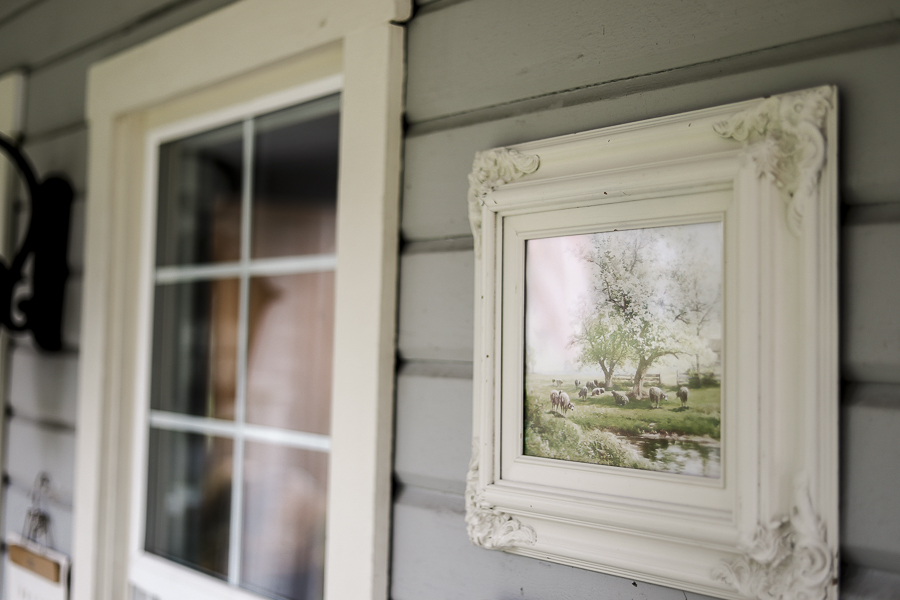
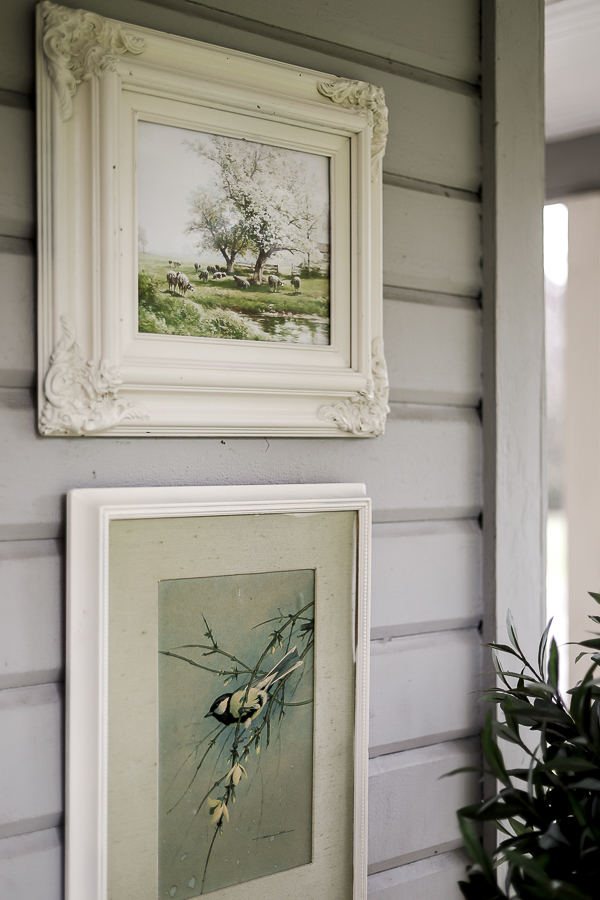
I found some really lovely options on Etsy! You can purchase them as digital downloads for usually about $5, and then you simply print them at home on cardstock!
- Flower Sketches – Peonies, Assorted Floral , Floral Bouquet
- Yellow Daffodils
- Grazing Sheep
There were so many, I even used some frames I already had at home to accommodate more.
For my bi-fold shutter doors and my clipboards, they simply needed a coat of Fusion Mineral Paint in the beautiful shade of “Lichen” green.
(Click Here to get 10% off your Fusion Mineral Purchase!)
To paint the clipboards I used some twine to secure the clips keeping them open while I painted and let the paint dry.
All I did to my tool box was add a grouping of faux ferns. I had one medium size faux fern plant from IKEA that I put in first, and then I filled the rest of the space up with fern stems from Joanns. The stems are usually around $5 each, but when you catch them on sale or at the end of the season, you can find them for between 50-80% off! I always stock up when I see them for a great price because they’re so easy to add to arrangements.
And ferns have such an elegant lacey look to them! They look great in a lot of circumstances, but certainly in Spring when their feminine detailing is just the English Cottage vibe we’re after!
I also have a tutorial HERE for making a quick 5-minute fern wreath!
Lastly, for my floral reliefs, I decided to use Ardex Feather Finish to give them a faux concrete look!
I used this same technique two years ago when I made my husband’s work desk and we loved how it turned out.
It’s pretty simple to use! I mix a 2:1 (dry to wet) ratio and for this batch, used 4 tablespoons of the powder and 2 tablespoons of water. You’re looking for a consistency similar to cake batter.
I use a chip brush for work like this so I don’t have to worry about washing the Ardex product out, and focused on making a really nice neat even texture before letting the first coat dry.
Once that was dry I did a quick second coat, and after that was dry, finished with a coat of sealer from Tile Lab.
They looked great hanging on my shutters.
[show_shopthepost_widget id=”4711556″]
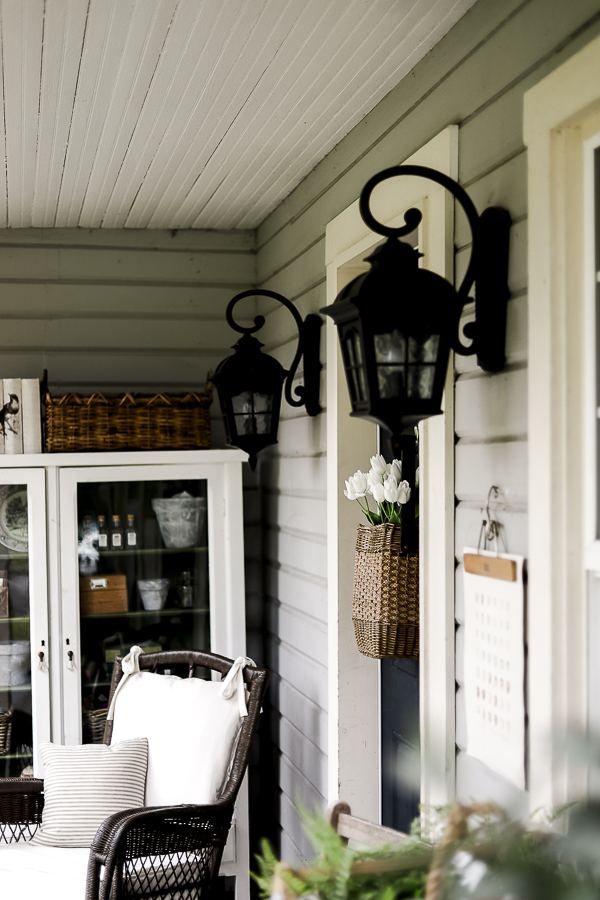
And now, for the rest of the Spring porch inspired styling:
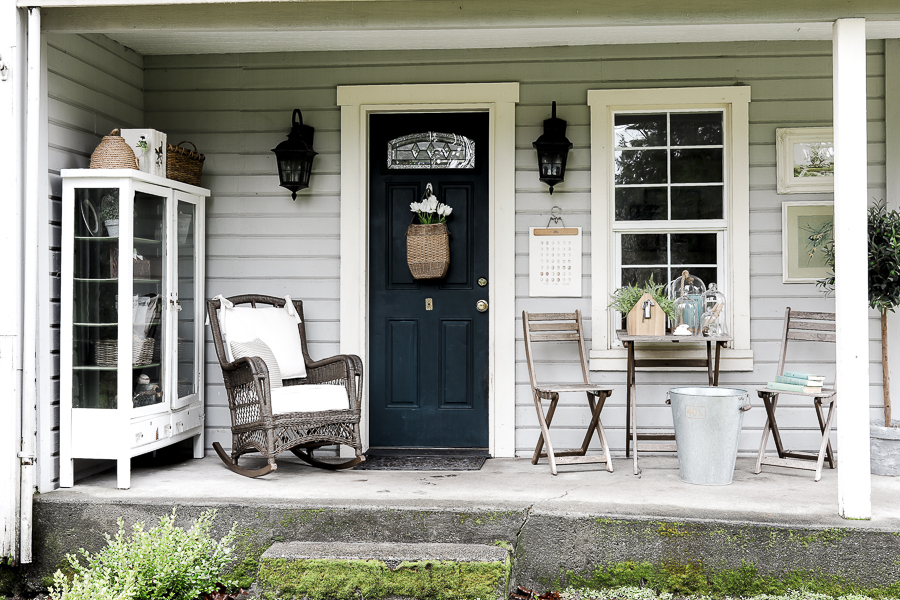
Eagle eye observers might recognize:
Click here for a Free Gift:
Pin These 8 Spring Inspired Porch Ideas For Later: