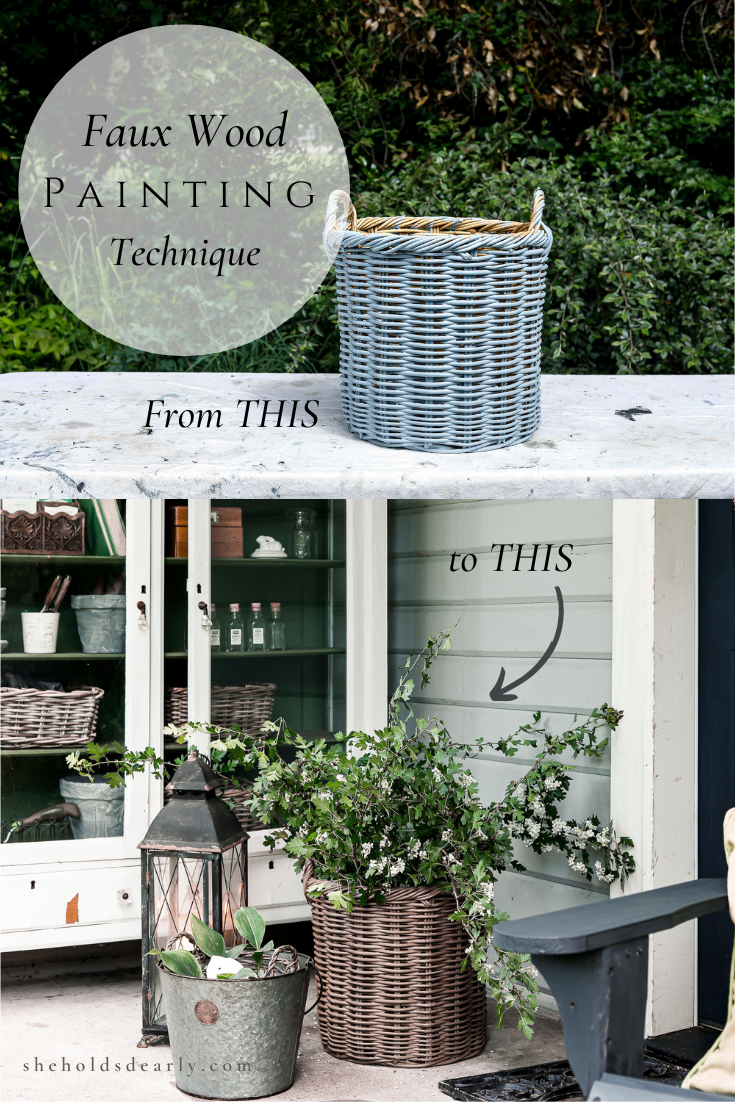
Faux Wood Painting Technique | Wicker Basket
If you need to save a poorly painted wicker basket, you’re going to love this faux wood painting technique that brings back all of that beautiful vintage charm!
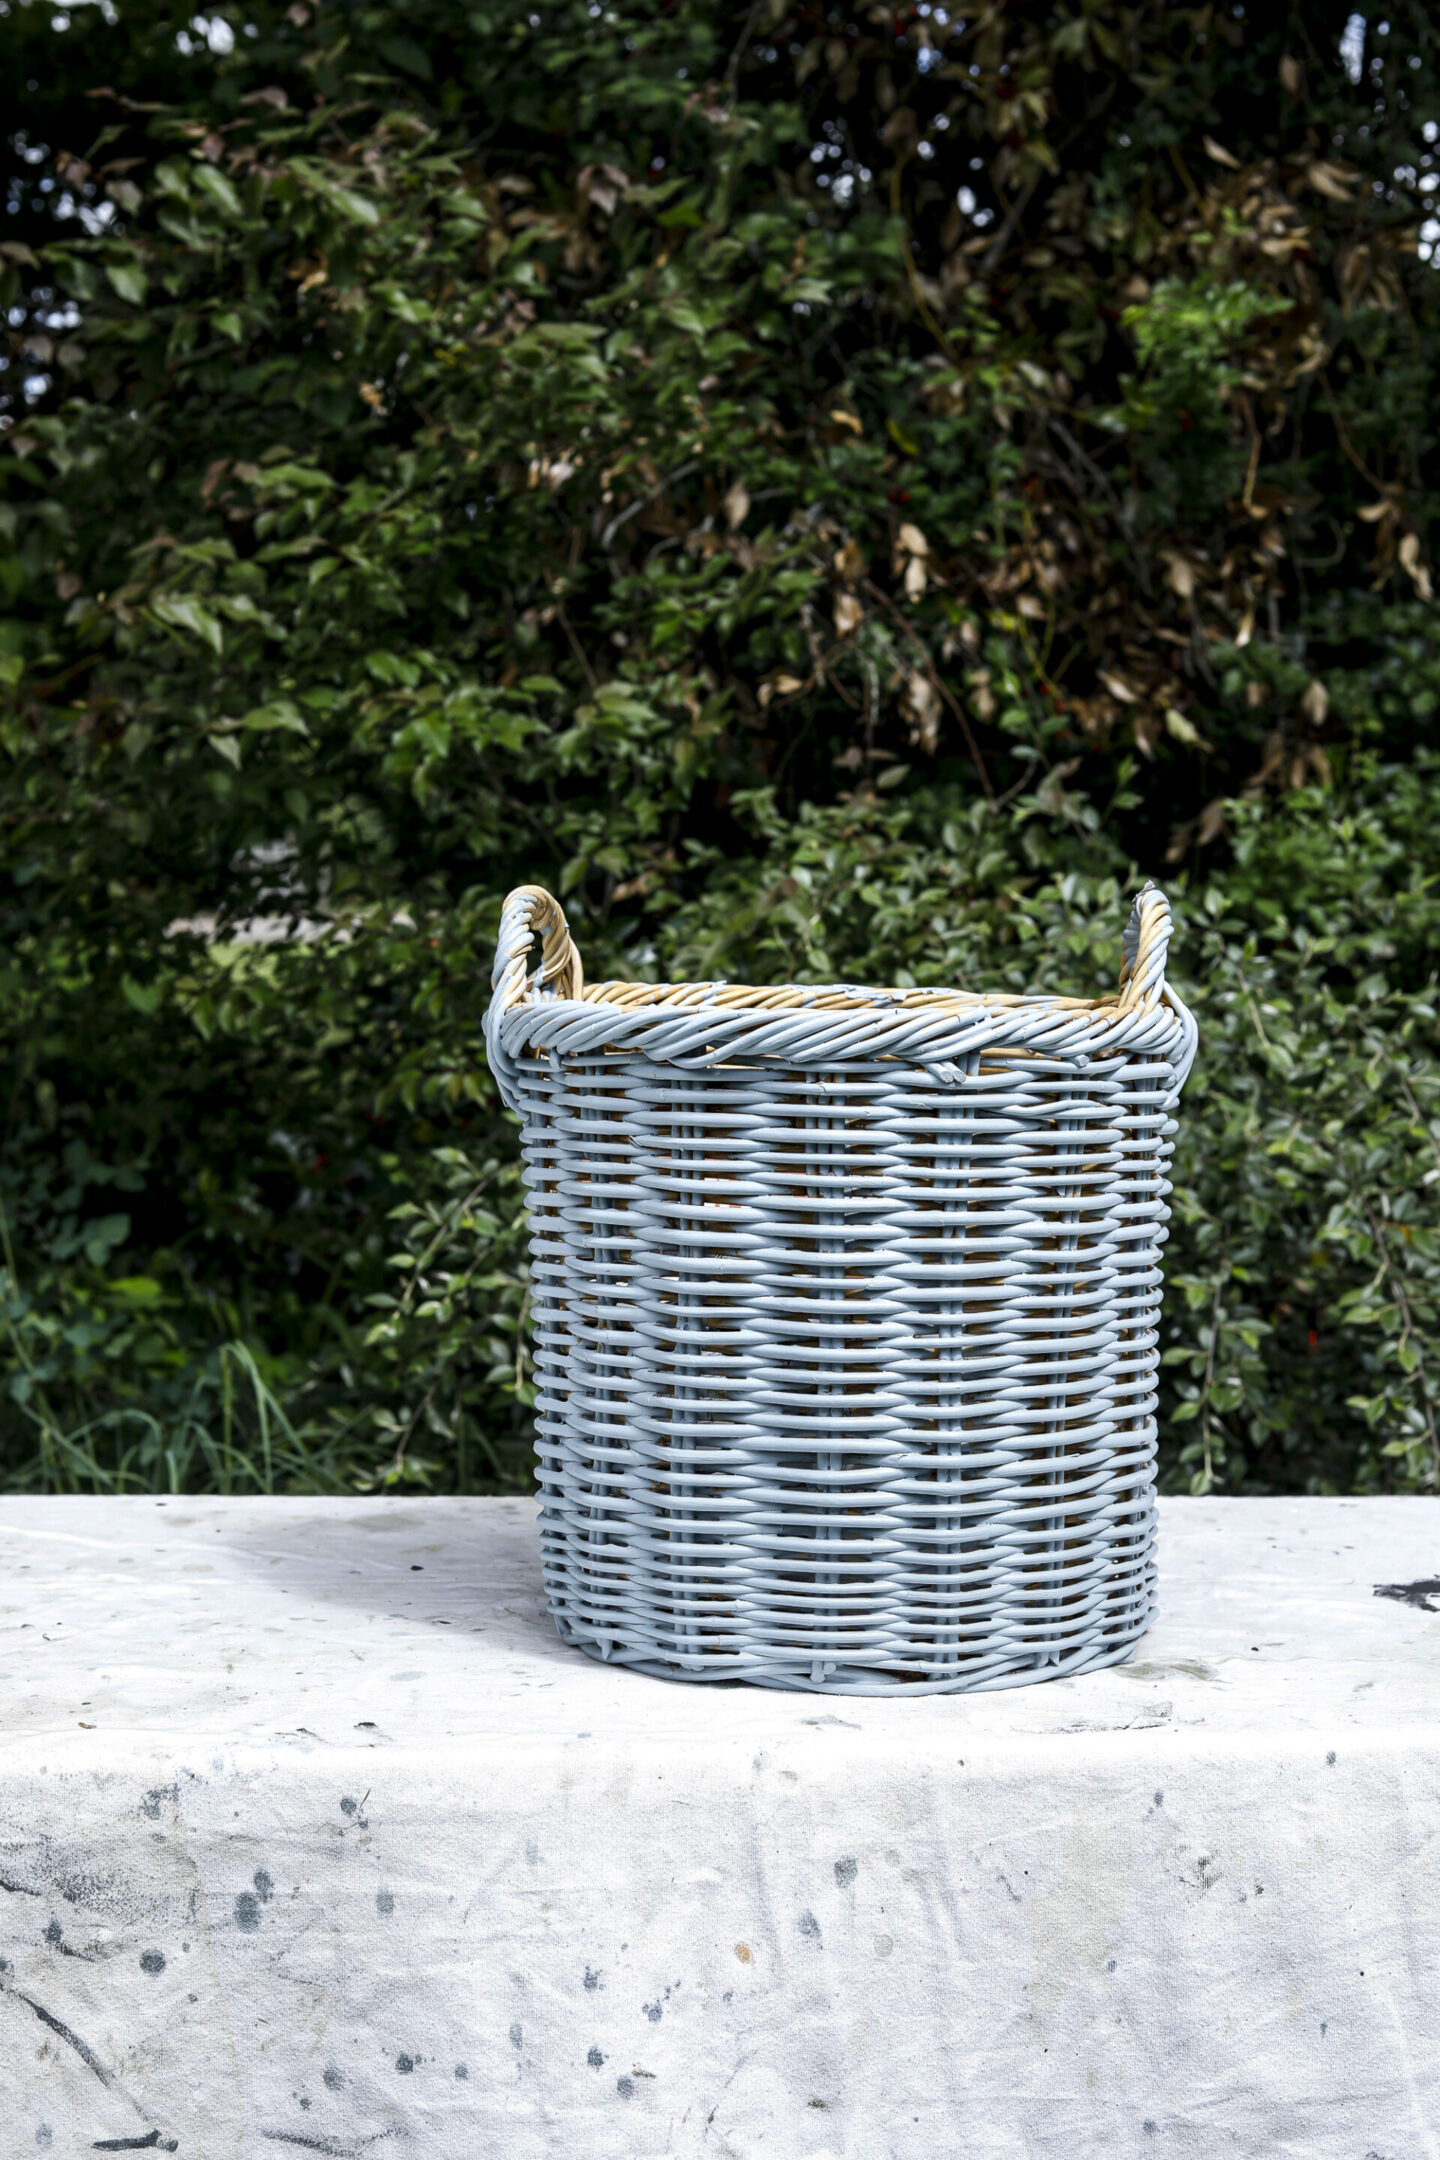
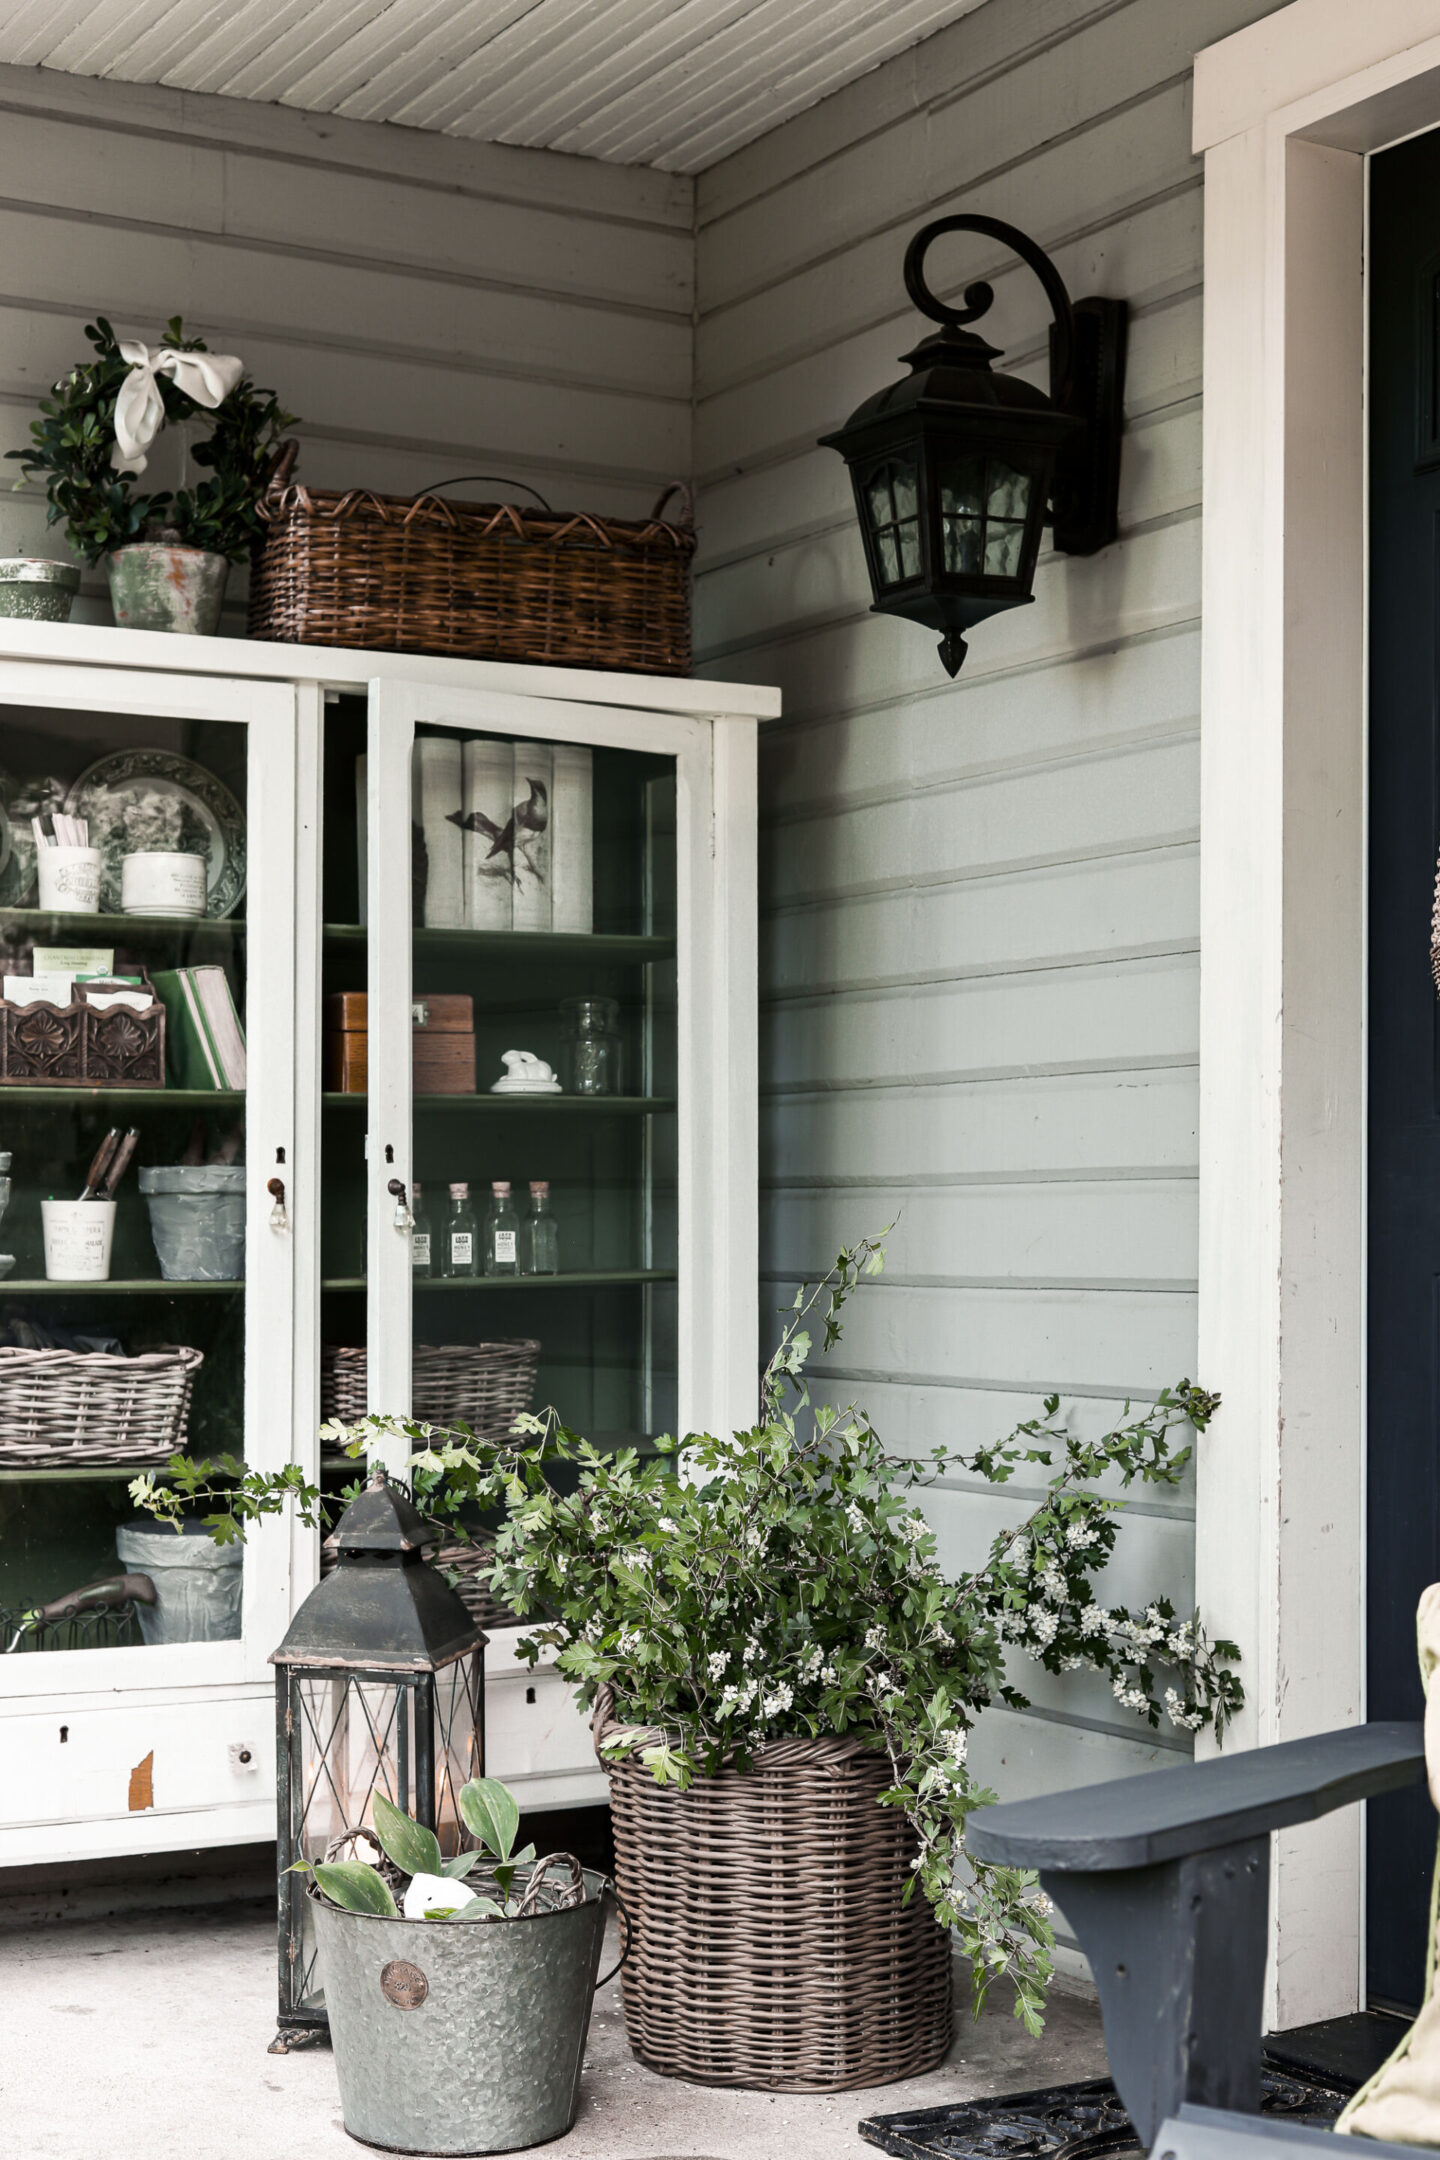
I am a sucker for round baskets with handles, so when I found this large one for only $5 at one of our local thrift stores, Desert Industries; I just knew I had to have it!
I’ll be honest when I say at first, I was a little stumped about how I was going to remove the blue paint.
I’ve had good luck stripping paint off wooden furniture pieces, but nothing with so many cracks and crevices like this. I thought about sanding, or potentially sand-blasting, but it seemed like a lot of effort, without full confidence that it would turn out.
Then all of a sudden it hit me!
Instead of trying to remove the blue paint, I decided to just cover over it with my faux wood painting technique!
This is a classic case of “if you can’t beat them, join them!”
I used this same process a few years back when I painted over the brass chandelier in our bedroom. There was a bit of an upheaval in the comments after that one because I was covering over brass; but it just did not match the look we were going for in our room.
I expect that I’ll ruffle less feathers using this technique on this poorly painted wicker basket!
*This post contains affiliate links to products I know &/or love.
How to do a Faux Wood Painting Technique:
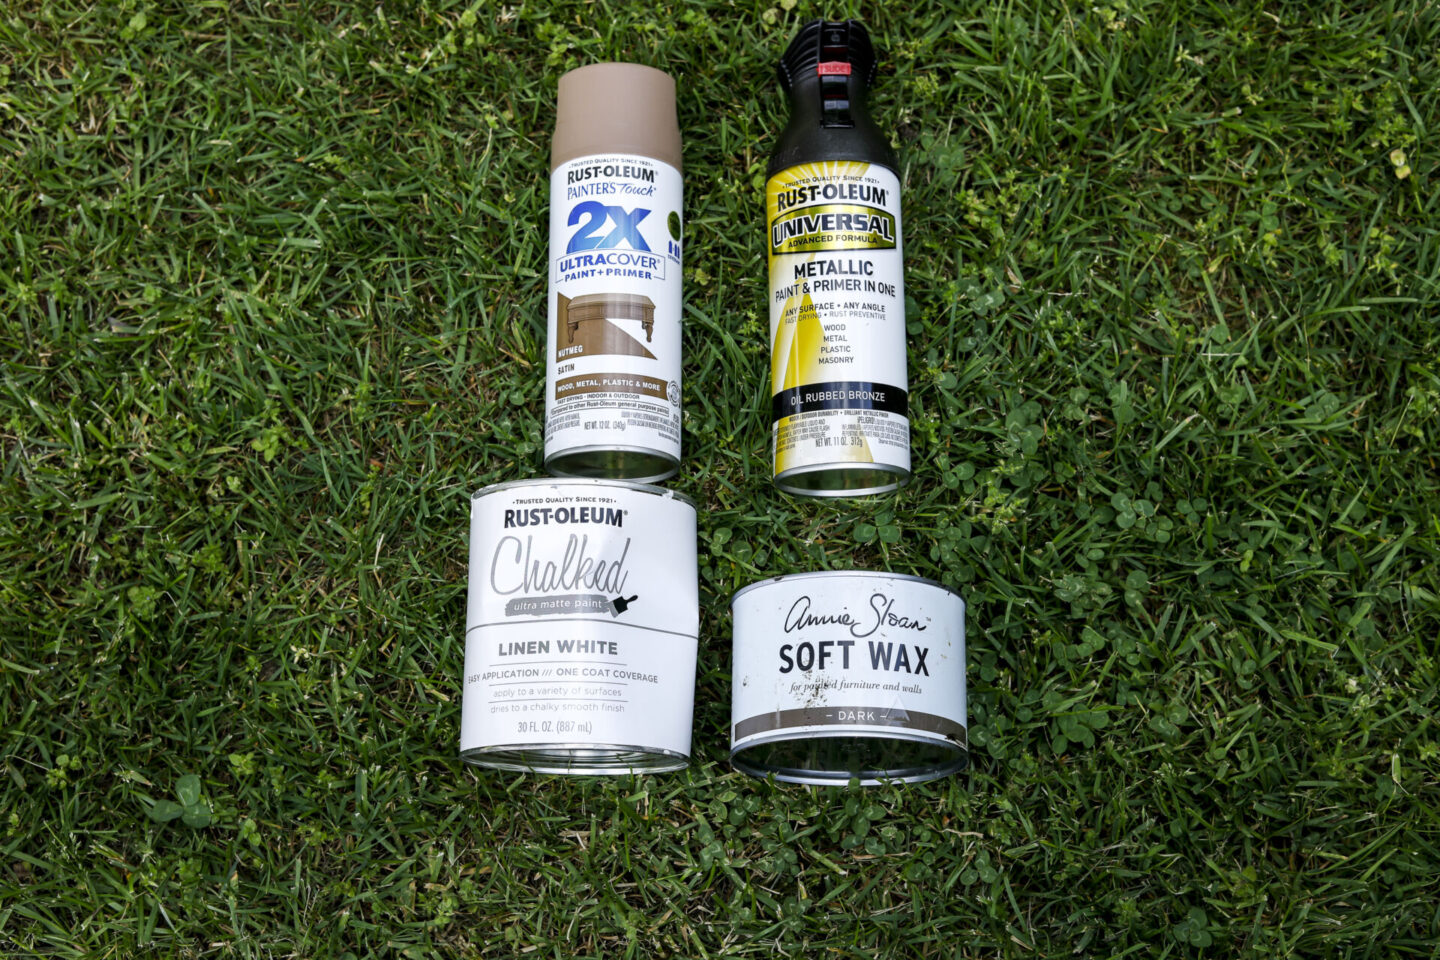
Gather your Supplies:
- Rustoleum Spray Paint in the Color “Nutmeg”
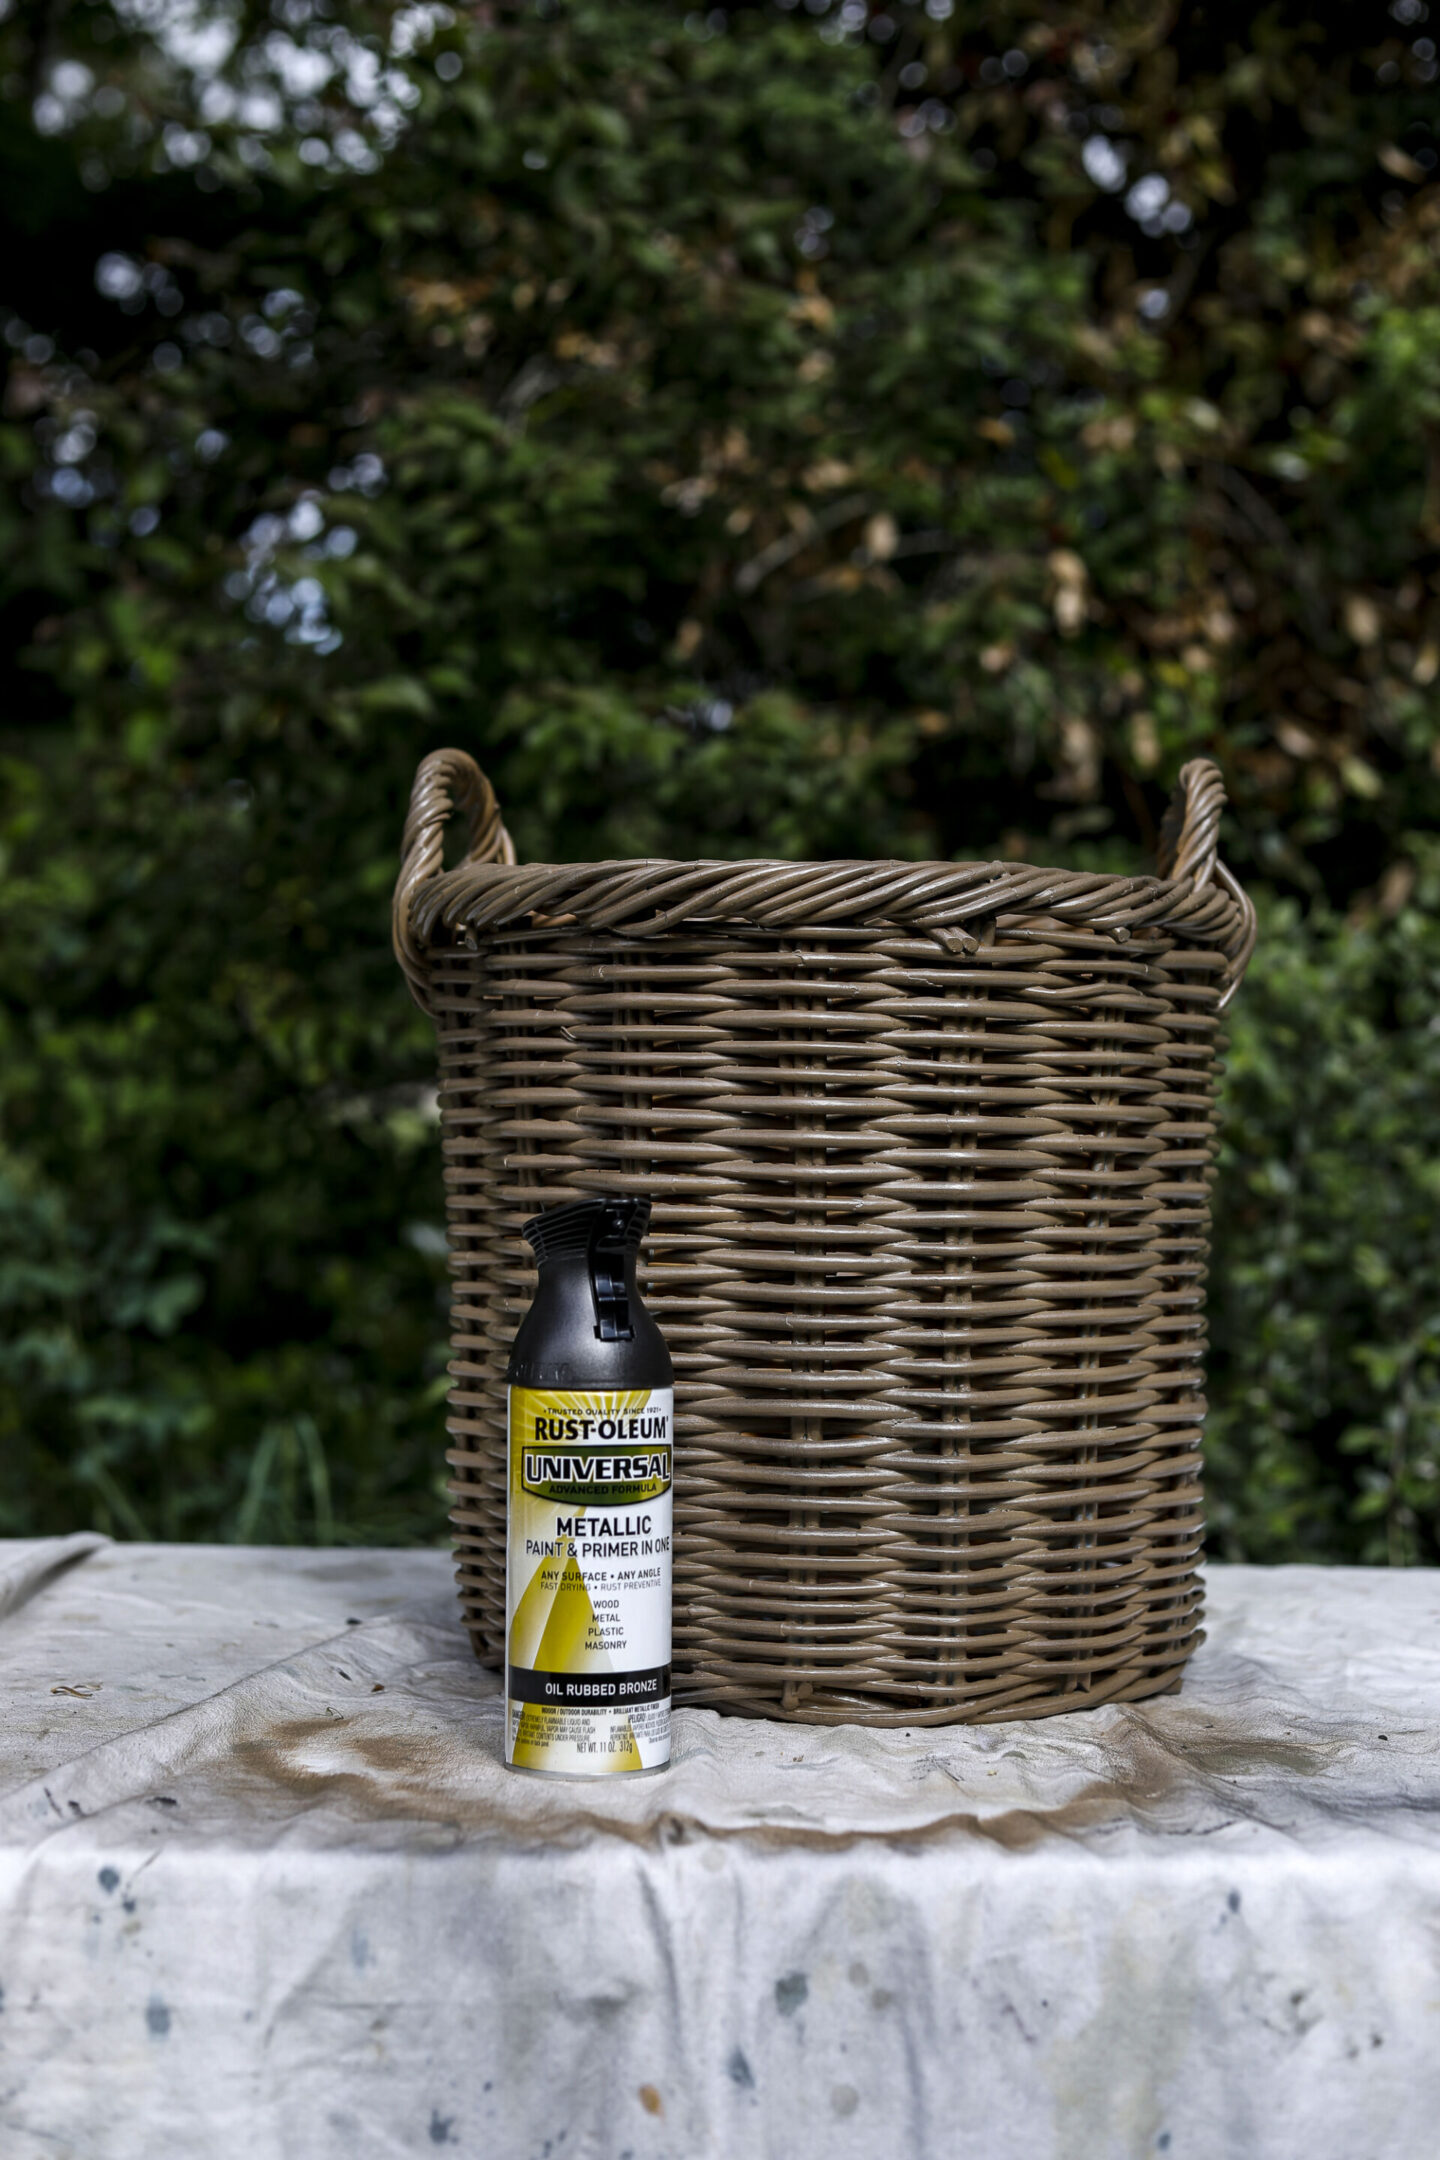
- Rustoleum Metallic Spray Paint in the color “Oil Rubbed Bronze”
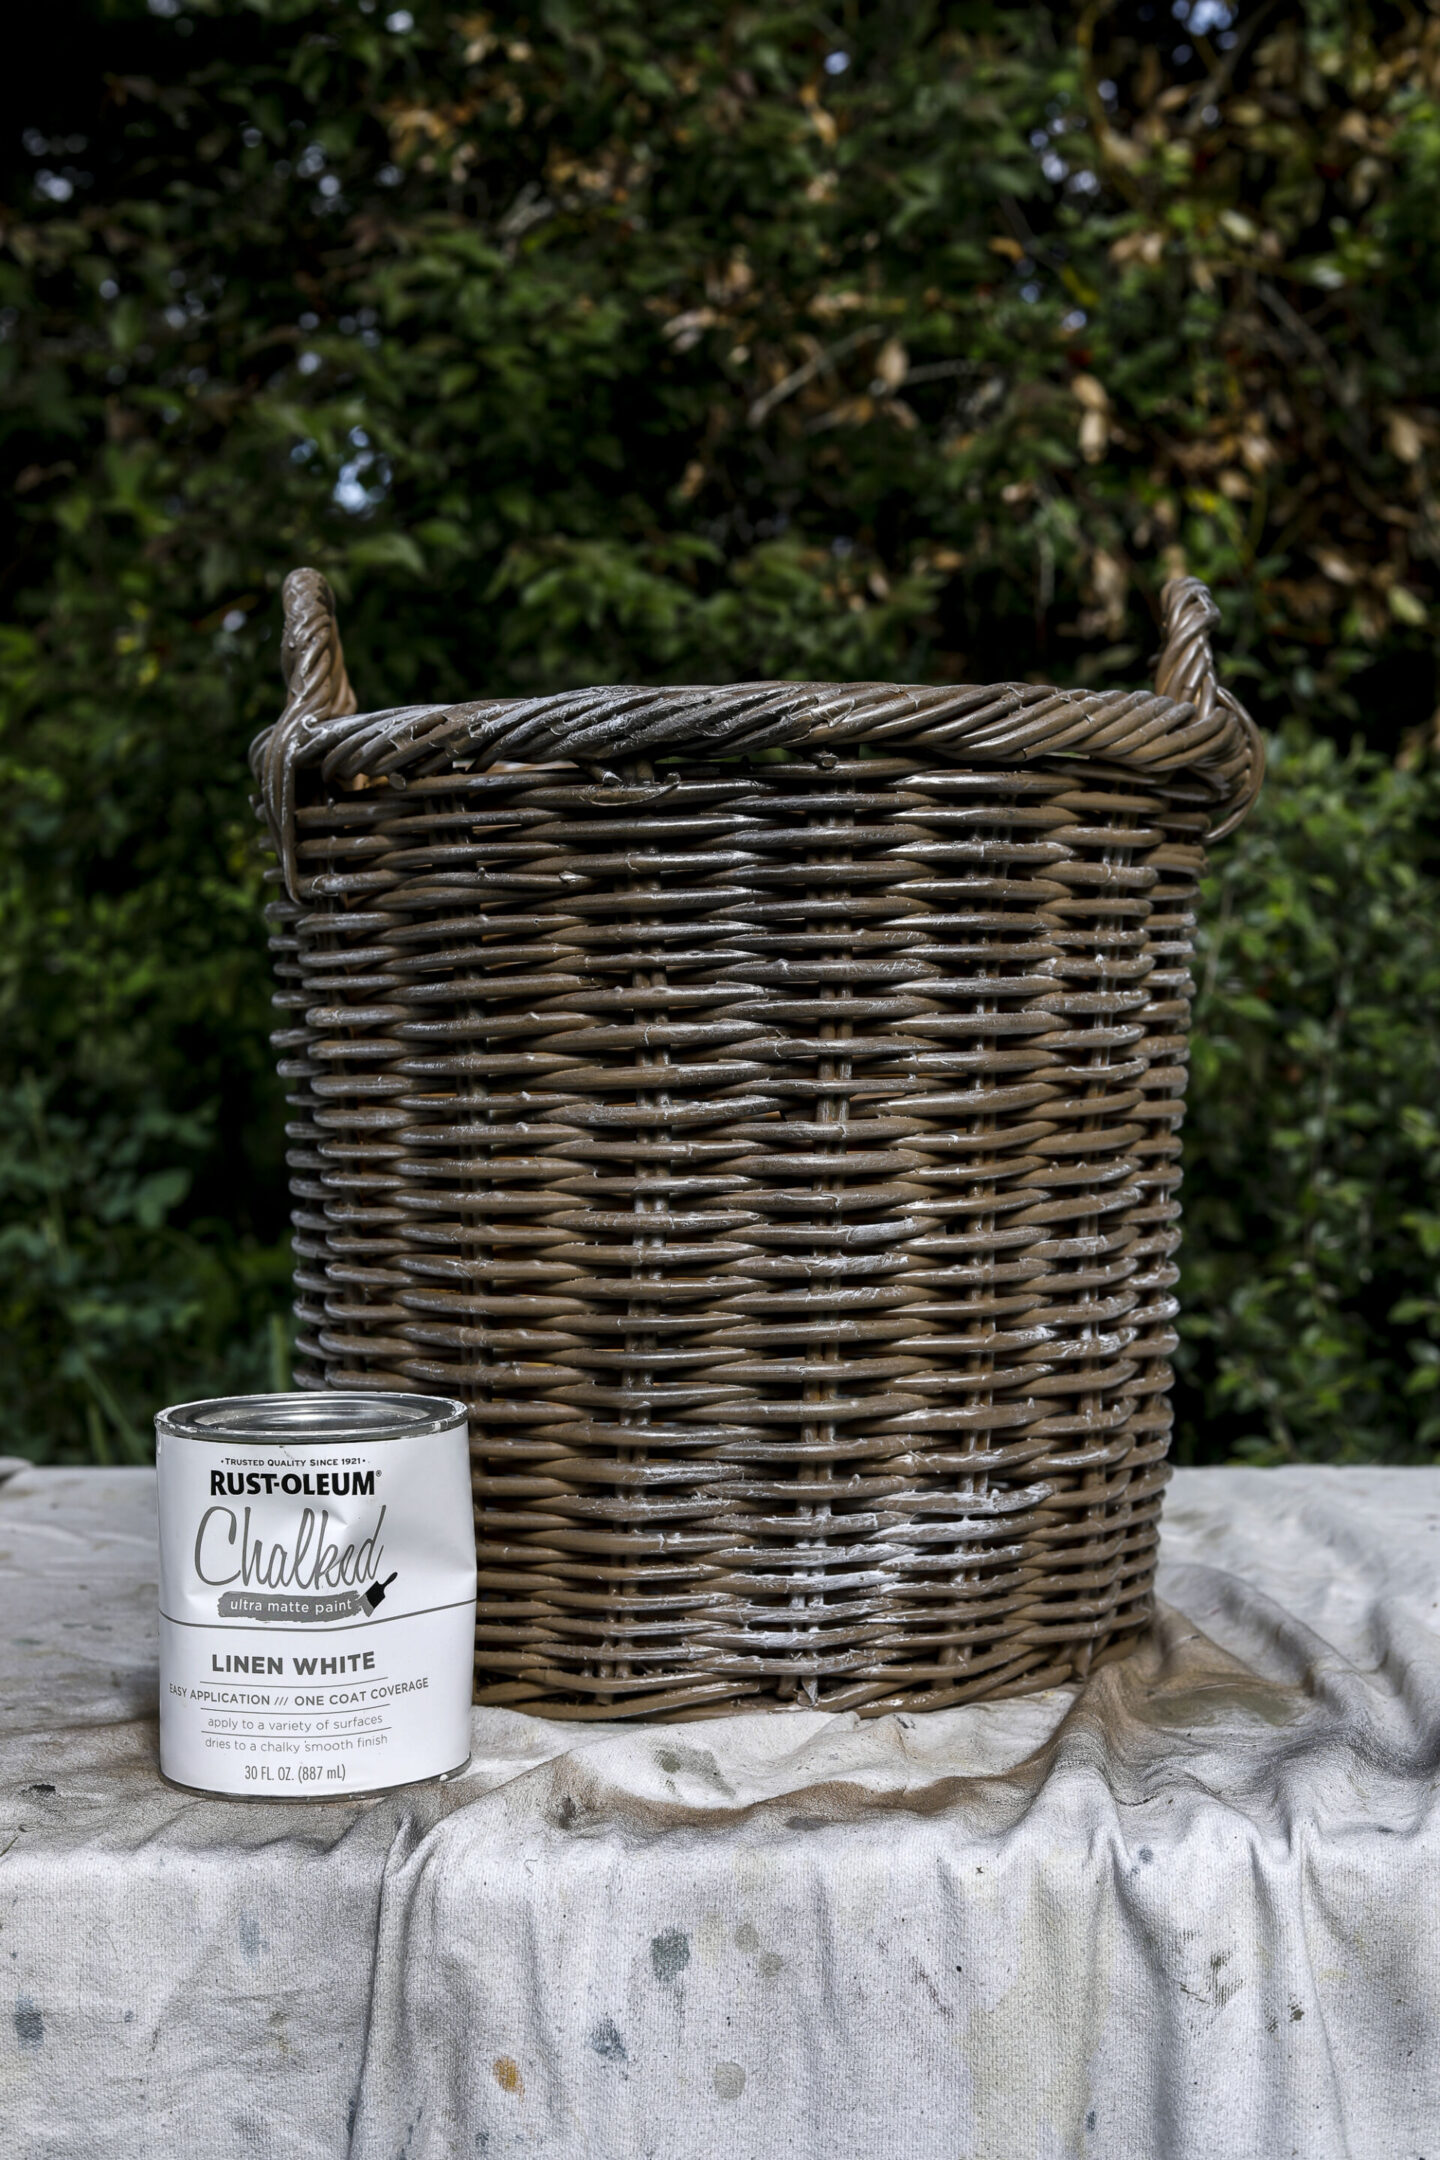
- Rustoleum Chalked Paint in the color “Linen White“
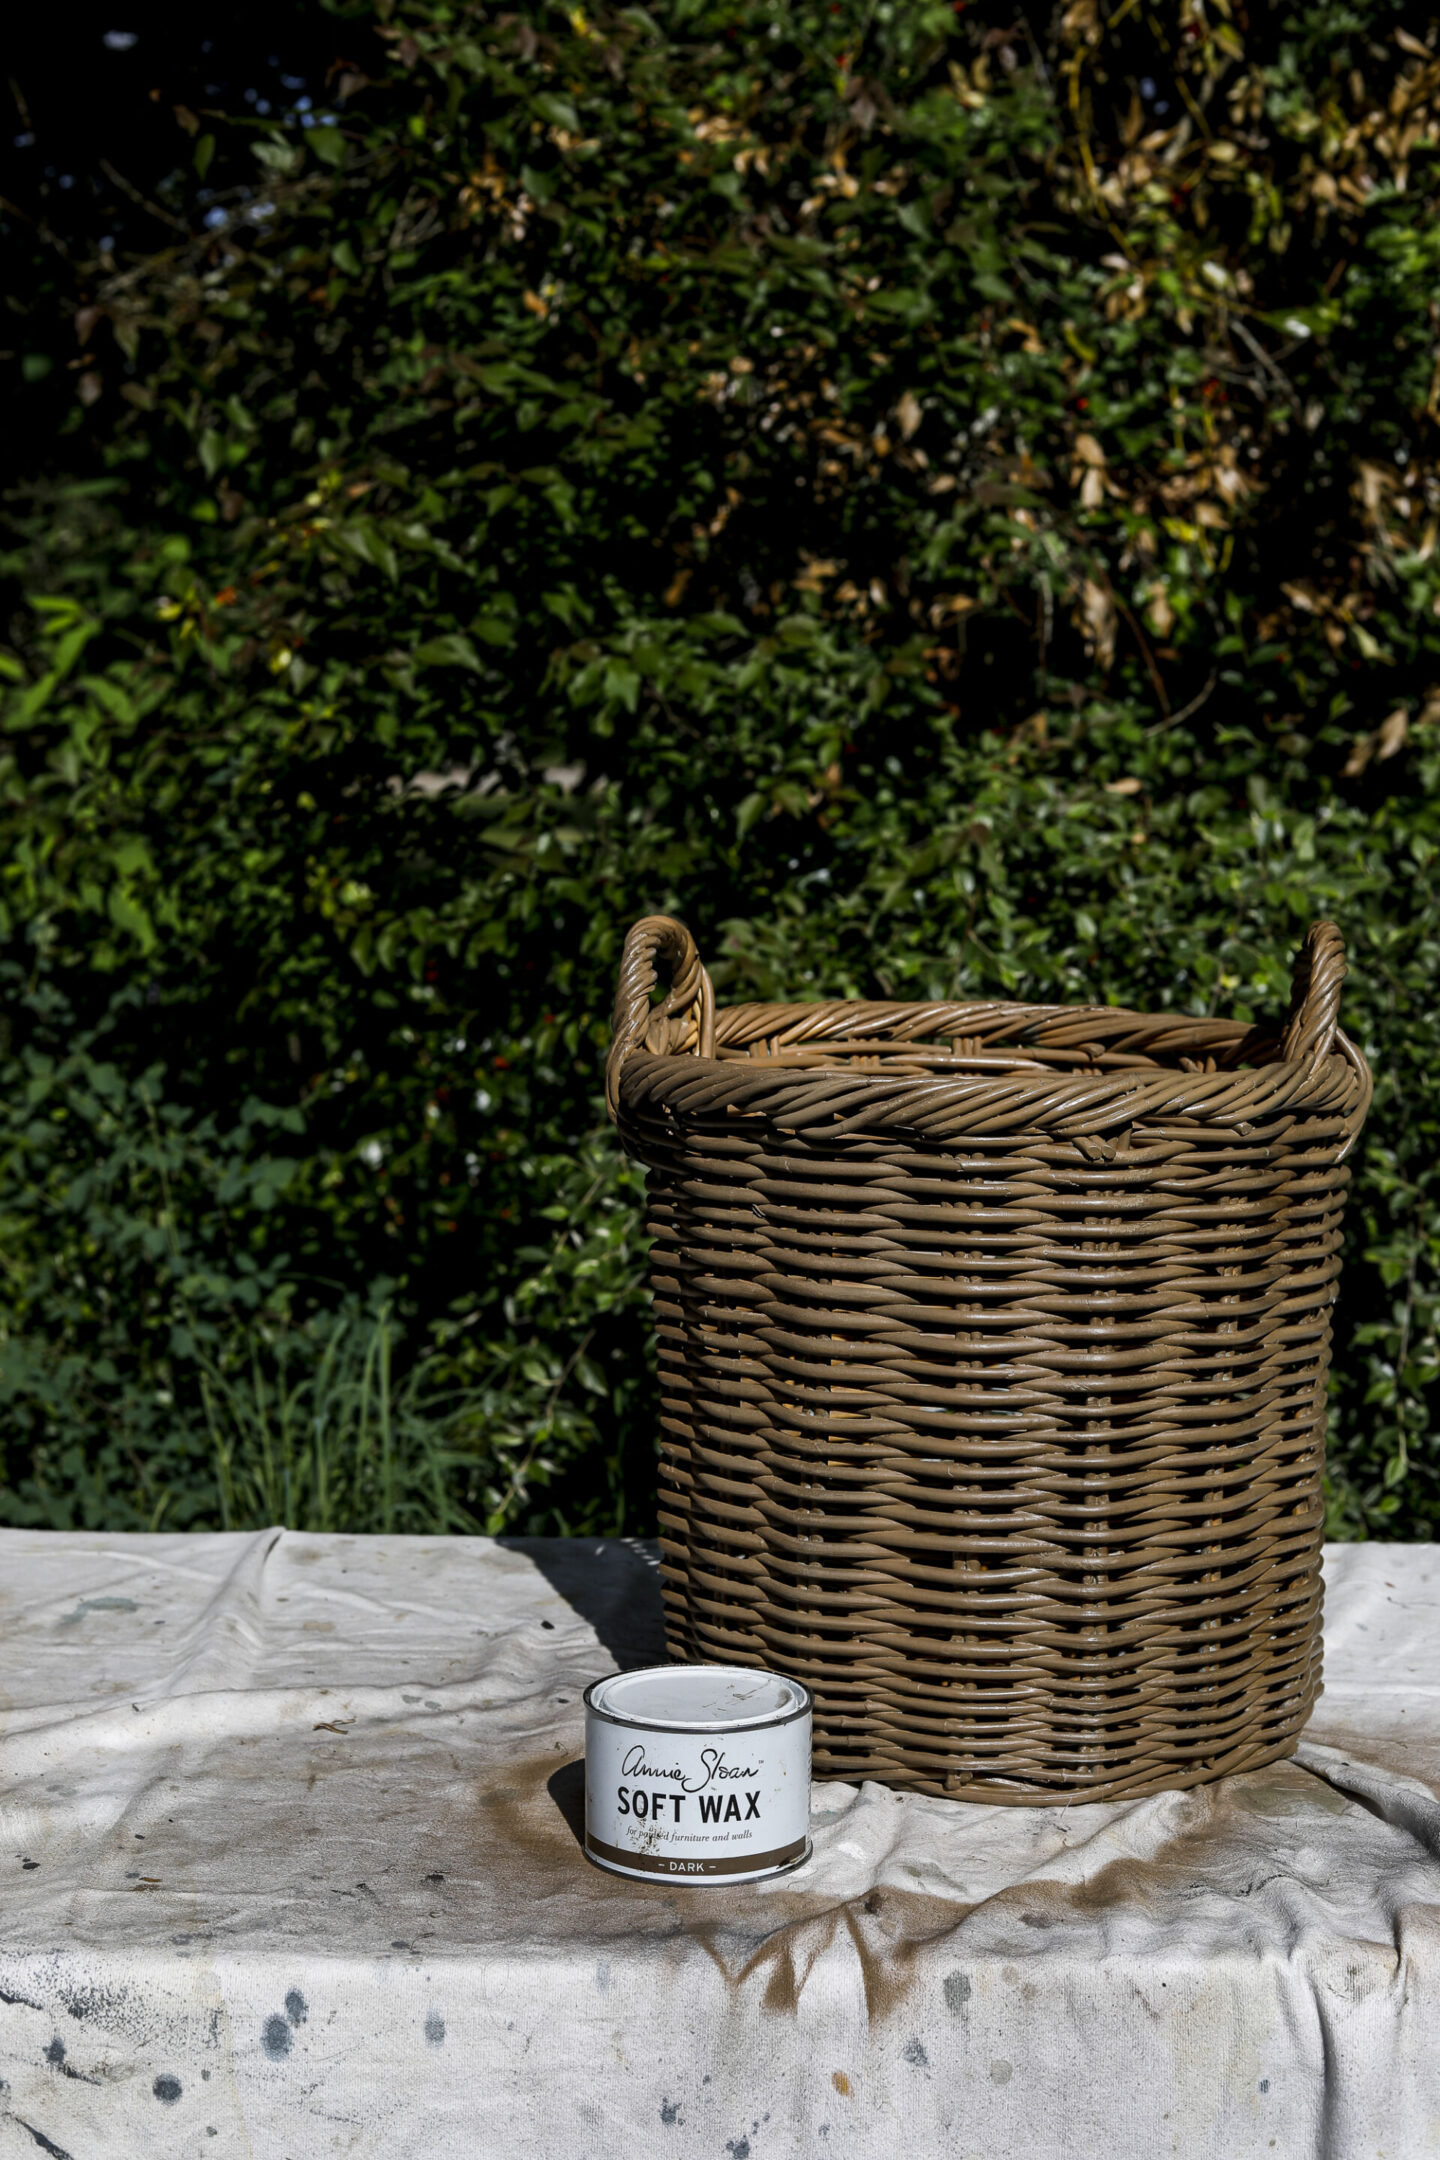
- Annie Sloan Dark Wax
- Chip Brush
As part of this specific tutorial, I’m using the thrifted basket I found (similar ones HERE), but this technique can be used on a variety of different surfaces, so don’t feel like you can’t branch out if the piece you have to start with is something unique!
The Four Step Process Involved in the Technique:
Step One | Do a light first coat with the “Nutmeg” brown spray paint for an all-over base layer.
If you’re working with something like a basket with lots of spaces, make sure to spray from multiple angles to cover all of the old paint.
Step Two | Over-spray a light coat of the metallic “Oil Rubbed Bronze”.
When say a light over-sprayed coat, I truly mean it! You can almost just spray this slightly upwind and let just the carried over paint hit your piece. With this layer we’re going for tiny specks to add dimension.
If you get a few splatters, that’s OK. It adds to the character, and we all know real wood isn’t perfectly uniform.
Step 3 | Dry brush on strokes of white paint.
I like to use chip brushes because a) they’re inexpensive b) can be thrown out and c) have a nice texture in the uneven bristles.
With just a tiny bit of white paint on the tip of your brush, you’re just going to brush in a crisscross “X” pattern over the entire piece. This should again be a very light layer with just a small amount of paint. You don’t want too much white in any one space.
But don’t be frightened if it all of a sudden feels like the white is way too bright. That will be resolved in the next step!
Step 4 | Brush on a coat of Dark Wax
For wax applications, I like to use my SIFF wax brush. I talk about these more in my post all about my favorite painting supplies, they’re really the crème de la crème of wax brushes.
This coat is brushed over the entire surface and it protects while also softening any of the bright white. The application shouldn’t be so dark that it covers over your texturing layers.
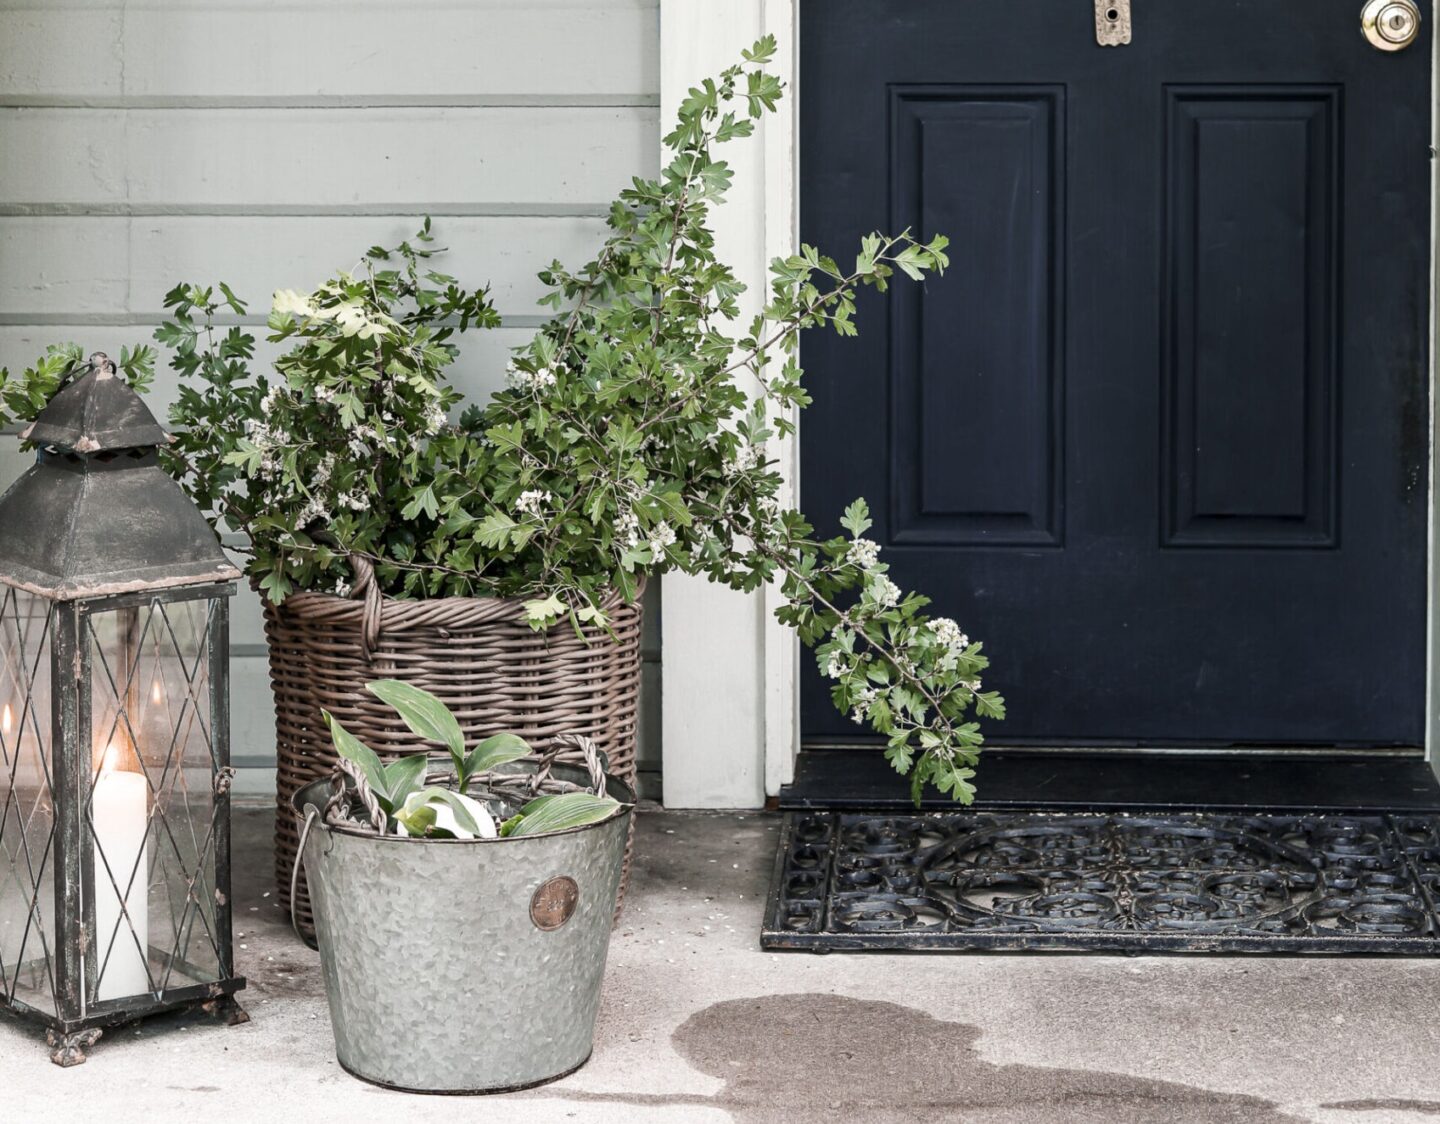
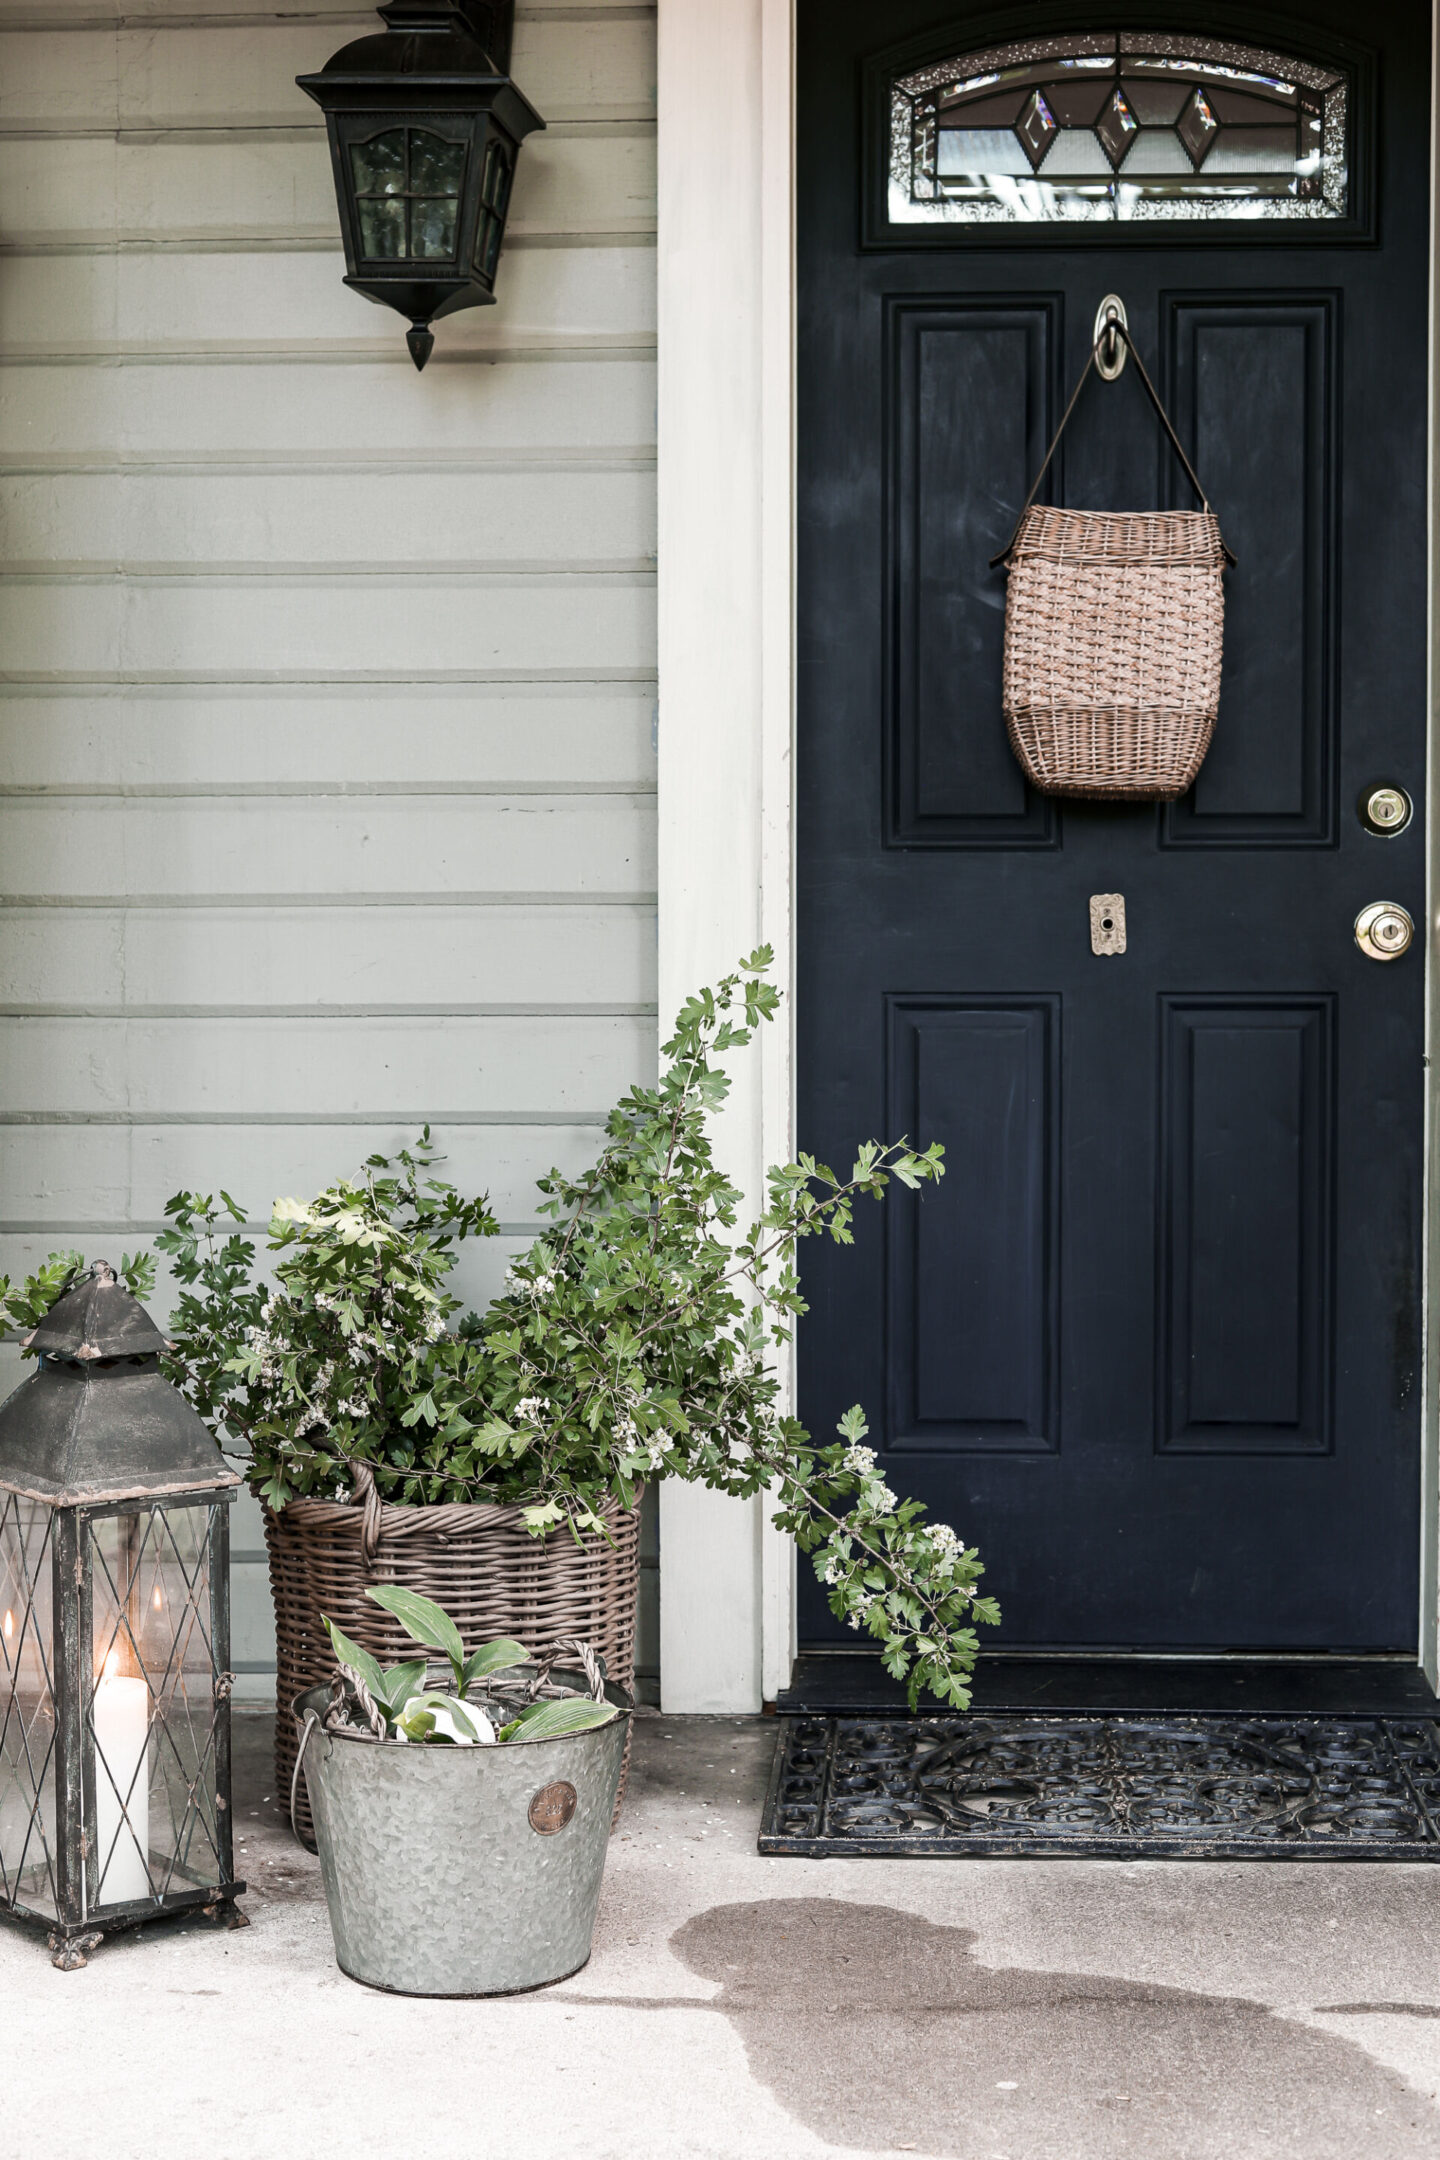
And then viola! You’ve restored 100% of the character with far less work than stripping the piece would have entailed!
Wanting to learn more Helpful DIY Design Tips?
I teach all about DIY products & techniques in my Elite Decorating Academy!
It’s a combination of my professional interior design schooling, and the DIY world, which I love because that closes the gap for any budget.
You could buy a basket for brand new at $80, or you can buy it for $5 and get the same look. I meet you at whatever season you’re currently at in life, and we design & create from there!
Head on over to elitedecoratingacademy.com to learn more and to get started!

Related Posts & Resources:
- Painting a Leather Recliner
- Professional Painting Tips
- Painting a Piano with Milk Paint
- How to Paint French Doors the Quick & Easy Way
- When to Paint Antique Wood Furniture
- How to Age New & Thrifted Wood Furniture
- Hacks to Make Your Furniture Look Vintage
And over on Pinterest:
- Vintage Home Paints Board
- My DIY Blog Post Collection Board
- Thrifting Tips & Tricks Board
Save this Faux Wood Painting Technique for Later: