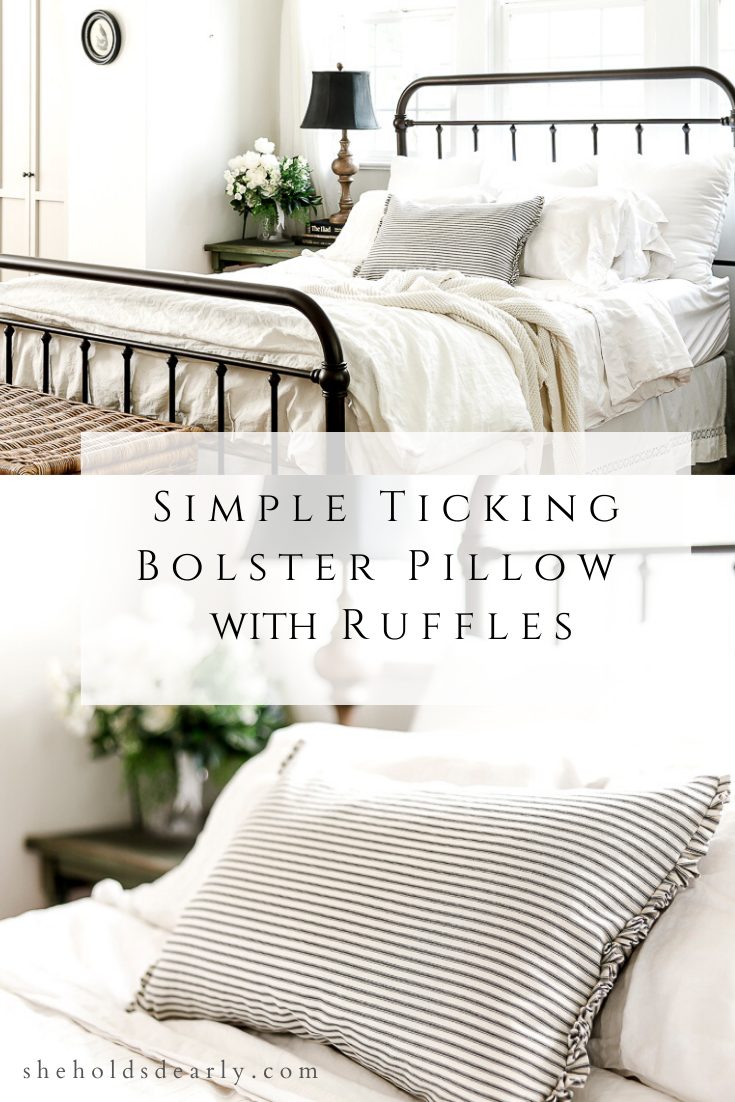
Simple Ticking Lumbar Pillow with Ruffles
What’s not to love about a Lumbar pillow with ruffles?
**Edited** The original version of this blog post called these pillows “Bolster” pillows, until I realized that bolsters are the ones with the cylindrical shape. So I’ve updated the post to show these are in fact Lumbar pillows!**
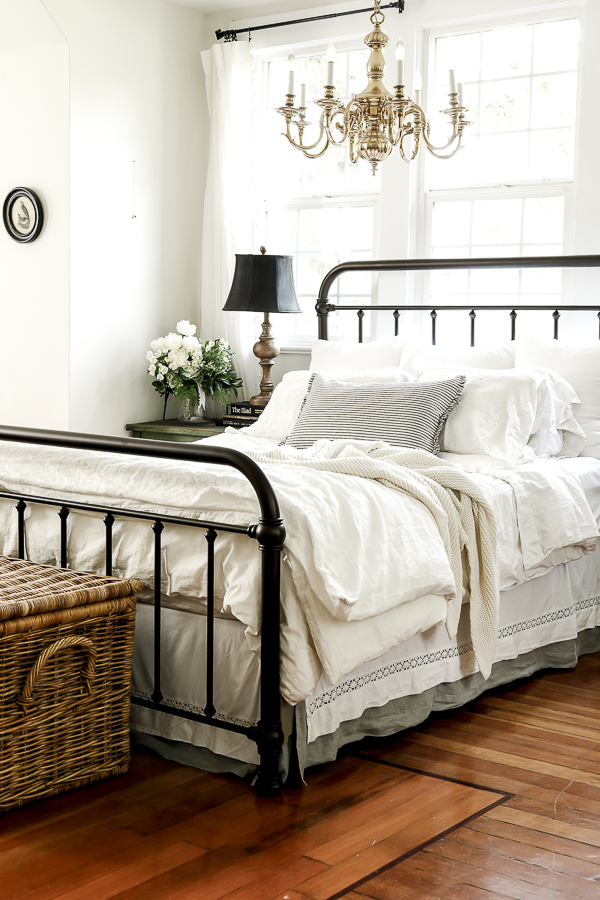
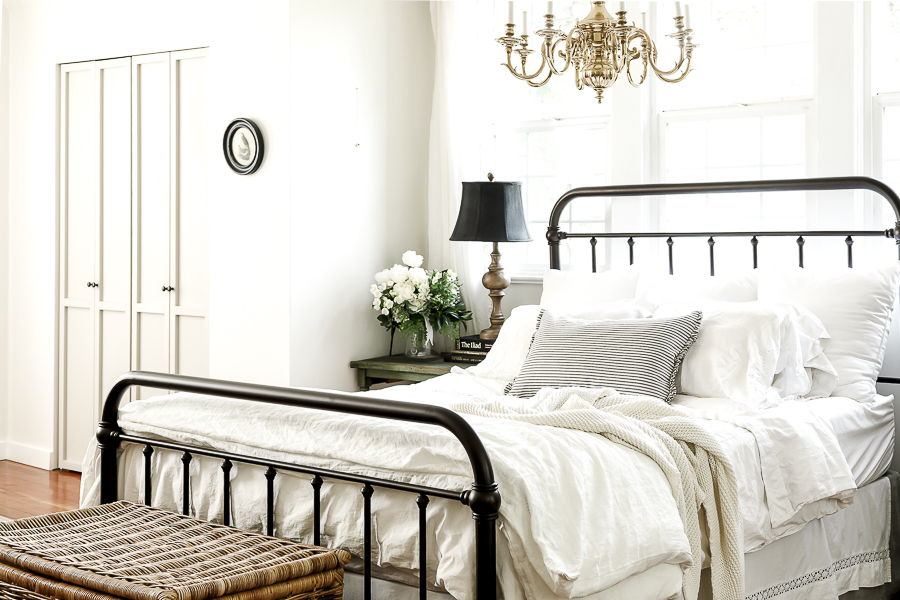
First of all, I think lumbar pillows are truly the perfect accent pillow to finish off any arrangement, whether on a bed, window seat, bench or couch!
Their size and proportions just finish off any look so neatly! I add one to just about every pillow set up I design, and I’m never dissapointed.
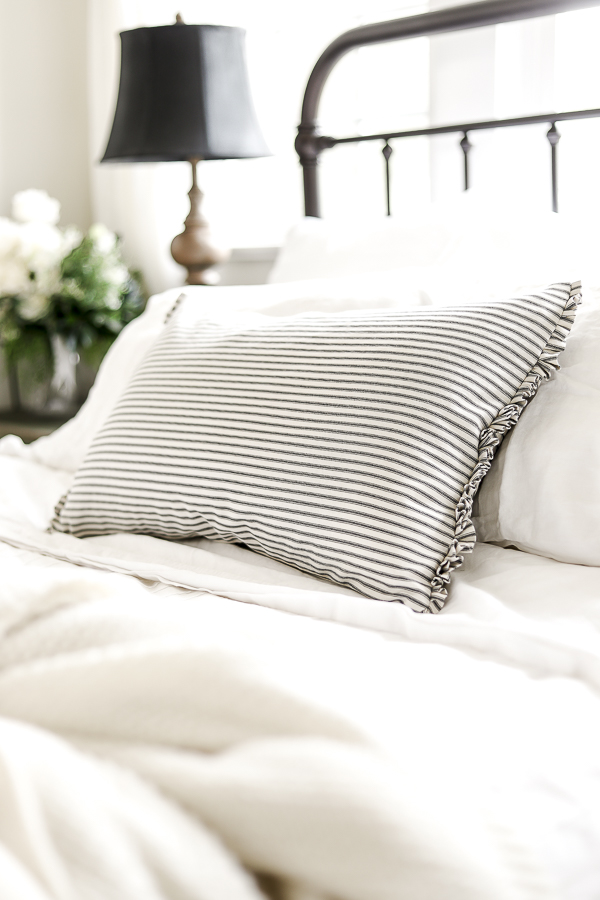
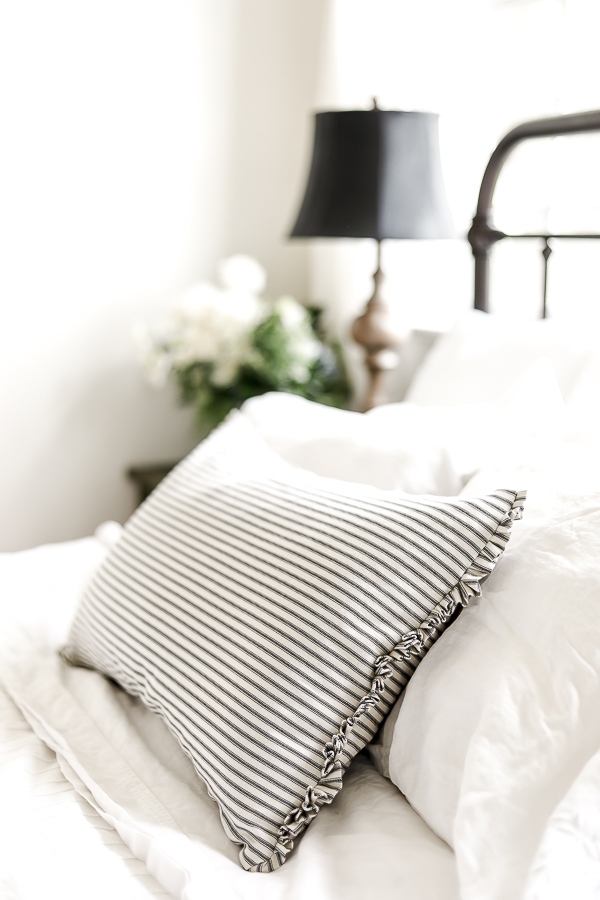
For this tutorial, I’m making a new pillow cover for a lumbar pillow for our bed.
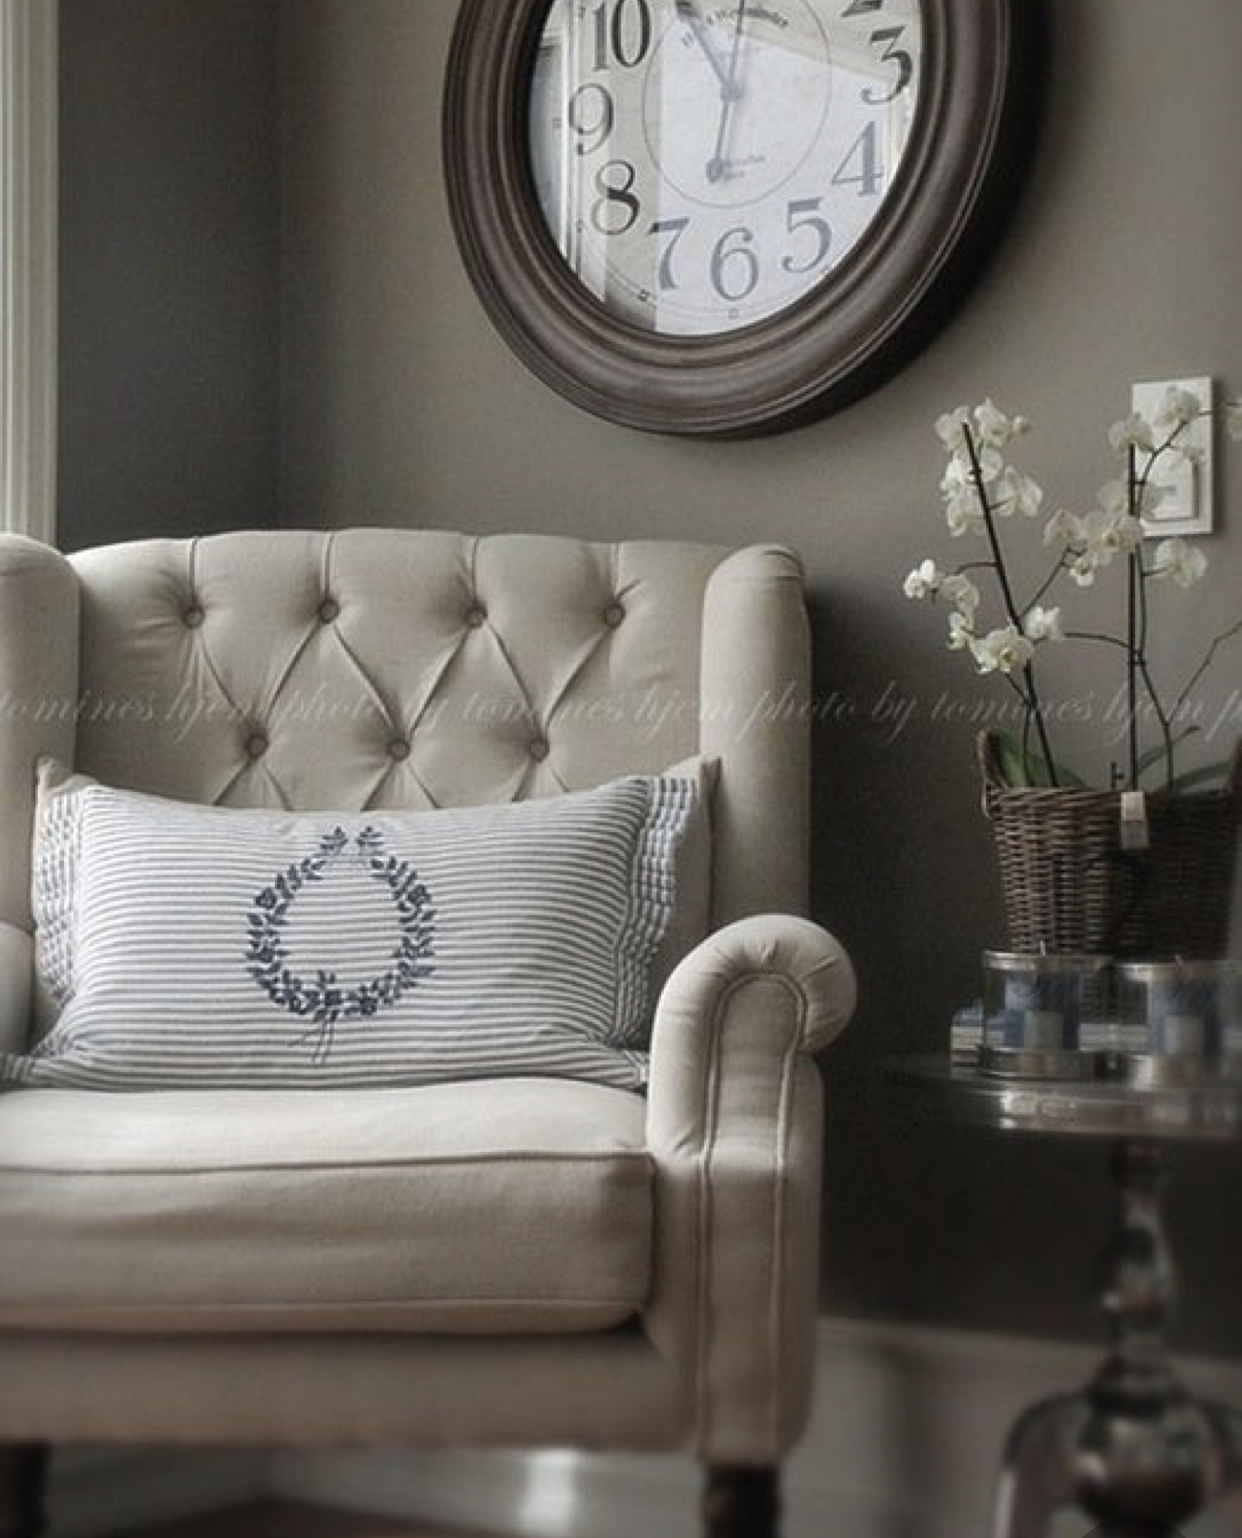
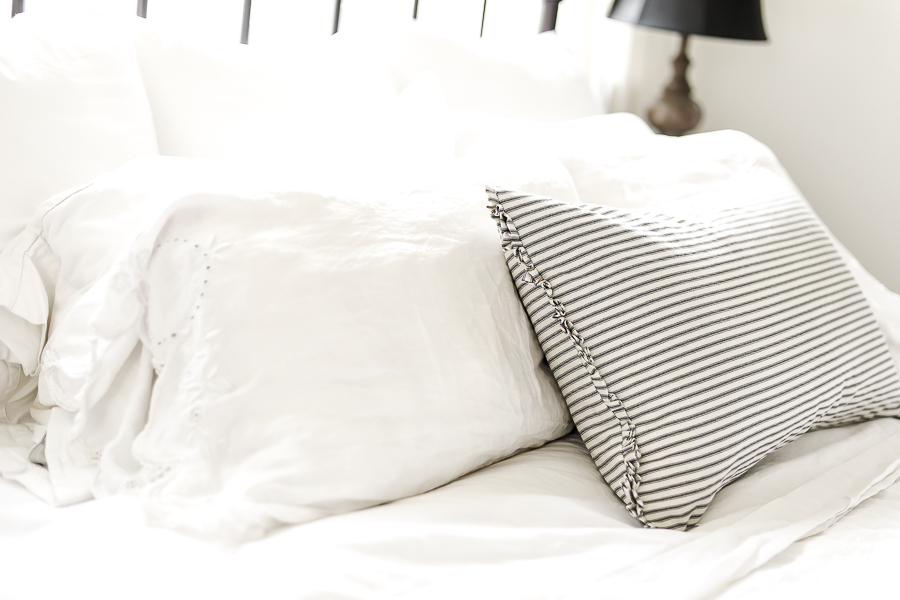
I wanted to bring in some more black to coordinate with our black iron bed frame, so I chose this cute black and white ticking material.
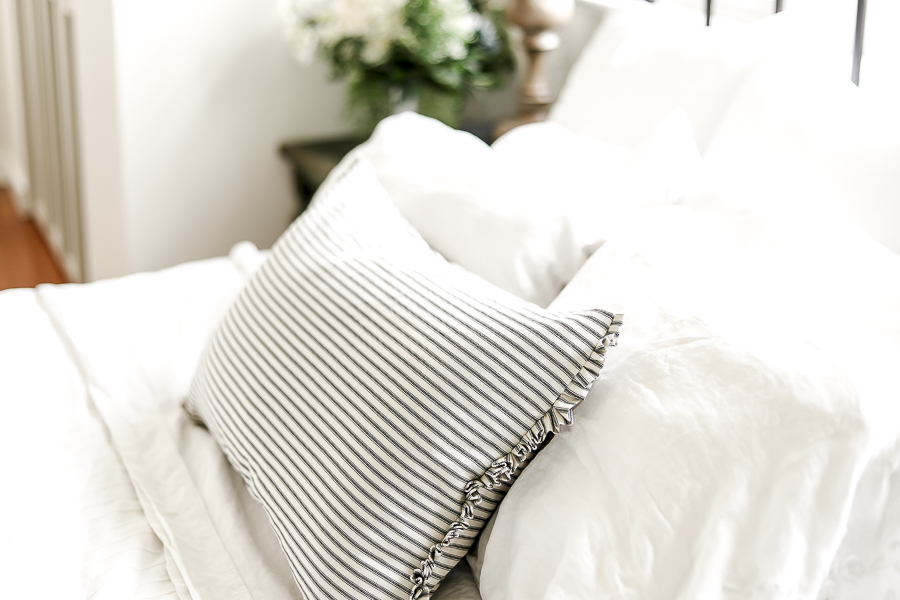
Ticking always satisfies my farmhouse style and the black stripes add the color I’m looking for along with great structure for otherwise soft bedding!
I had previously purchased these linen pillow covers and just LOVED the dainty ruffles on the edges. I knew I’d want to add those to my ticking pillow.
I also love the pleated detail, and think I might do a separate post sharing the process when I recreate these in grey linen. Let me know in the comments below if that is something you’d possibly like to see!
Another inspiration picture I just loved was this one by Tomines Hjem.
If you’ve been here a while you’ll already know that I LOVE a good wreath accent, and if you didn’t already know that, you can find more about some of my favorite wreath projects here:
…and I don’t think that’s even the complete list!
The DIY Vintage Monogram Tutorial is especially fun because it includes a free wreath printable that you can use for any fabric you chose!
I already have quite a few wreath accents in my room, so I decided not to embroider one on this specific pillow, but again… there might be a post in the future that includes it!
One last thing before I get started on the tutorial! If you love the look of this ticking pillow cover but aren’t up for the sewing part, just yet – you’re in luck! IKEA has covers called SNÖFRID for just $12.99 that look similar!
They fit over the 26″ x 16″ lumbar pillow forms linked below if you don’t already have some that size.
*This post contains affiliate links to products I know &/or love.
Creating your Own Lumbar Pillow With Ruffles
Here are the supplies you’ll need:
Pillow Form | My favorites are the FJÄDRAR from IKEA. They’re only $7 and a beautiful 26″x16″. If you’re sensitive to feathers, they have a polyester filled form the same size called the INNER for only $4!
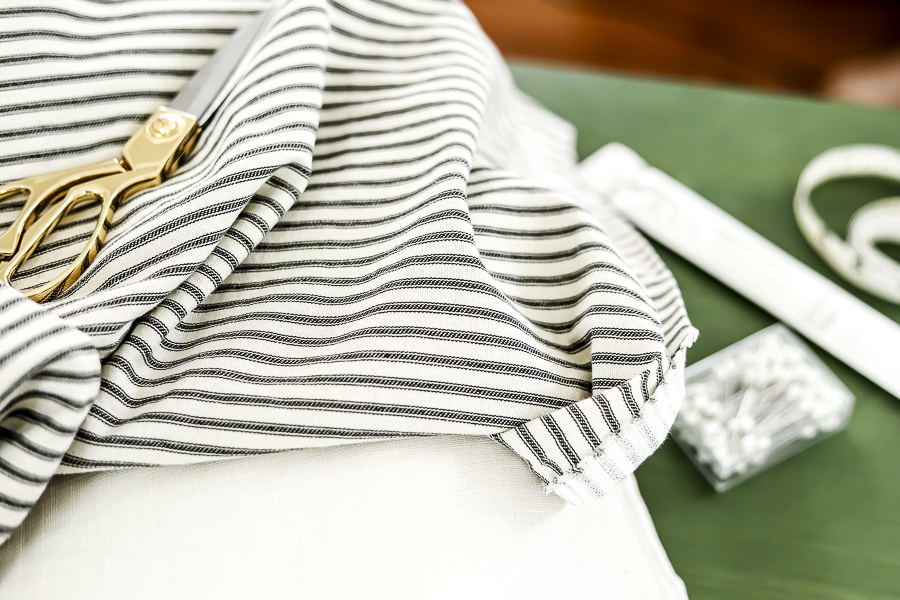
Ticking Fabric | You can find this at Amazon, or usually in the utility section of your local Joann’s/Fabric stores. They also have a variety of colors. I’ve personally seen black, red, blue, purple & more!
Coordinating Invisible Zipper |If you can find one that is 26″, that is great, but these smaller ones work OK, too!
Sewing Machine | with a zipper foot attachment
Iron
Ironing Board
And Here’s the Process:
Step One | Measure your Pillow Form
If it’s pretty fluffy, I always suggest flattening it out as much as possible before measuring. If you’re between two measurements, round up to help account for the extra volume once it’s puffed back up.
Add 1″ to both your length and width measurements to give enough extra material for a 1/2″ seam allowance on all 4 sides.
Step Two | Cut Your 2 Pieces of Material to Size
If you’re using directional material like my ticking fabric, make sure you determine which direction you want your pillow cover to show when finished, and cut accordingly!
I knew I wanted horizontal stripes, so I cut my 2 cover pieces at 17 x 28″ with the stripes parallel to the longer measurement.
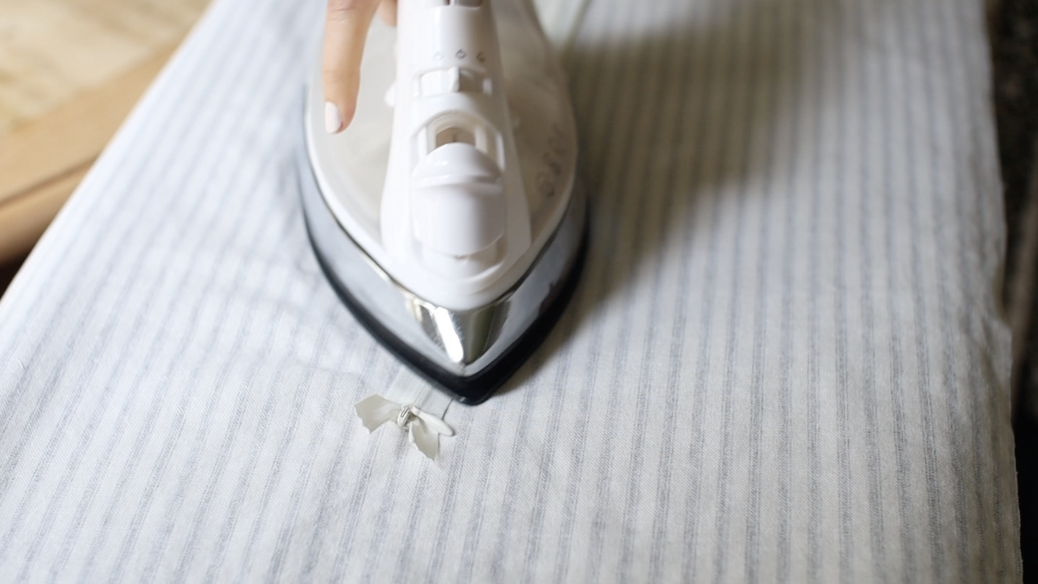
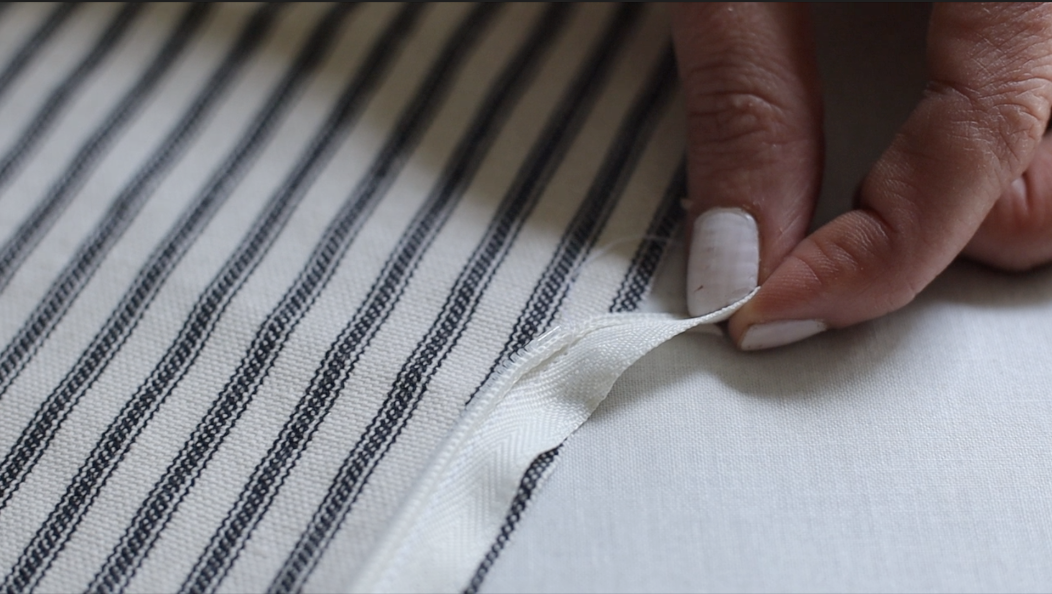
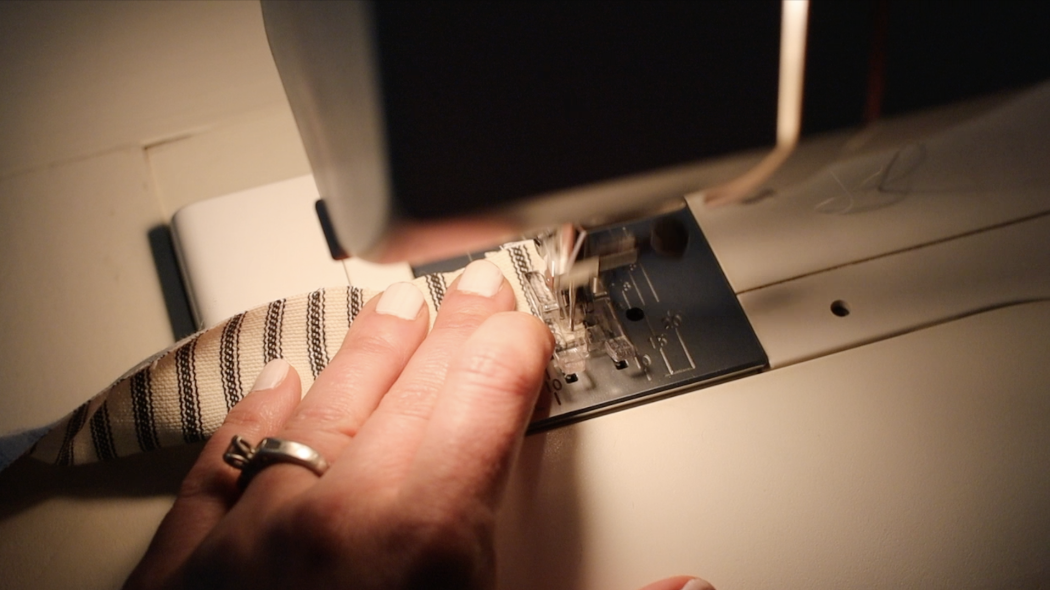
Step Three | Add in your Zipper
I always suggest ironing your zipper flat before working with it to remove the creases from the packaging.
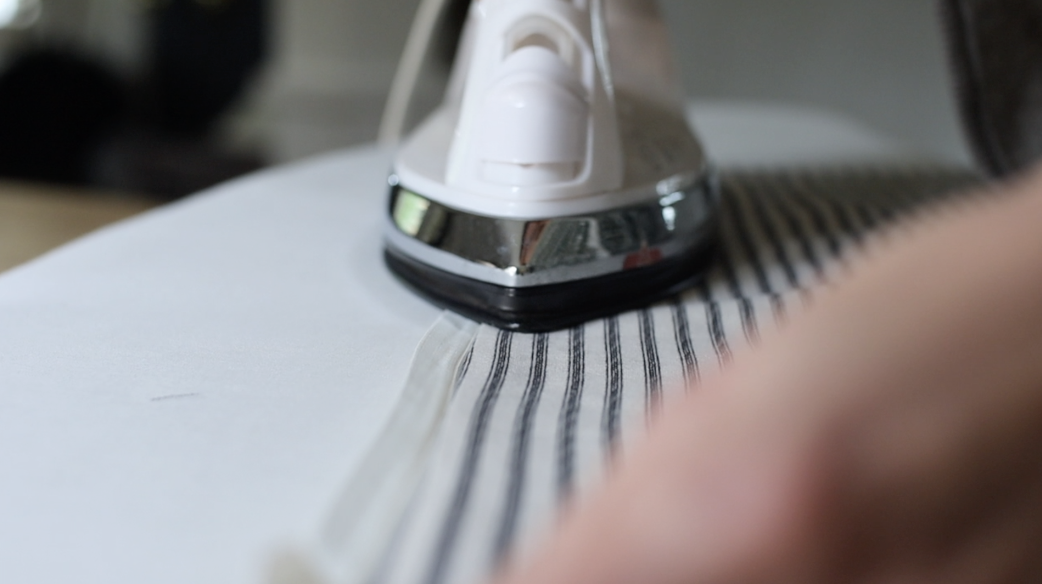
Unzip the zipper and sew the right side of 1 side to the right side of one of your pieces of material using your zipper foot attachment. The zipper should be face down against the right side of your material!
I always like to flip the material over and iron down the seam allowance when I’ve finished sewing the side together.
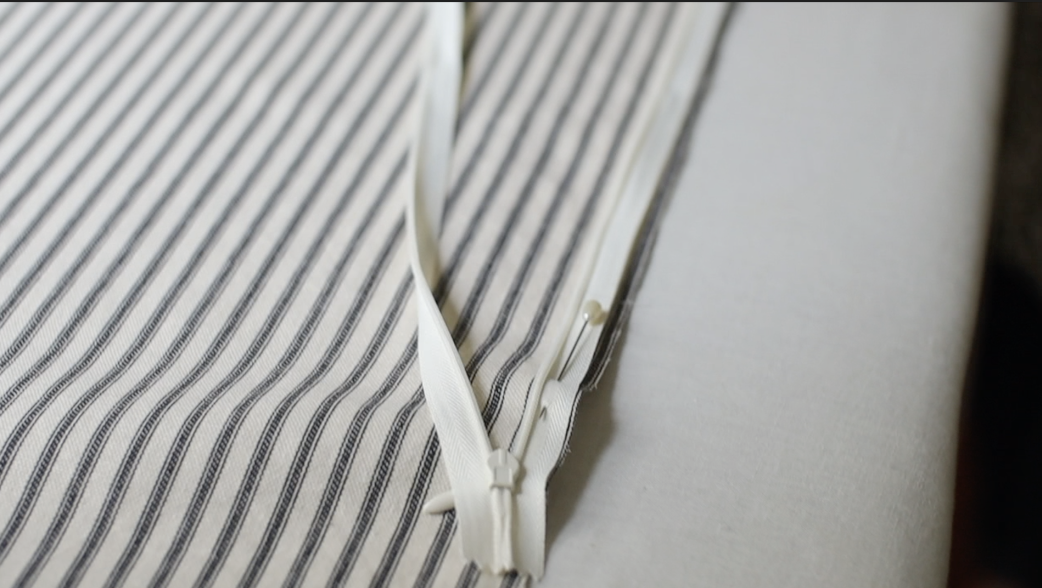
Then to attach the second side of the zipper, position your material & zipper face down on top of the right side of your remaining fabric piece and pin the edge in place.
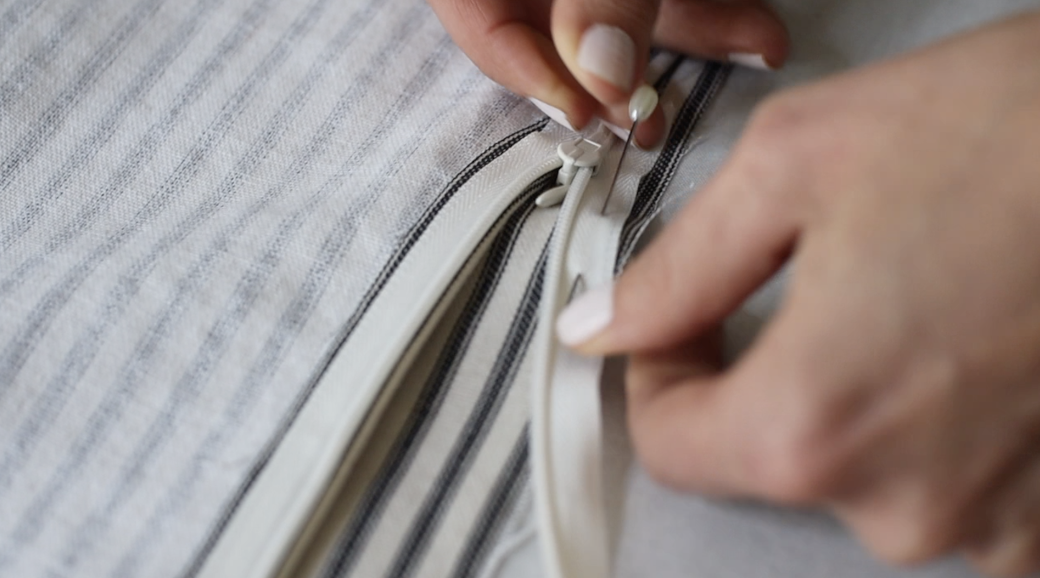
Sew that with your zipper foot as well.
When you’re getting to the end of your zipper pieces, fold them away to the OUTSIDE raw edge of your material so that the tails are tucked away inside your pillow once you’re finished.
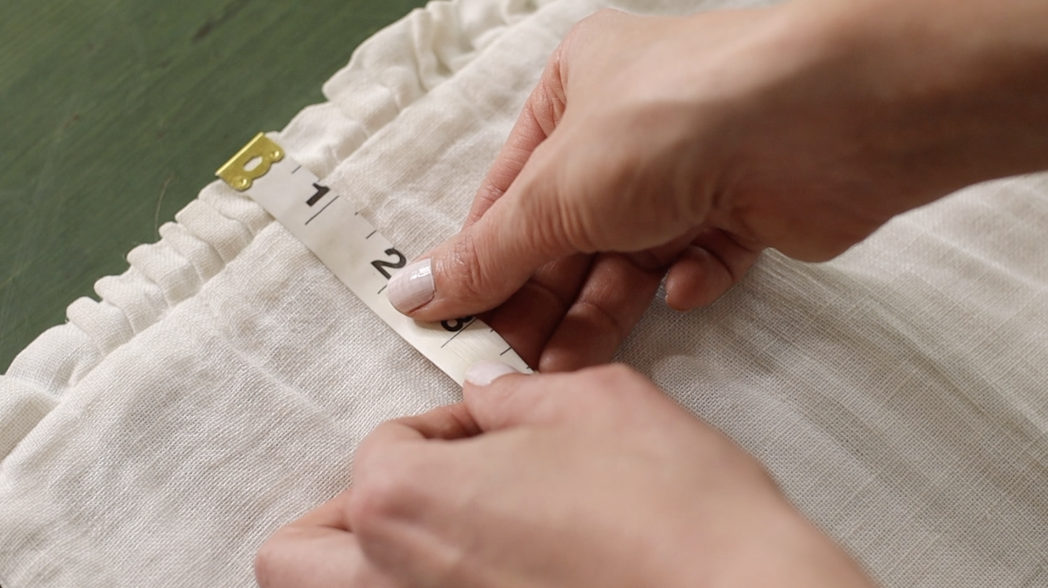
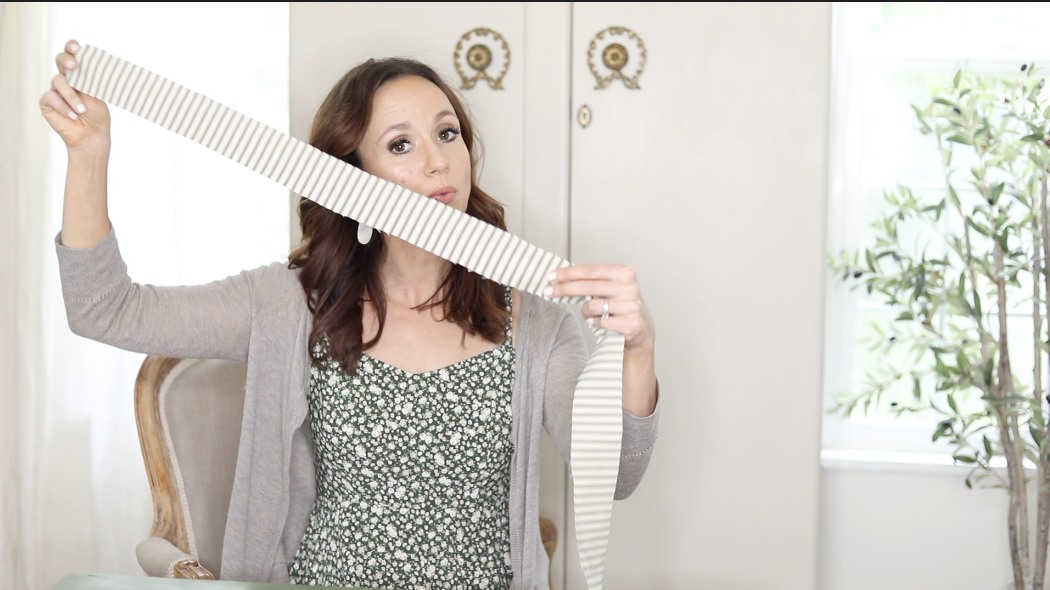
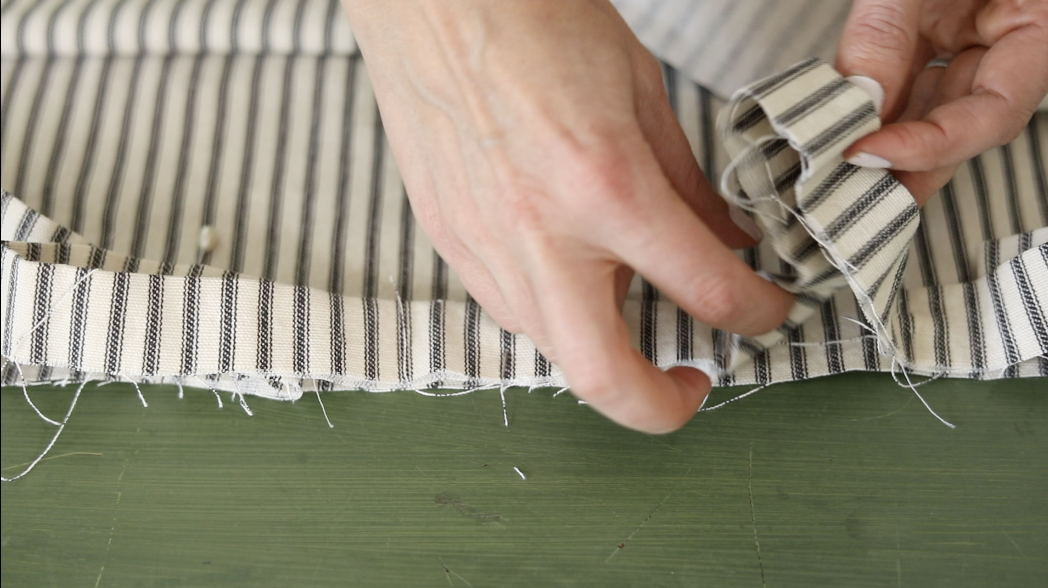
Step Four | Make your Ruffles
Depending on how ruffled you want your edges, you can either double or triple your side measurement!
I chose to triple mine for extra ruffles – and because I figured that if it were too ruffled, I could always cut some of strip away. It’s much harder to add more ruffles than to take them away.
I cut my strip at 2″, but realized afterwards that I would have rather done 3″ strips for slightly larger ruffles.
To determine the size of your ruffle strips, add your ruffle width, plus the size of your seam allowance, and then double it because you’ll be working with a folded piece for a finished edge!
So for my pillow, in hindsight I would have done:
1″ ruffle + 1/2″ Seam allowance = 1.5″. Multiplied by 2 = 3″.
Step Five| Finish the Ends of your Ruffles
Because these ends will not be attached to anything, you’ll want to finish them before attaching your ruffles.
Fold the ends of each of your ruffle pieces over about 1/2″ and iron.
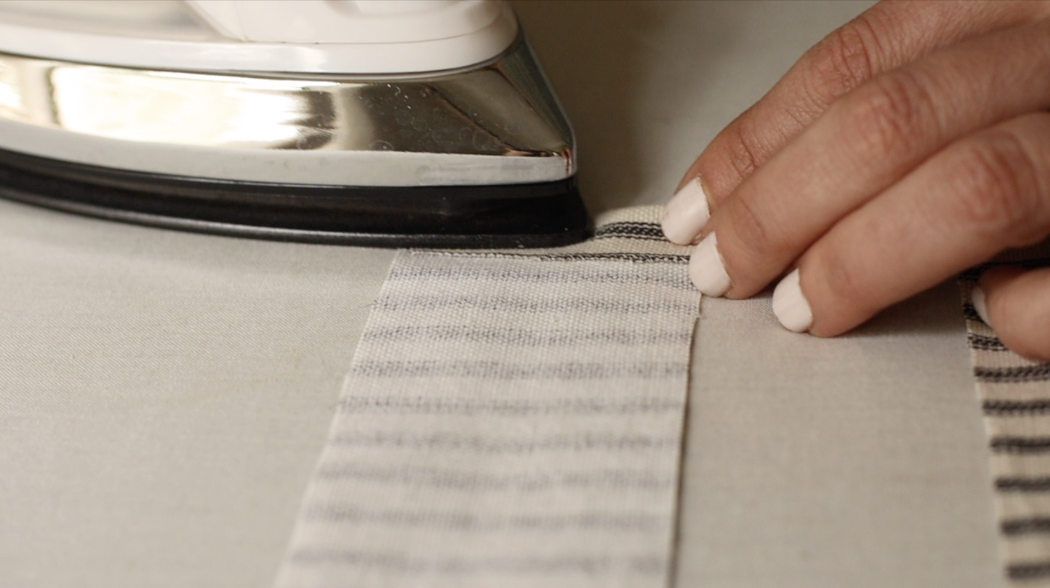
Fold it in half with wrong sides together.
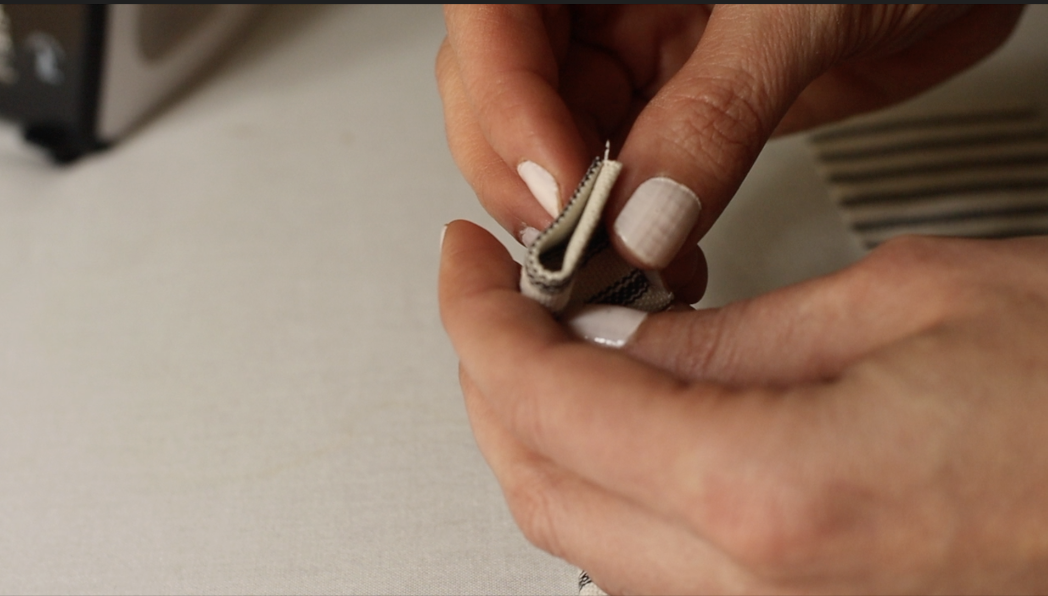
Then Sew that end closed with a straight stitch.
Alternatively, you can turn the end of your ruffle to get caught up in the seam allowance in the next step to create a rounded/finished look if you prefer it.
Similar to how I ended the piping when I was doing this DIY Slipcover with Piping tutorial.
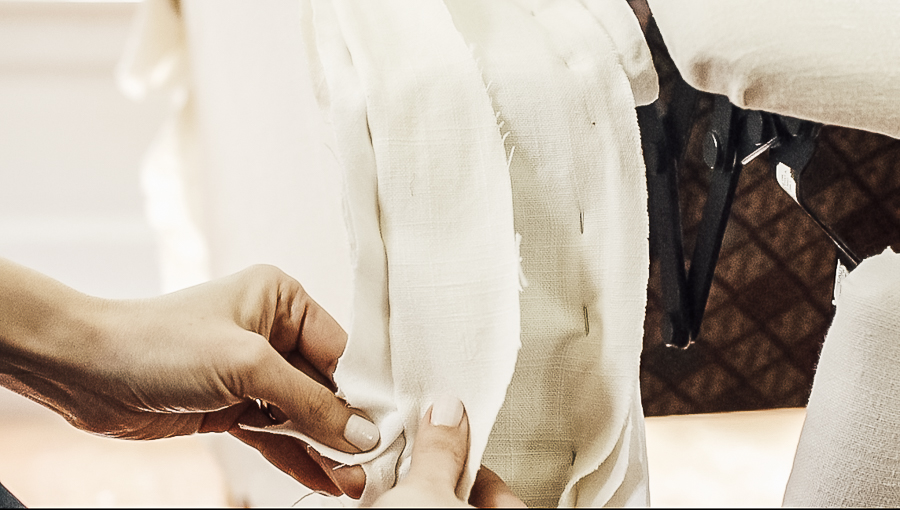
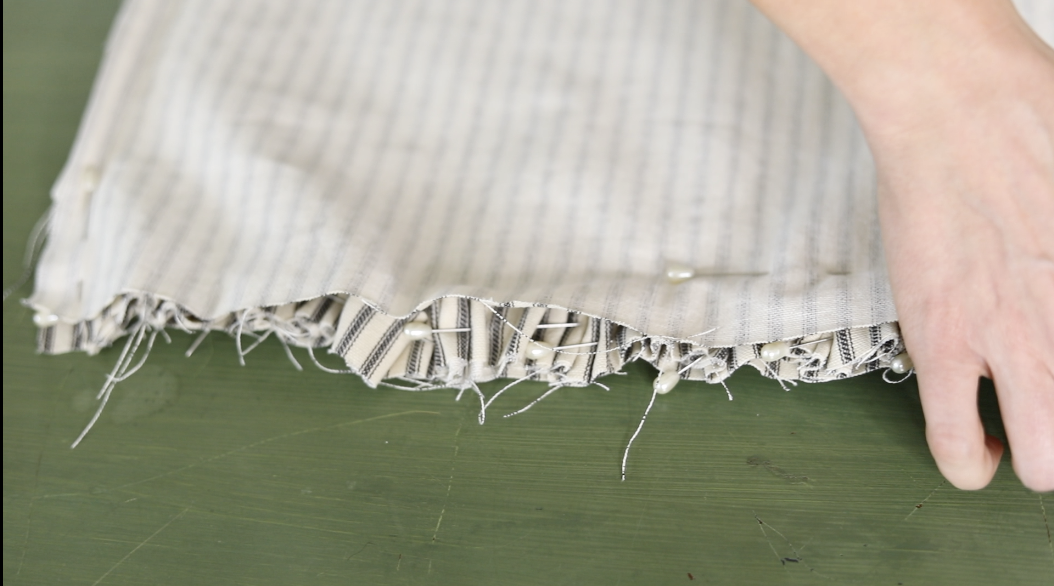
Step Six | Pin your Ruffle in Place
If you know how to gather ruffles on your sewing machine, you can do that before starting this step, or you can follow along as I manually gather/pleat and pin them in place.
I started by pinning the ends of my folded ruffle piece in place about 1/2″ away from the ends of my pillow cover pieces (so that the finished ends of the ruffles aren’t caught up in the bottom and top seams).
Then I pinned the approximate middle of my ruffle piece to the middle of my pillow cover piece, then I pinned again at the quarter sections so that I was working with smaller sections as I pleated.
Then I simply folded loosely, almost in an accordion style within each of my 4 smaller sections and pinned generously to hold them in place.
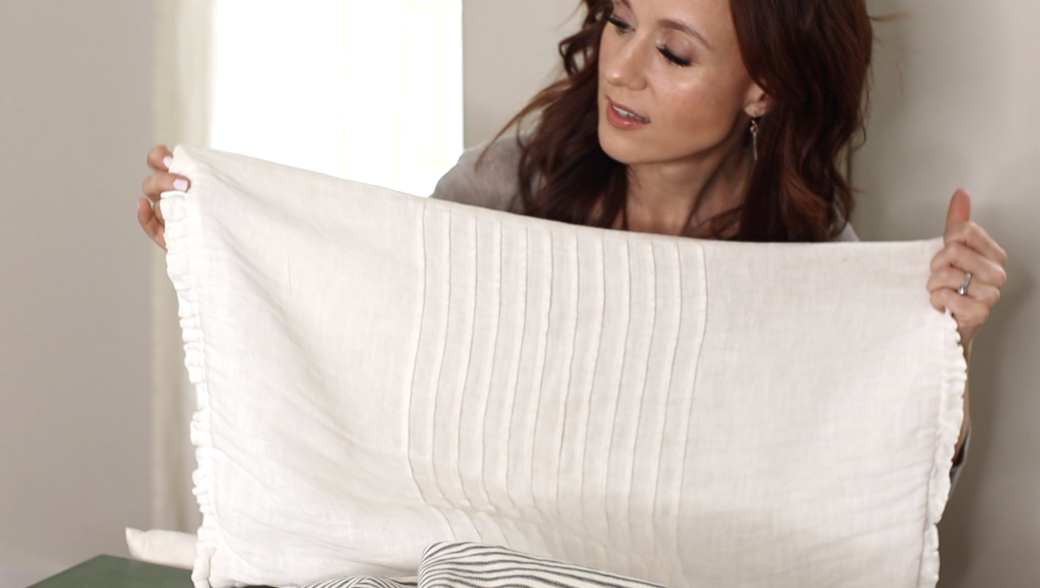
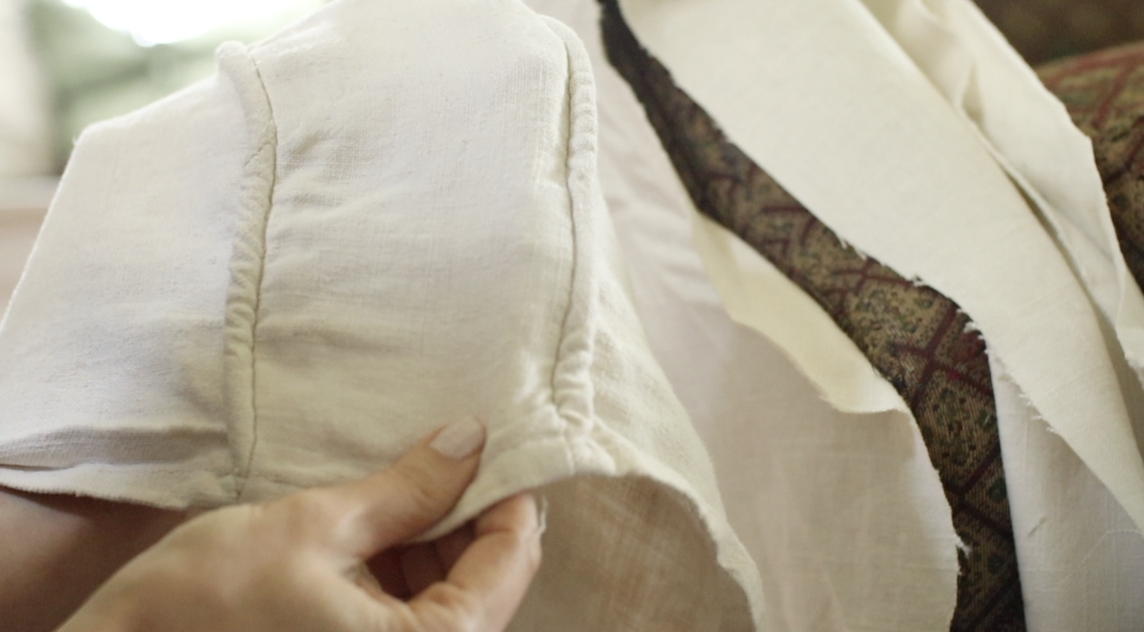
Step Number Seven | Pin the Remaining Pillow Cover piece in place & sew.
Place the remaining pillow cover piece right side down sandwiched over the ruffles and pin in place along the 3 open sides.
Unzip the zipper about 6″ so that you’ll be able to reach your arm in once it’s sewn to turn it right side out!
Sew around the 3 pinned sides with a 1/2″ seam allowance.
Step Number Eight | Turn it right side out, put your pillow in & enjoy!
[show_shopthepost_widget id=”4087607″]
Shop This Look
I hope you enjoyed this lumbar pillow with ruffles tutorial! If you chose to make one of your own, please share it on Instagram and tag #sheholdsdearlyinspired.
I love seeing what this creative community can do, and sharing it for others to see as well!
And if you’re looking for more fun pillow inspiration, I recently did a tutorial for a Patriotic Pillow with an iron-on transfer – but it’s a method that can easily be used for any image for any season!
Pin for Later