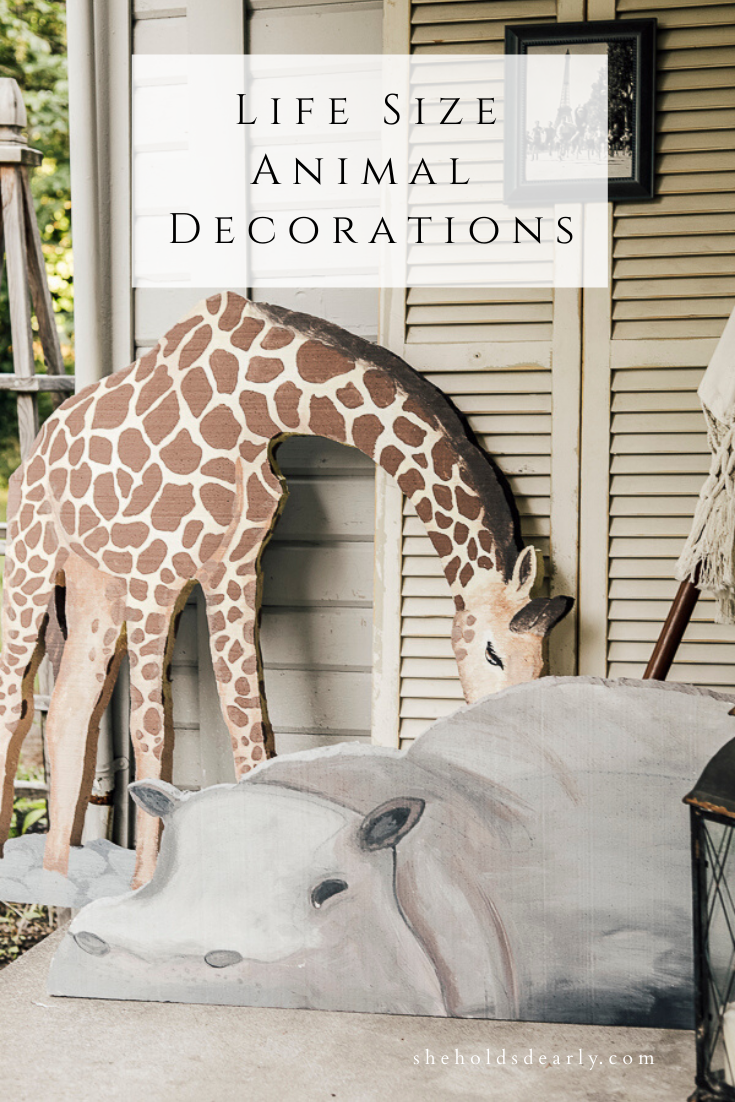
How to DIY Life Size Party Animals That Stand Alone
Have you ever wanted life size, stand alone party decorations? Well I’ve got you covered in this post!
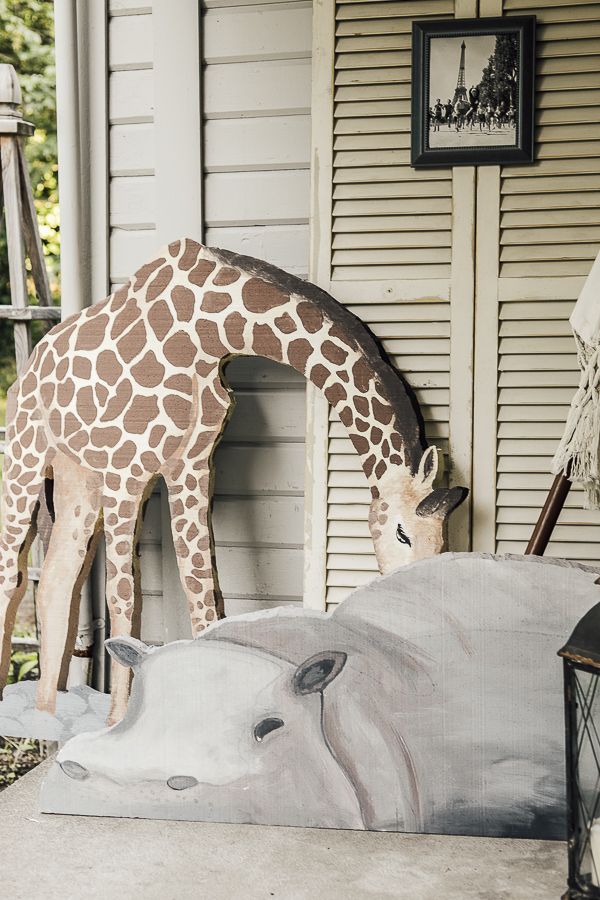
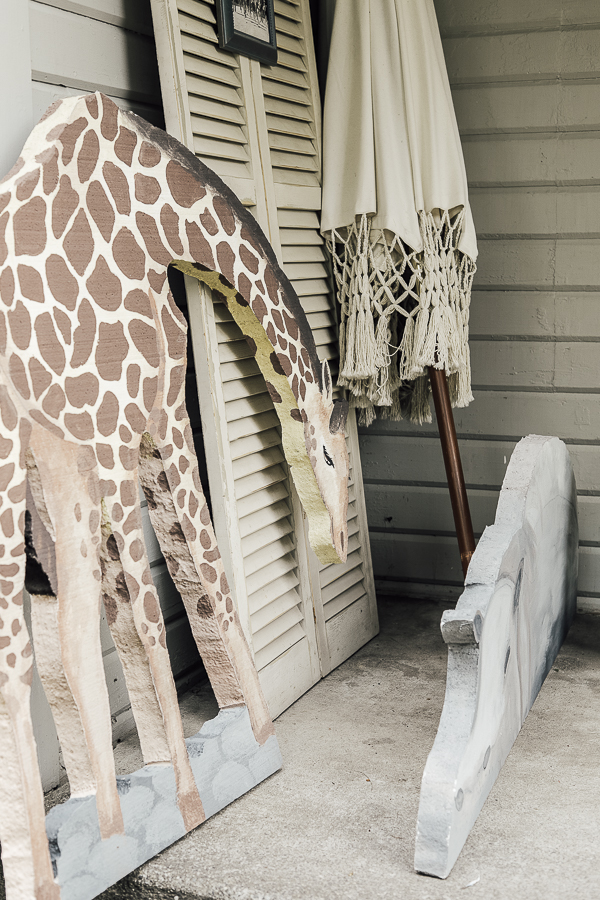
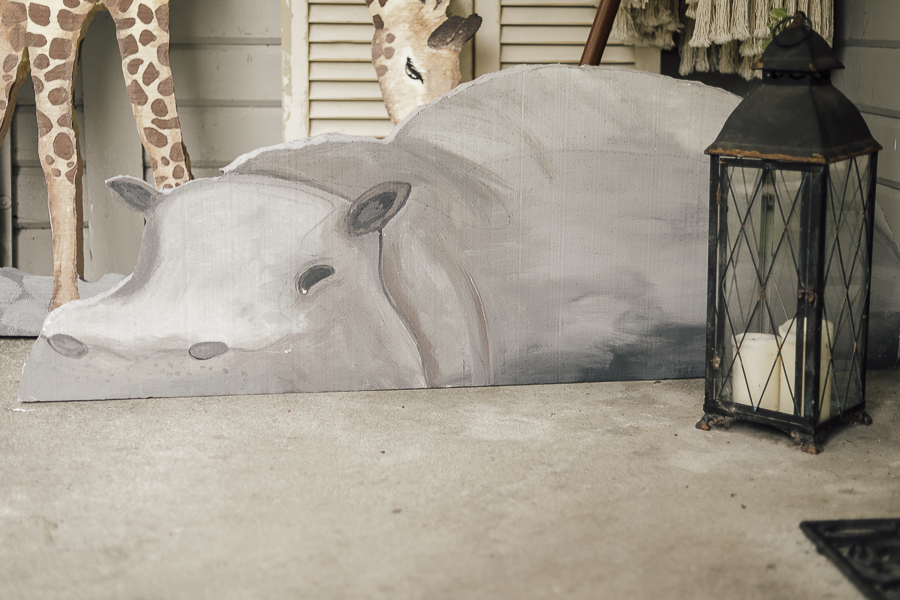
I made these animals for our church’s Summer KidsCamp (also commonly known as Vacation Bible School or VBS), but the idea and process can actually be duplicated for any number of occasions or ideas!
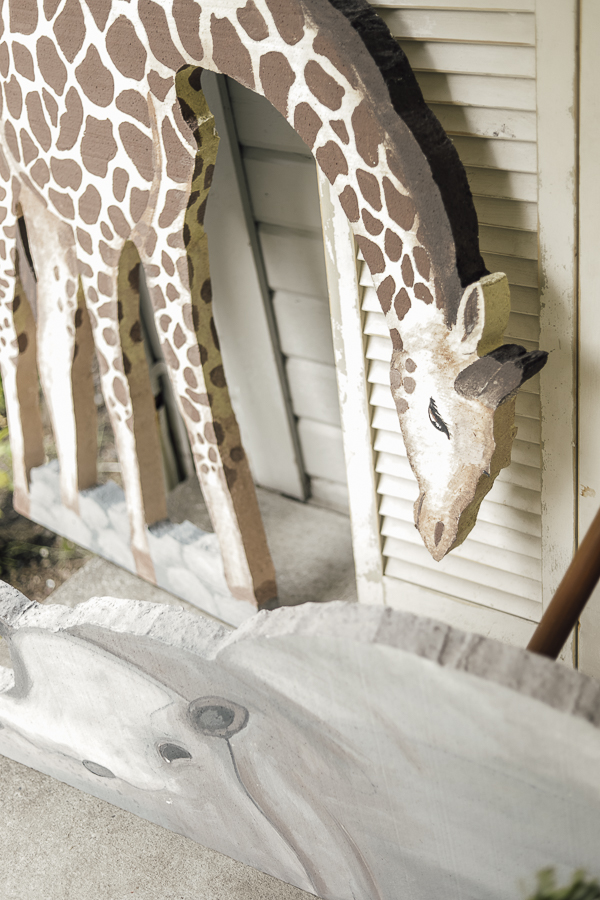
I’ll be sharing specifically about these life size stand alone animals that we made for our “In the Wild” theme camp. We used them as stage decorations along with our fun DIY Palm Trees that I shared a few weeks ago.
It was a pretty fun experience to see the campers’ faces light up as they saw these big animals appearing on stage each day! (We added one each afternoon after camp had finished for the day.)
The wonder of children at summer camp is one thing, but truly, there isn’t a limit to what 2D shape you can make with this knowledge!
Birthday parties, wedding receptions, baby showers, window displays, school plays – there’s something for everyone!
*This post contains affiliate links to products I know &/or love.
Supplies you’ll need for Stand Alone Party Decorations:
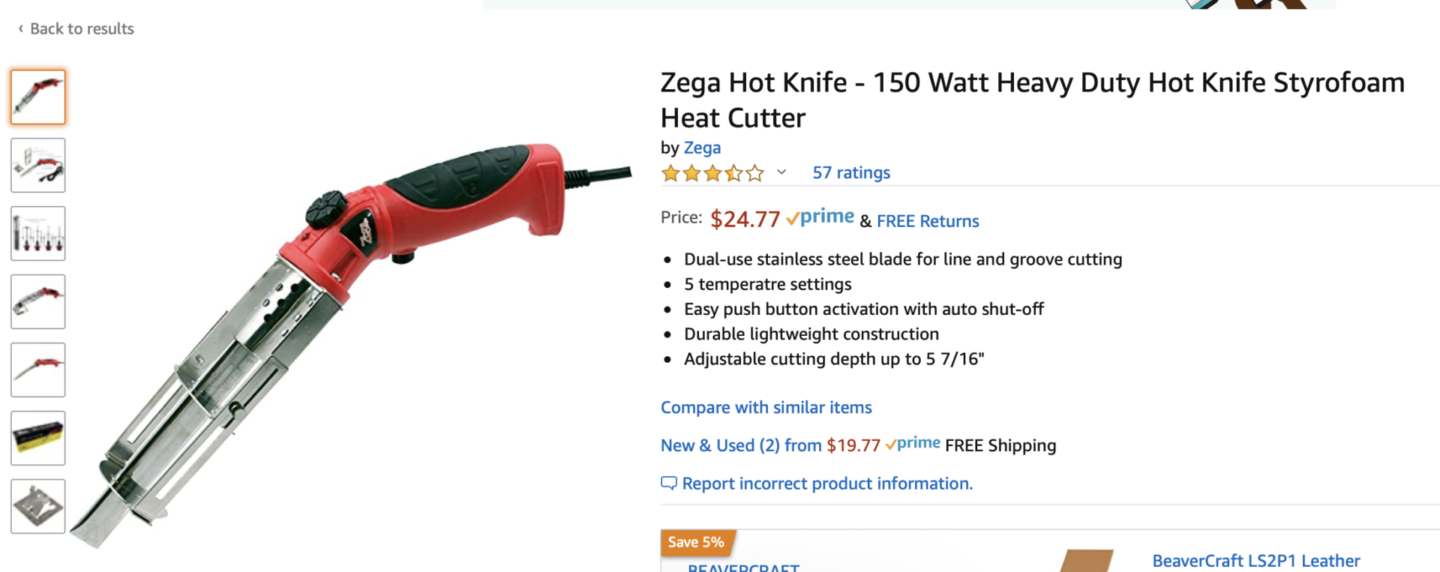
- Sheets of Home Depot Insulation (1 1/2″-2″ thick.)
- Hot Knife
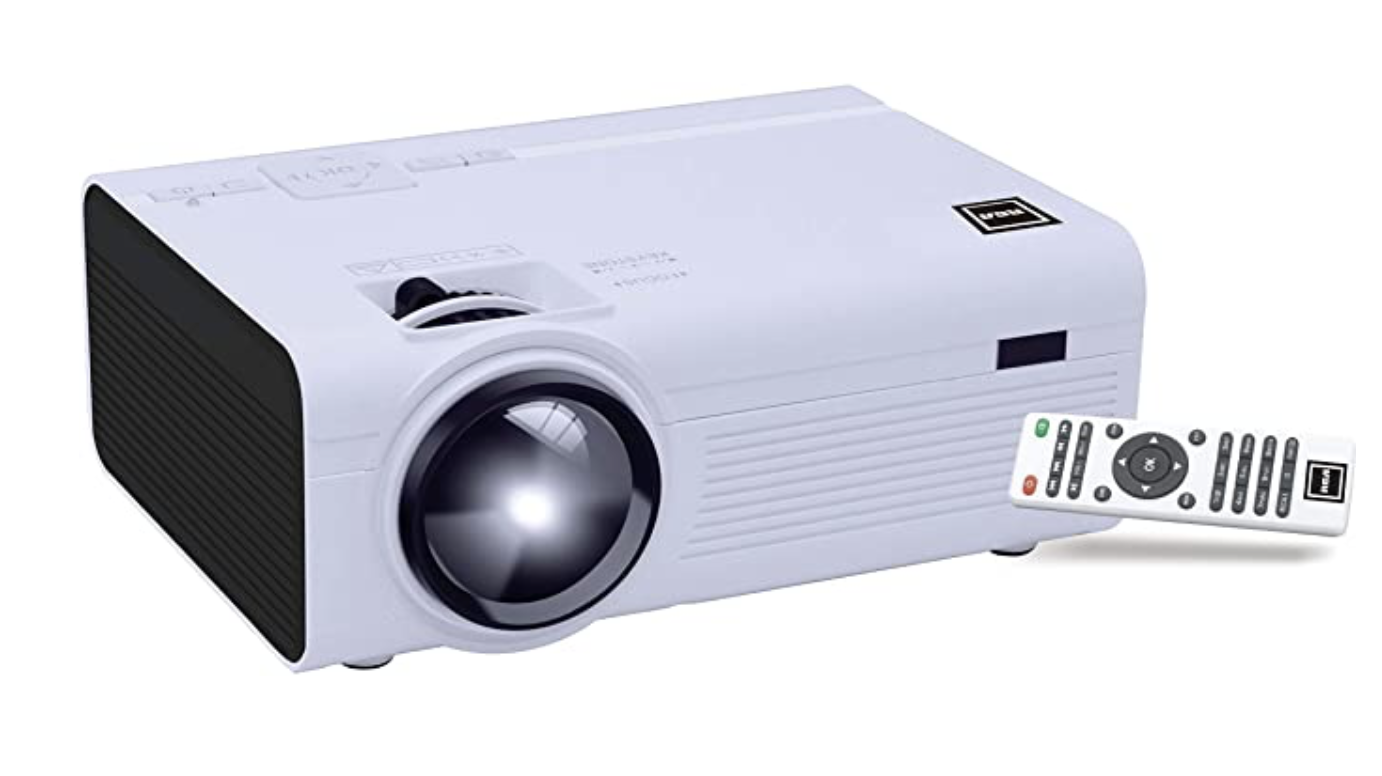
- Projector
- Tempura or acrylic Paint
- Paint Brushes
- Large Wall for a Tracing Work Surface
General Notes before we begin:
The insulation boards are 4’x8′, so plan accordingly when you are going to pick them up to be able to transport them home! They cost about $16-21, depending on the thickness.
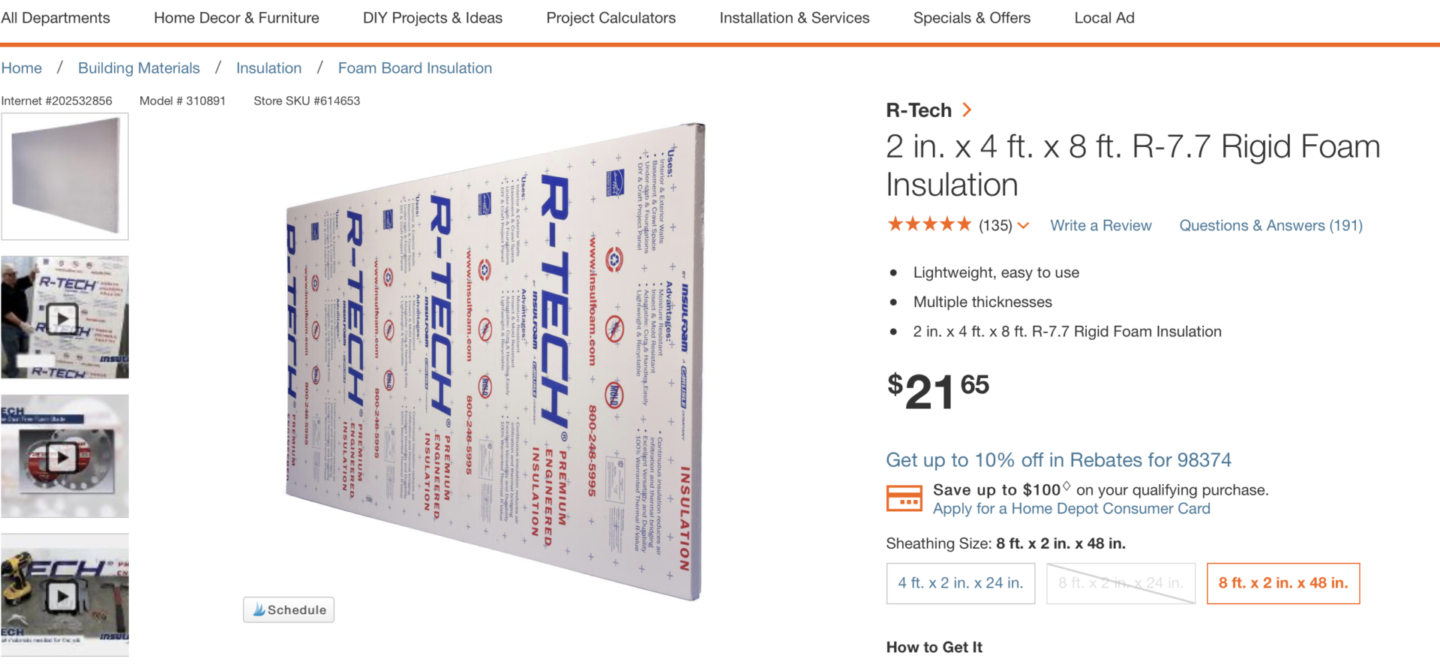
To help the cut outs stand alone, the 2″ width is best because it gives a wider base and more stability.
Plan on using tempura or acrylic paint, NOT spray paint. There is a chemical reaction when you use spray paint on this type of foam and it will actually eat away at your board. Yikes!
One of the best parts of this project is that you can use any image you want! Make sure to plan ahead of time and save it to a computer that you can hook up to a projector.
When you’re tracing your shape onto your foam, you’ll use that projector and you’ll want a large wall to work out your adjustments to get the tracing lines to the size you want!
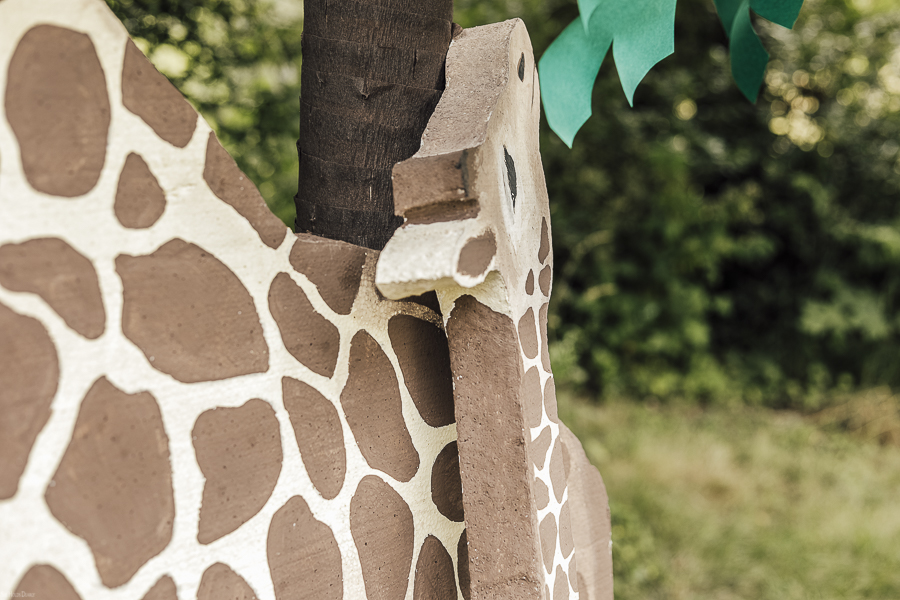
When we did our giraffe, who is basically a full 8′ tall, we used a large wall at our church and backed the projector up quite a ways until it fit how we wanted it to!
Using a hot knife to cut the shape out is a really efficient way to do it, but it can cause quite a bit of smoke, and it really stinks! So make sure to either work in a very well ventilated area, or outside (this is best if possible!).
Lastly, the foam is not water proof, so you need to be really careful when working or transporting it outside to protect it from water.
If you have any ideas for sealing these to protect them and make them more durable, I’d love to hear about them in the comments below!
The Process:
Step Number One | Peel off the plastic & silver backings from your foam insulation board.
Step Number Two | Use your projector to Trace your Image onto your Foam.
Adjust the projector backwards or forwards to get to the desired size and shape!
We traced our shape onto our foam with regular sharpie markers.
Step Number Three | Cut Out your Shape with a Hot Knife.
Use the hot knife to carefully cut around the outside edge of your sharpie lines.
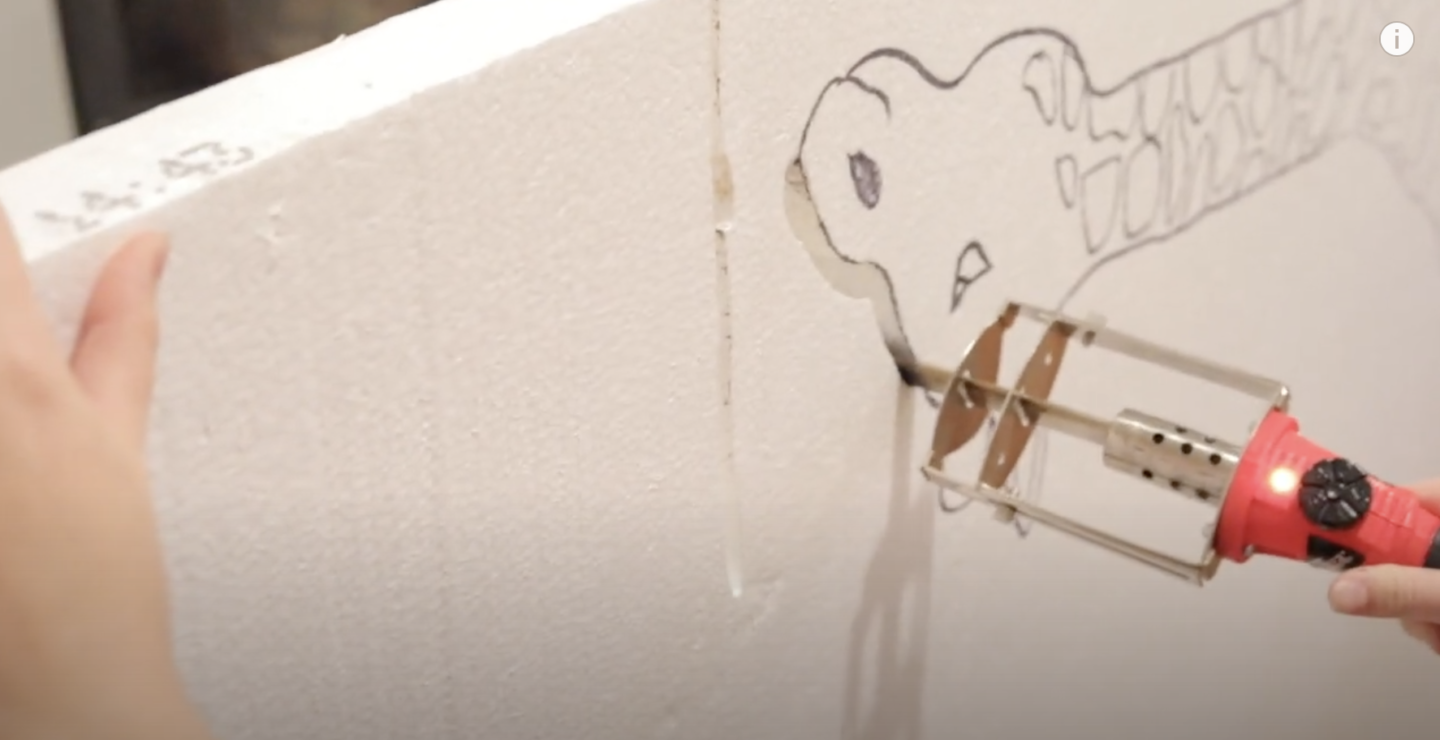
Note | Because the hot knife works by melting away the thin piece of foam around your shape, you need to account for that when tracing your items. Never put two cut lines closer than maybe 1-2″ because you’ll accidentally melt through one line while cutting the other.
Remember to work in a well ventilated area!
Step Number Four | Paint your Shape!
Use tempura or acrylic paints!
I’m not a strong free hand painter, so I traced any applicable lines (like the giraffe spots as an example) while still using my projector, and then followed the sample picture closely while painting and shading.
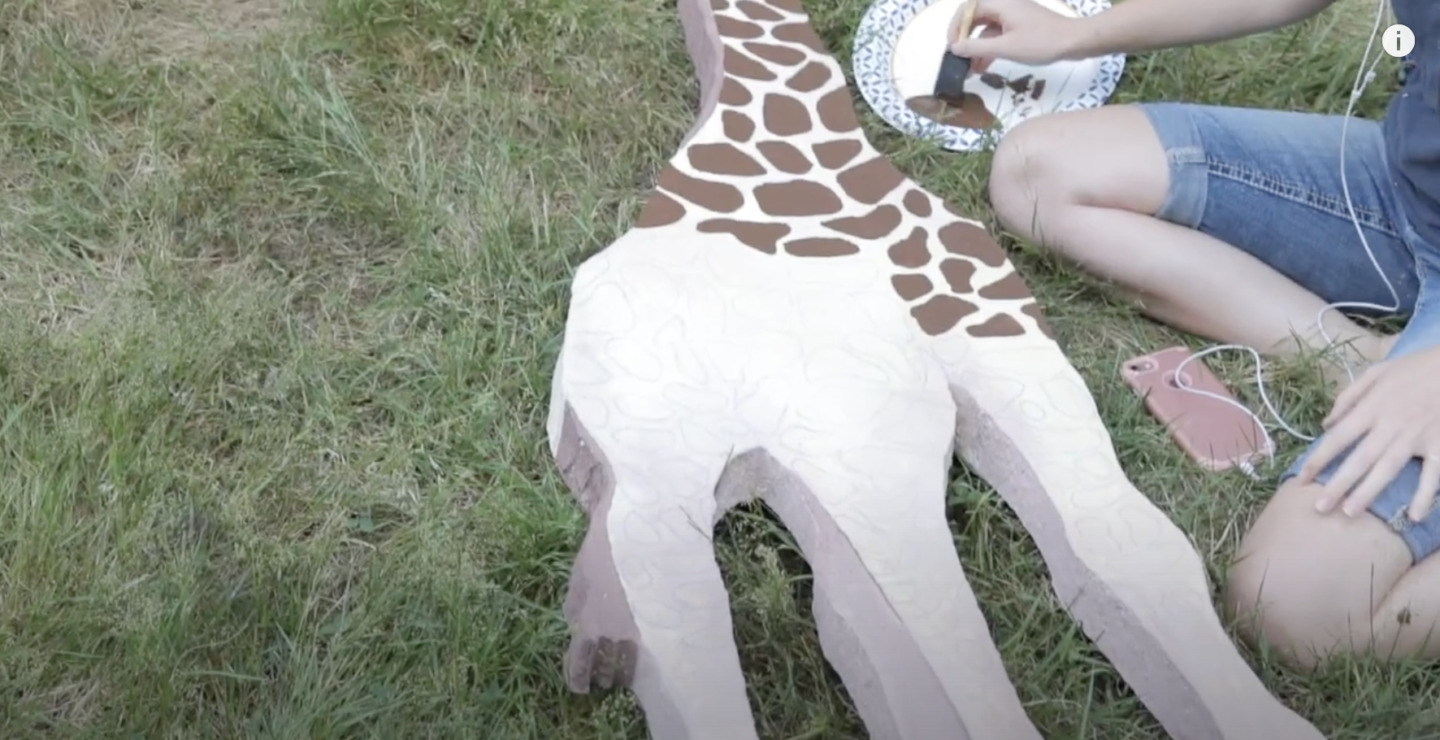
My daughters are talented painters, and helped immensely finishing all the details to really make these realistic!
We painted even the edge of the foam to make sure the original bright white color wasn’t peaking through.
And that’s it!
I can’t wait to see your creativity as you use these skills to make statement pieces of your own!
If you are on Instagram, I love seeing what these tutorials inspire you to do! Please tag me and #sheholdsdearlyinspired so I can see and share them!
Uses For Your Own Stand Alone Party Decoration:
I love throwing fun, themed parties, and now that we’ve gotten some practice with this process, I’m excited to try this out on a stand-alone party decoration for another party someday!
If you like theme parties, too, here are some of the ones we’ve done in the past few years!
- Teen Boho Birthday Party
- Anne of Green Gables Party
- Narnia Party
- Pride & Prejudice Party
- Where the Red Fern Grows Party
I’d love to hear which one was your favorite!
Pin this for Future Reference:
Until next time,


