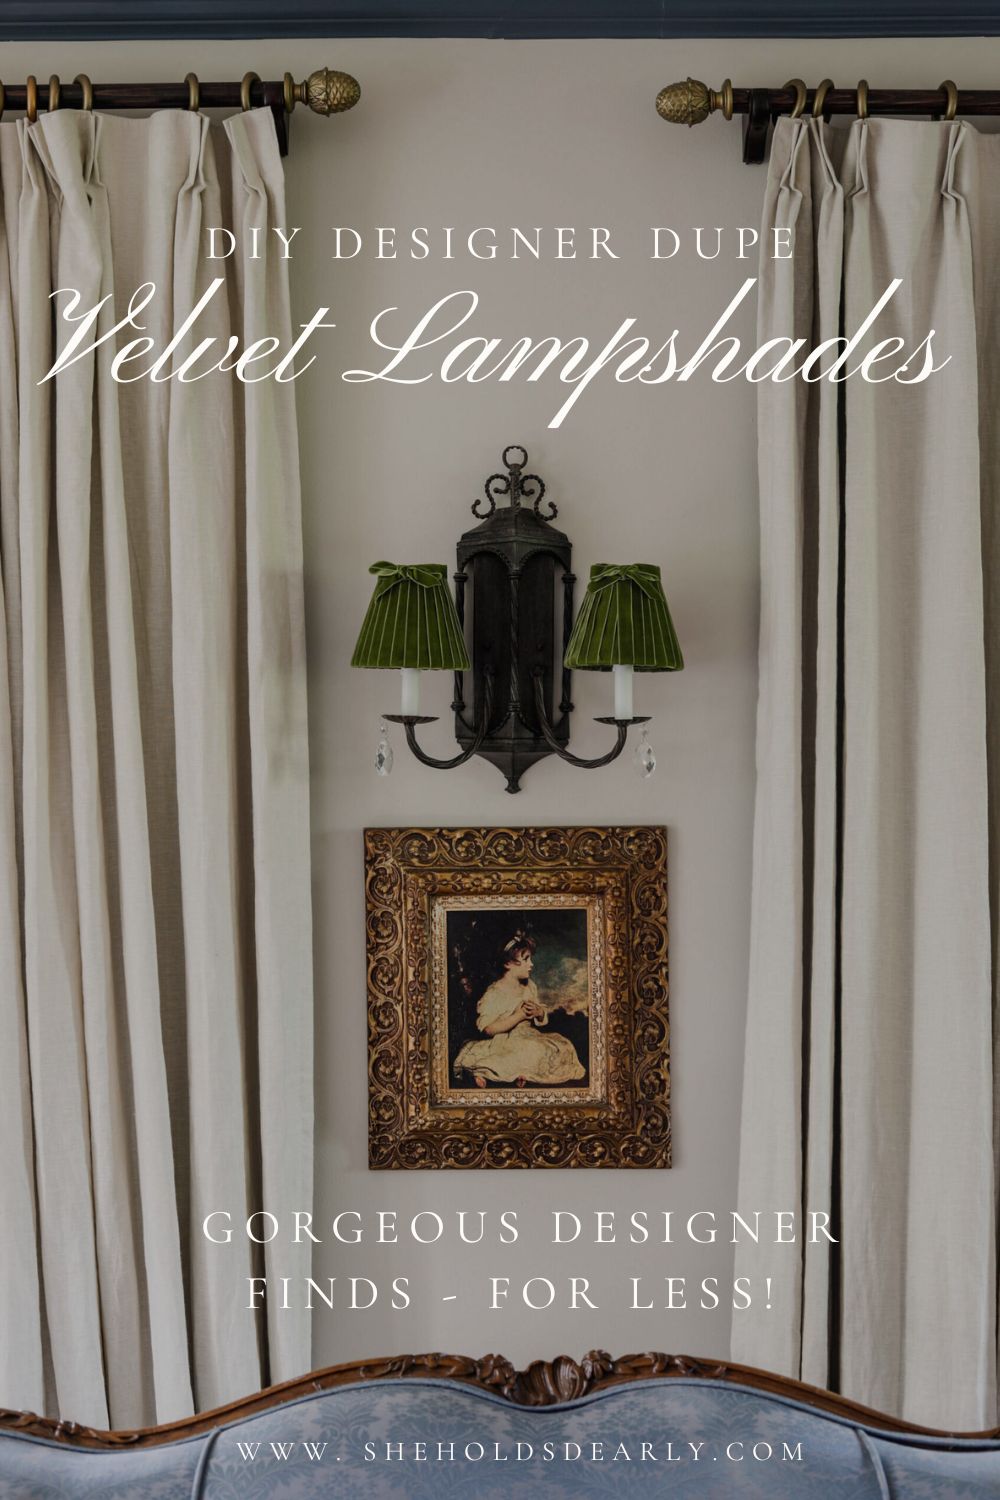
How to Make a Designer Dupe Velvet Lampshade
Looking for a velvet lampshade? Instead of paying $60+ for a designer option – I created a DIY version for far less! Let me show you how.
This post is part of a new series that I’ll be doing on YouTube and on the blog making Designer Dupes of home decor items I see & love!
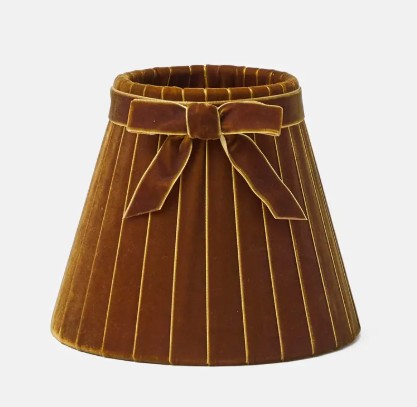
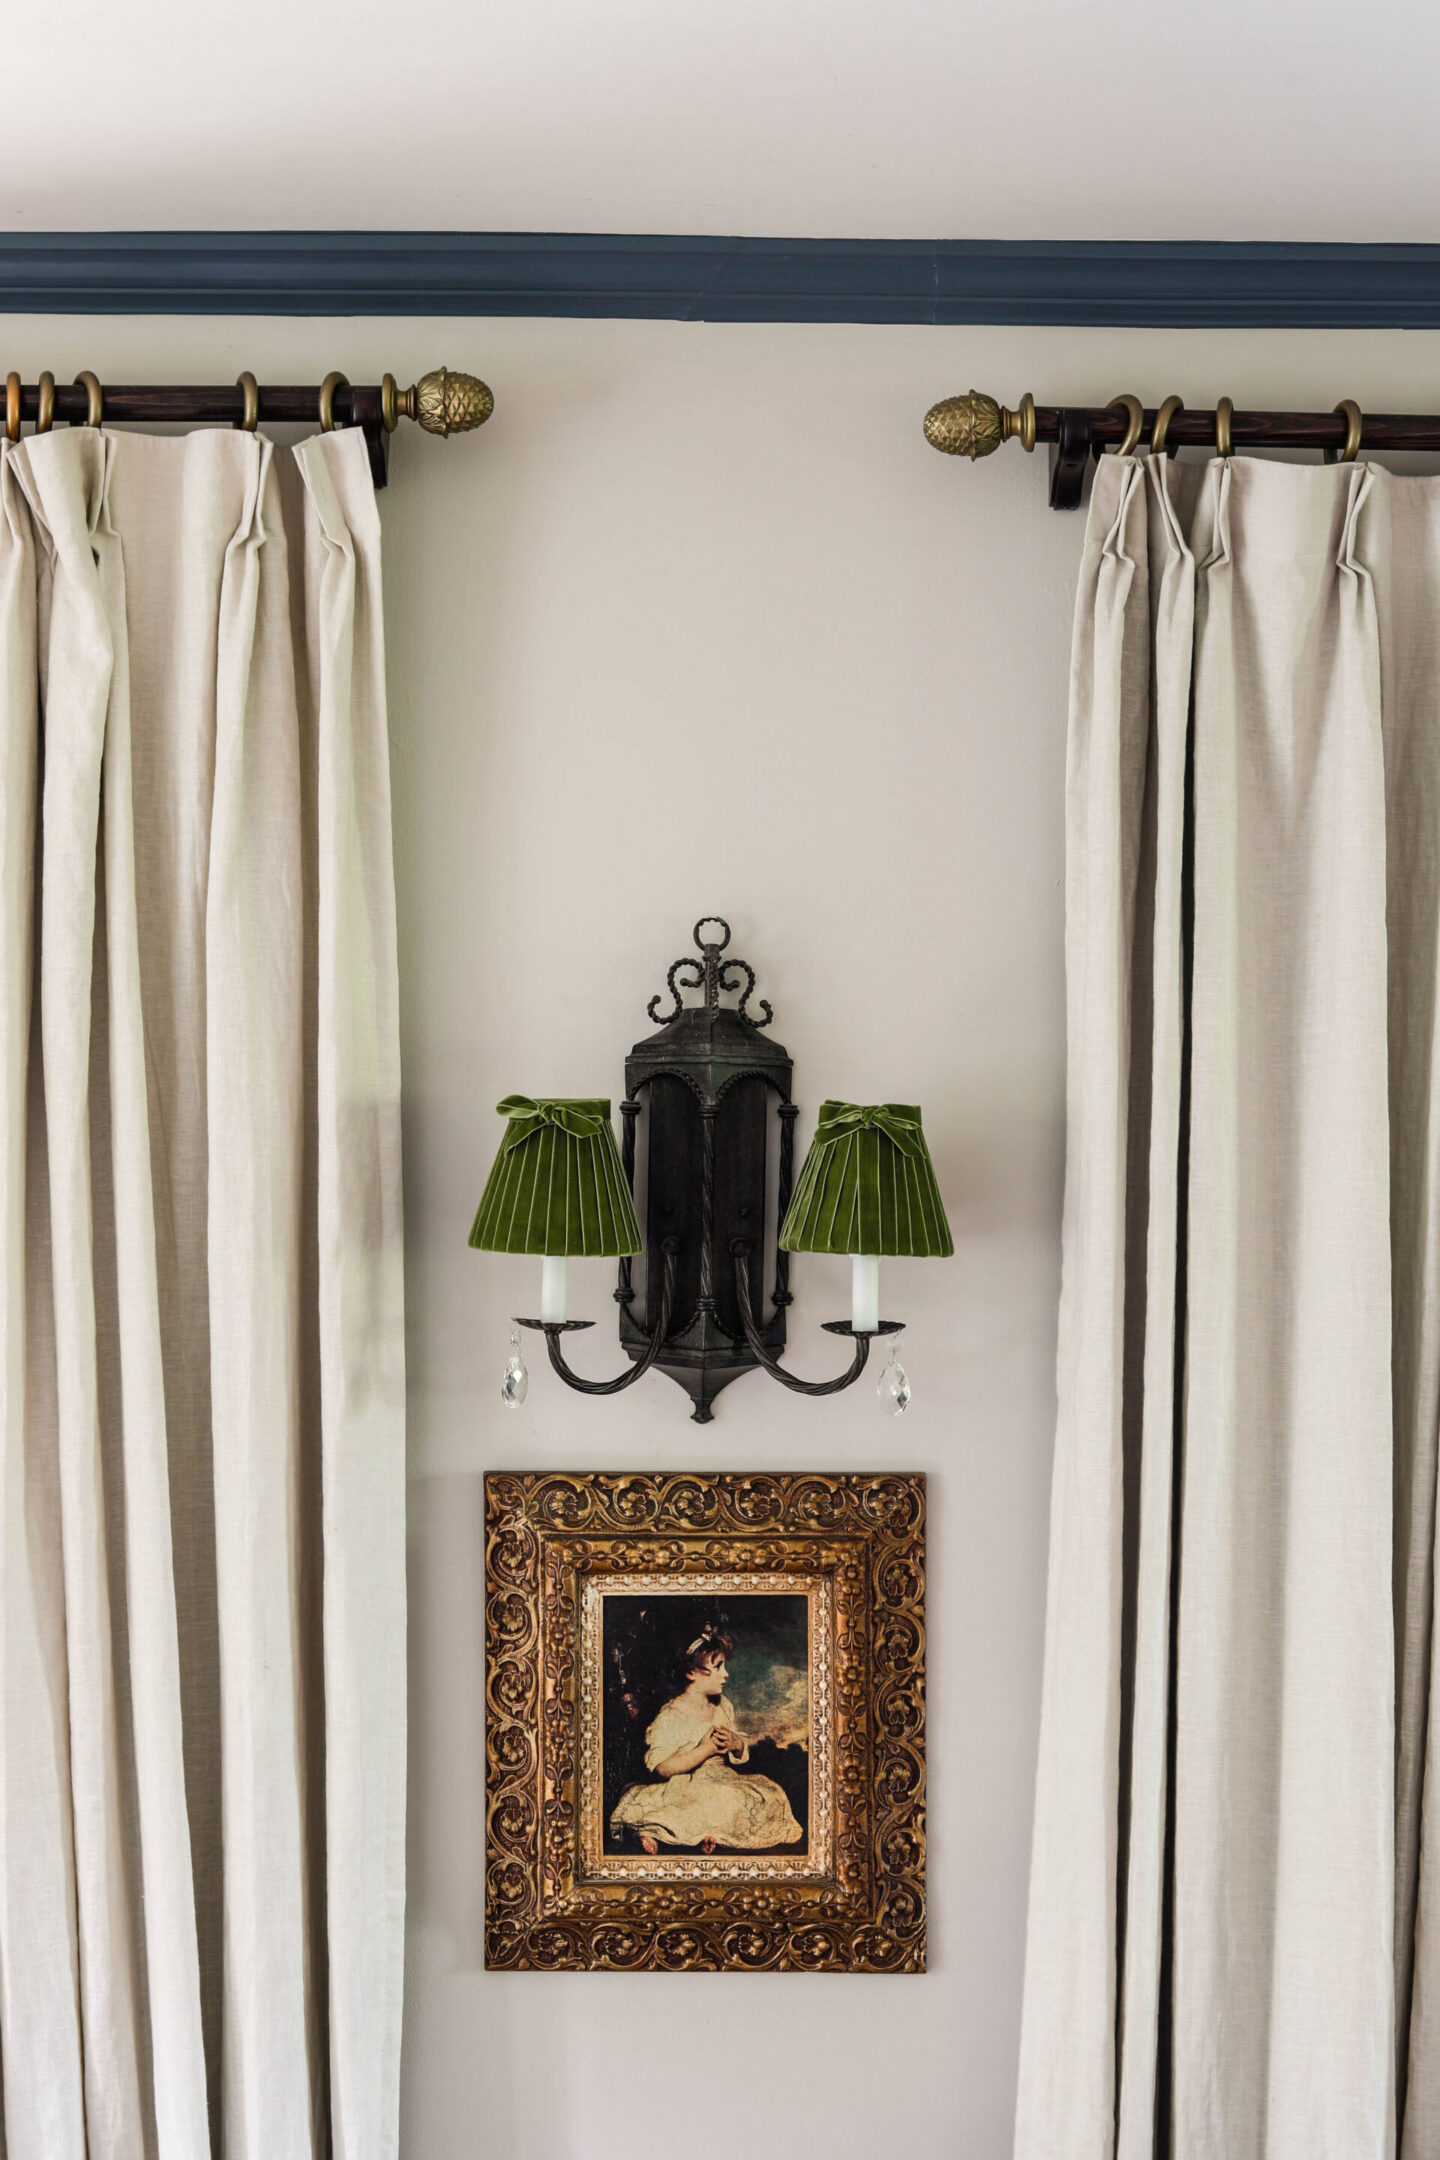
When I saw this cute velvet lampshade on the Nordstrom website for $64 – I had two thoughts.
The first, that I knew I wanted to use velvet lampshades for my living room sconce and second – that I could make a DIY Dupe version for far less money.
The Cost for a DIY Velvet Pleated Lampshade
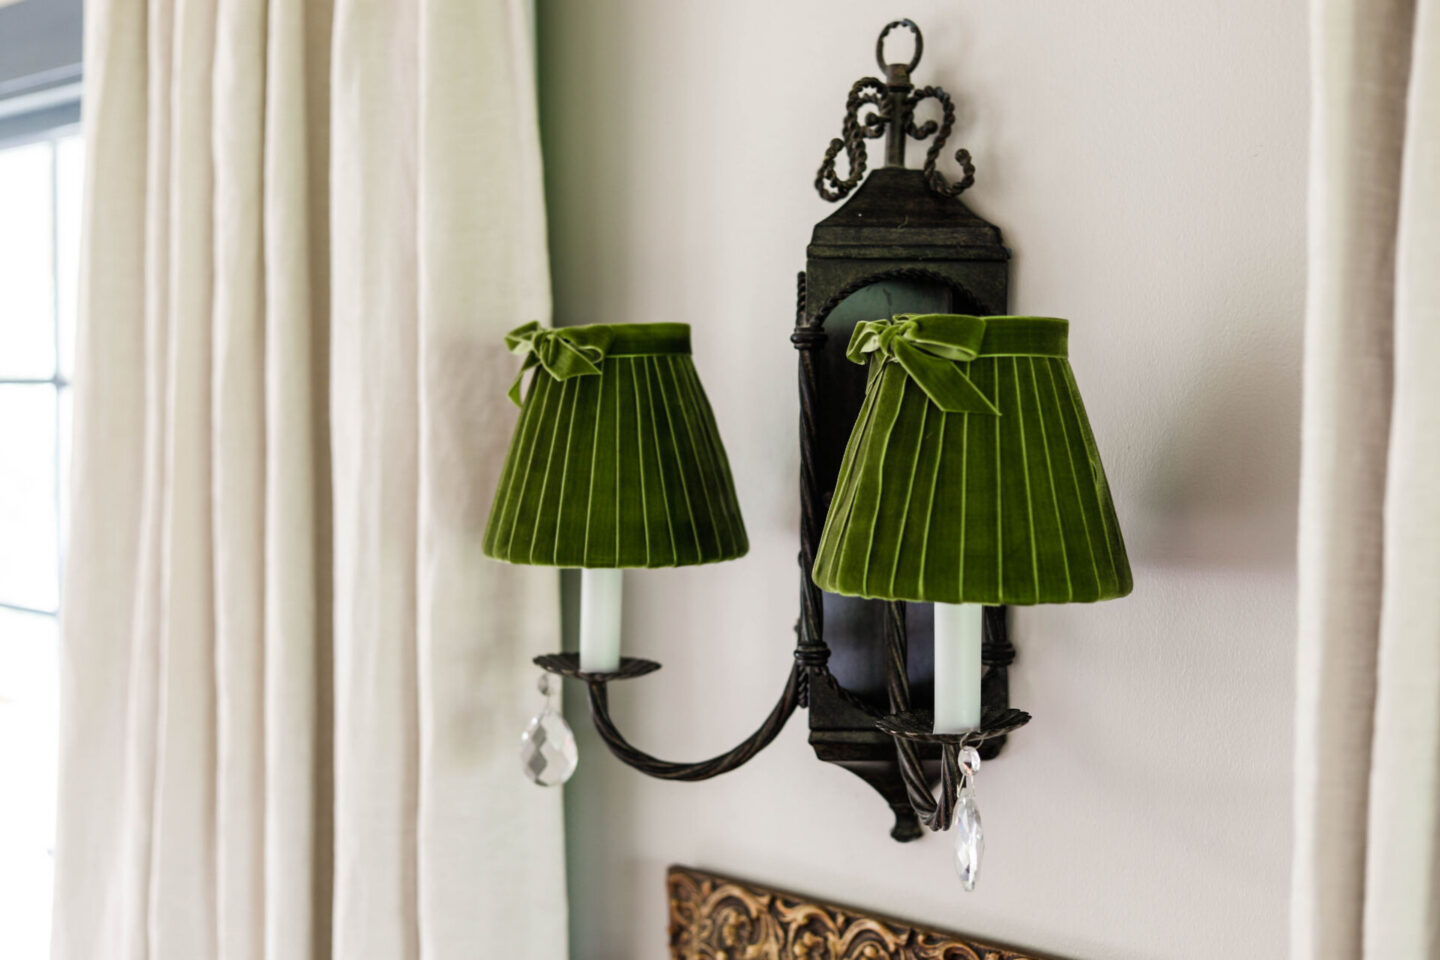
These two lampshades turned out to be FREE for me, since I already had both the basic white shades that I could cover, and enough beautiful green velvet ribbon to use.
If you were purchasing your materials new, you’ll spend about $20 per lampshade, and the price decreases if you thrift the shades &/or ribbon!
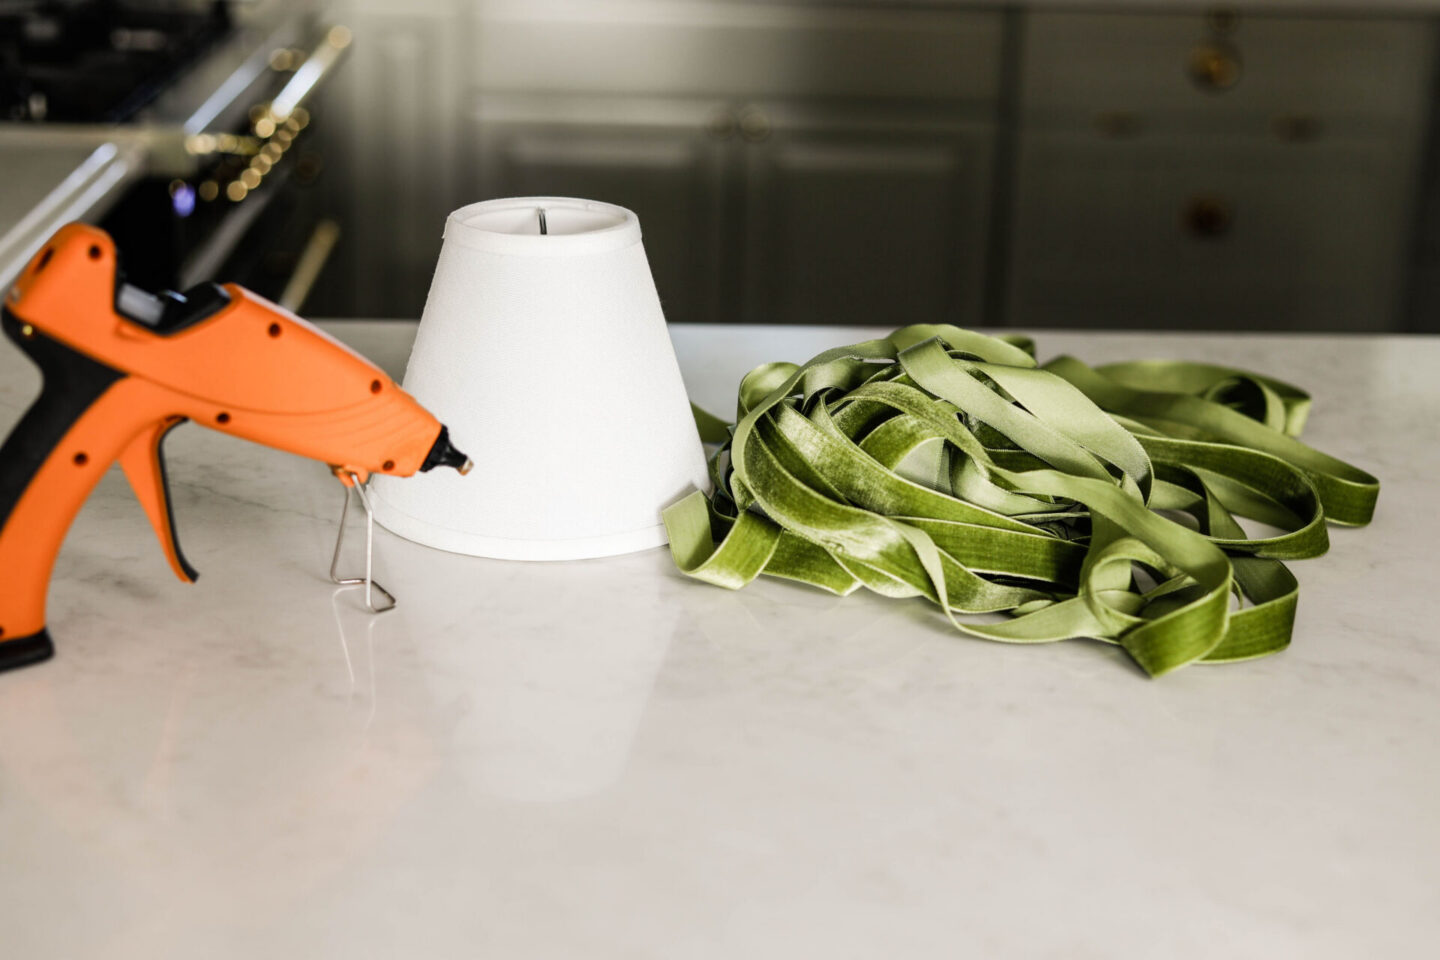
Supplies
- Basic Lampshades that fit the lamp you’re working on | For small chandelier lamps, you can purchase these on Amazon.
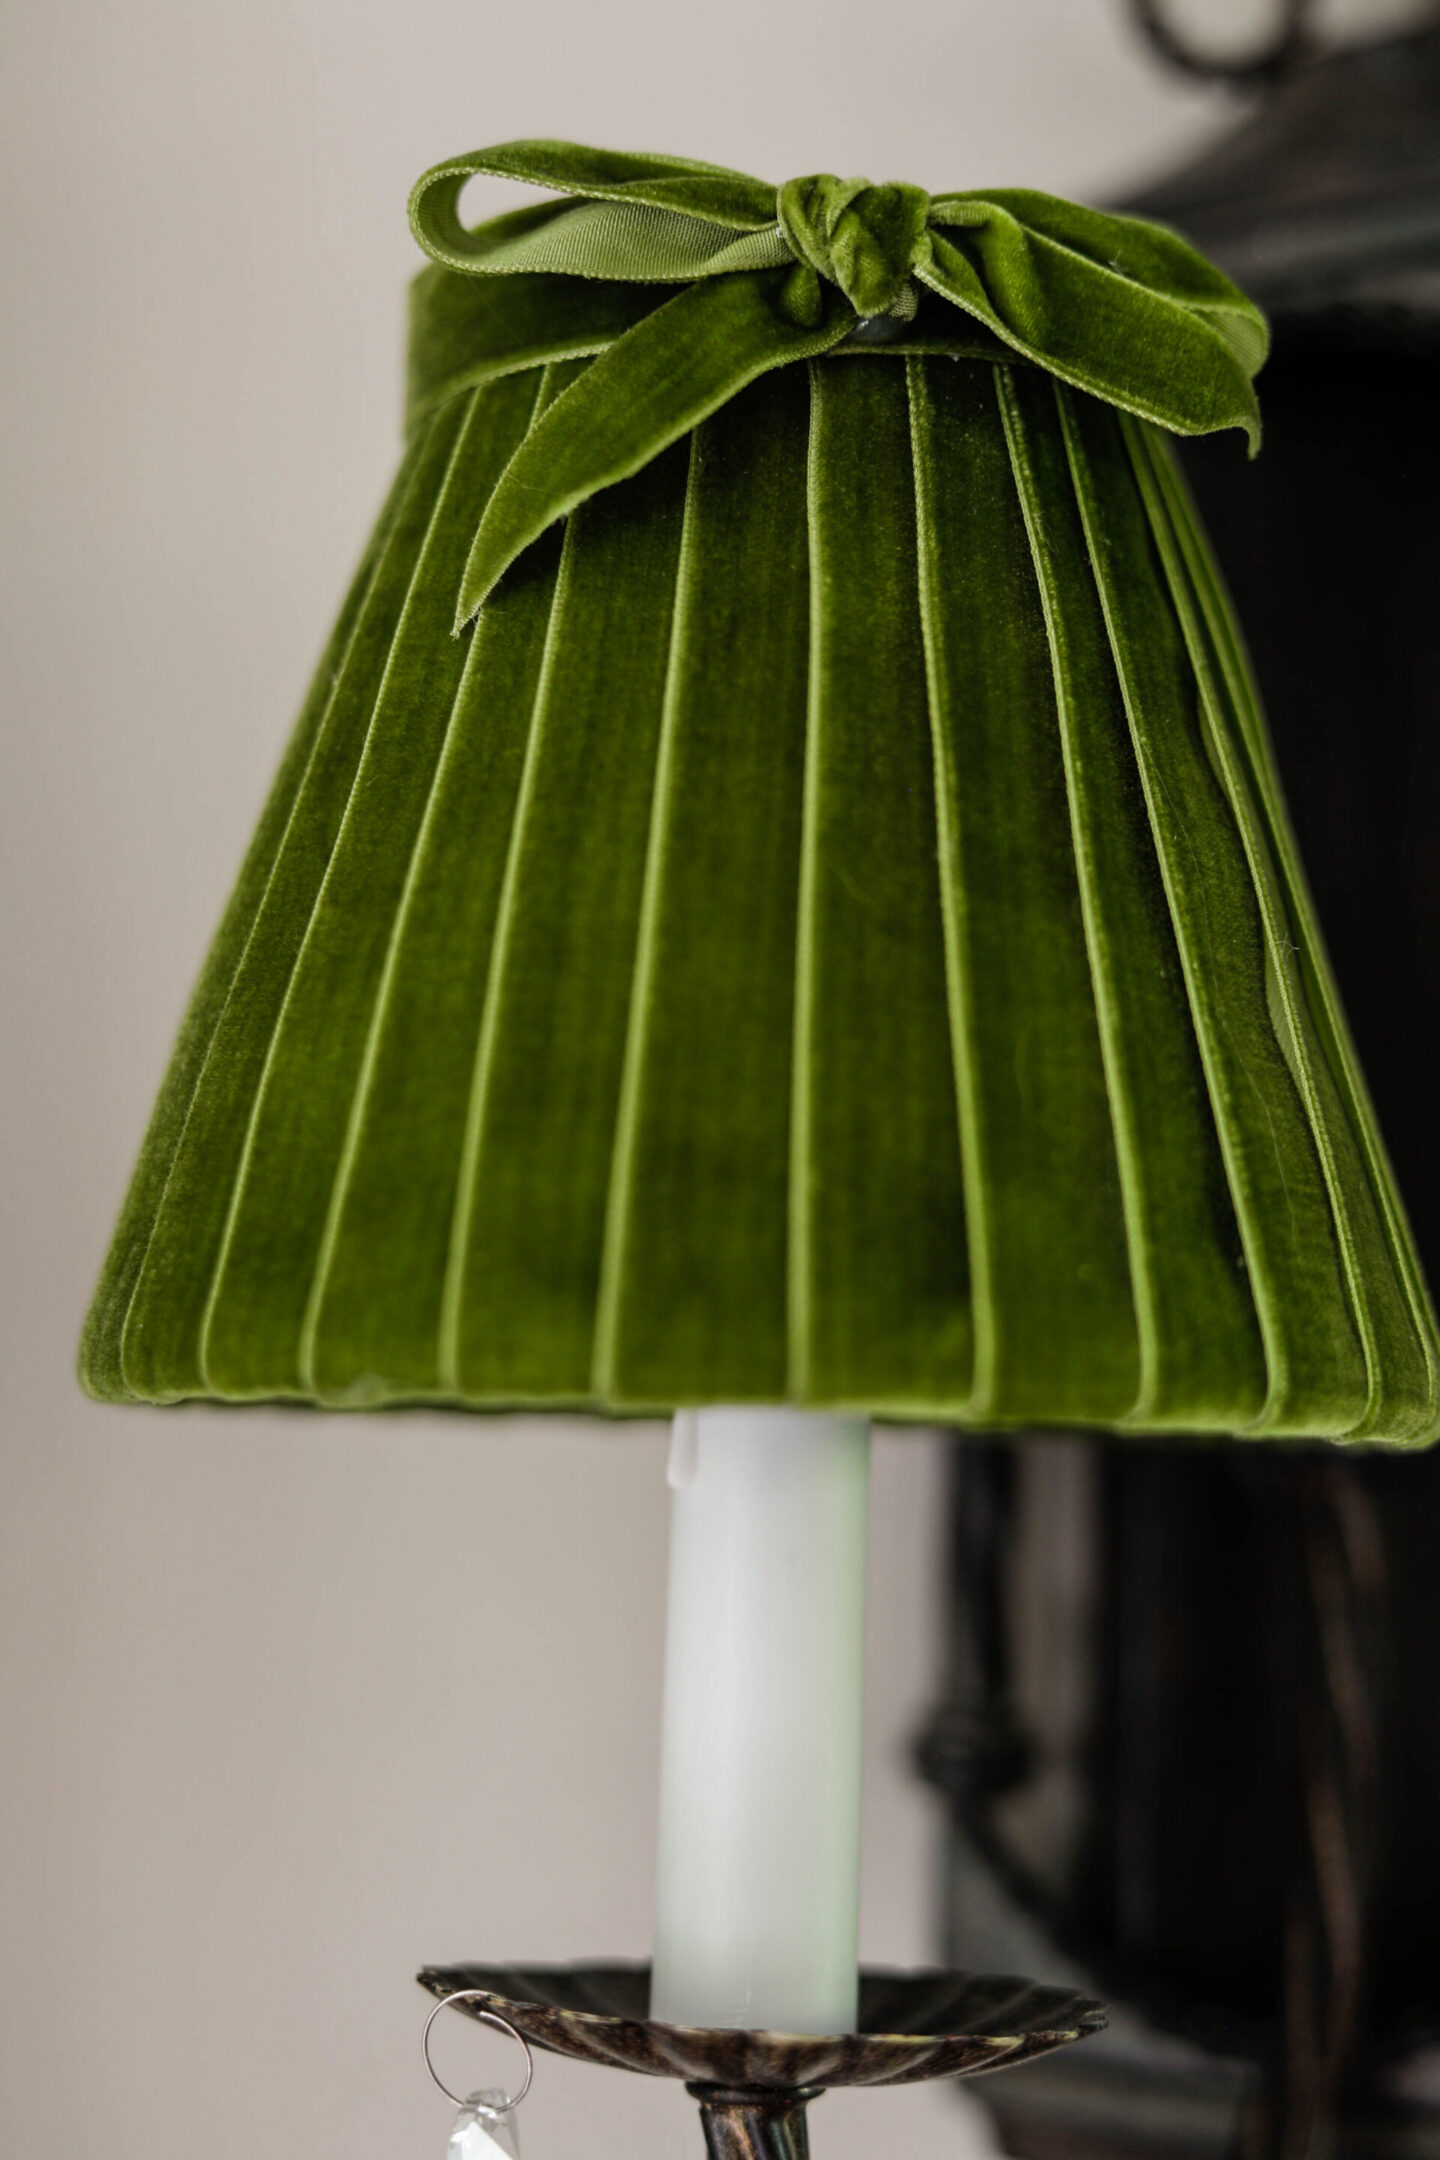
- Velvet Ribbon | I used 3/4″ wide velvet from MayArts | For each of my shades, I used 28 strips cut approximately 7″ long.
- Hot Glue Gun
- Scissors
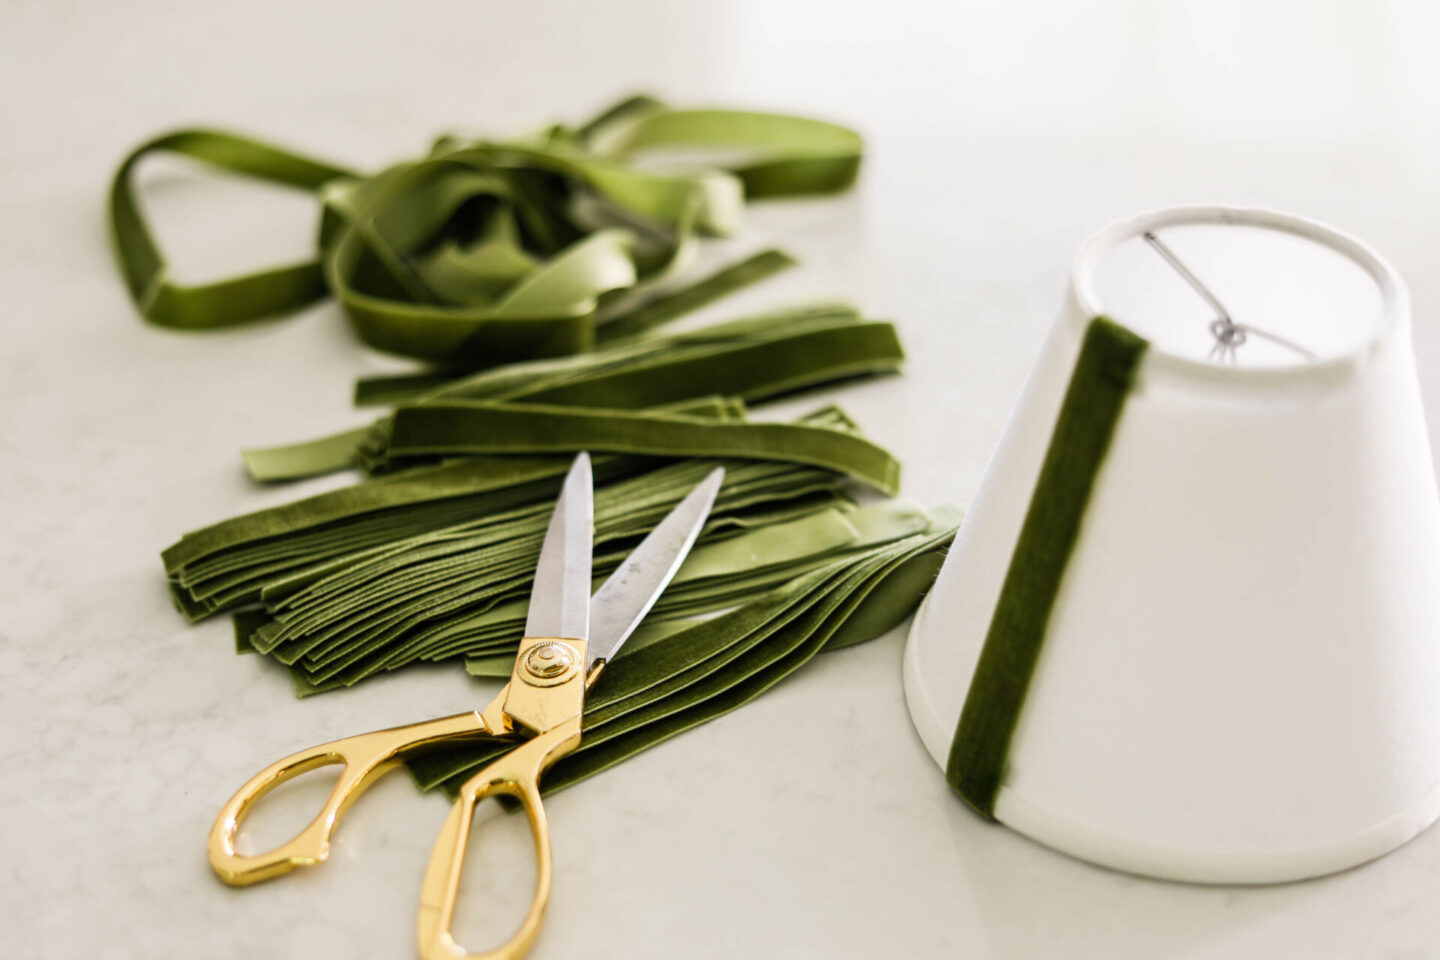
The Process to make DIY Velvet Lampshades
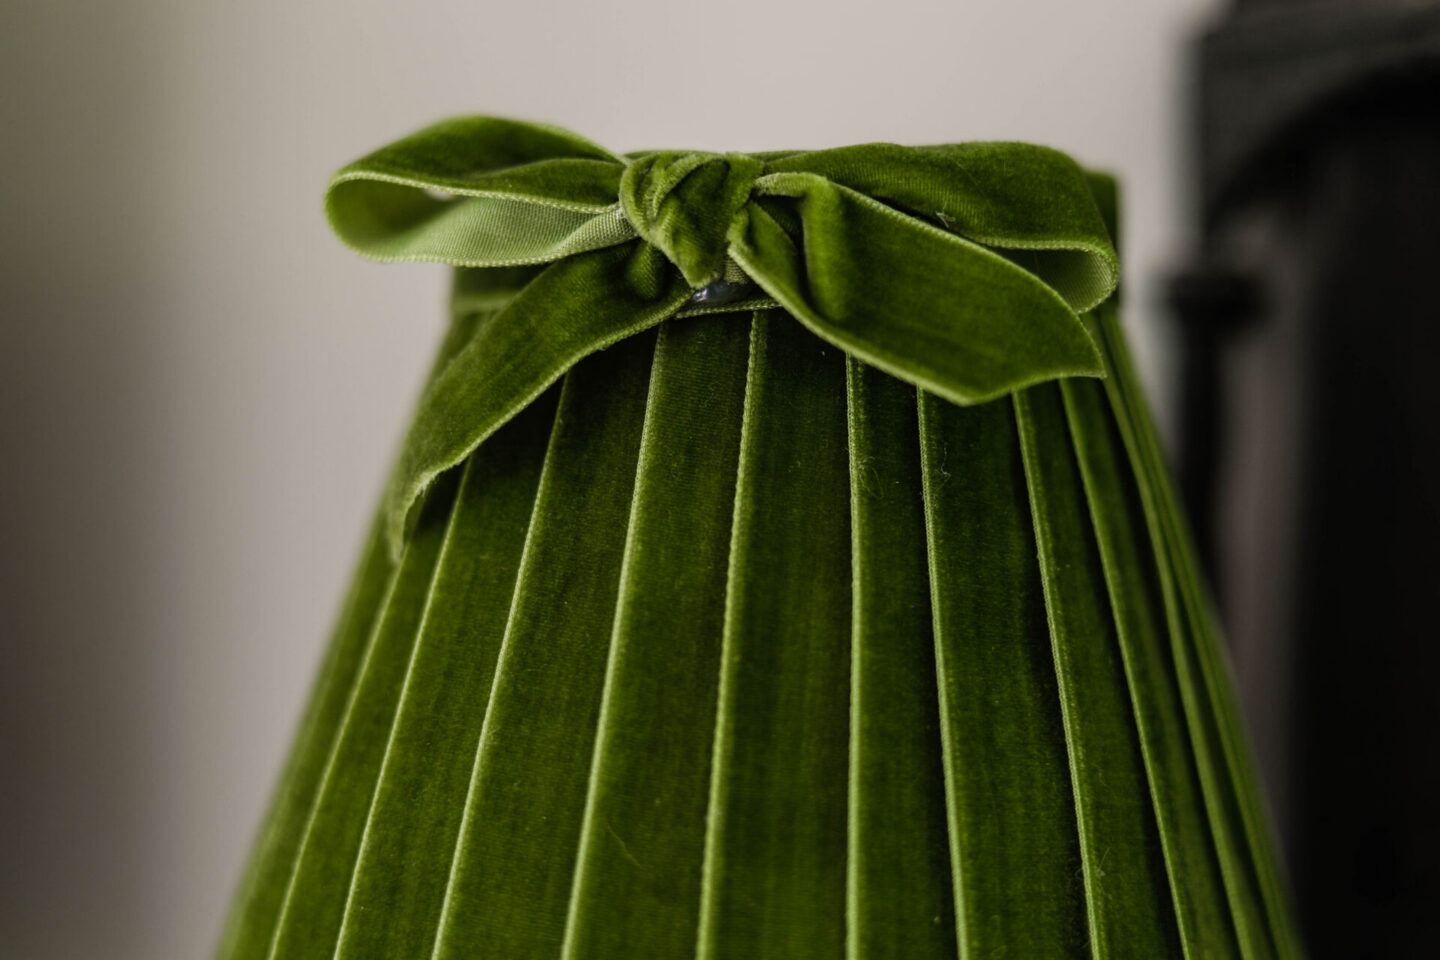
- Cut out the strips of velvet ribbon. I measured mine against my shade with an added 1″ of length so that I could fold them over 1/2″ at the top and bottom to glue them down.
- Add a dot of glue inside the top of your shade where the pre-existing seam is.
- Place 1/2″ of your ribbon over the dot of glue and straighten it down the side of the shade.
- Secure the second end with another dot of glue.
- Continue adding the strips of ribbon straight up and down until the shade is covered.
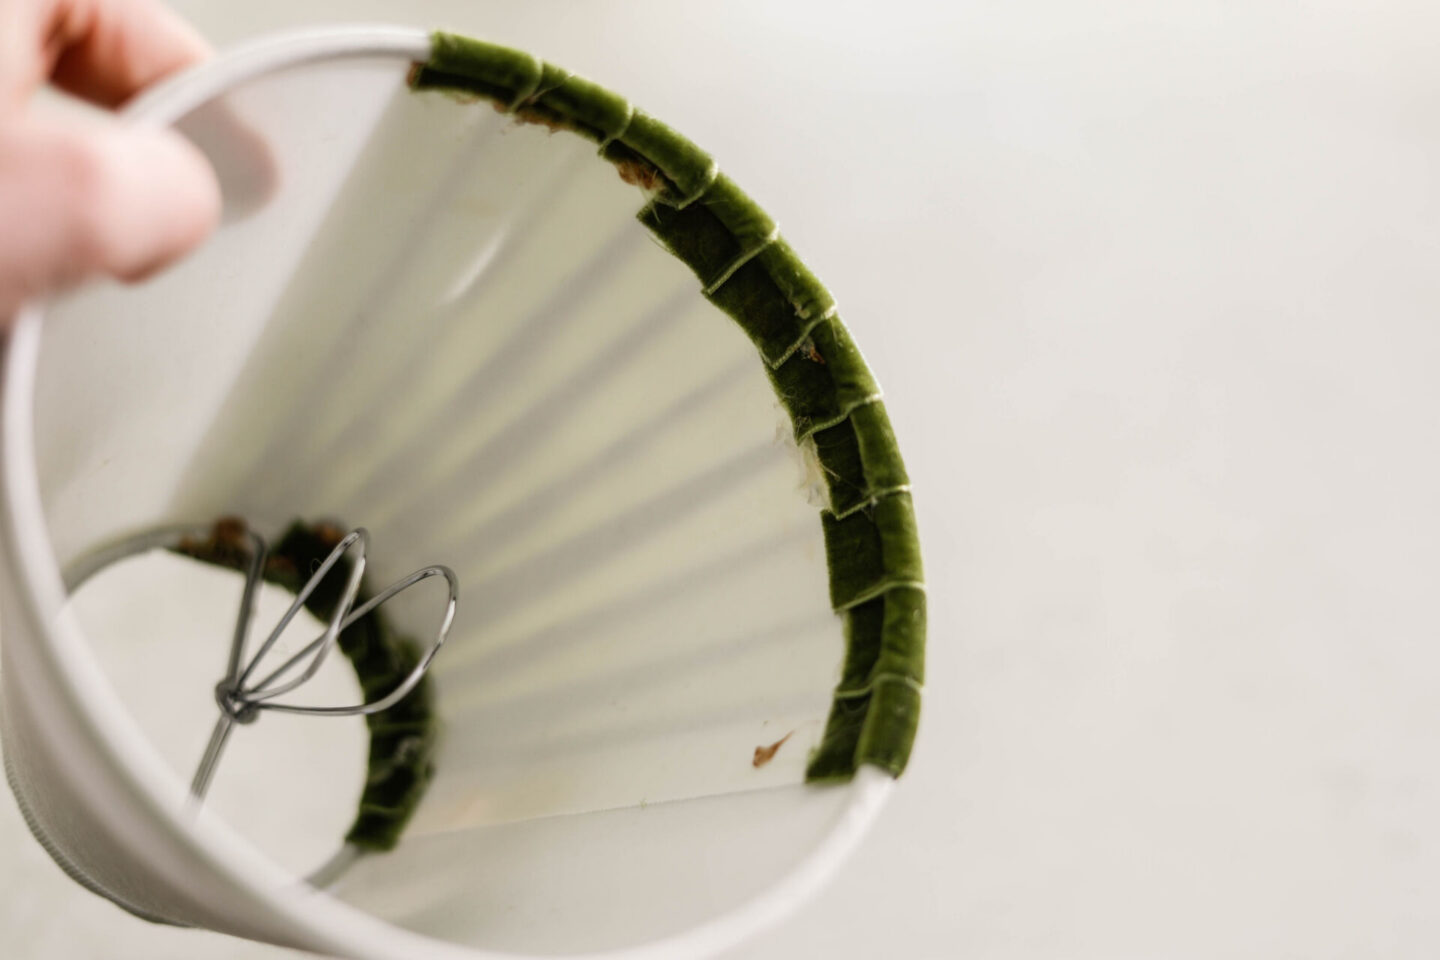
Because you are trying to keep a straight line with your ribbon, the top sections of your ribbons will overlap the piece below them by about half the width of the ribbon, with the base overlapping the tiniest amount.
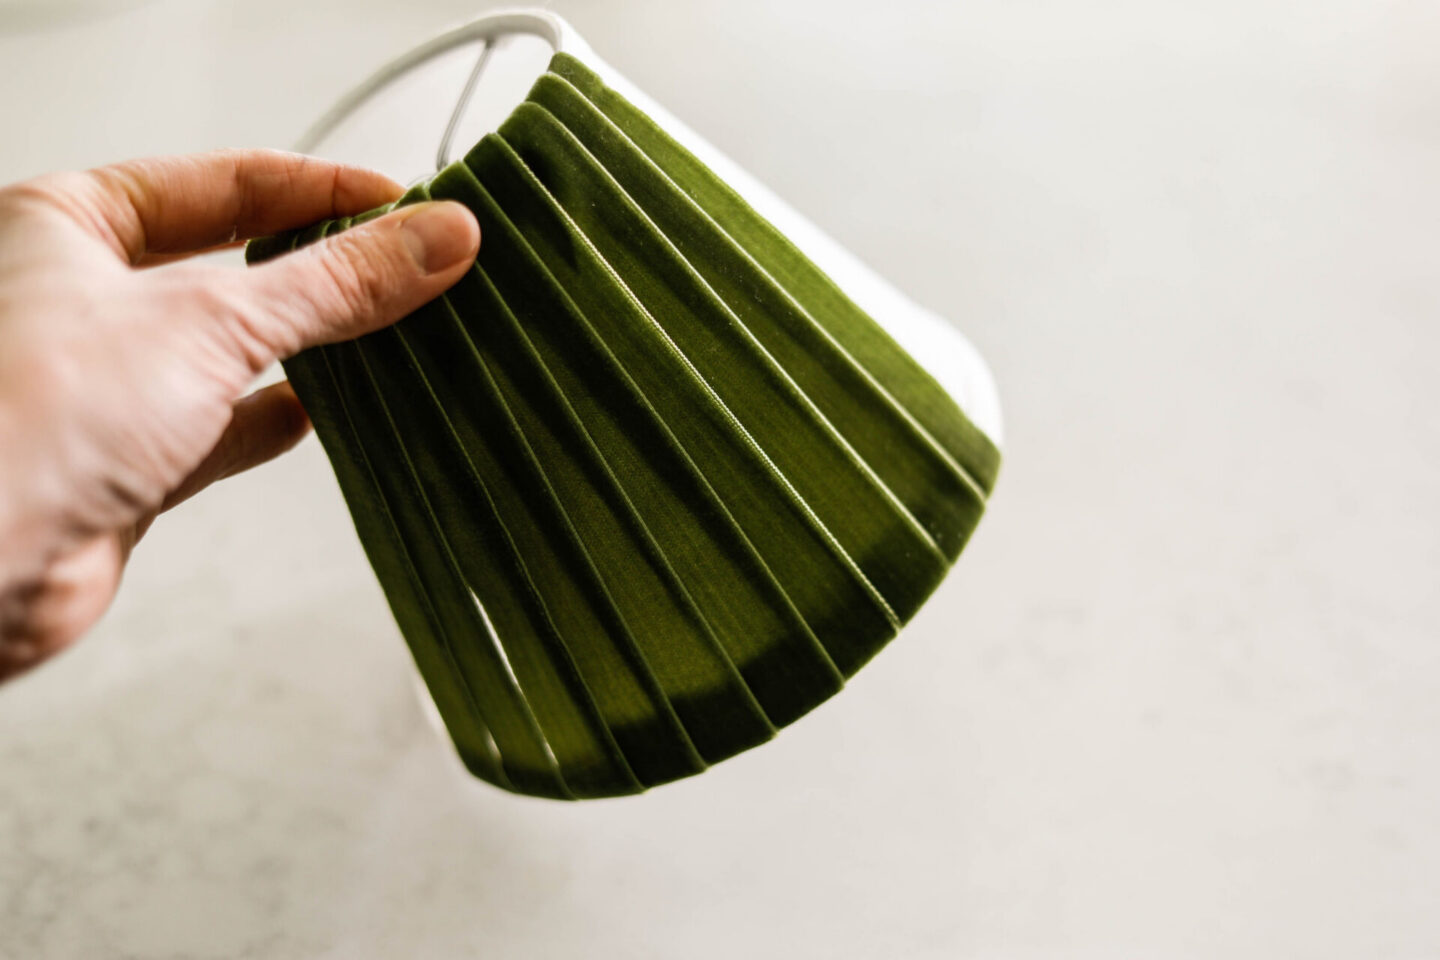
Once you’re finished with all of the vertical lines – it’s time to add the finishing touches!
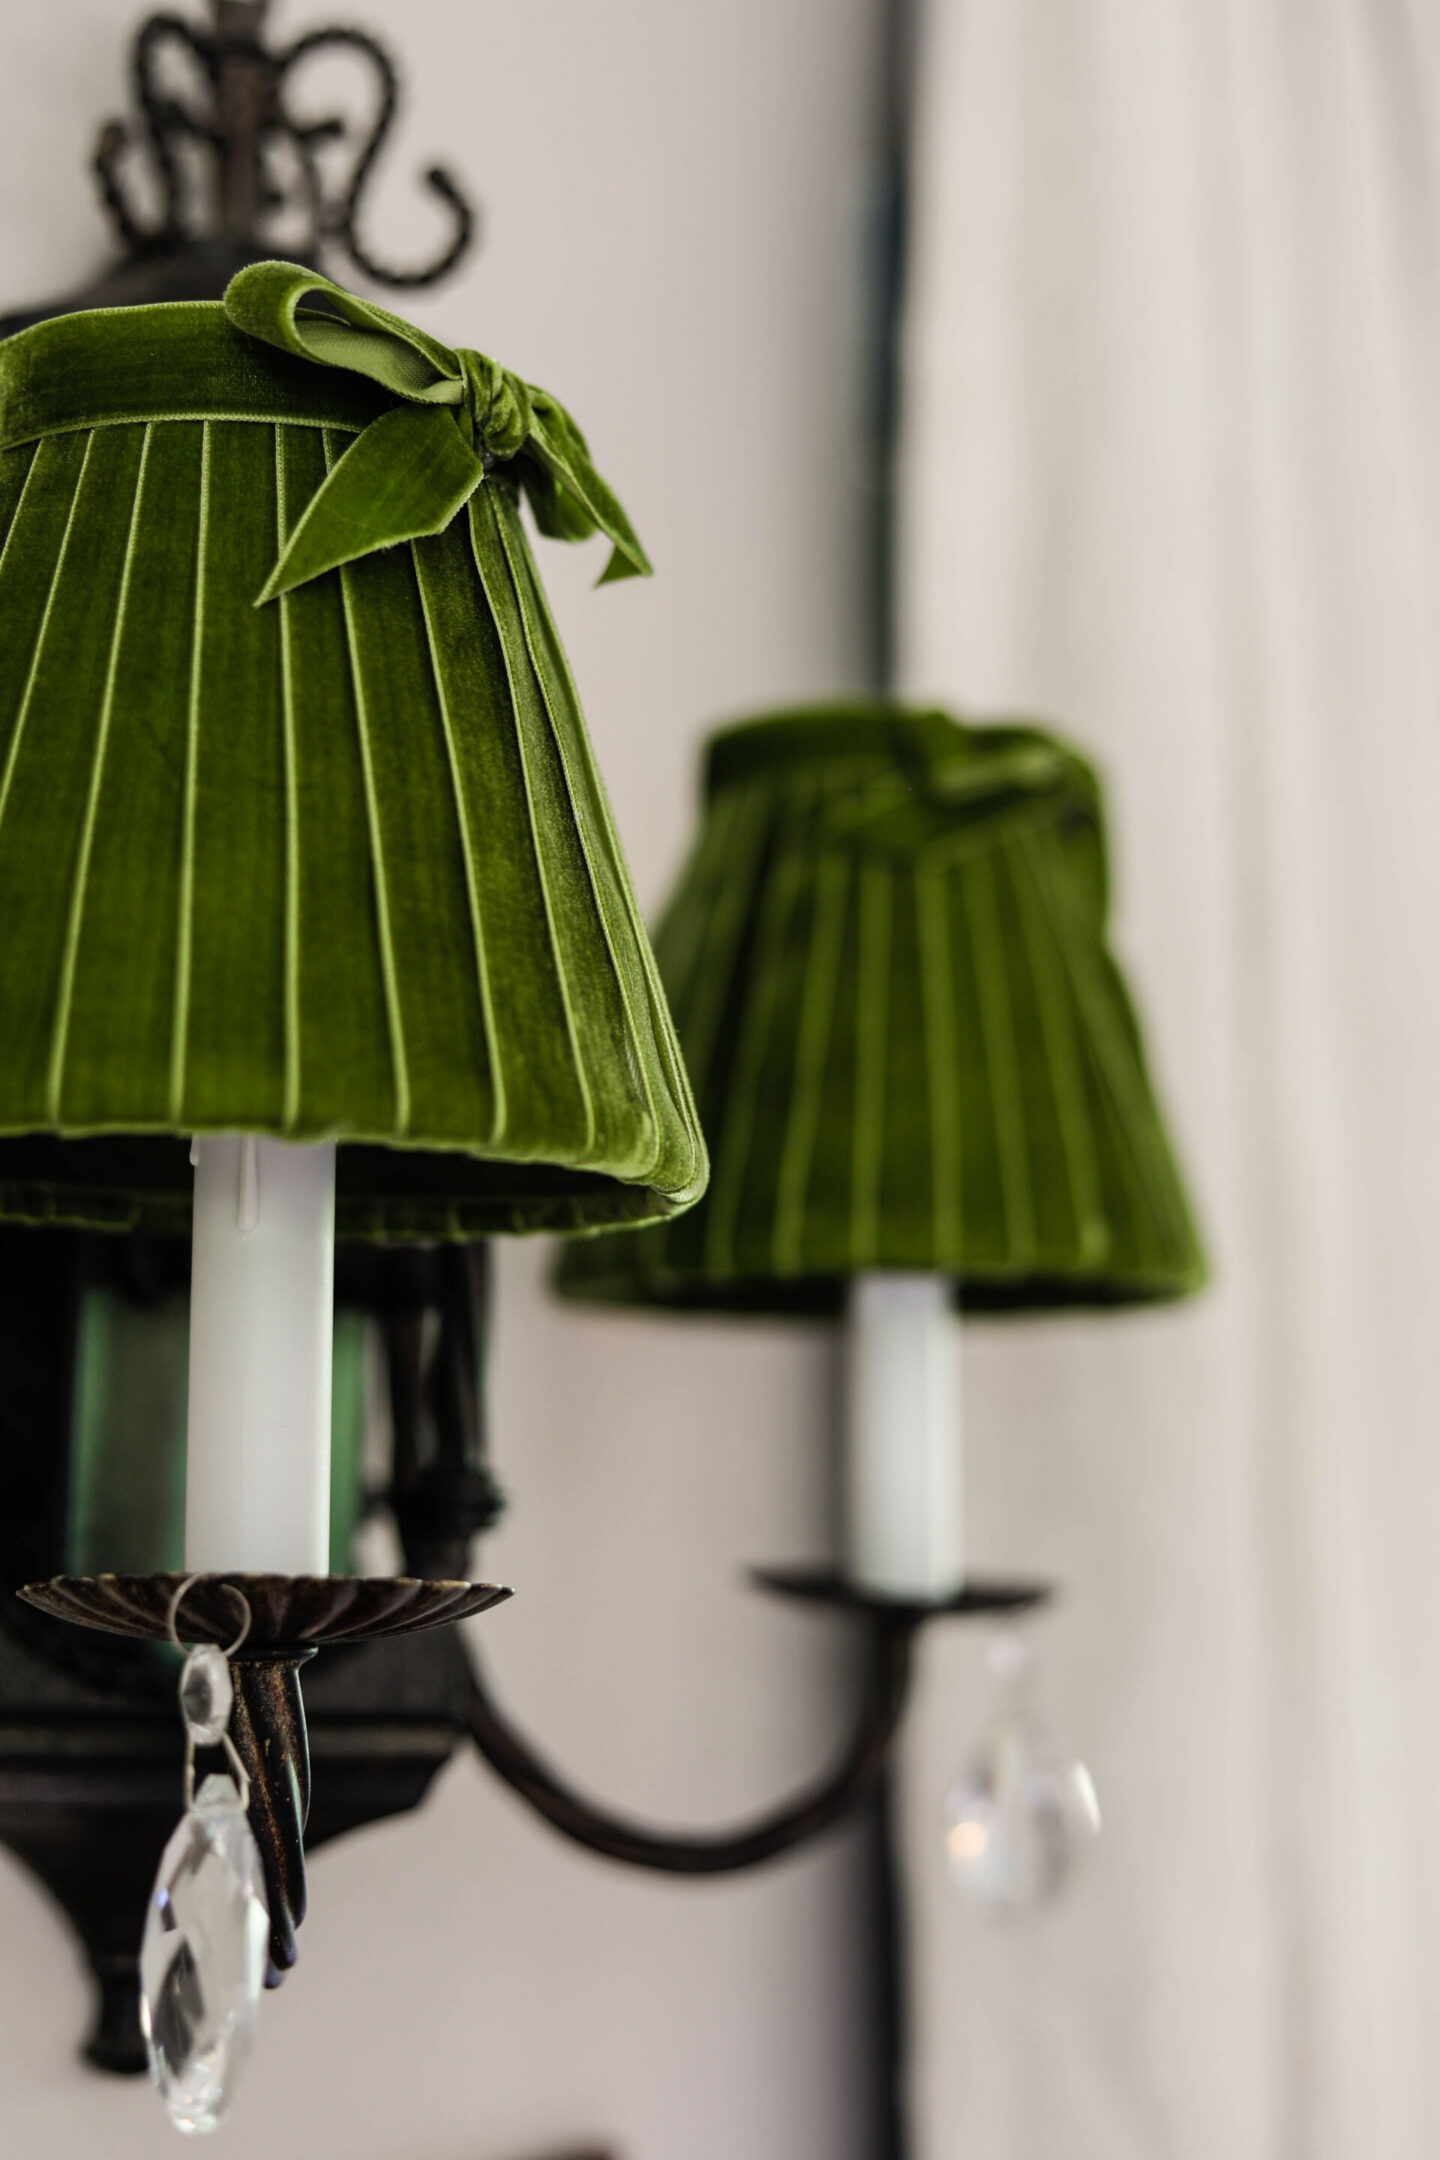
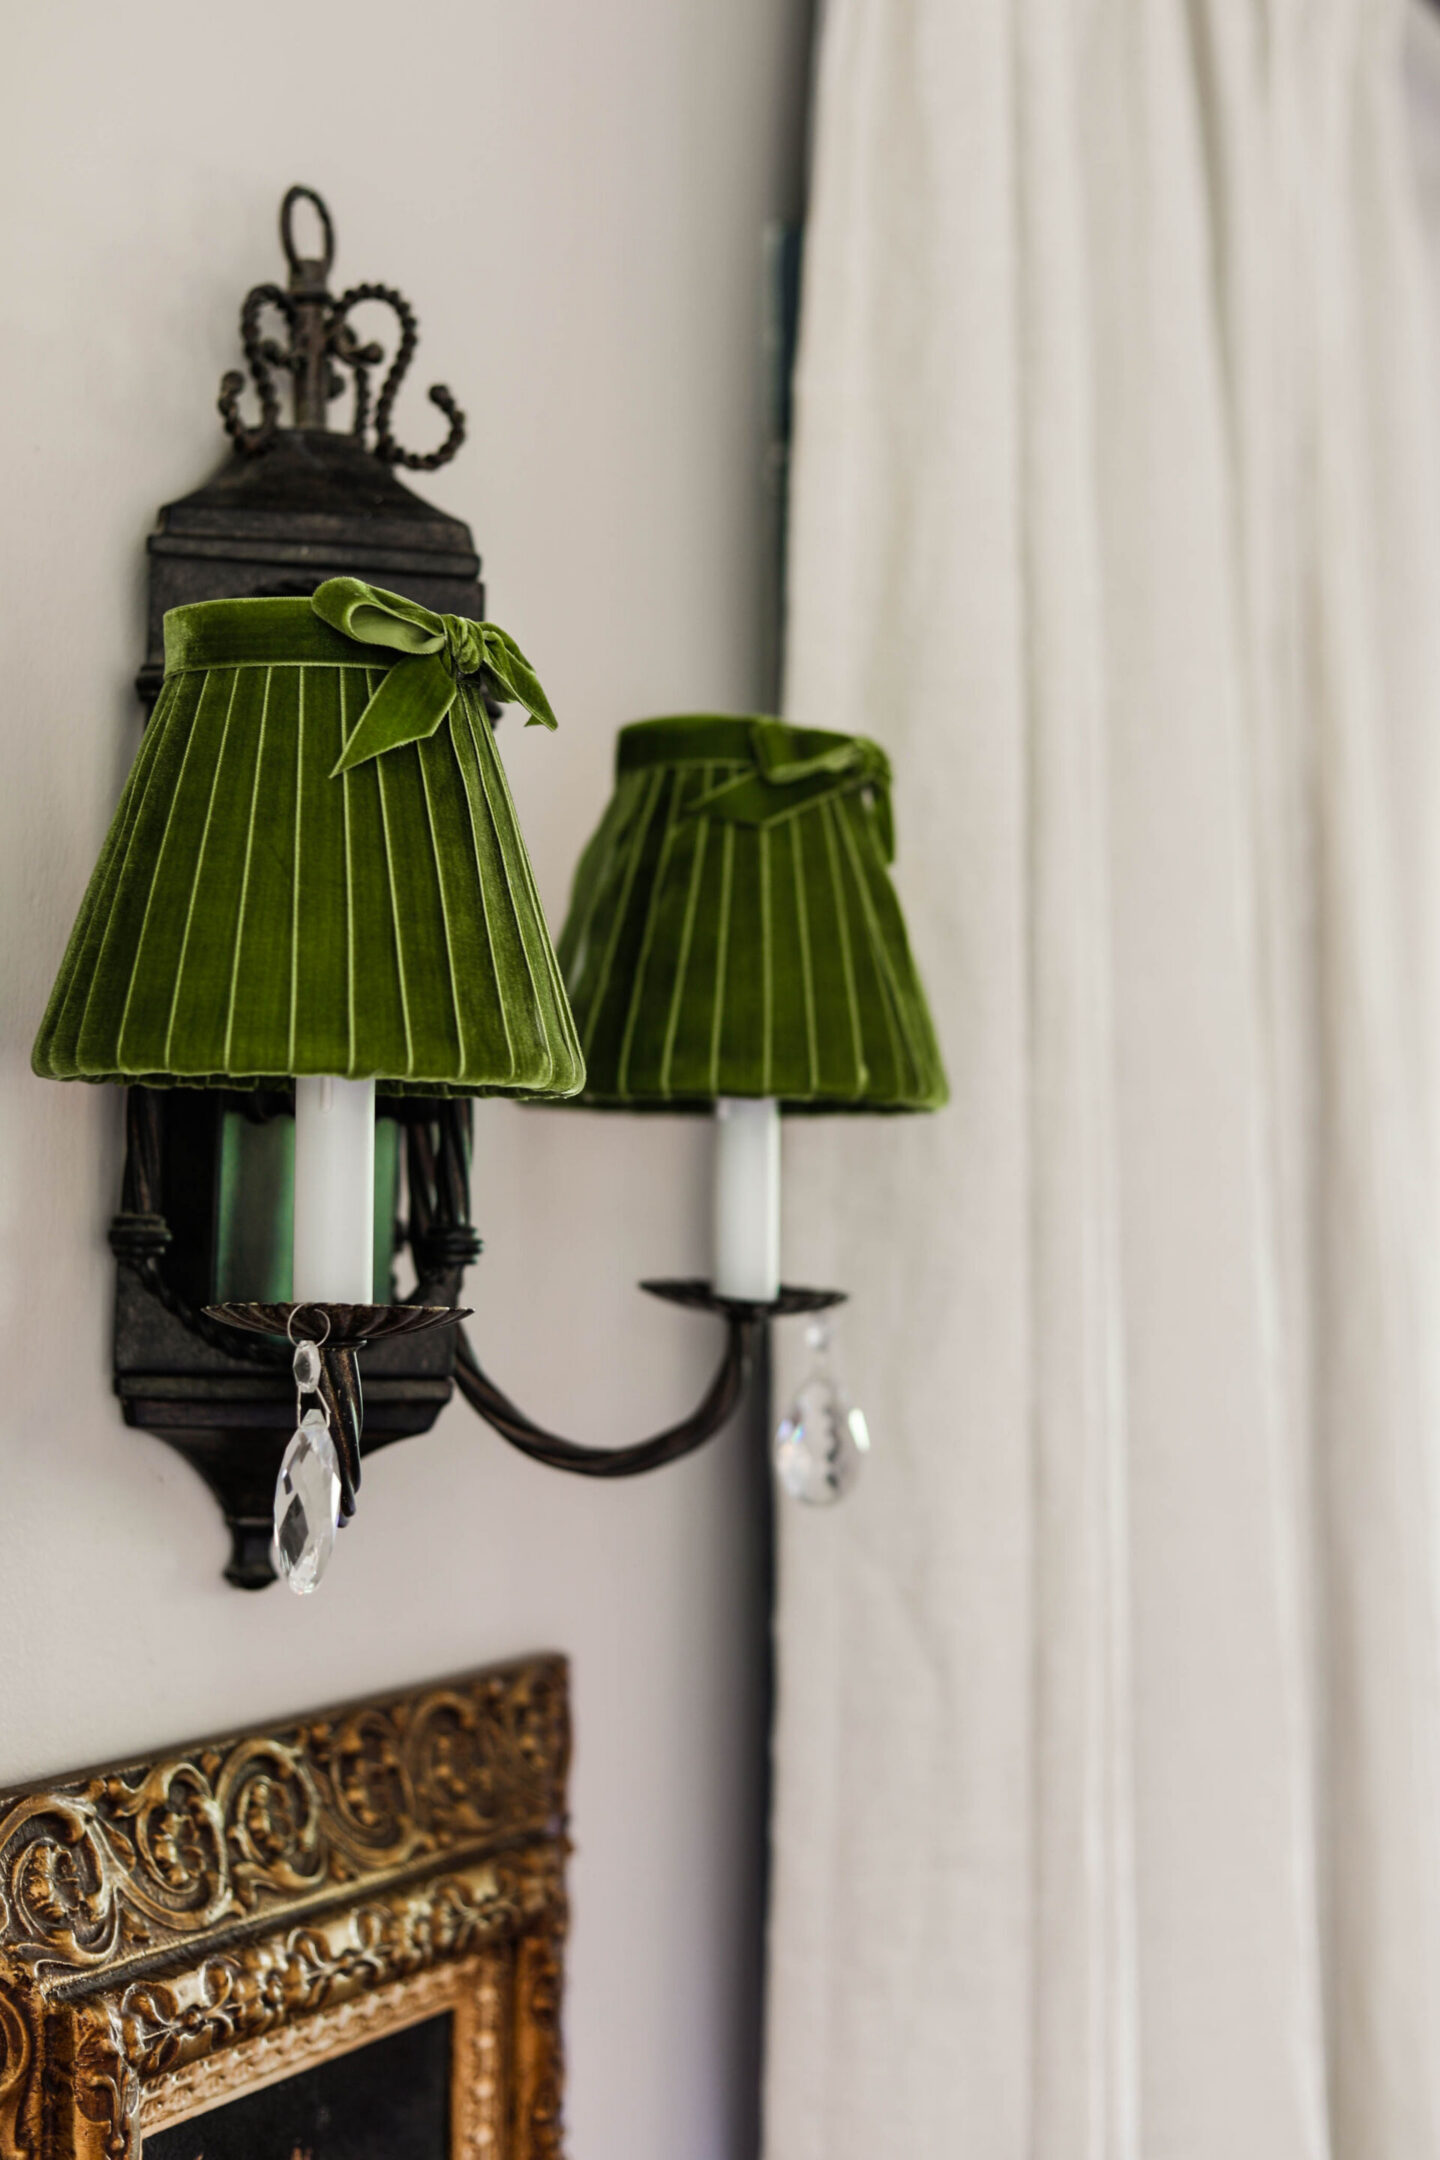
I added a single horizontal ribbon around the top rim; glued at the bottom edge of the ribbon only. I choseto leave my top piece sticking up straight rather than folding it down.
My lamps are hung on a wall, so no one is looking down over the top edge. IF you were doing these for a shorter table top lamp, you may want to adjust your top finished piece.
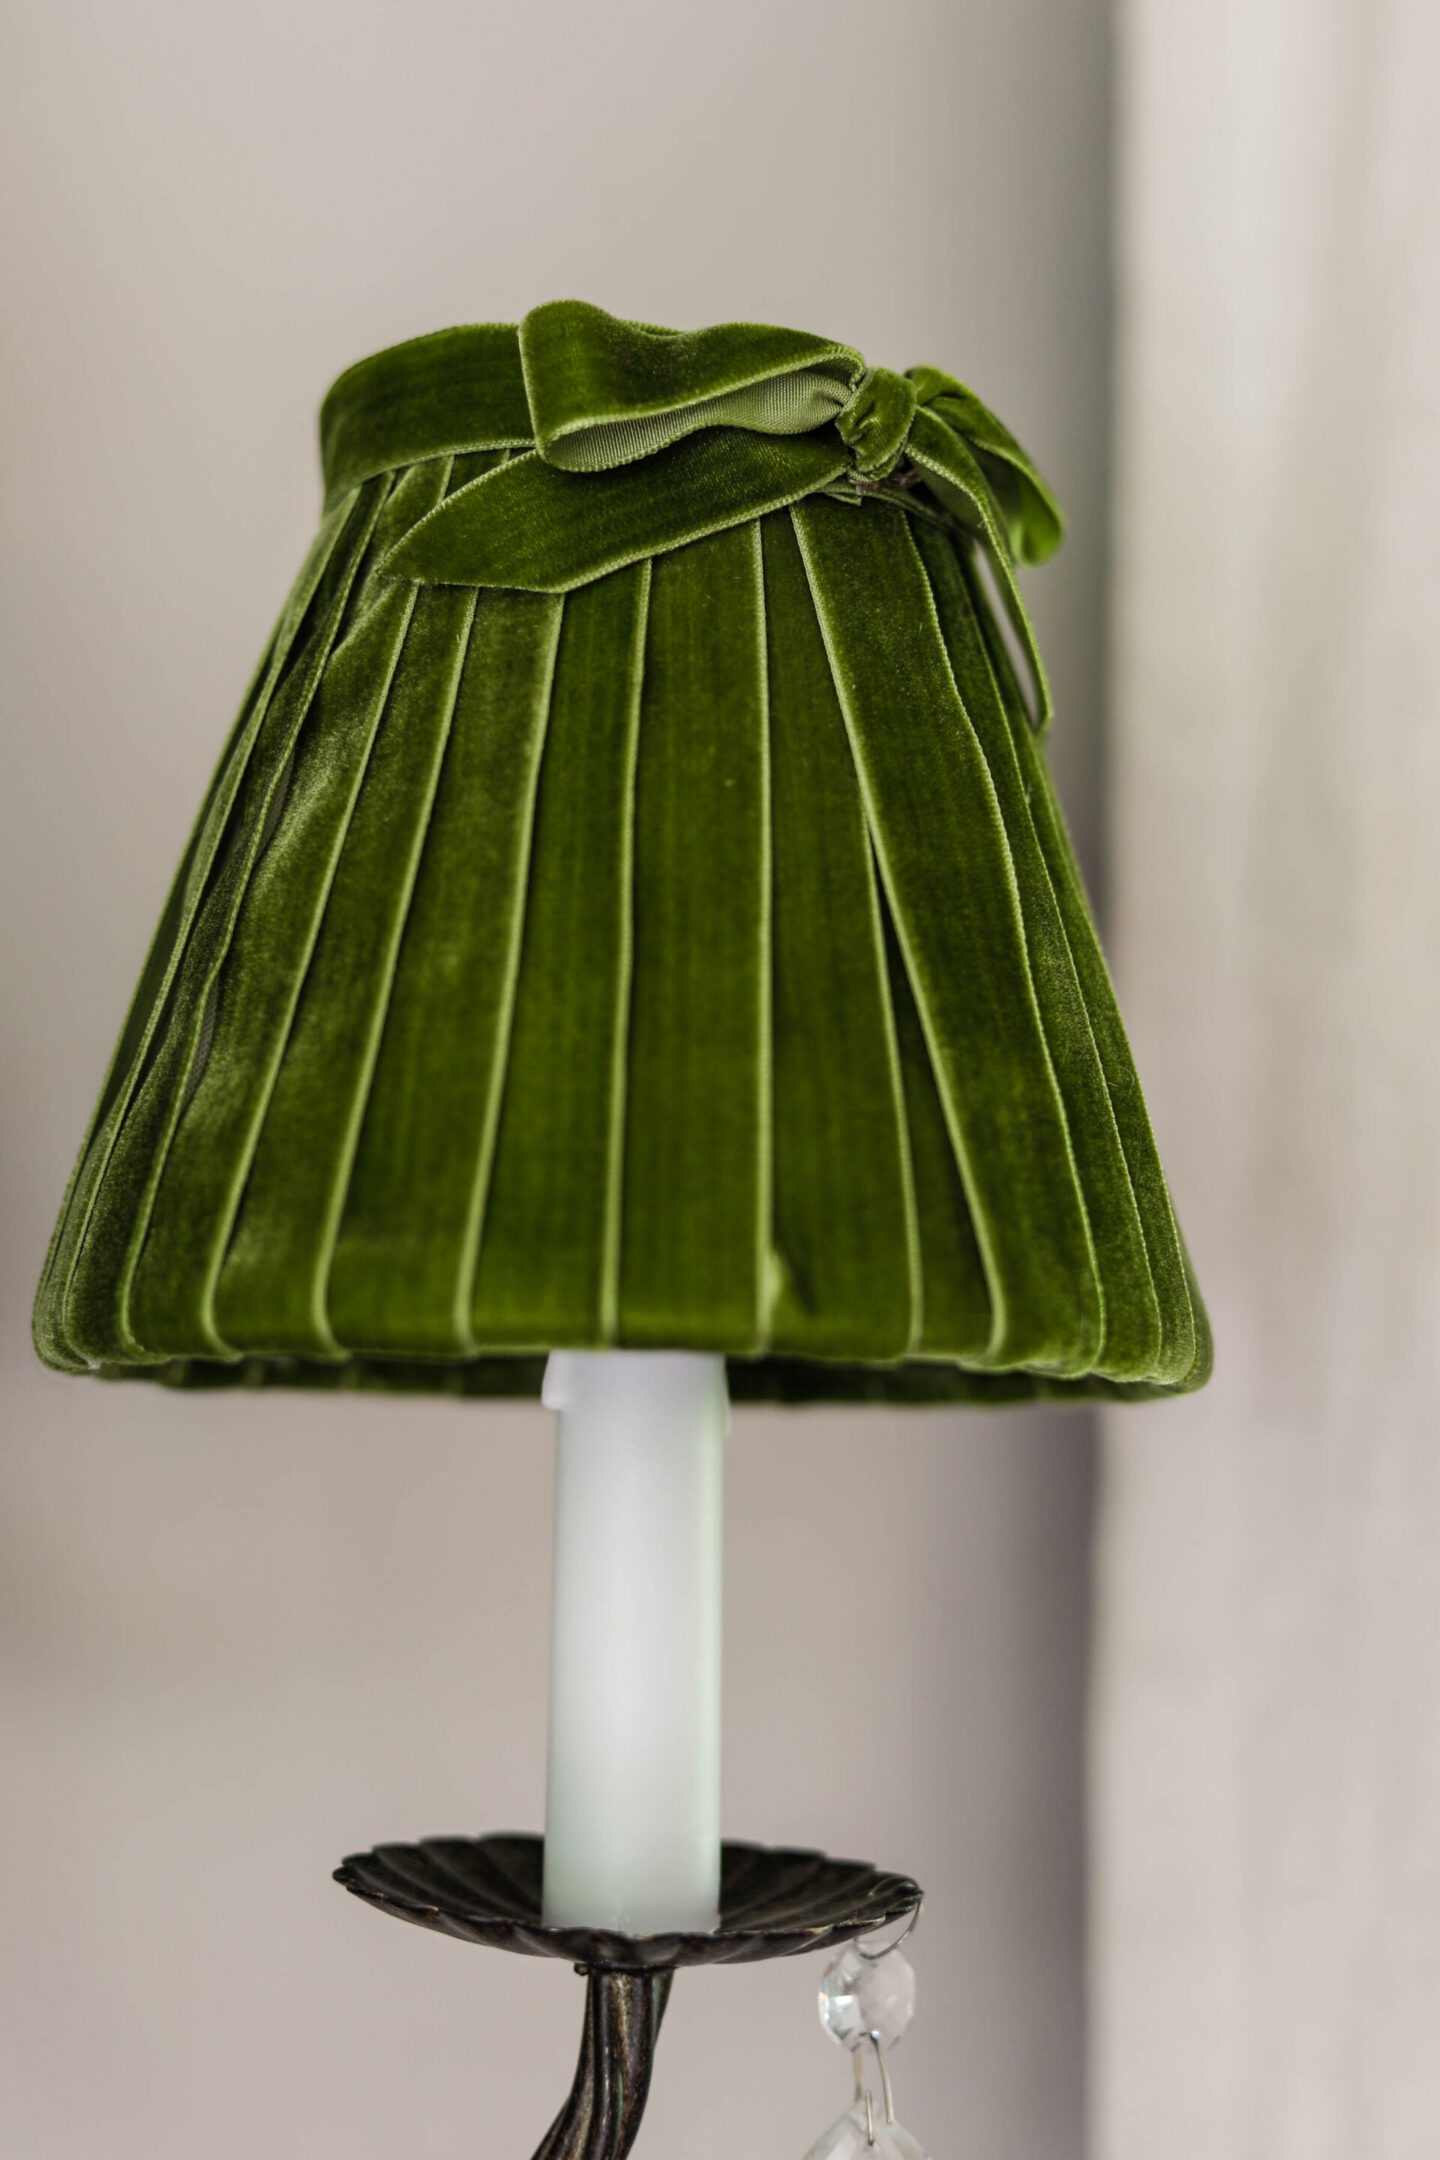
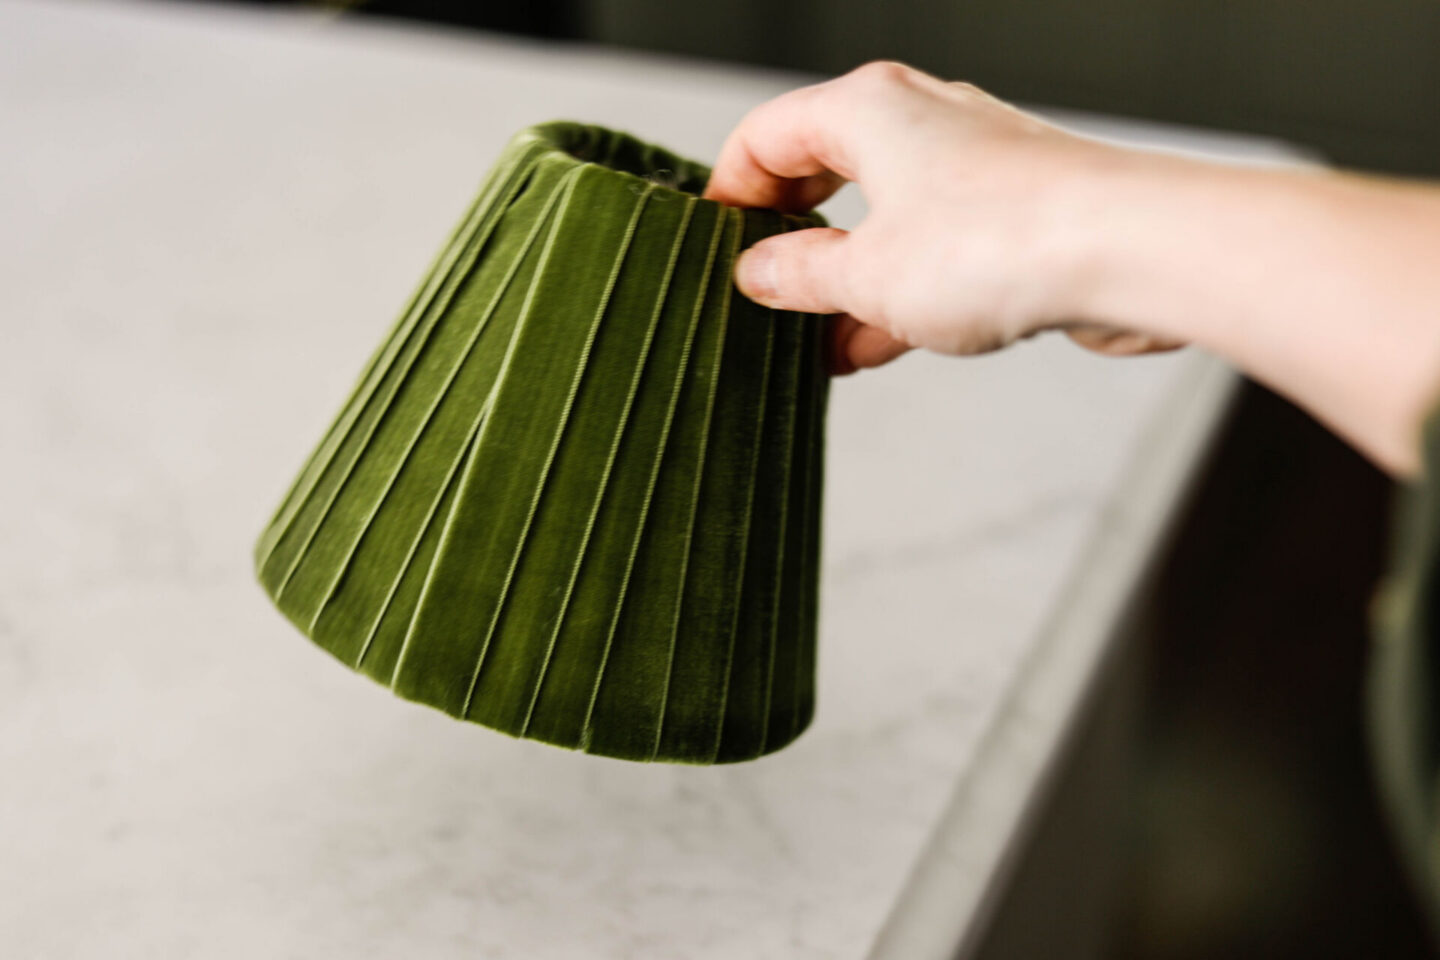
Then I used another separate piece of ribbon to tie the bow, and glued that on top of my horizontal piece of ribbon.
Lastly, I finished the inside bottom edge with another horizontal strip of ribbon since these are often seen from the bottom side by anyone sitting on the couch.
As I was working on this DIY – I had the thought that this would be a superb women’s ministry or party craft where you have lots of ladies together who want to have their hands busy, but also want to be able to visit and fellowship with one another!
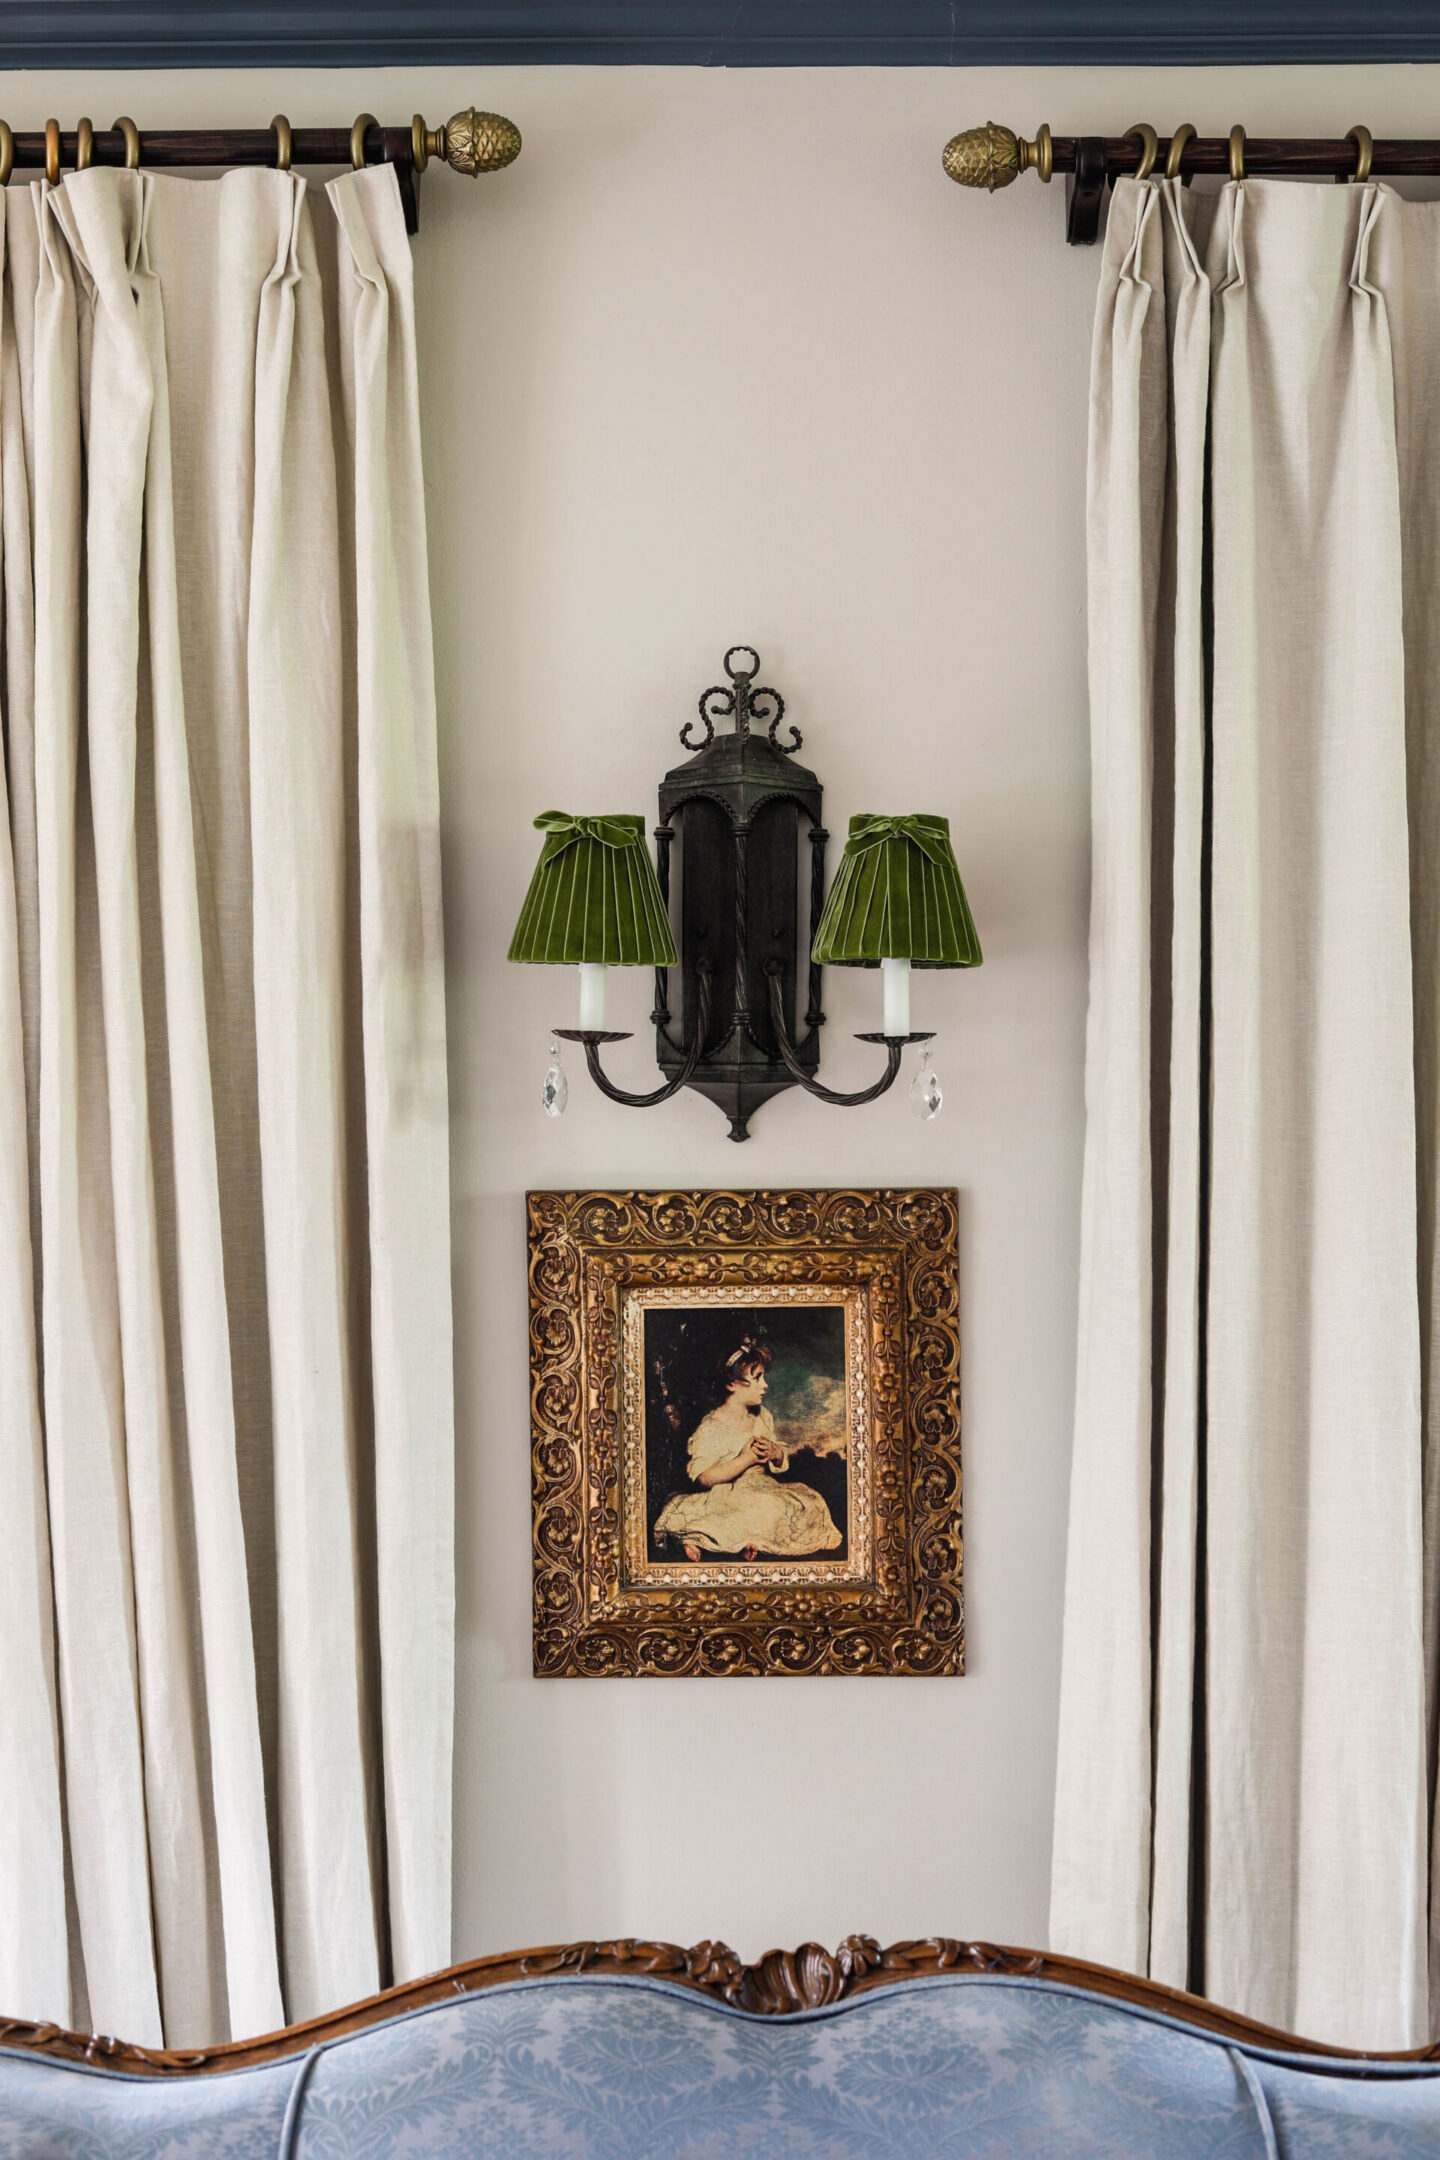
This was an easy & quick project with a great impact in the look of my space once they were finished.
Related Posts & Resources
- DIY No-Sew Pleated Lampshade
- How to Paint a Lampshade Black
- Brass to Faux Raw Wood Chandelier Makeover
Save this DIY Designer Dupe Velvet Lampshade Tutorial for Later