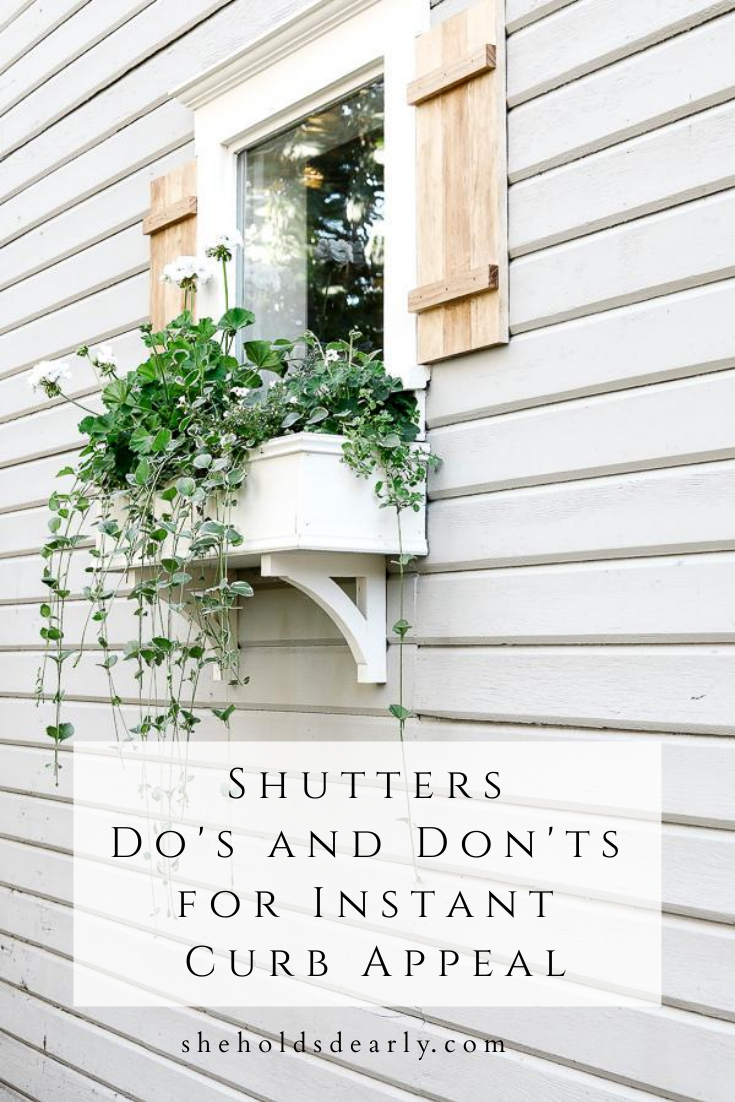
How to Style Shutters Correctly for Instant Curb Appeal
Today I’m answering ALL your questions about shutters! From their function, to the size they should be for your specific window, and sharing how we made our own DIY shutters for our farmhouse.
If you’ve got shutters on your mind, it’s interesting how much more likely you are to notice them as you’re driving around town!
They’re a wonderful way to add charm, character, and curb appeal, and they’re actually really simple to DIY.
But, be careful, because they’re also really easy to do incorrectly!
I’m going to share some dos and don’ts for shutters in this post, and I’ll share a tutorial for the cute board and batten style shutters my husband and I made for our cute stairwell window as well.
Common Questions about Shutters:
A quick online search shows that there are a lot of people that have questions about how to do shutters correctly, so if you found this blog post by searching any of these questions (or something similar), you’re not alone:
- Should shutters be longer or shorter than a window?
- Can exterior shutters be longer than a window?
- Can window shutters be shorter than the window?
- What is the Purpose or point of having Shutters on a house?
- How can I make my own window shutters?
I’ll be answering all these, and more as you read on!
First up, some History!
Our modern day shutters are almost all purely cosmetic, but for most of the previous hundreds of years since they were invented, they were actually created to be functional window coverings.
They were used for:
- Security
- Privacy
- Temperature Control (To block heat, or to keep warm air in, and louvered paneling allowed for fresh air to come in even when the shutter was closed.)
- Protection from the elements (keeping windows safe during storms)
Their Purpose
That being said, their original purpose was always to open and close over the window depending on the circumstances.
When you keep that in mind, a lot of these dos and don’ts make more sense!
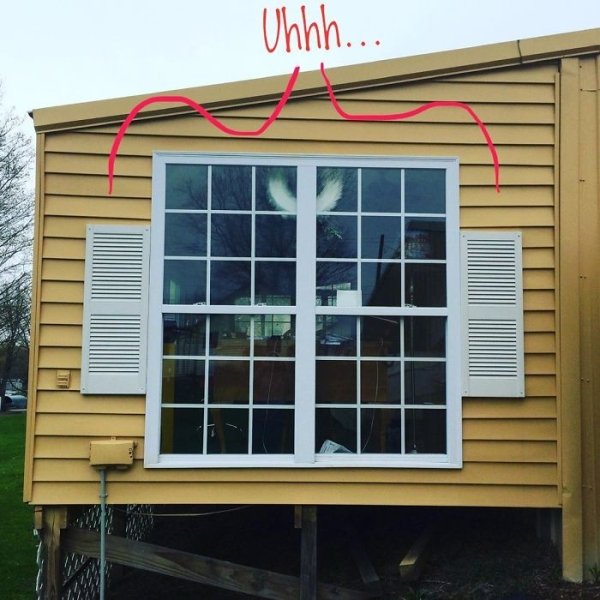
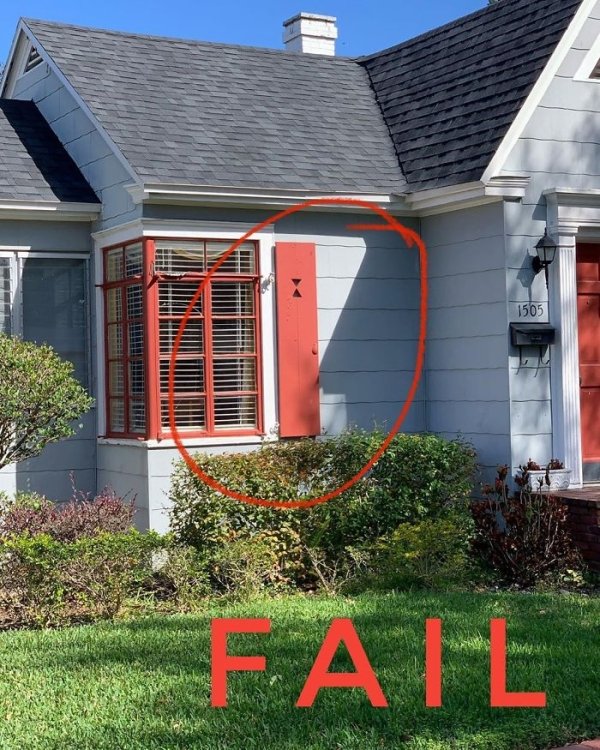
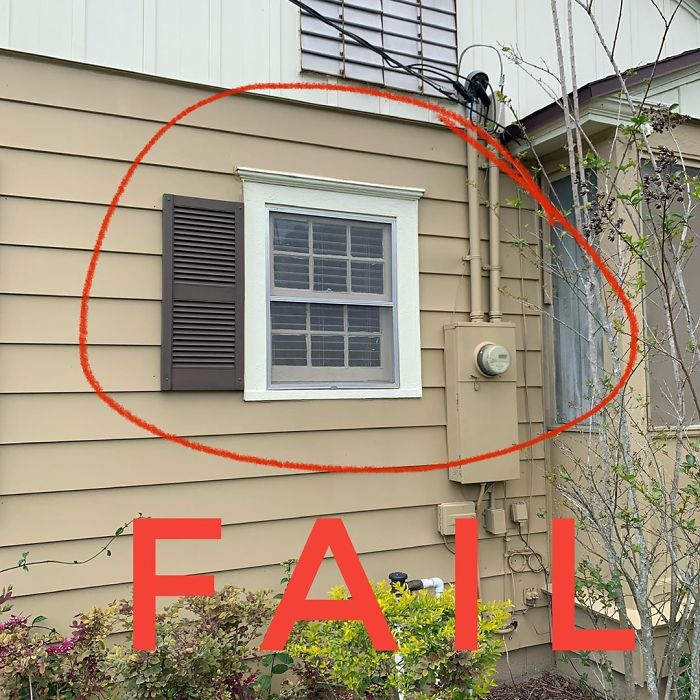
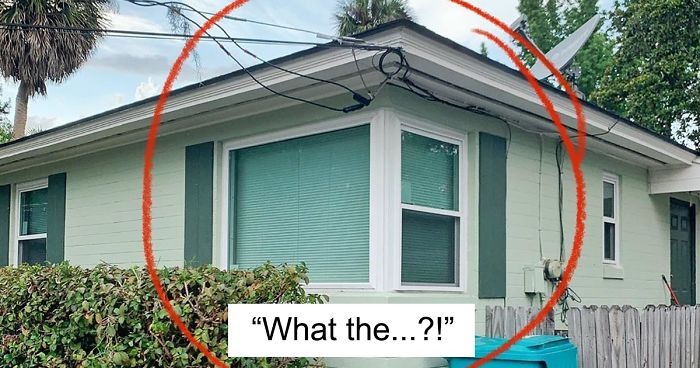
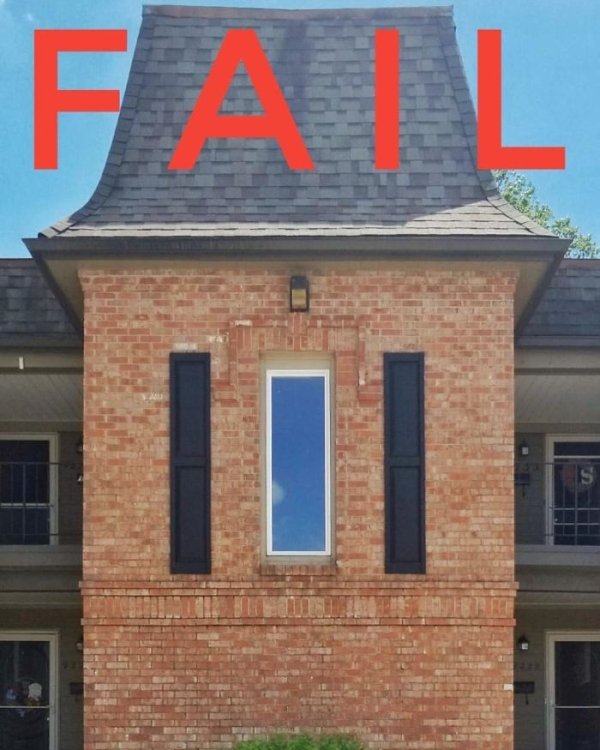
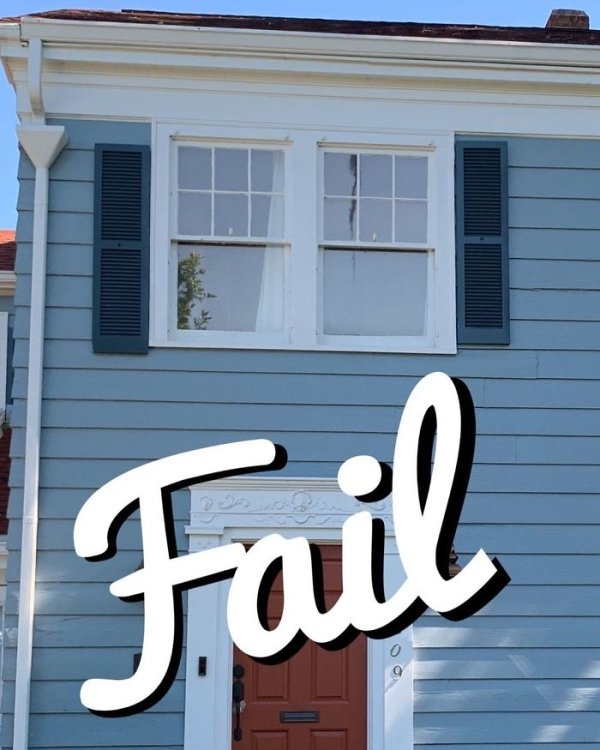
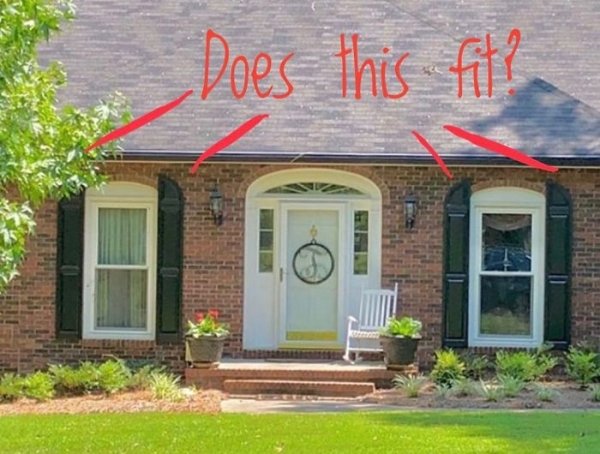
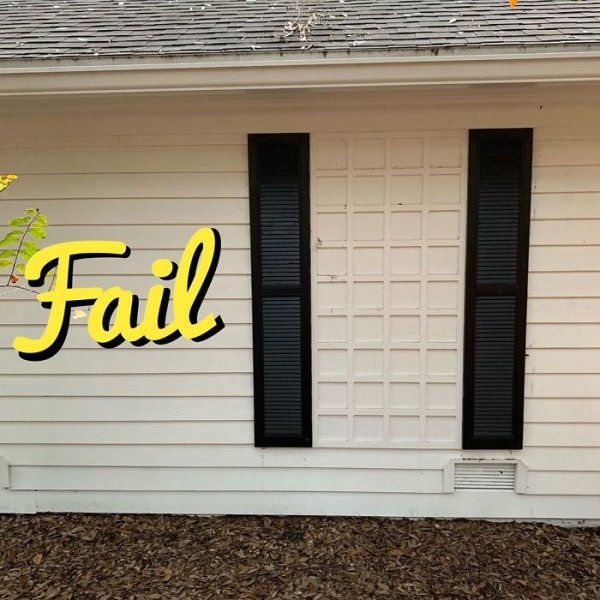
Here are some shutter fails I found from boredpanda.com to emphasize my points.
Don’t Do This | Shutter Fails
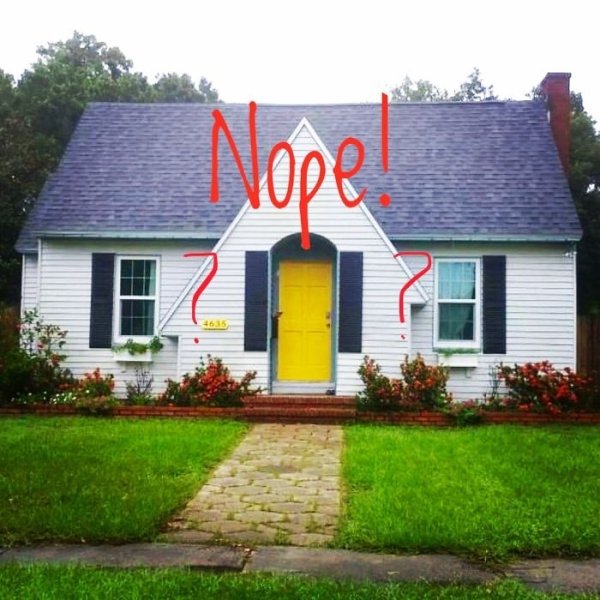
- Shutters should never be above or below windows.
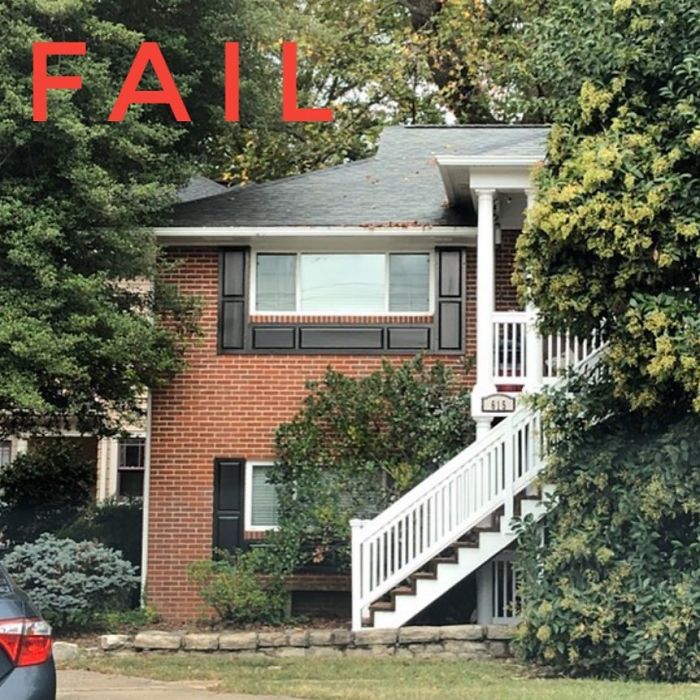
Only on the sides!
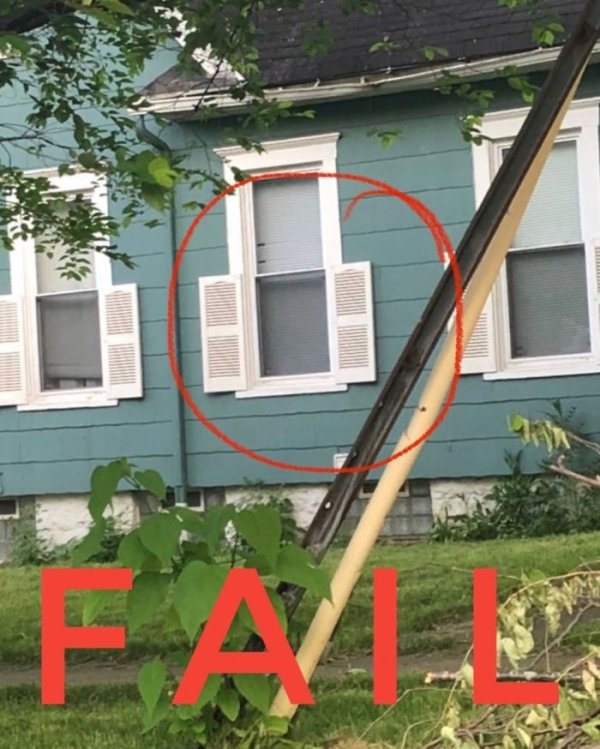
- Shutters shouldn’t be bigger than the window/frame, but they also shouldn’t be too small, only covering a portion of the window.
- Shutters should always be hung in a set on both sides of a window
- If your window doesn’t have space on both sides, it’s best to skip the shutters.
- The same can be said for corner windows.
- And bay windows.

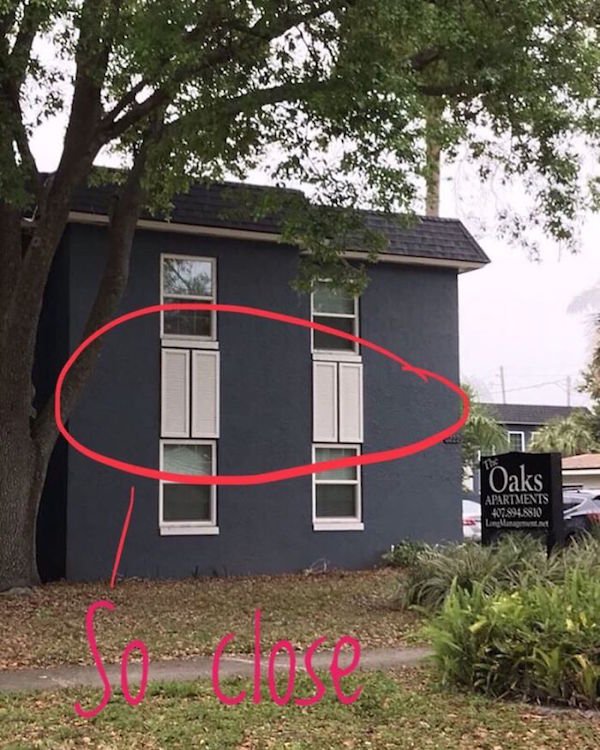
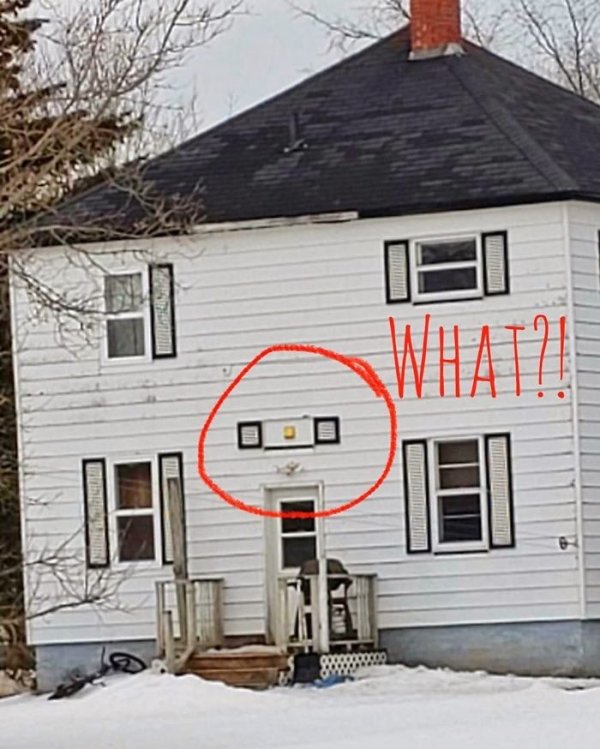
- Shutters should always be directly against the trim of a window – not floating nearby.
Enjoying Learning Something New?
Your next learning experience can be my Thrift Like A Pro Workshop! 90 minutes to help you learn the tricks of professional thrifting that can help you save thousands a year.
- Shutters should always be hung level with each other!
- Shutters shouldn’t have anything layered over the top of them. (Remember, you want them to have the appearance of being able to open and close over the window.)
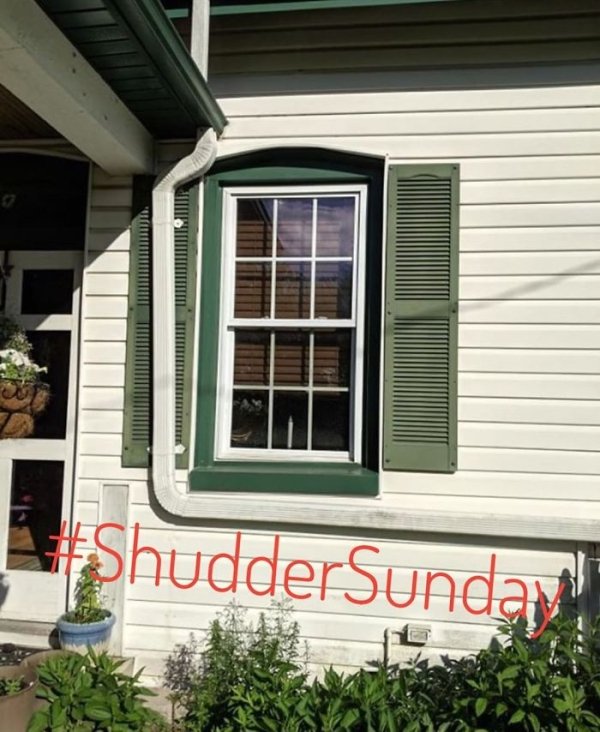
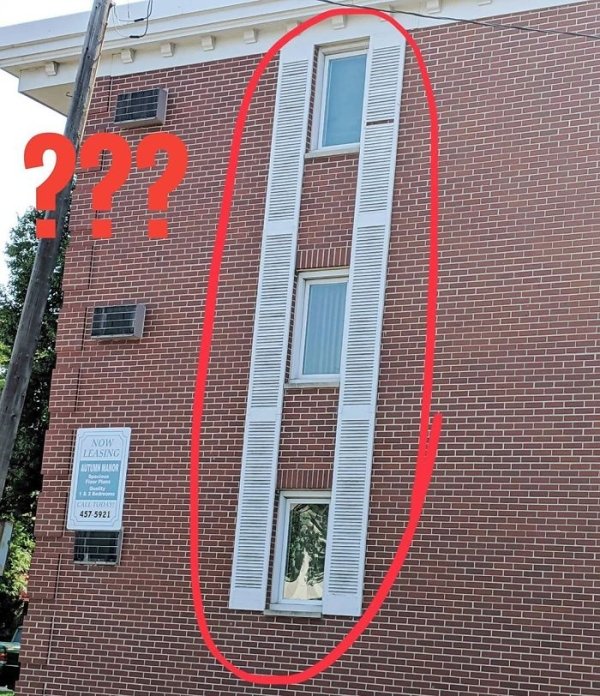
- Shutters should match the shape and size of your window.
If these shutters were closed, they’d no longer fit the window shape.
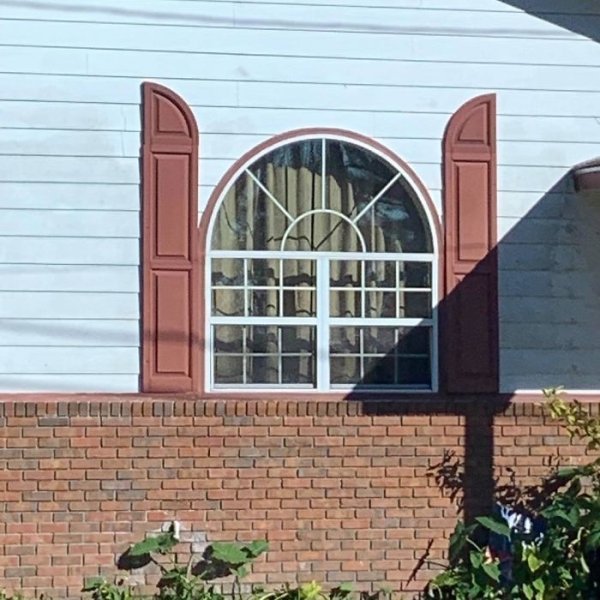
These are hung correctly, as far as direction is concerned – but are far too tall for this window.
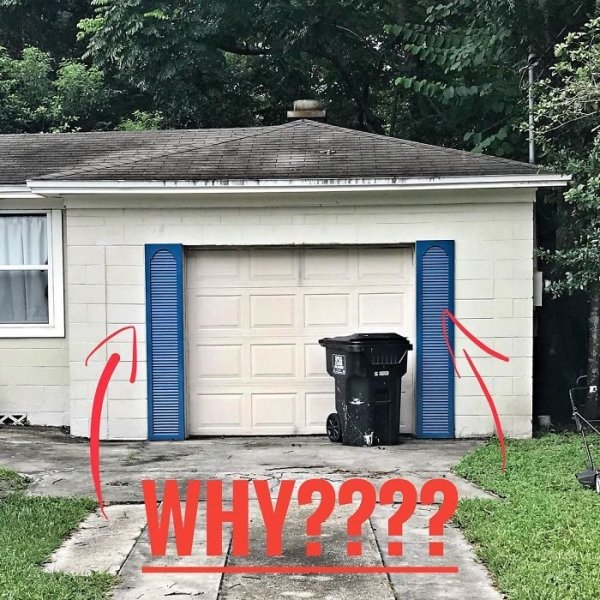
- Shutters shouldn’t be used around anything except windows. (That means no doors, no garages, and no miscellaneous wall items.)
Yikes. Right? I was *shuddering as I scrolled through those.
(*Sorry, couldn’t help myself)
Wanting More Design Knowledge?
Join me in the Elite Decorating Academy for over 28 hours of practical interior design teaching & useful skills! Teaching is broken down into 160+ classes that are an average of 10 minutes each, which means they’re a perfect fit for any schedule.
Head to elitedecoratingacademy.com to learn more and get started!
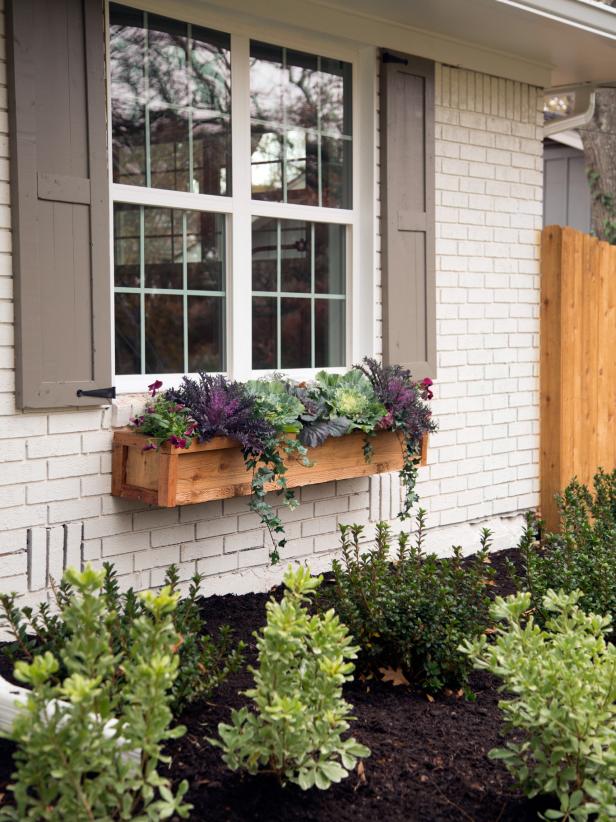
Do This | Shutter Wins
- Size your shutters to fit well alongside your windows.
This picture is from HGTV.
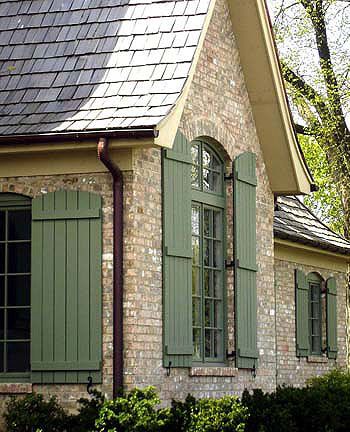
- Match the shape and size or your windows
Like this example from Arts and Crafts Homes
Other things to consider:
- Make sure the color complements your home and surrounding decor
- Make sure the style matches the style and era of your house
Deciding on our shutters…
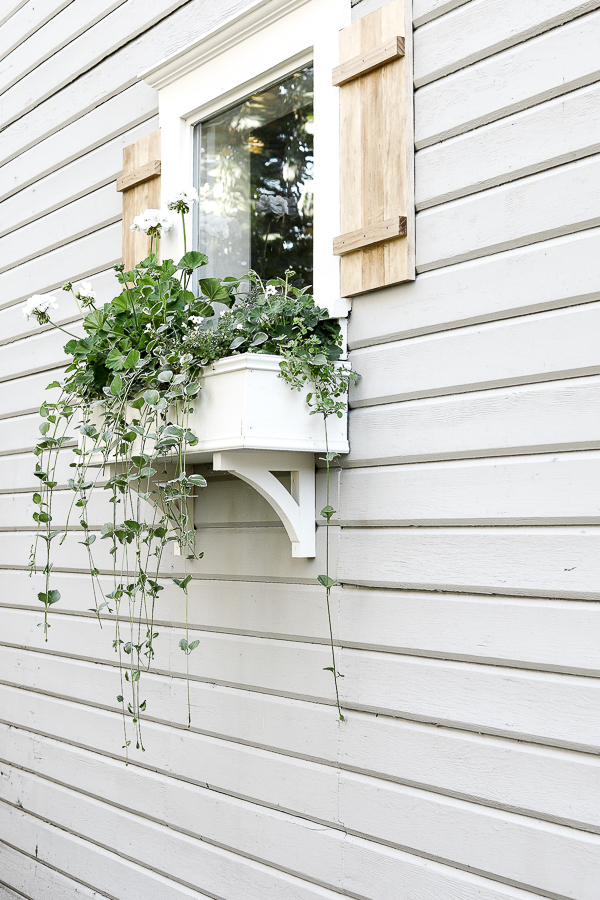
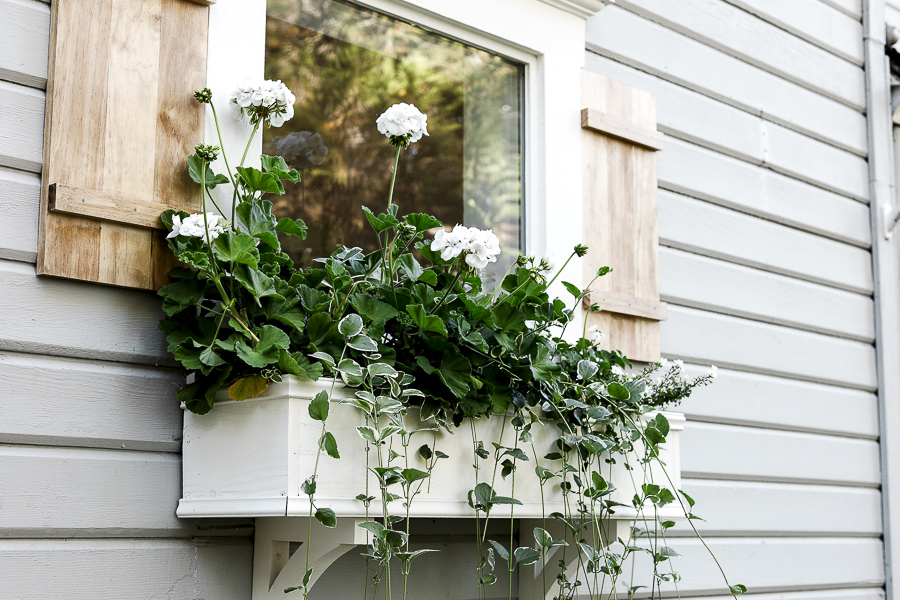
A few months ago we made the DIY Self-watering Window box for our stairwell window. We loved how it turned out, but I knew it needed a little bit more.
I knew shutters would look beautiful there, but I needed to decide which kind to use.
Some of the main types of shutters are:
- Louvered
- Flat Panels
- Raised Panels
- Board & Batten
We decided to go with board and batten shutters. The other style of shutter I like best is the louvered look, but I thought it would be too busy along with our siding (which looks almost louvered itself) and our two dressed-up porches.
I knew I wanted them to be raw wood to match the other raw wood accents we have on our porches, like our church pew and the table I added to the kitchen porch during our porch refresh project last month.
I looked and found a ready-to-buy set for $165, but I knew my husband and I could make them for much less!

*This post contains affiliate links to products I know &/or love.
DIY Board and Batten Shutters
This project cost us about $30, and took approximately 3 hours (including a run to Home Depot for materials.)
Supplies:
- 1 x 4″ Pine Boards
- 1 x 2″ Pine Boards
- 2 1/2″ Finish Nails
- Finish Hammer
- Measuring Tape
- Saw
- Clamps
- Spar Urethane
- Chip Brush
I knew I wanted my shutters to be approximately 12″ wide, but we figured that using 3 of our 1 x 4 ” panels (which are really milled to 3/4 x 3 1/2″) would get us close enough at 10 1/2″ wide.
We measured the height of our window between our top and bottom trim pieces and it came out to 23 1/4″.
So we cut 6 pieces (3 for each side) at 23 1/4″ using our compound miter saw.
Then we needed our cross pieces for the “battens”.
We cut 4 pieces (2 for each side) at 10 1/2 ” – the same width as our three boards.
We used a clamp to stabilize our three boards together and measured out where we wanted our battens to sit on our boards.
We chose to have them 3 1/2″ down from the top and up from the bottom.
We marked where the battens should be, and pre-drilled holes for our nails – one in each of the boards at the bottom, and again in each board at the top.
Then we used a finish hammer (with a flat face, not the “waffle” face of a framing hammer) to pound our 2 1/2″ finish nails in about 1 1/2″ – not all the way in! The last 1″ of the nail will help secure the shutters to our exterior wall.
Then we got to do the fun part – installing them on each side of our window!
Once they were nailed into the exterior wall. My husband, Colby applied a coat of spar urethane to help protect the wood from weather damage.
The two of us have found that we prefer pouring our clear coat into a plastic container (in this case, a red solo cup) to work from when we’re applying it onto a piece rather than dipping directly into the can. It seems to help eliminate any kind of contamination from our brush into the leftover product in the can. I also usually use a chip brush for any oil-based paint applications – because I don’t like having to try and wash oil-based products-out of a quality brush.
Our shutters will be pretty well protected by the eaves from our roof since they’re right up against the house, so we didn’t think it was necessary to spend a lot of time coating them with the clear coat on all sides before hanging them up.
If you wanted a more thorough coat of clear coat, you could certainly cover the boards individually before assembling, or cover the assembled piece before installing it on the wall. It’s a personal preference, and depends mostly on where the shutters will be, and how much weather they’ll be exposed to!
And that’s that! I hope you enjoyed this in-depth expose (haha – I’m joking) about shutters and that you’re inspired to look into them for your own place if you’ve considered it in the past!
If you have any additional questions, please share them in the comments below!
Pin This for Later:
Until next time,


