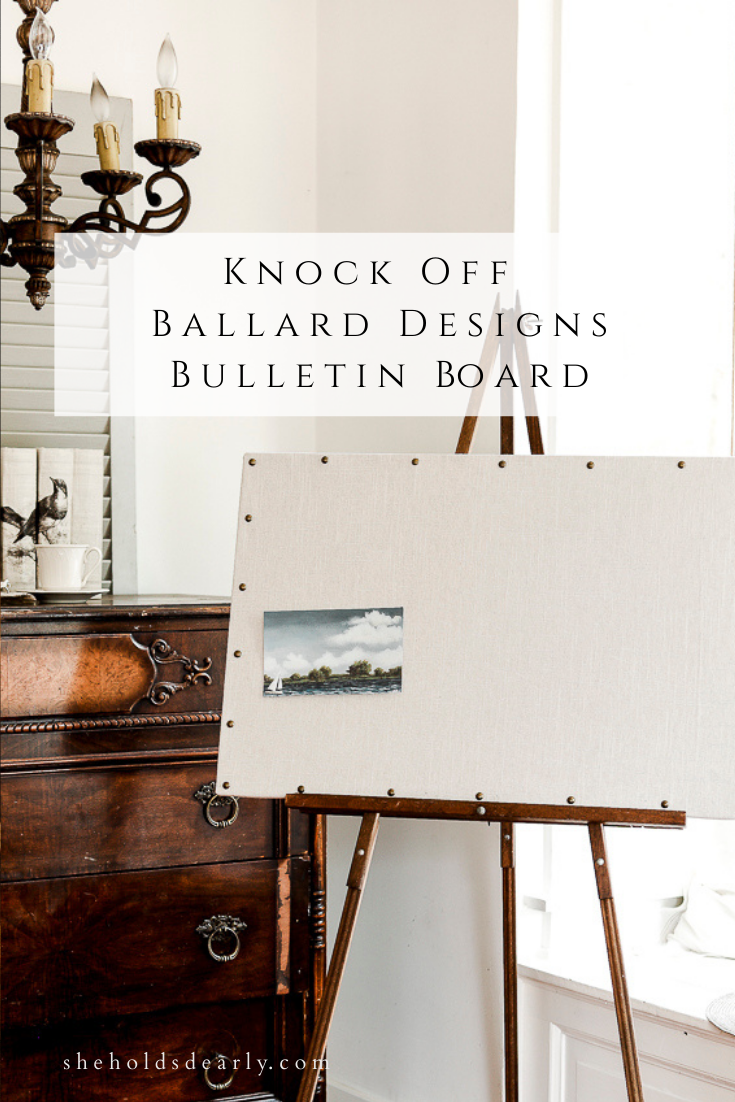
Knock Off Ballard Designs Bulletin Board
This knock off bulletin board gets you a cute on-trend message board, but for 1/4 the price.
One of my favorite things is to find cute trends from online, on Instagram or in magazines and catalogs and then to figure out how to recreate them at home for much less!
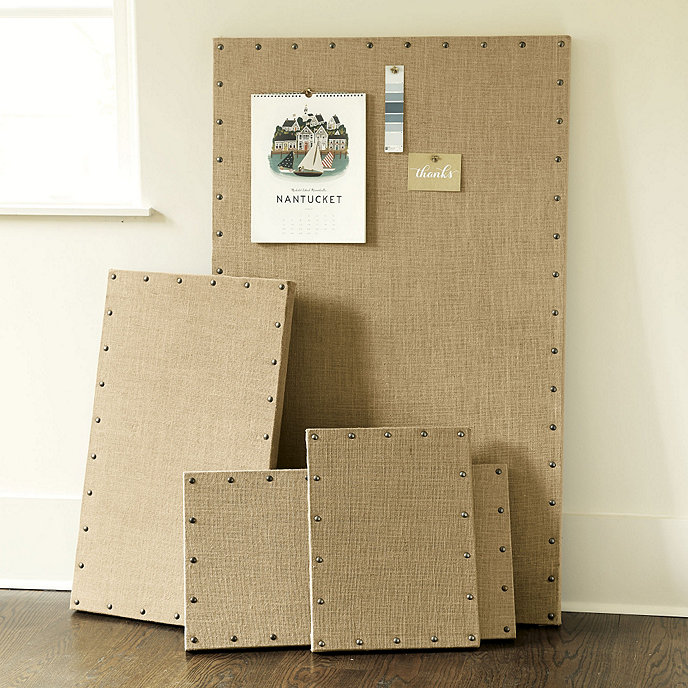
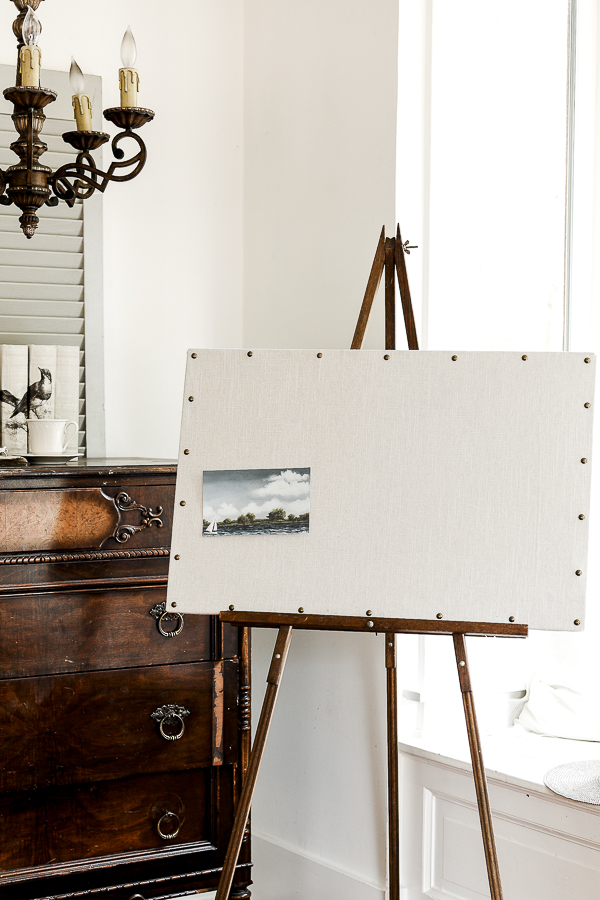
I recently saw this cute burlap bulletin board from Ballard Designs and knew that I had a great place for one just like it at home.
But the price tag, at $130 (plus shipping & taxes) for the size I wanted was just a bit too steep.
Plus I realized it would be easy to DIY and share with you!
*This post contains affiliate links to products I know &/or love.
Knock Off Bulletin Board Tutorial
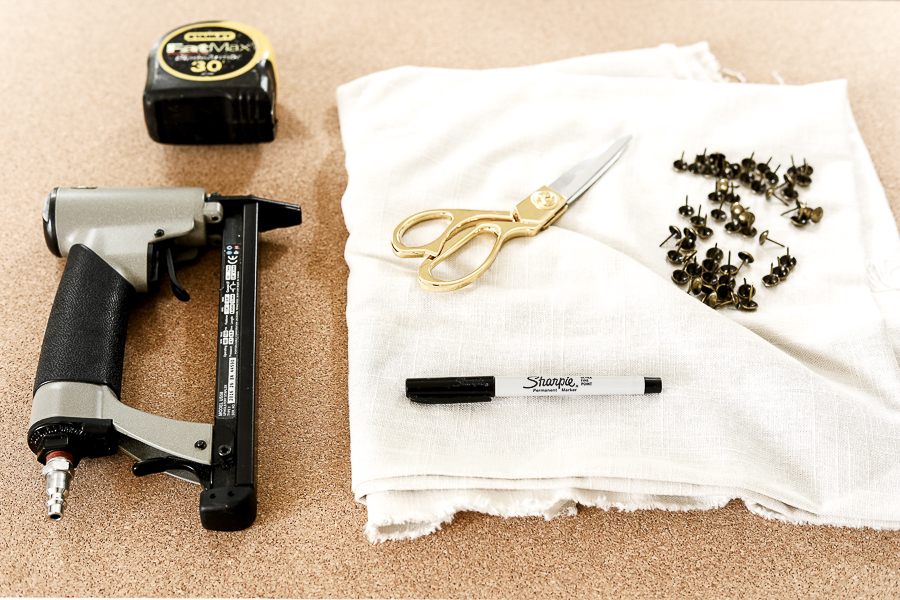
Here are the supplies you’ll need:
- Bulletin Board (I chose the 20 x 30″ size, but you could use any size you wanted – OR any size you already had at home.)
- Linen or Burlap Fabric (The size of your board + a few inches of overhang on each side.)
- Fabric Scissors
- Pneumatic Stapler or a Manual Upholstery Stapler
- Staples
- Air Compressor (if you use the pneumatic stapler)
- Upholstery Tacks
- Pen for marking measurements
Notes before we Start:
The process for wrapping this bulletin board in your fabric is actually exactly the same as what you would do upholstering any simple flat piece like a bench or a footstool!
I share more details about that process here in the Recliner Foot Rest post as part of my Slipcover and Upholstery Series!
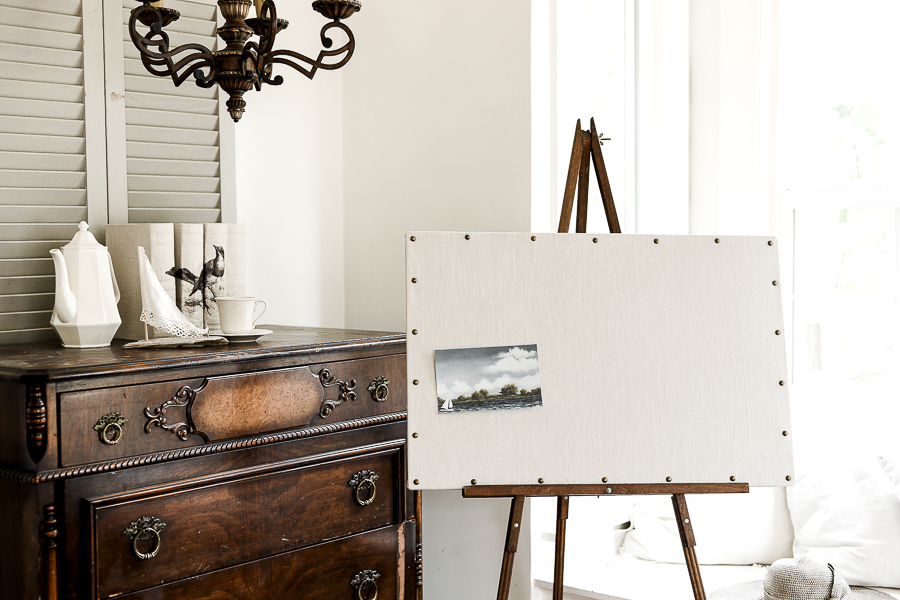
I chose to use linen instead of burlap simply because that was what I had on hand and available! You can do either for your own version – or really any fabric your heart desired!
The Process for making a Knock Off Bulletin Board:
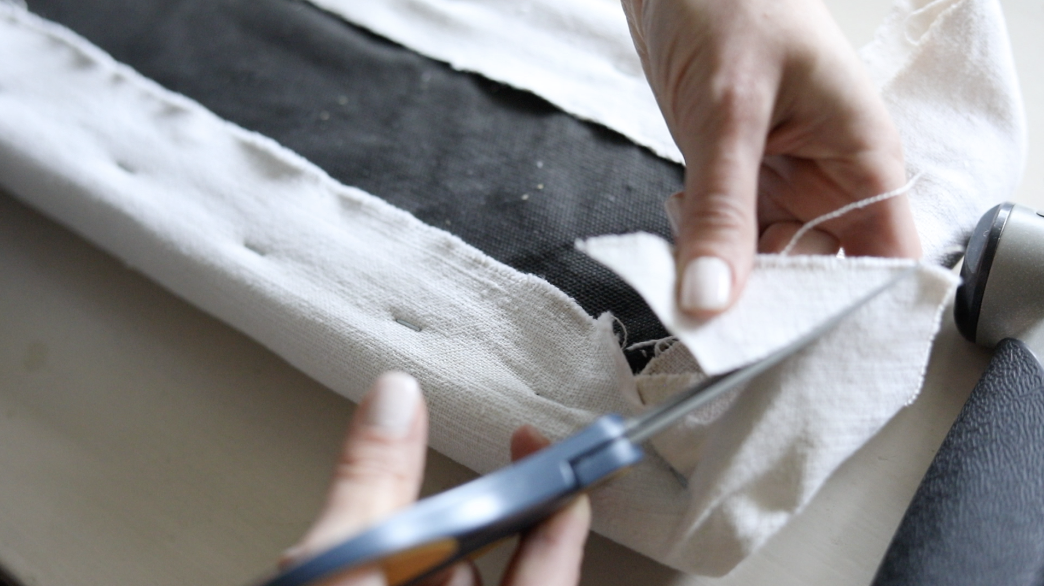
Step Number One | Iron your fabric, then measure and cut it about 2″ wider and longer than your bulletin board on all 4 sides.
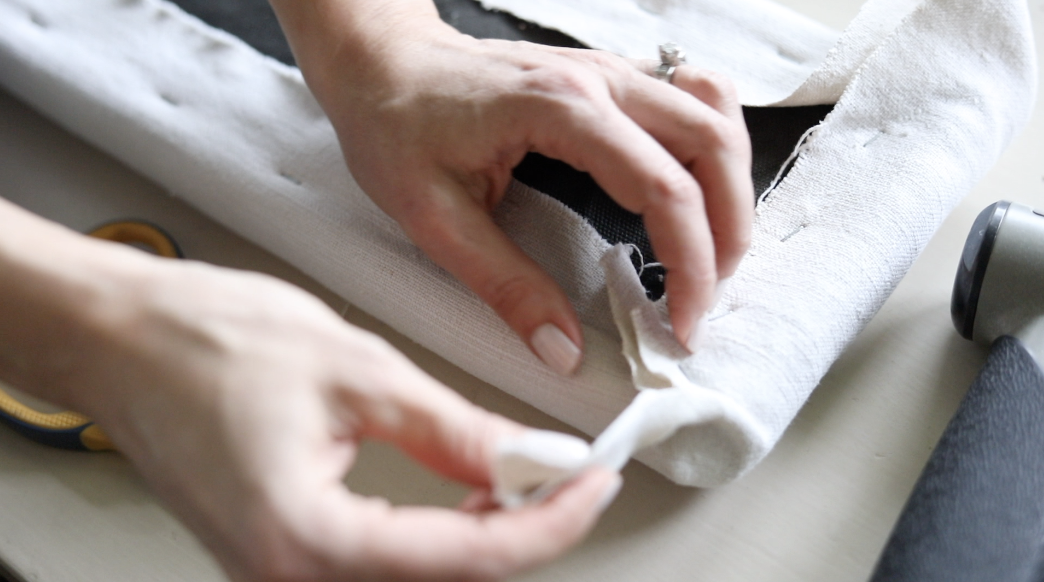
Step Number Two | Flip your board cork face-side down onto the center of your fabric. Then fold the fabric on the top side over to the back of your corkboard and use your stapler to secure it.
Step Number Three | Next work on the opposite side (so if you started on one long side, go down across and do the other long side next.) and secure the fabric in the same way. Make sure to gently pull the fabric straight – but not stretched too far.
Step Number Four | Repeat the stapling process with the remaining two opposite sides.
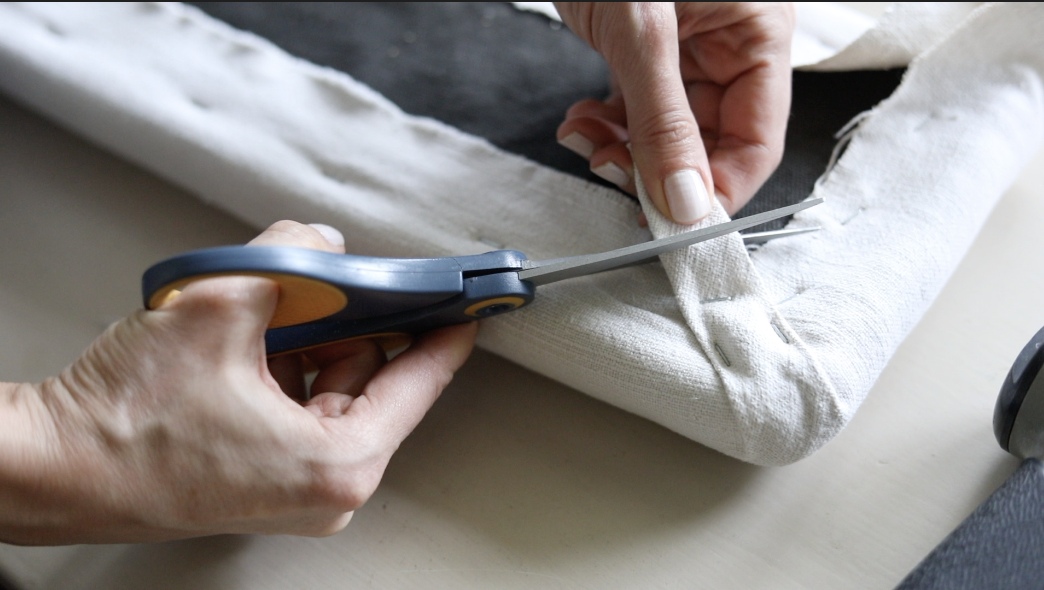
Step Number Five | For the corners, pull the fabric together to create an imaginary reference line that is diagonal from the corner in toward the center of the board, and staple the fabric on both sides up against that middle imaginary line.
Step Number Six | Cut away some of the bulk of the remaining corner flap leaving the end of the tail intact at its full width. Then pull that piece down flat toward the middle of the board and staple to secure it.
Here are some pictures that better show what I mean, and click here for the video from my Recliner Foot Rest Tutorial!
- Step Number Seven | Add your Tacks! Flip your board over so the stapled side is down and the pretty upholstered side is up. Measure about 3/4″ away from the edges in the corners and make a mark with your sharpie. Then measure each point about 5″ apart from the corners for your tacks. Then simply press the tacks in over your marks!
And that’s it!
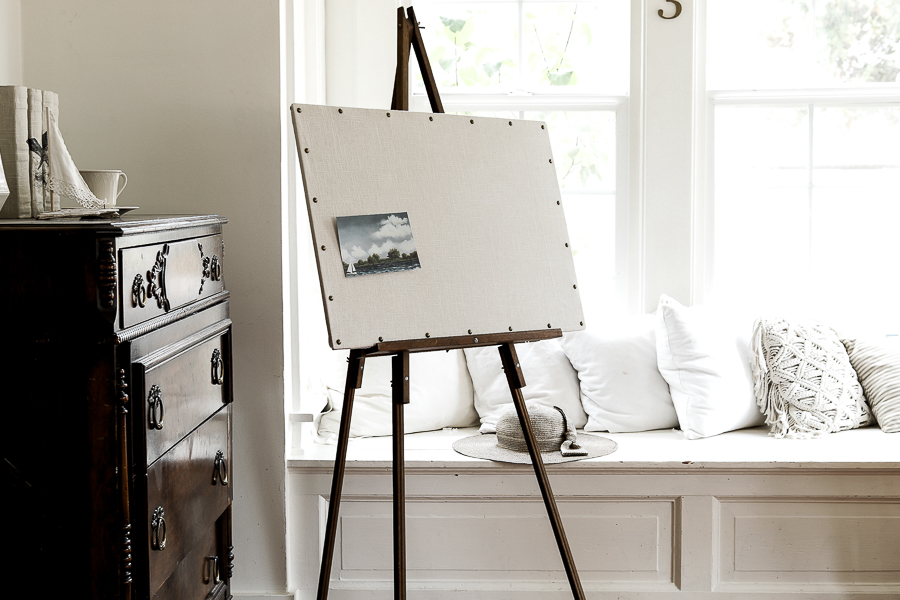
This knock-off bulletin board costs only about $40 in supplies, and looks just as charming and trendy as the original!
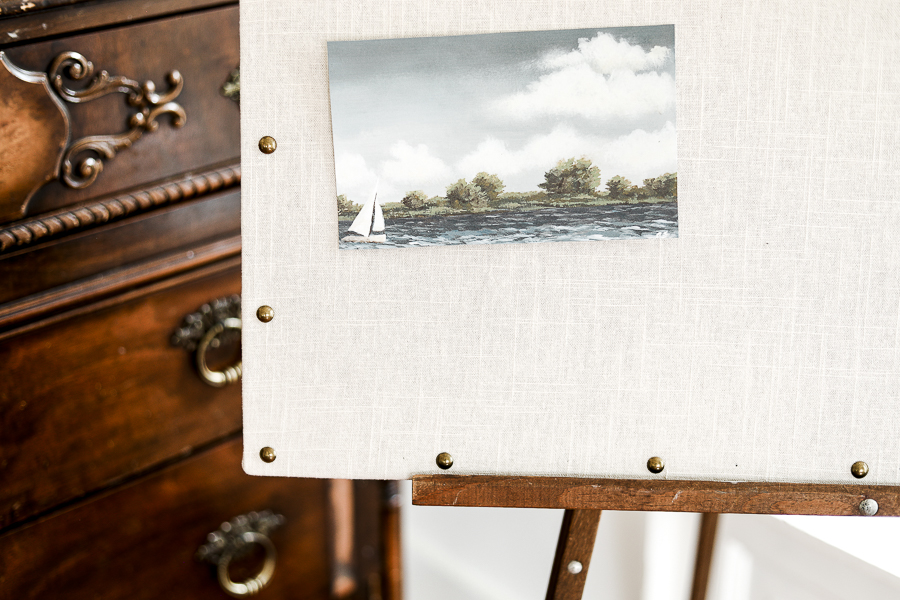
This cute painting I used to style our board is from my sweet friend Andrea at Pine and Prospect Home! You can find her paintings here at her online store! This one is called “The Wind Behind Your Sails“.

The more permanent home of this board will actually be in our living room closet which my daughter uses to store and process orders for her business.
I guess my Daughter didn’t just get her entrepreneurial spirit from me, but also her love of an office made from a closet!
You might remember this closet from an older post where we made it over using ship-lap to create a more tidy and modern space. It was originally our pantry and toy closet, but with my kids getting older, we didn’t need as much toy space.
She’s been organizing her orders for her business up until this point with sticky notes on the wall – but they never stuck on very well and she’d find them on the floor, and I wasn’t a big fan of how they looked… so this board will solve two problems at once!
A Side Note about Children’s Items
I actually hear from parents pretty often asking me about how to deal with their children’s things in a decorating sense.
We know that children as members of our families and our homes deserve space and freedom to play and enjoy themselves, but as women who love to decorate, it can sometimes be hard to strike the balance, can’t it?
My advice is to first, help teach your children how to de-clutter and keep only the things that bring them joy.
Then, find them cute ways to store those things that they love and chose to keep. Containers that fit in with your taste and vision for your home. A cute container can literally cover a multitude of collections and “things”.
Do you see this chest of drawers here, I bet you never would have guessed that my son’s hundreds of LEGO pieces are stored in those drawers, right?
Giving children, both younger and older, a space to put their things away that fits right into your home is kind of the best of both worlds!
I talk a little bit more about this and my other suggestions in an older post called “Five Tips for Decorating with Children.“
And if you need more ideas, you can pin with me over on Pinterest where I have an entire board dedicated to Farmhouse Organization, and another to Farmhouse Kids Rooms.
Pin This For Later:
Until next time,


