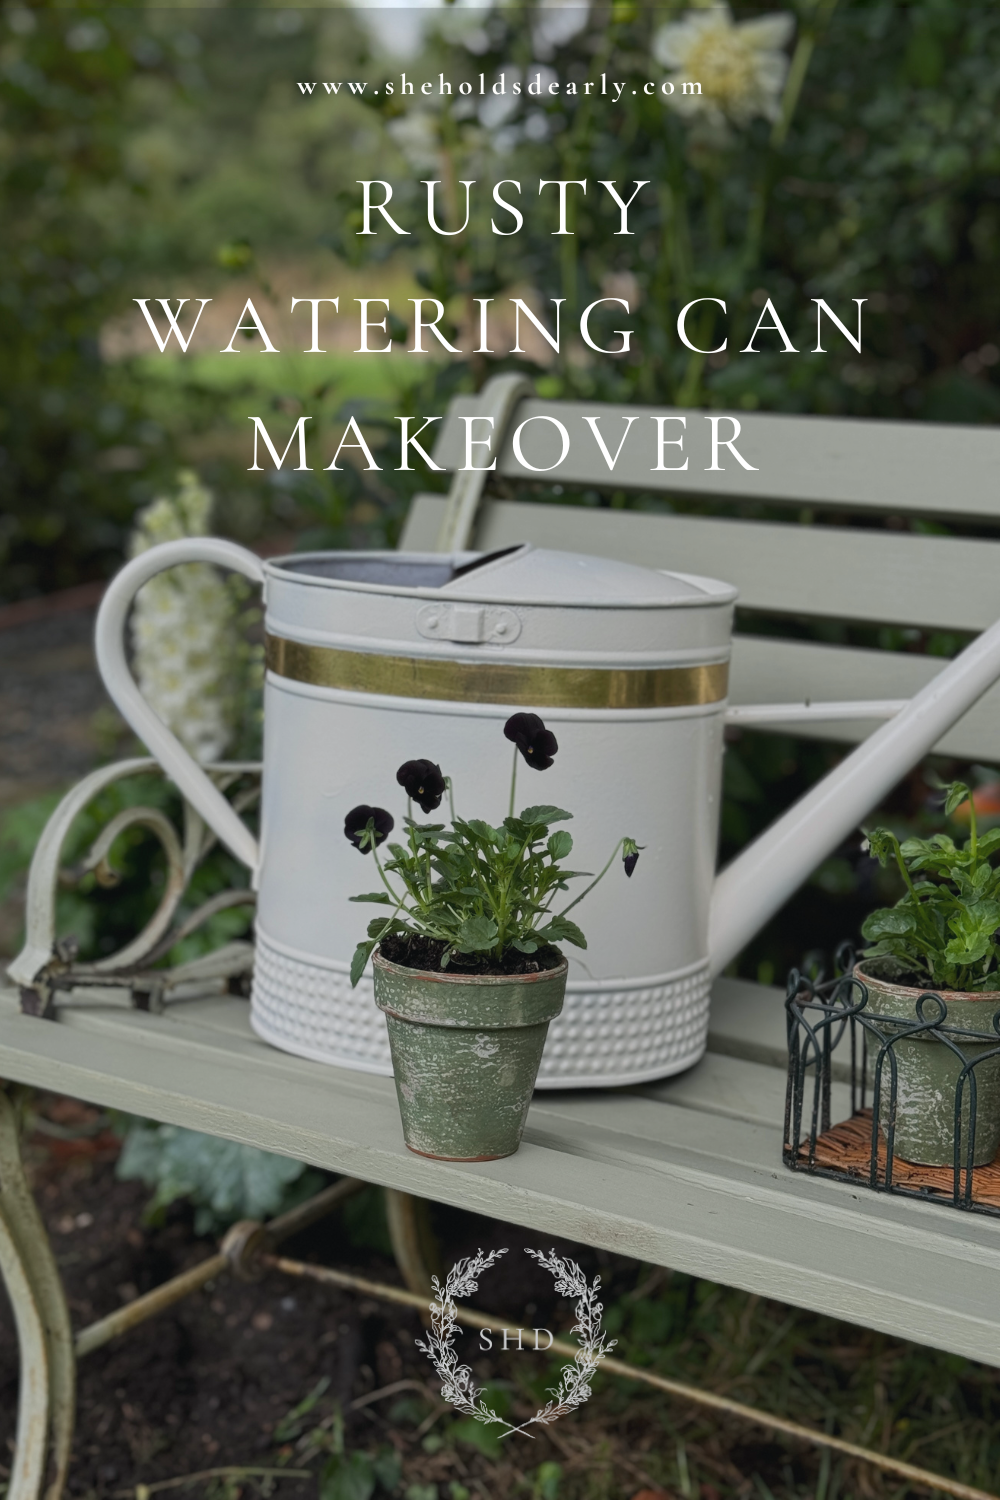
How to Makeover a Rusty Watering Can
Don’t let that rust keep you from buying and using the watering can of your dreams – here’s how to make over even the rustiest watering can.
I’ve had this watering can for over 10 years – and was at the point where I decided I was either going to get rid or it or make it over; and BOY I’m glad I went with the second option!
Watch the transformation here, along with our project last year to create our French garden pathway.
*This post contains affiliate links to products I know &/or love.

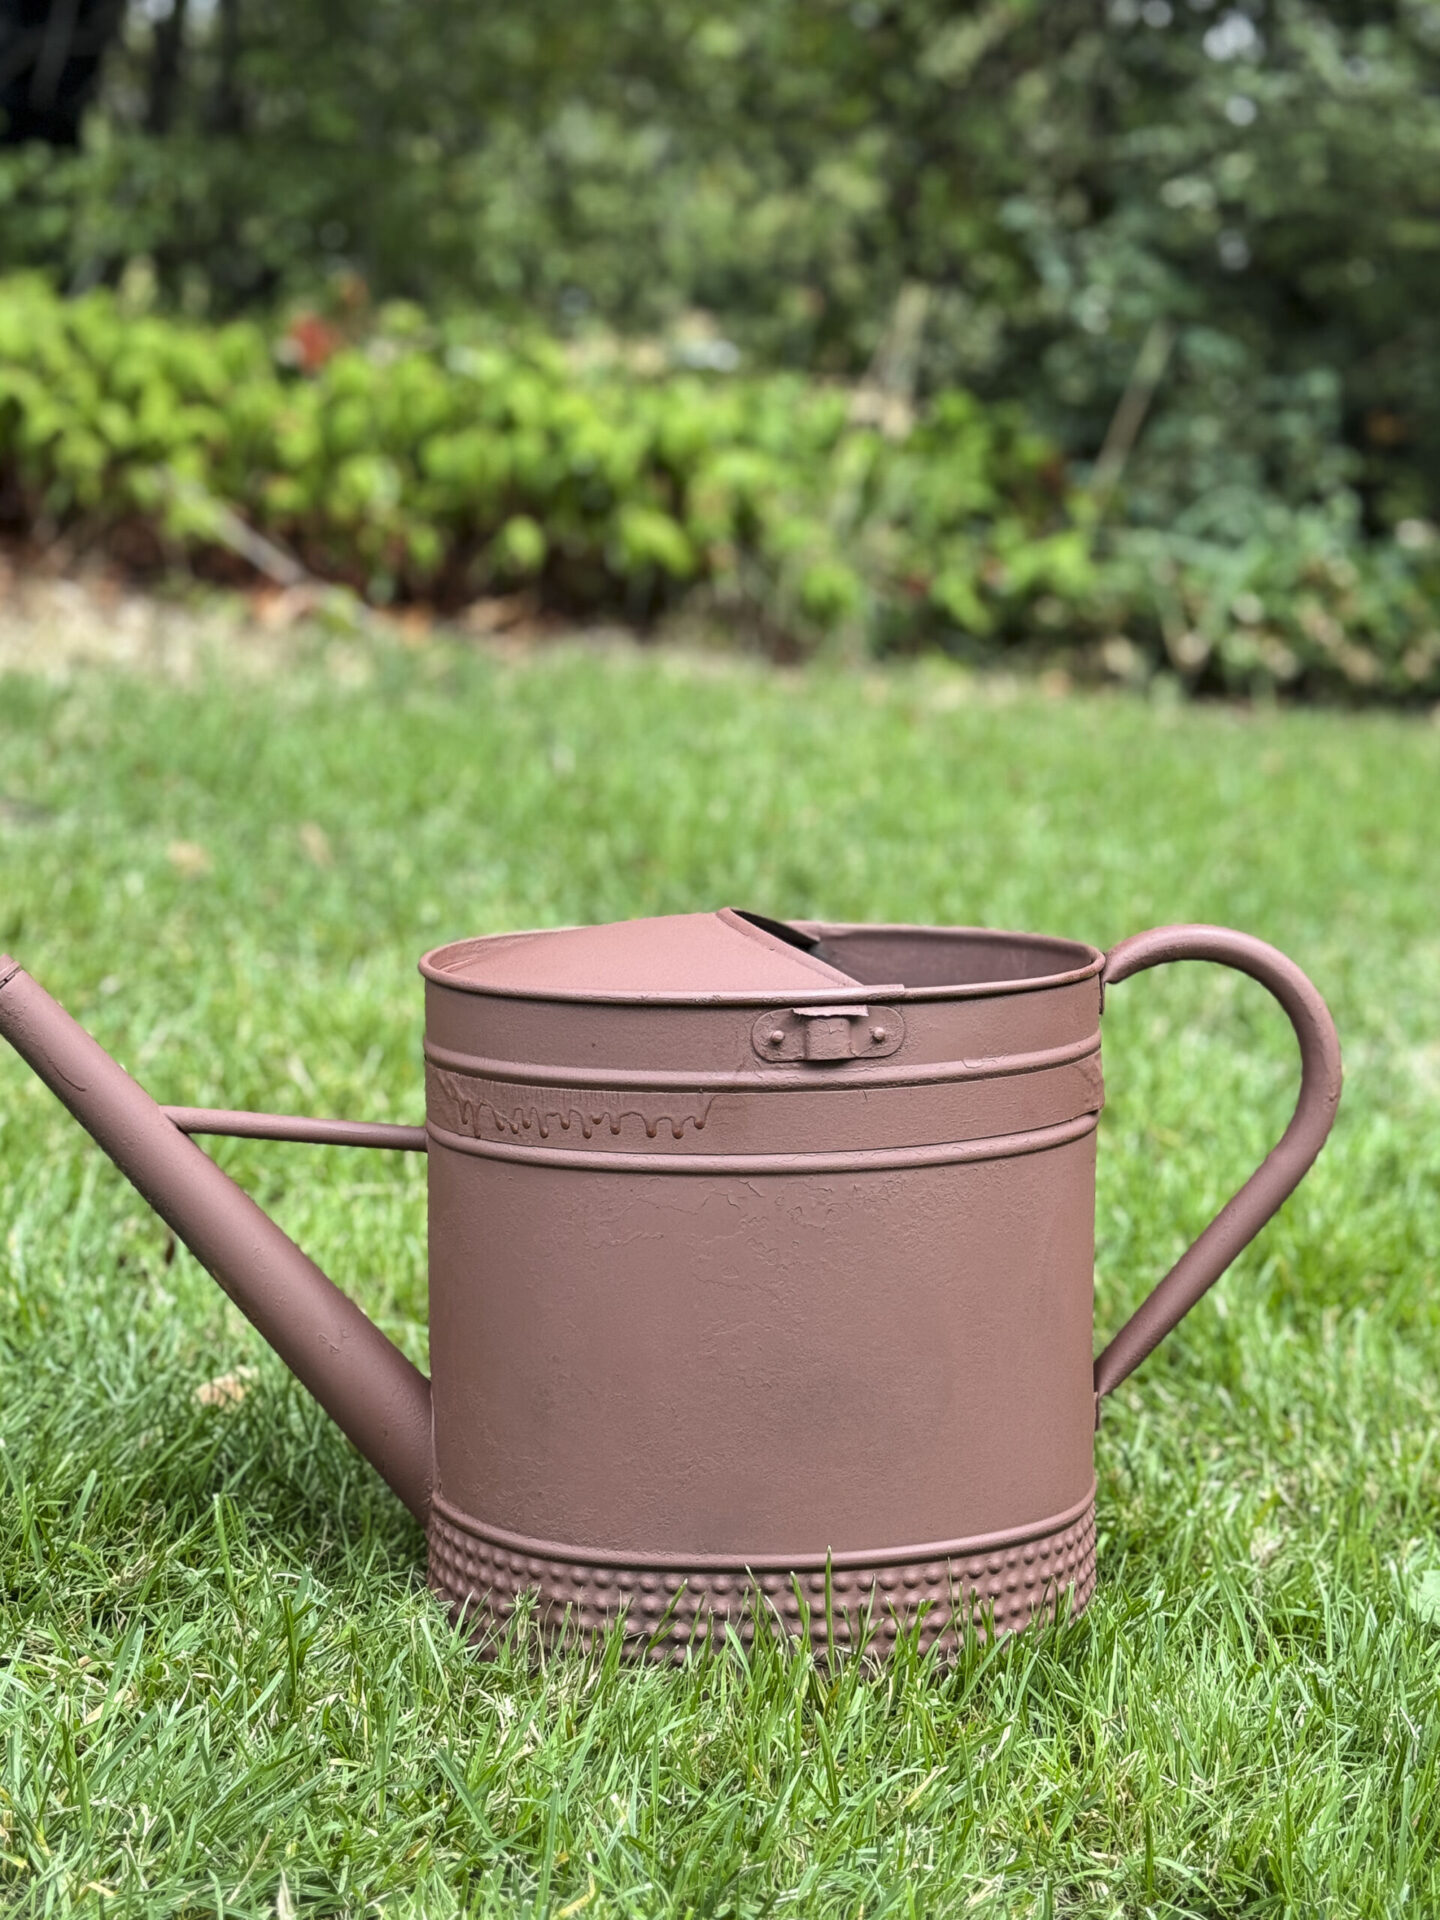
How it Looked Before…
Here’s how the can had sat looking for the past 10 years. I knew I wanted to clean it up, and that it would look amazing once I was done with it. It just needed some TLC.

The Transformation…
I began by sanding down the worst sections of rust and giving it a good scrub with soap and water.
Then I left it to dry outside in the sun to make sure no moisture remained when I started painting.
I wanted something that would protect it from future rust – and found a rust stopping primer that did just that.
Before I started painting I knew I wanted to save the beautiful gold band accent, so I taped it off carefully, using a razor blade to cut perfectly straight lines along both edges.
Then I sprayed on a coat of the rust stopping primer and let it dry completely.
Once that was dry, I covered it with two coats of my favorite white spray paint – Rust-Oleum Heirloom White. I love this color so much, I buy it by the case so I can always have some on hand!
Looking for More Spring Inspiration?
Before I finish telling you about my vintage watering can, I have to share some exciting news about something brand new for 2025!!
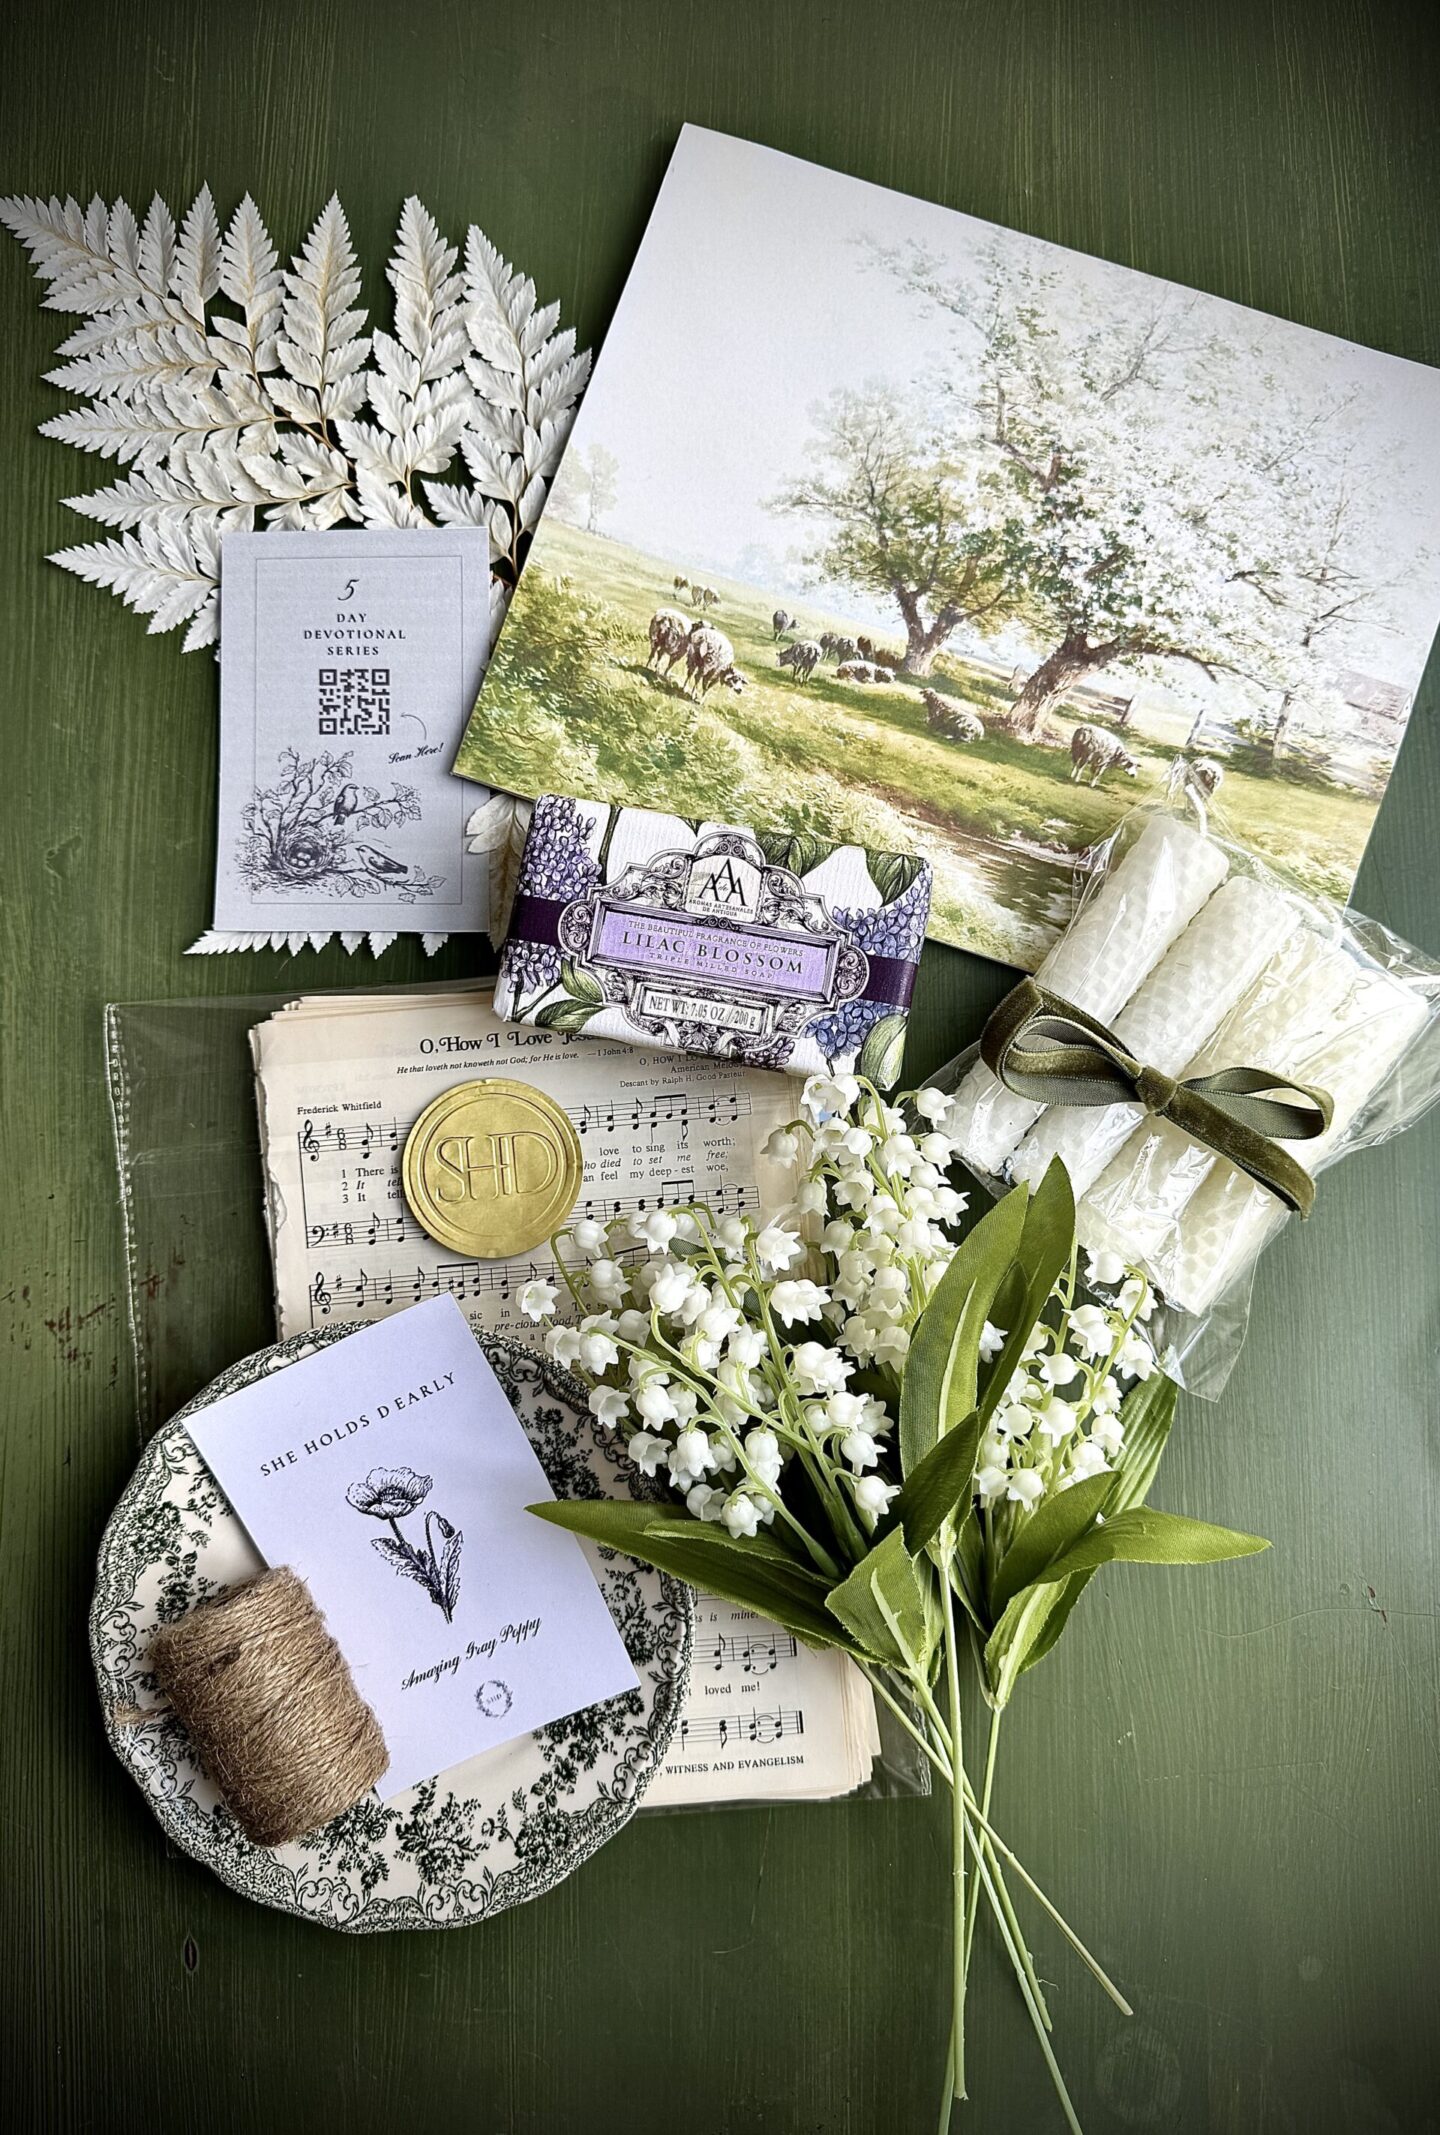
Introducing my Spring Decor Boxes | These are a curated collection (hand selected & packed by yours truly) that includes some of my favorite spring decor pieces, as well as simply DIY projects – all delivered right to your door!
Here’s what’s included:
• Lily of the Valley- life like bouquet, 5 stems
• Green transferware side dish, 6.3″
• AAA Lilac Blossom exfoliating bar soap
• Amazing Gray poppy seed packet
• Hymnal page runner DIY kit
• 5 day audio devotional, led by Sarah
• 8 x10 sheep art print on canvas board DIY kit
• Jute twine
• Beeswax candles DIY kit
• White fern stem
Click HERE to learn more and to order your box now!
There are a limited quantity available!
Boxes include free shipping within the US. International shipping is not available.
And now back to our regularly scheduled programming…
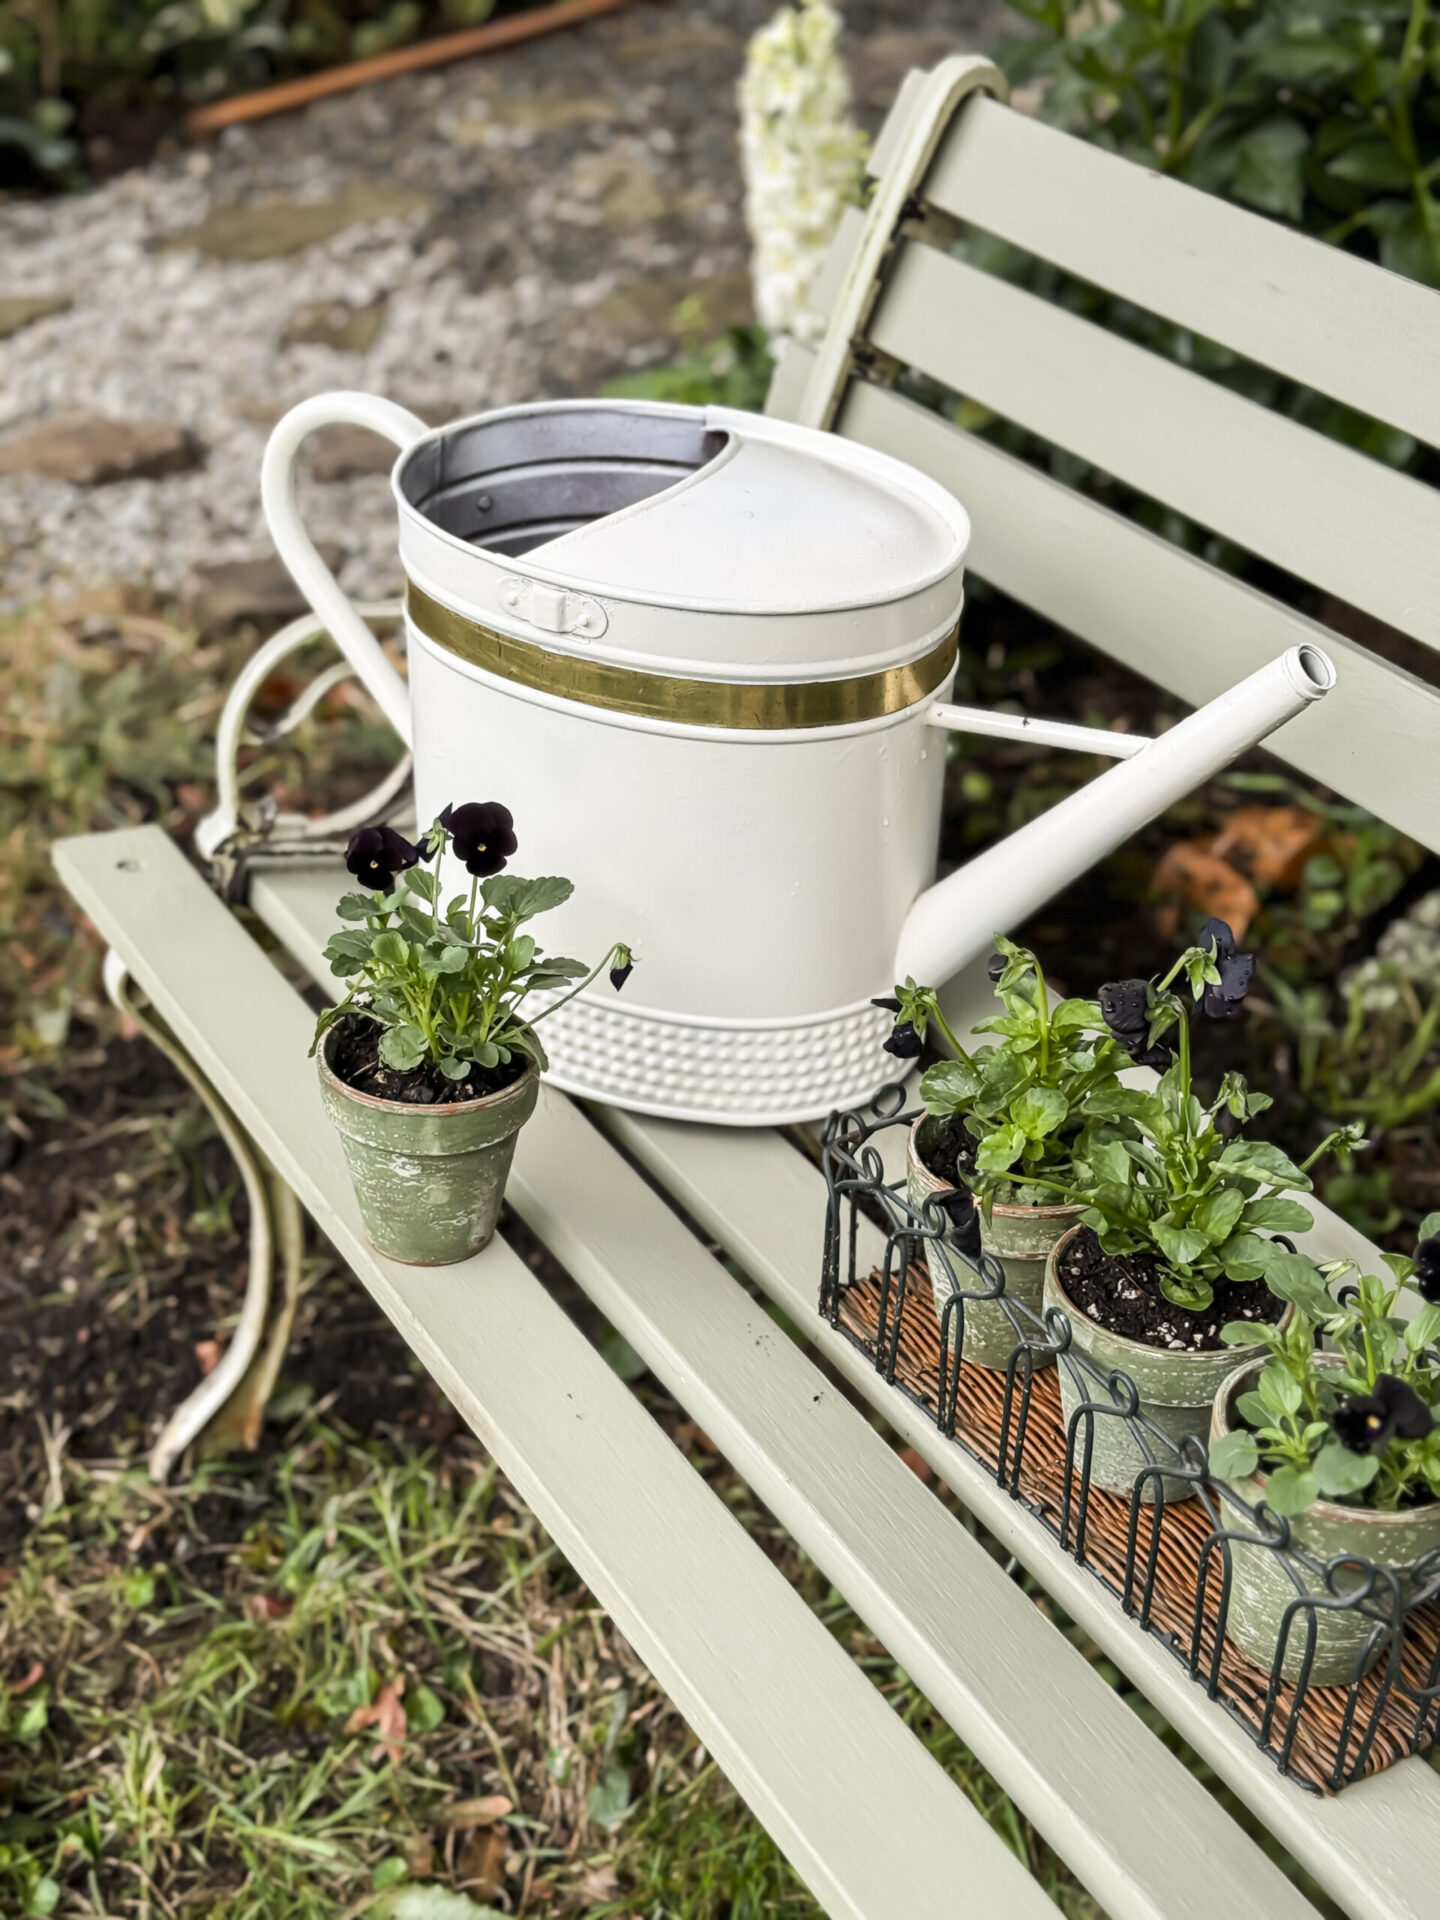
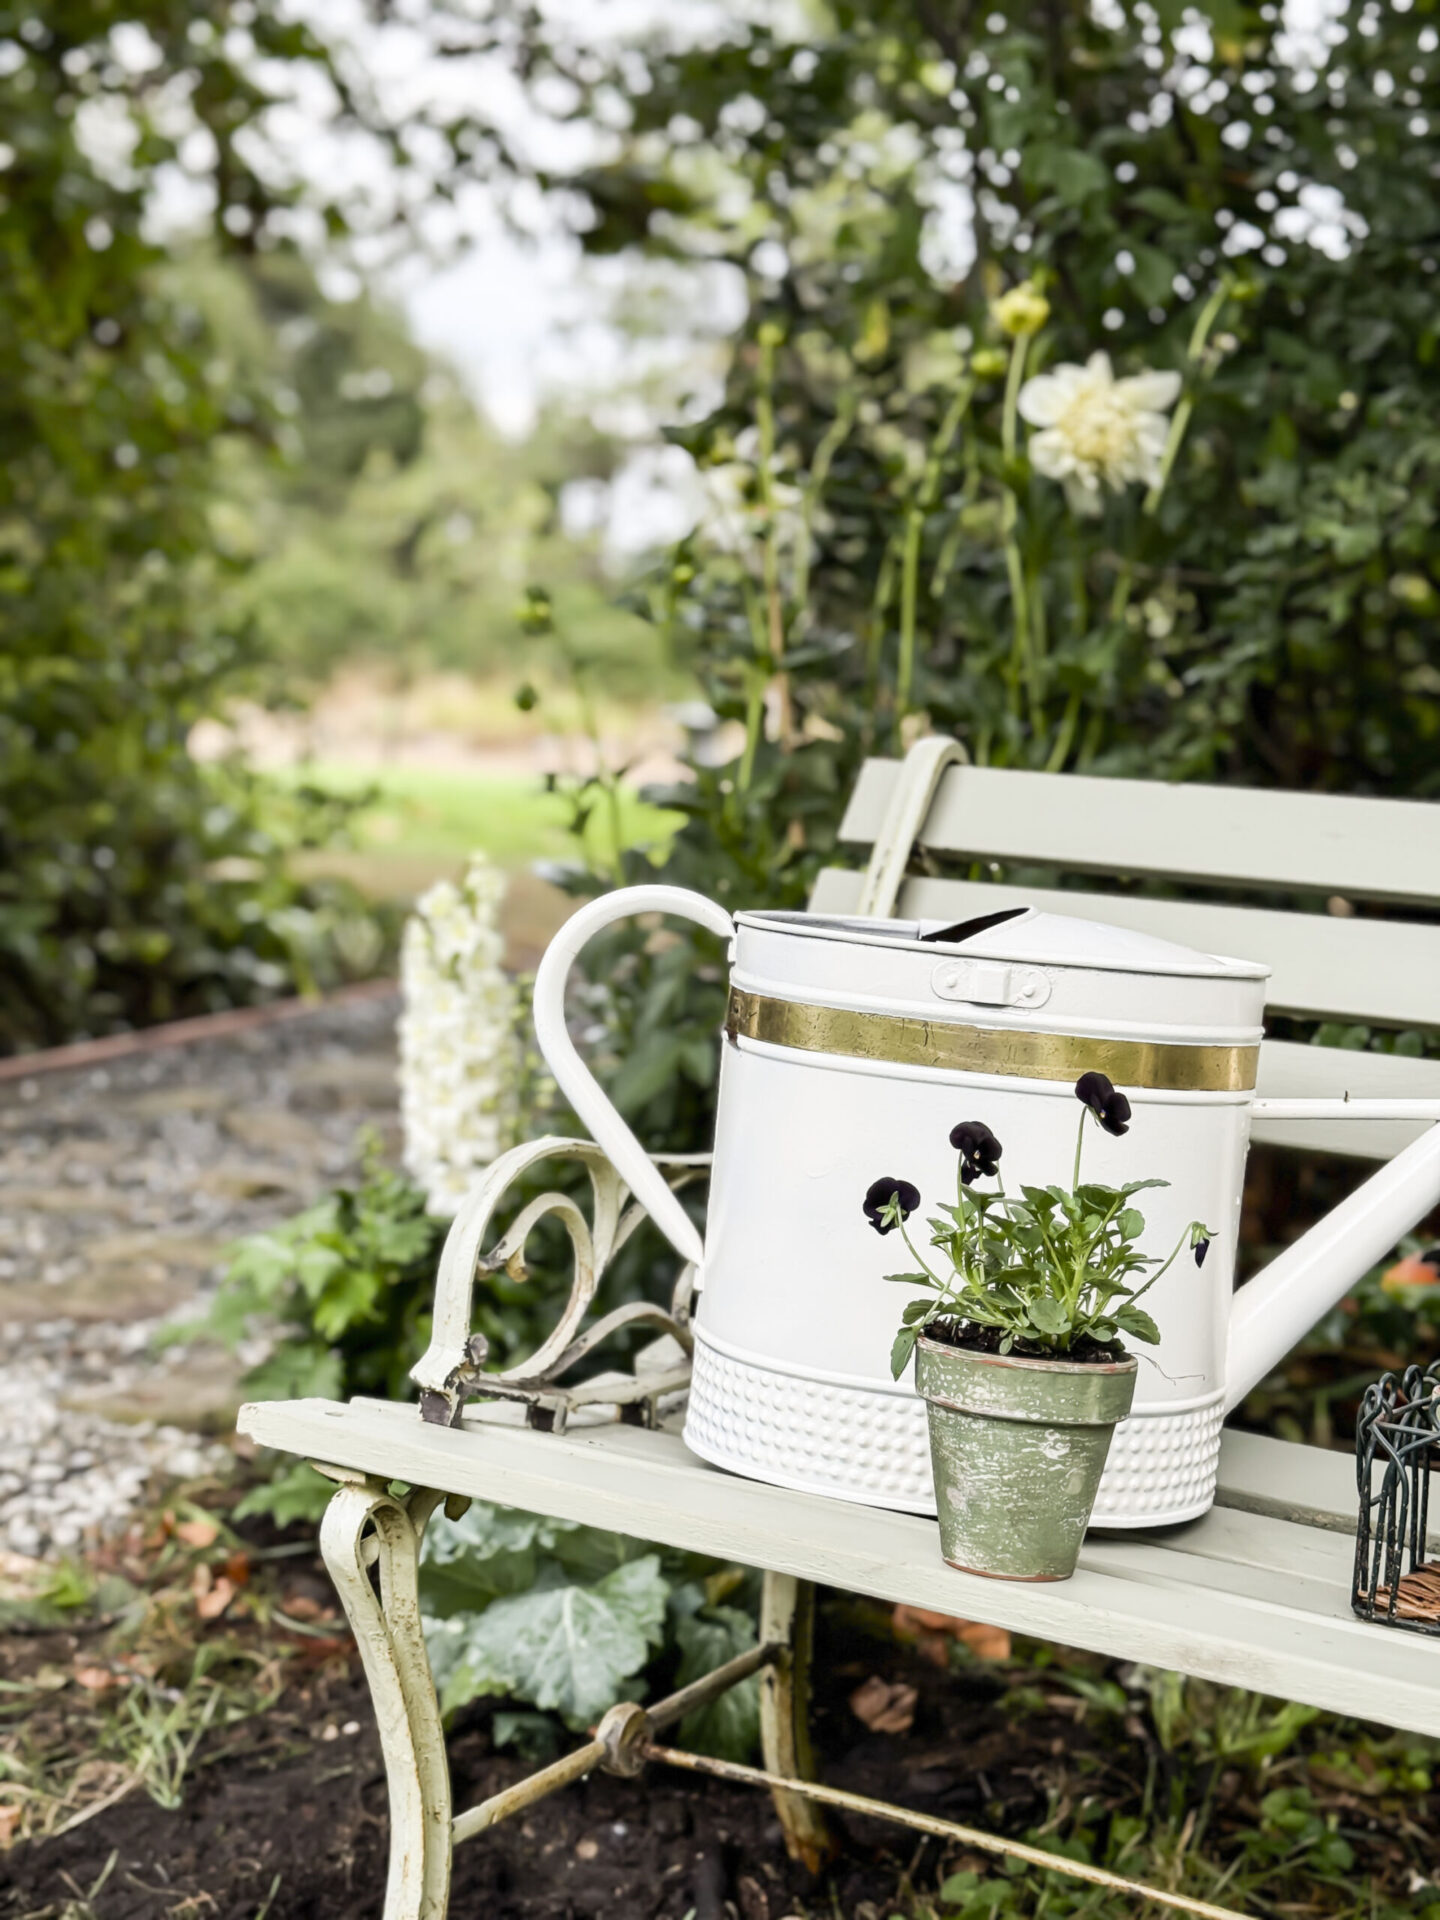
Once the white paint dried, I was able to do the BEST part – pulling off the tape. I just love how the gold stands out against the heirloom white.
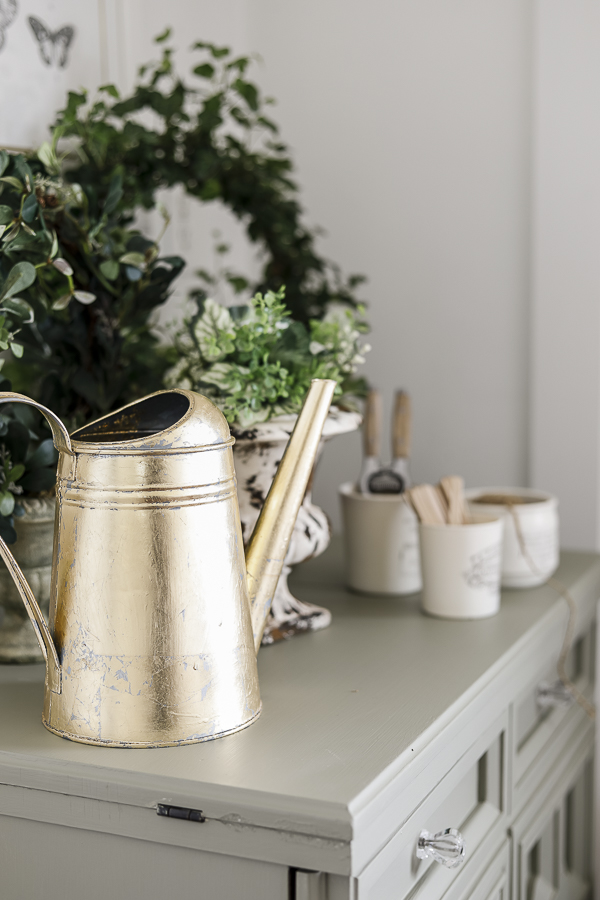
And I love that the gold on this watering can coordinates beautifully with another watering can I have that I gilded with gold leaf. (If you’ve never seen that one, the process was documented HERE.)
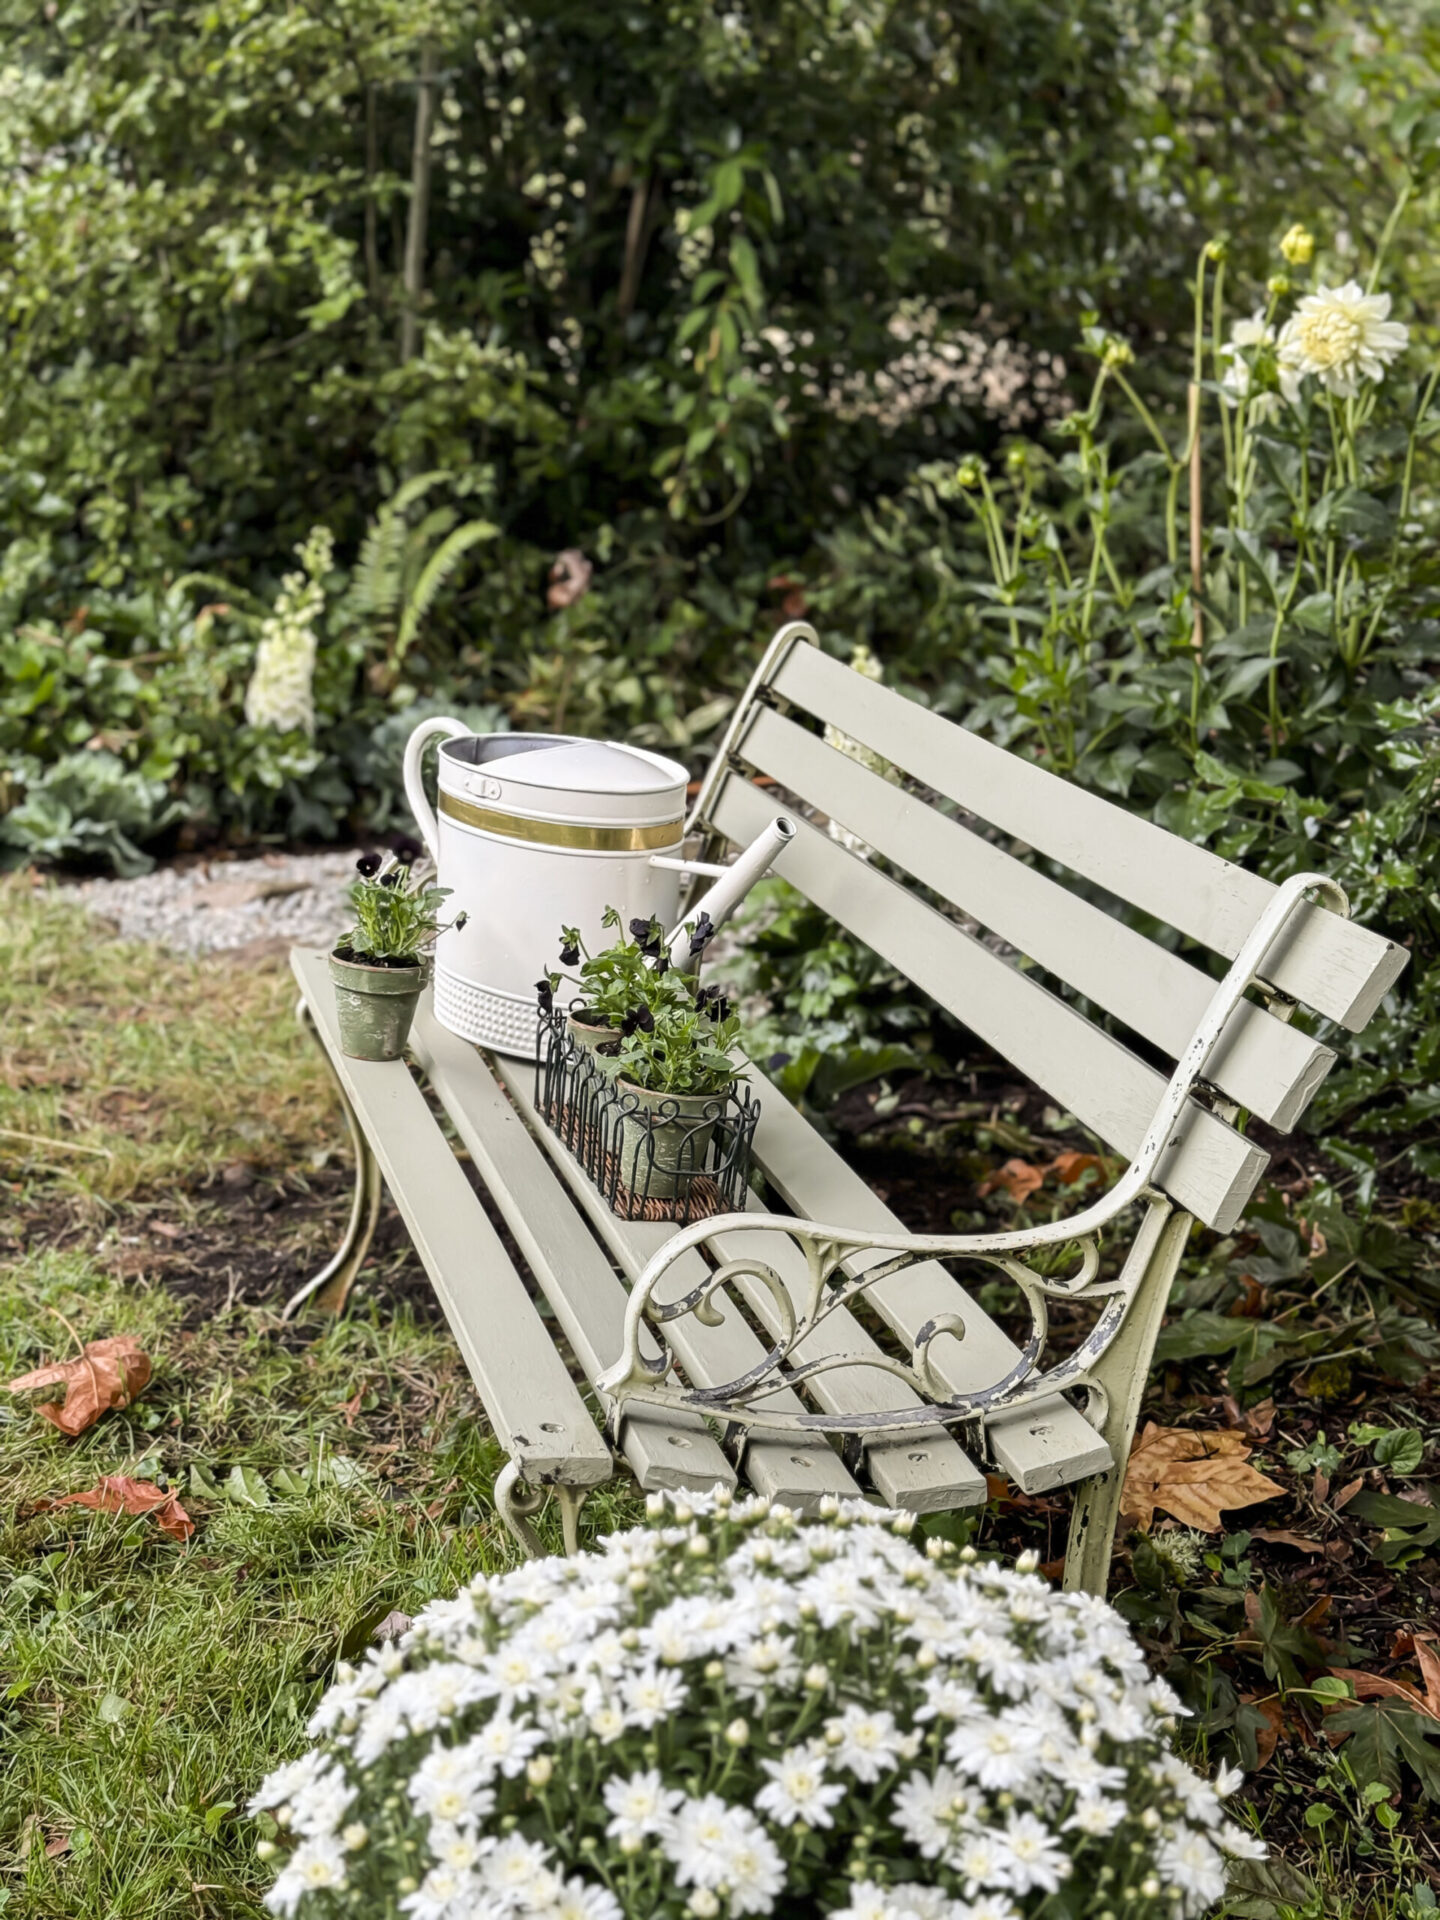
The last step was to style it along our newly created French garden pathway! I set it on top of our sweet children’s bench that my daughter’s thrifted for me a few years ago for just $5!
I had painted this bench with some of my favorite paint by Fusion Mineral in the color “Lichen”. This paint has beautiful self-leveling properties, a lovely consistency and is such a dream to work with.
If you want to try some for yourself, use this link for 10% off your order! When I’m using painted pieces outside, I also love to use Tough Coat as a protective final layer- It’s another fusion mineral product that I highly recommend.
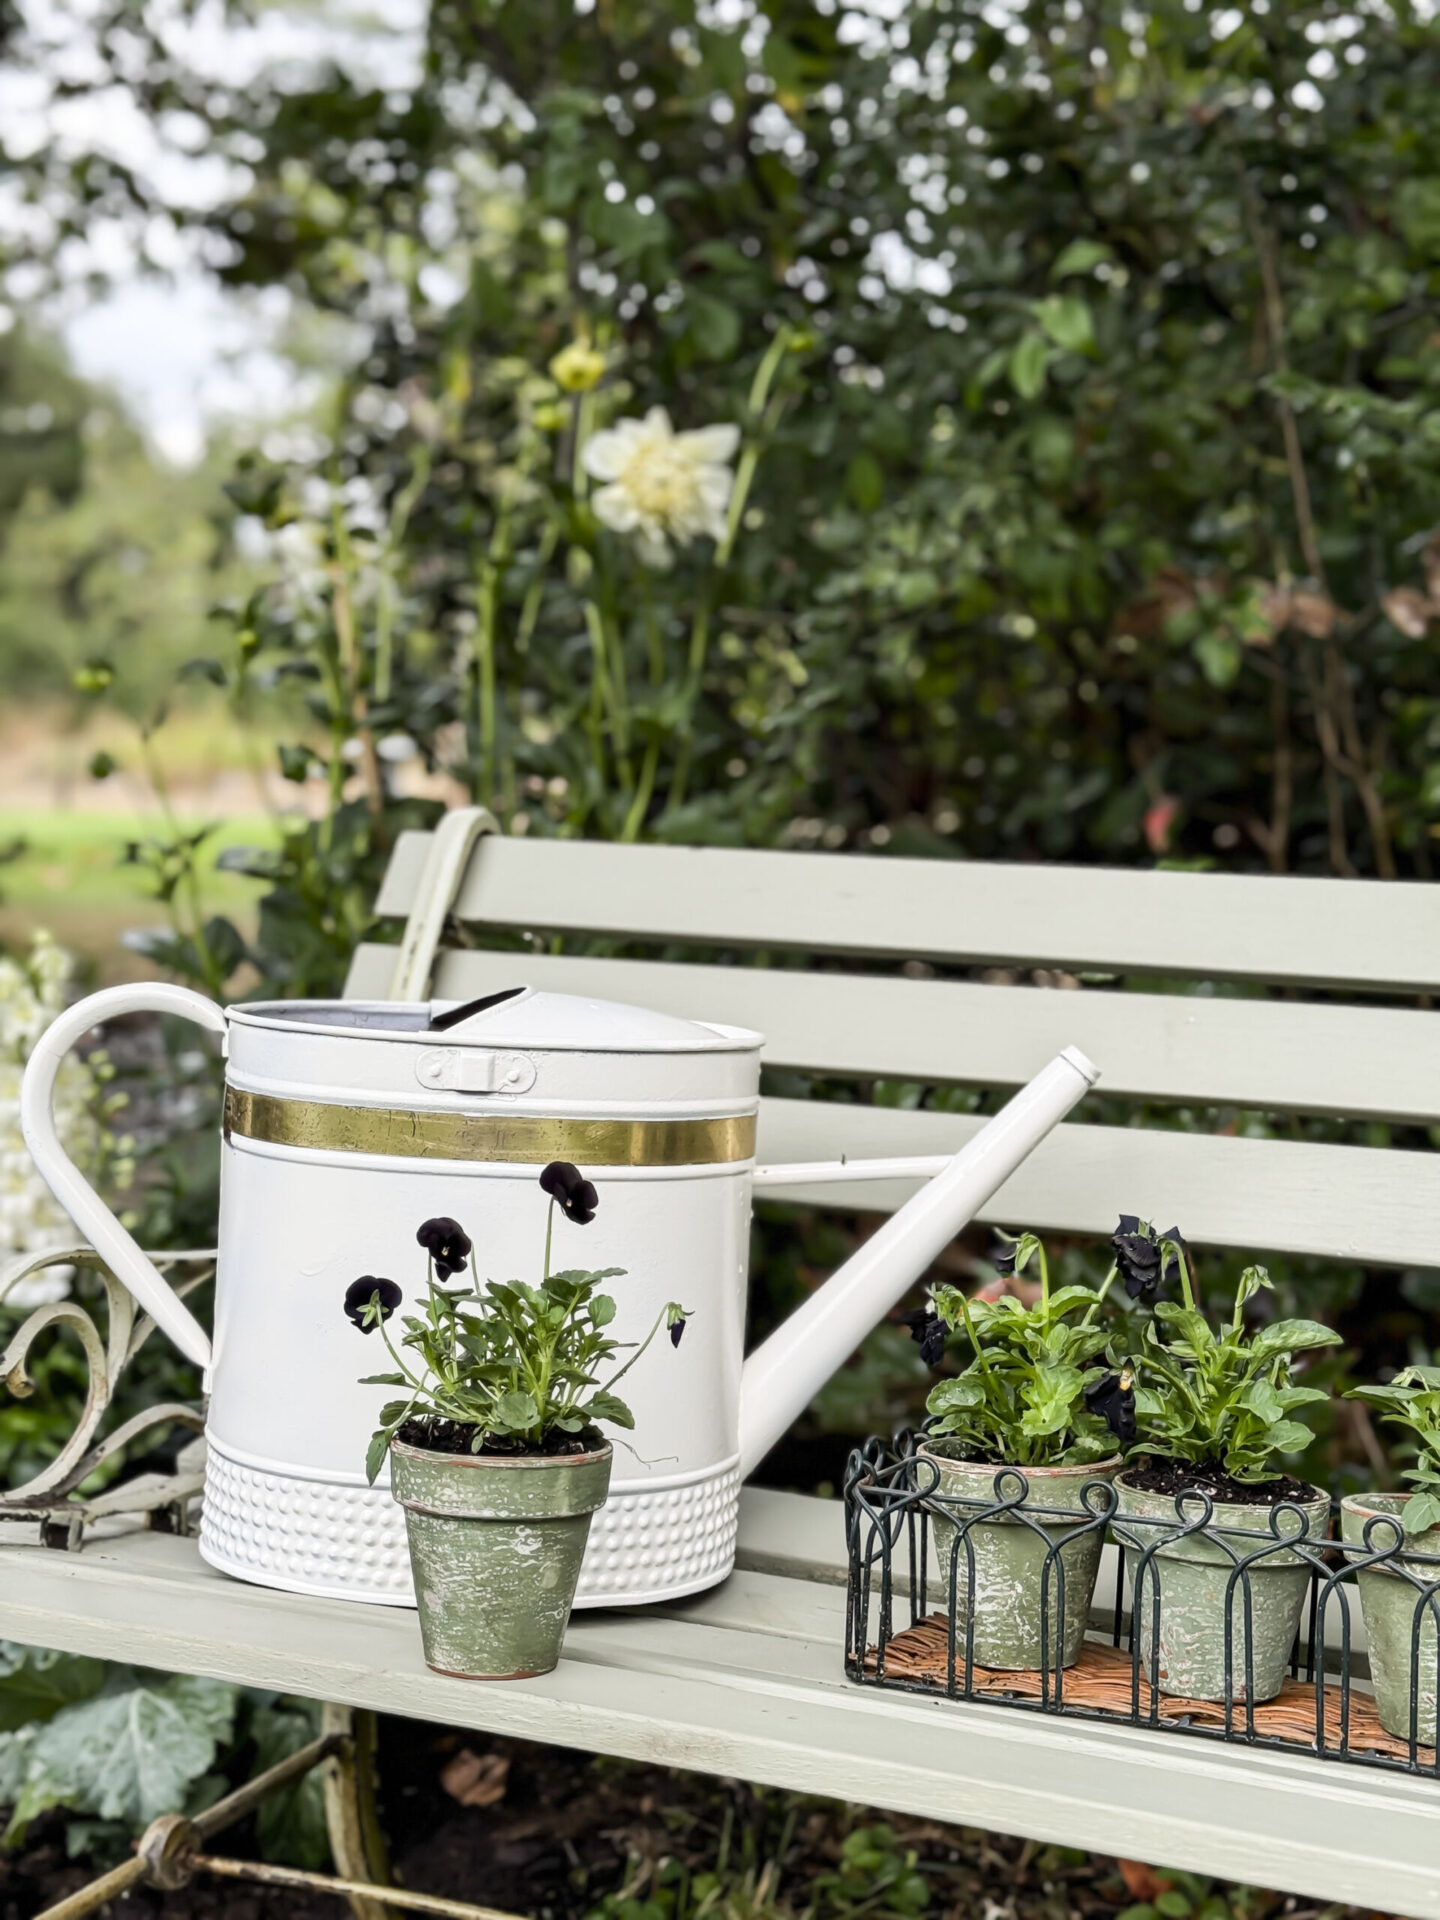
I finished the styling off with a few potted black violas.
This area was one of my favorite places to sit and enjoy while working at the end of summer last year, and I can’t wait to begin again once the spring weather arrives!
Related Journal Posts & Resources:
Don’t forget to get one of my Spring Decor Boxes before they’re all gone! Click HERE to learn more & order yours.
- Easy Garden Inspired Spring Decorations for your Home
- Creating a Beautiful French Garden Front Porch for Spring
- 3 Easy Spring Decorations you can Easily DIY
- Styling Thrifted Decorations for Spring
- 5 Elegant & Creative Uses for Spring Flowers
You can also pin with me on Pinterest:
Vintage Spring Inspiration | Vintage Garden | Vintage Exteriors | Thrifting Tips & Inspiration | DIY Projects |
Pin this Rusty Watering Can Makeover Tutorial for Later: