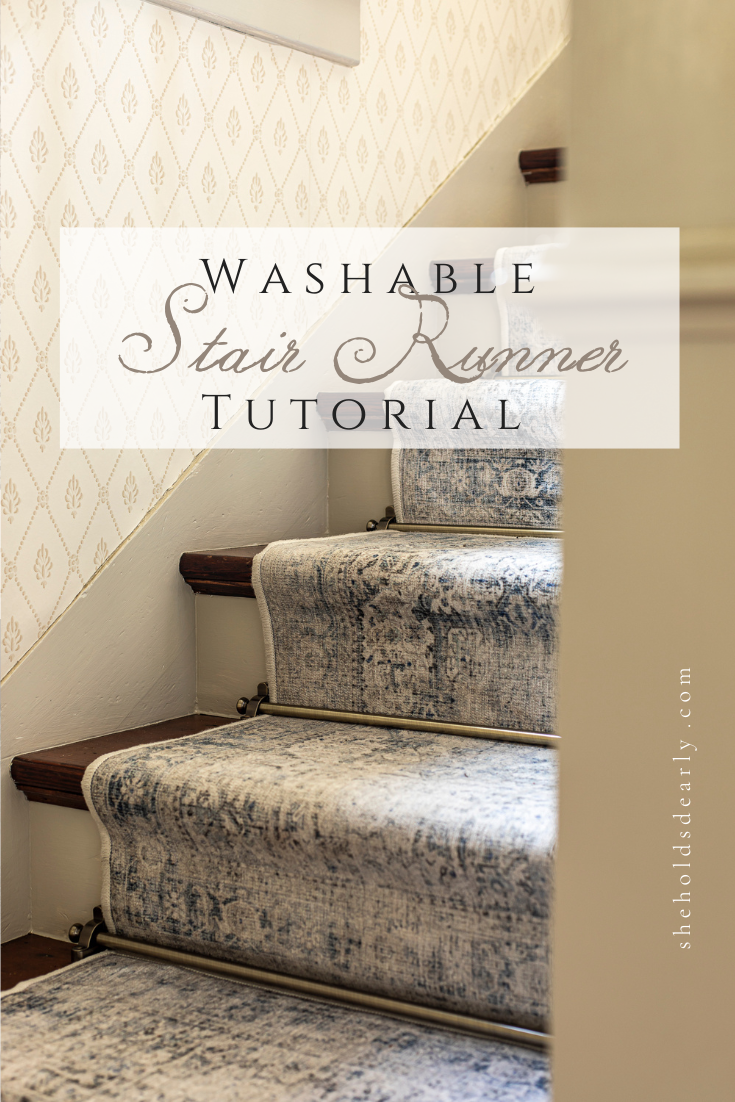
DIY Washable Stair Runner
If you’ve been searching for a washable stair runner, you can rest assured you’re finally in the right place! After a long hunt of my own, I’m happy to share a DIY tutorial for a washable stair runner using Ruggable Rugs!
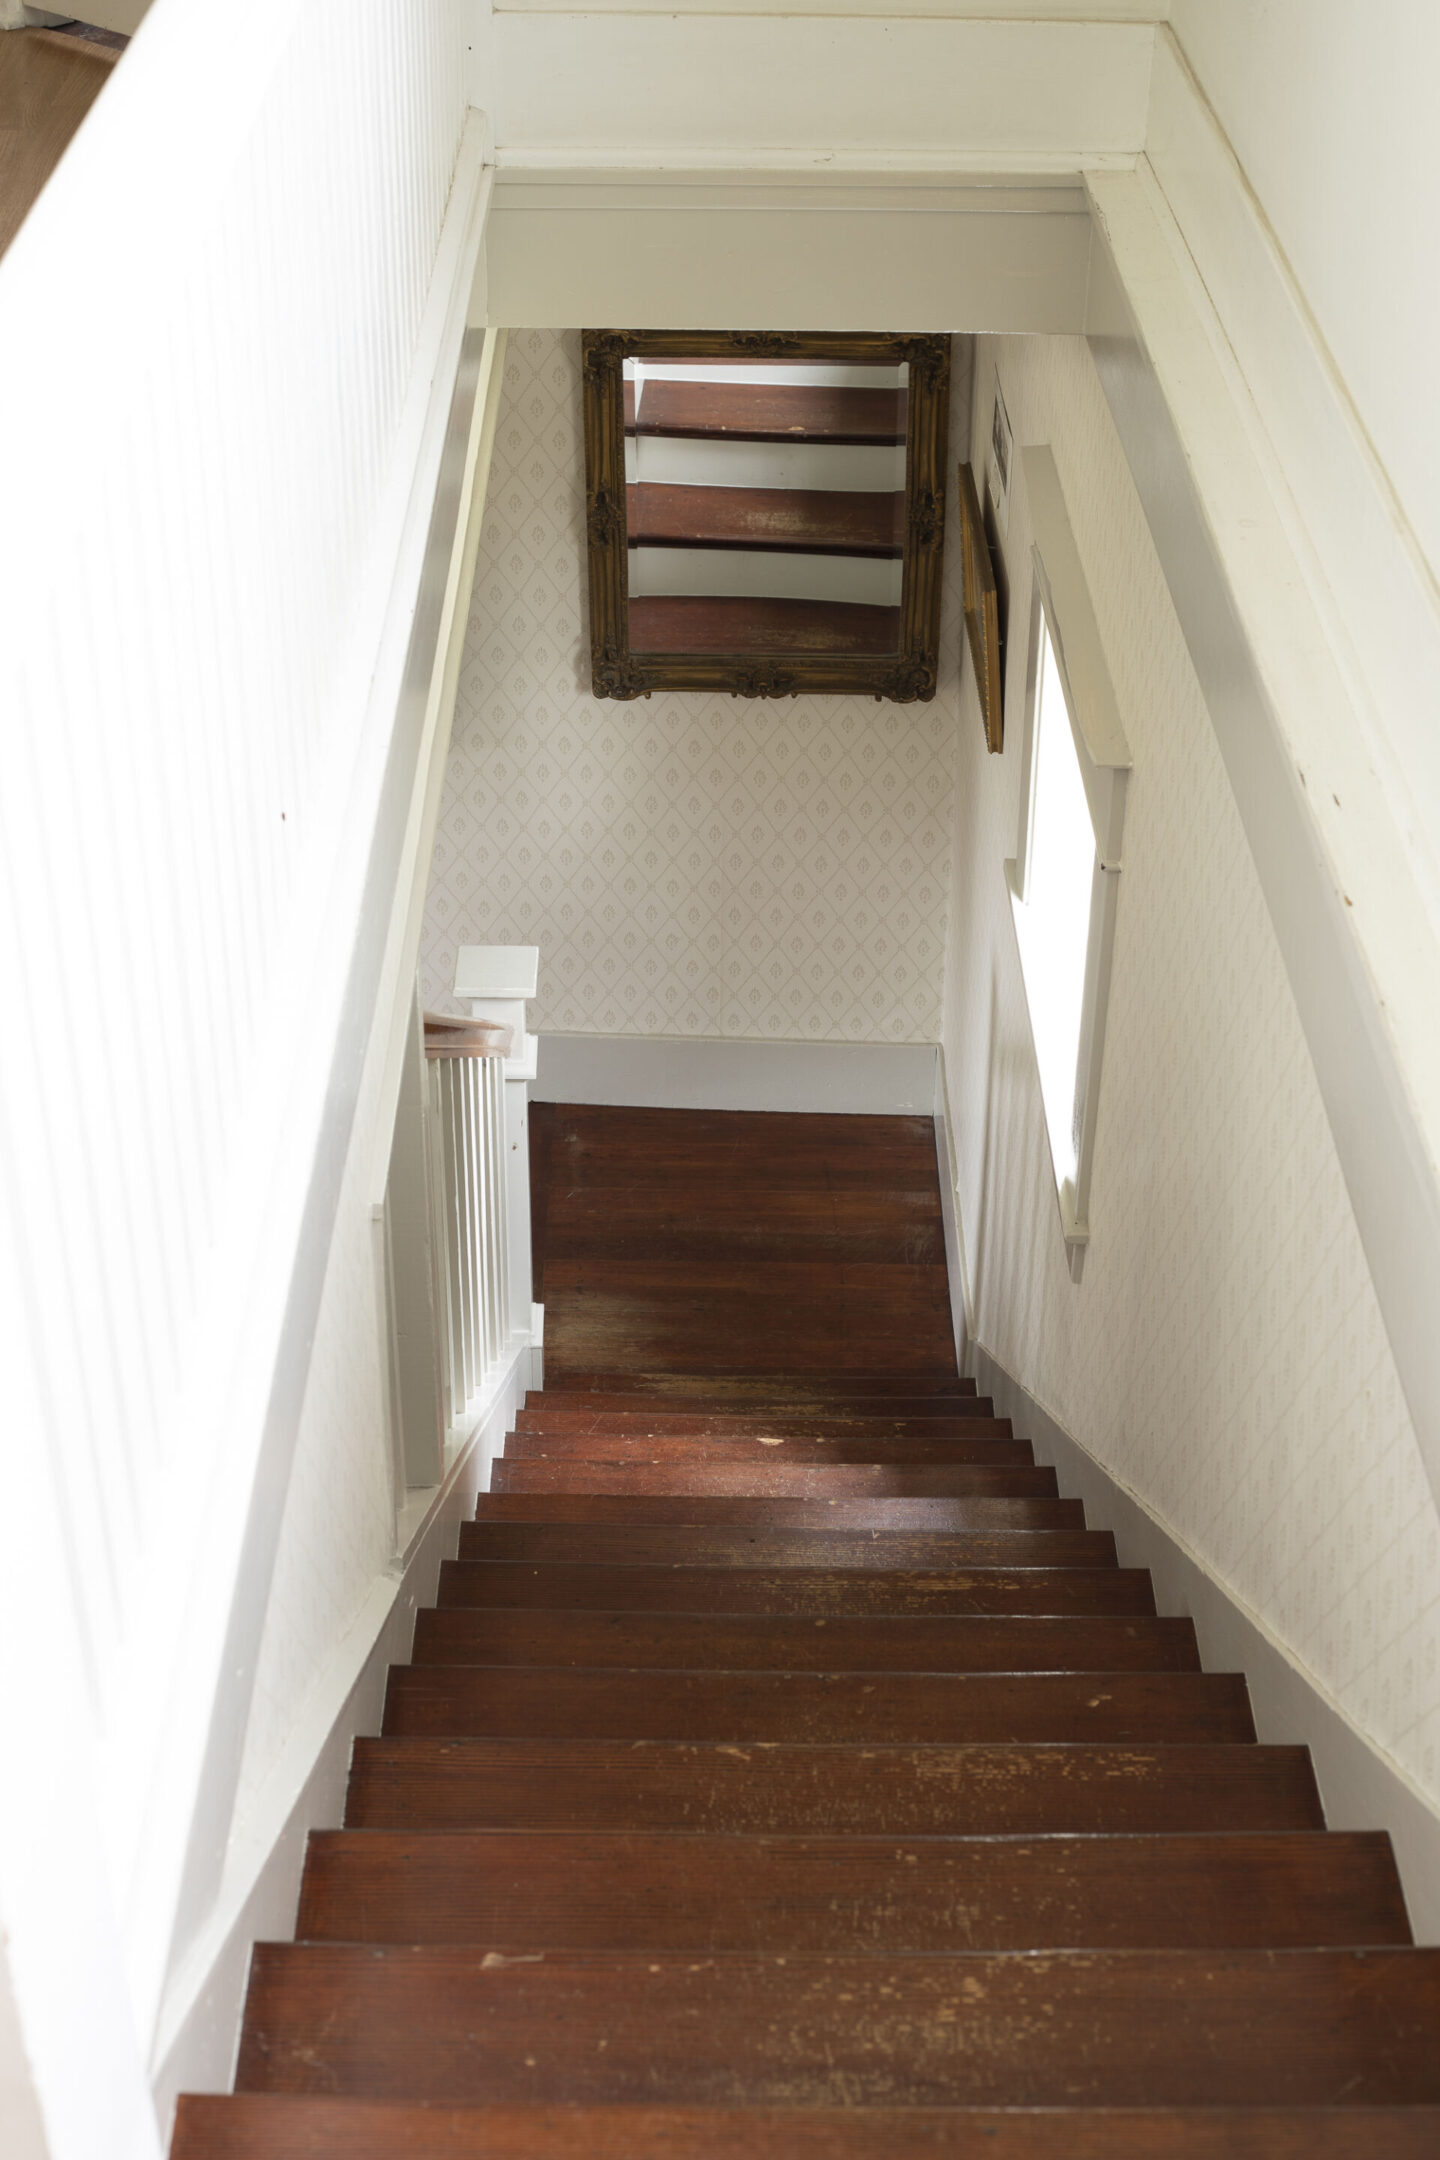
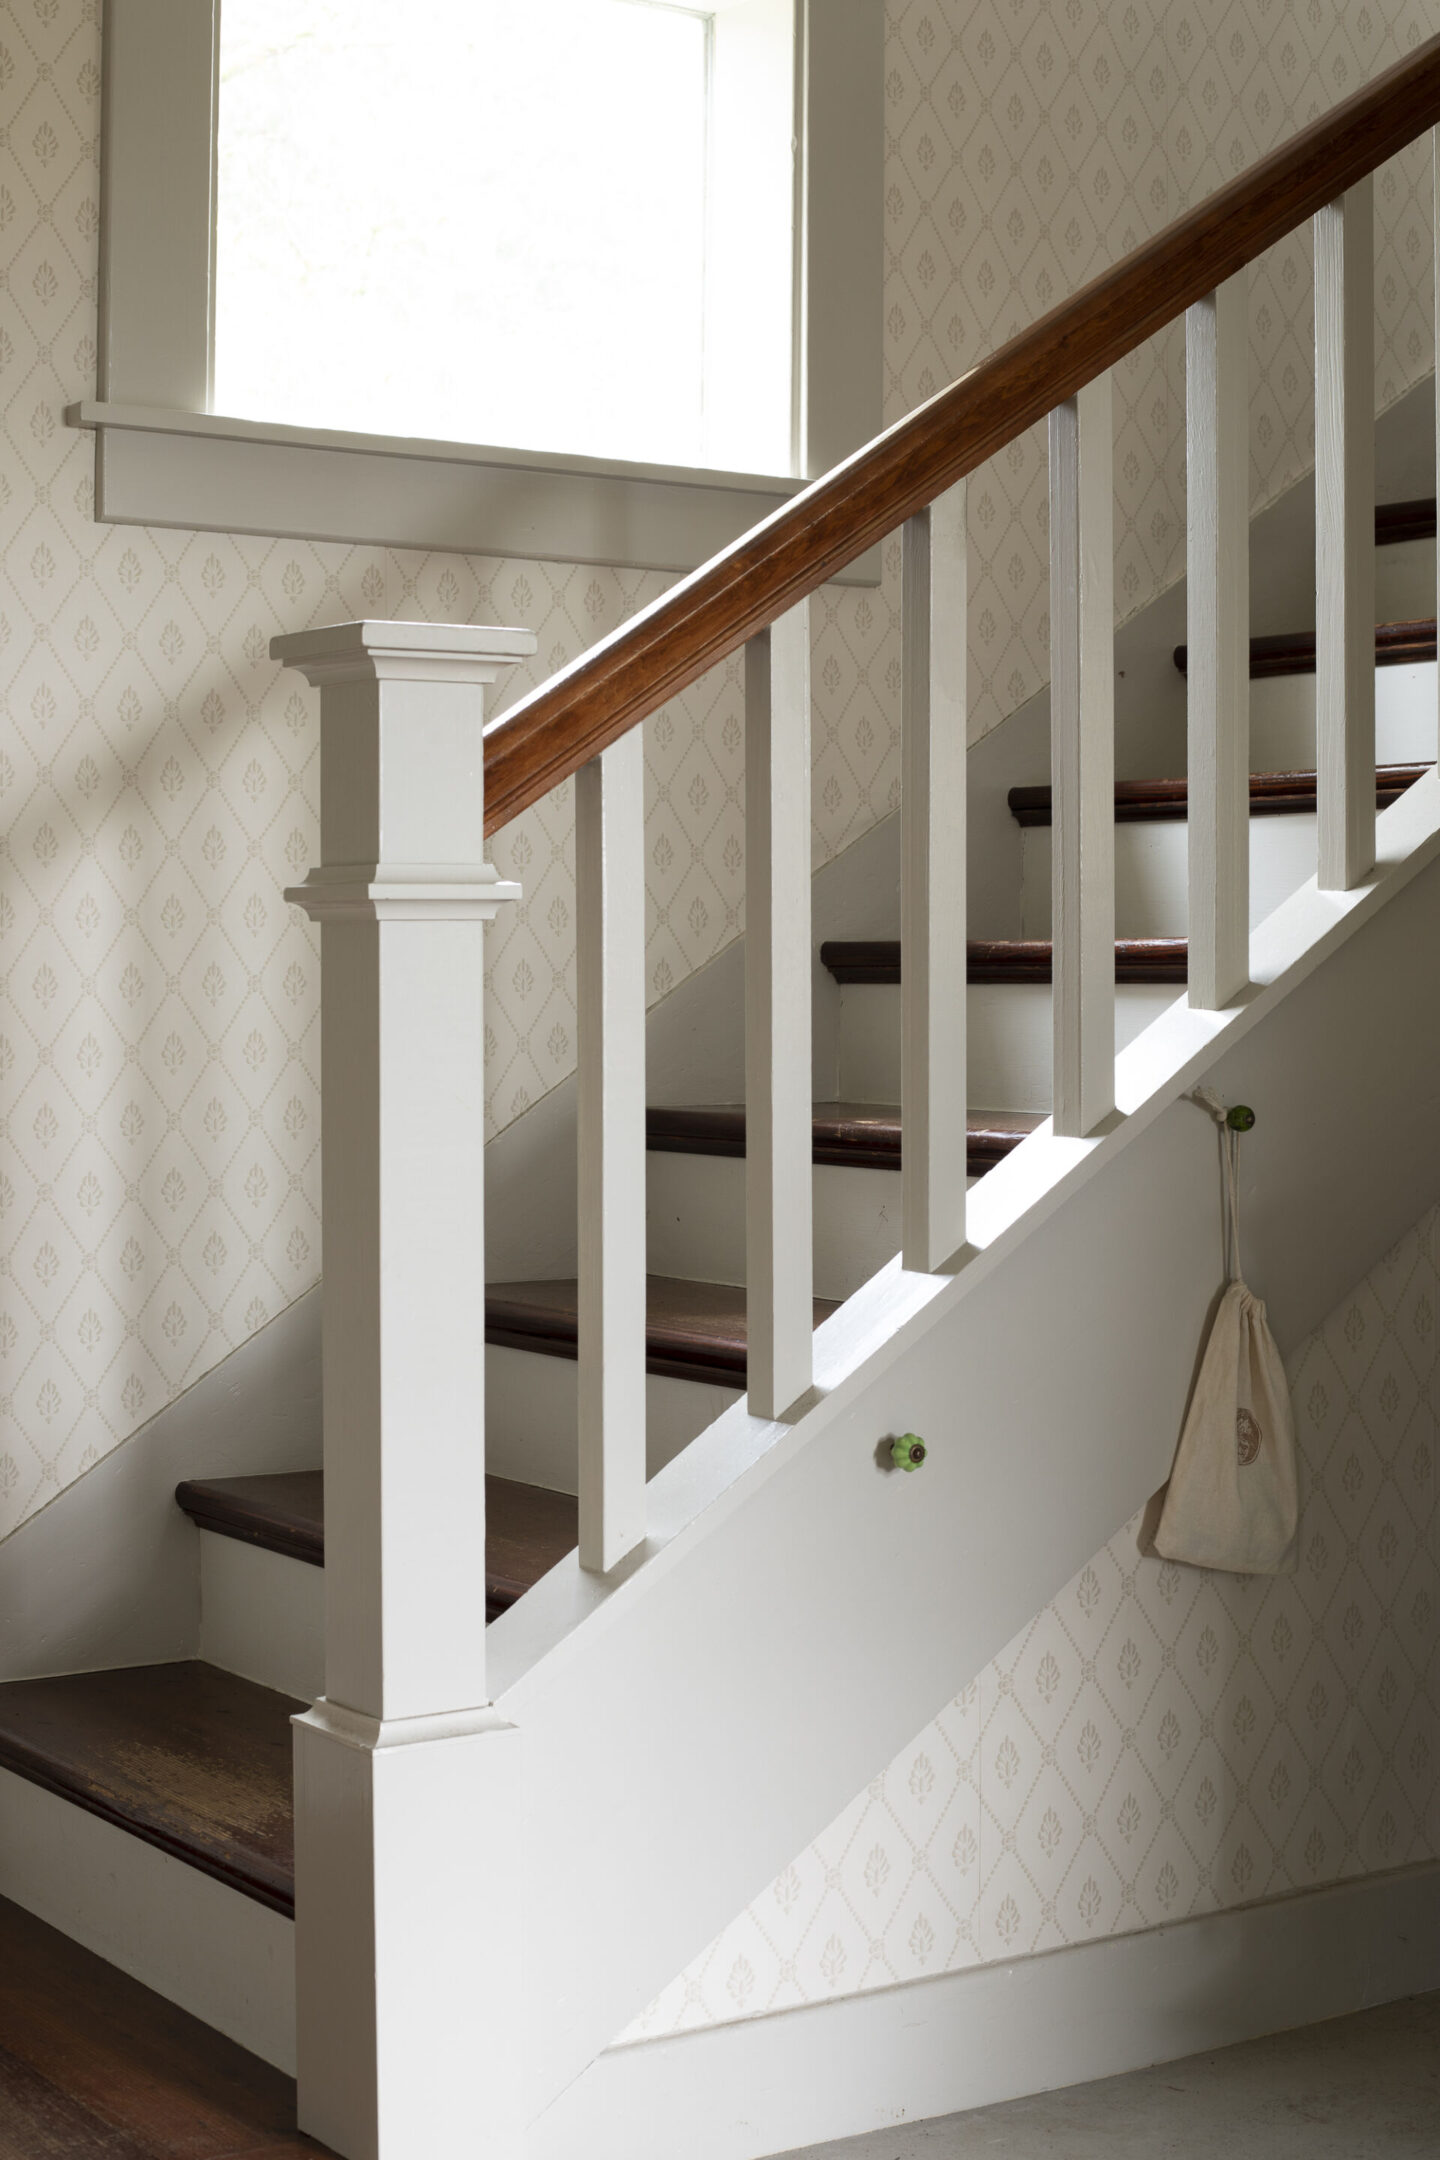
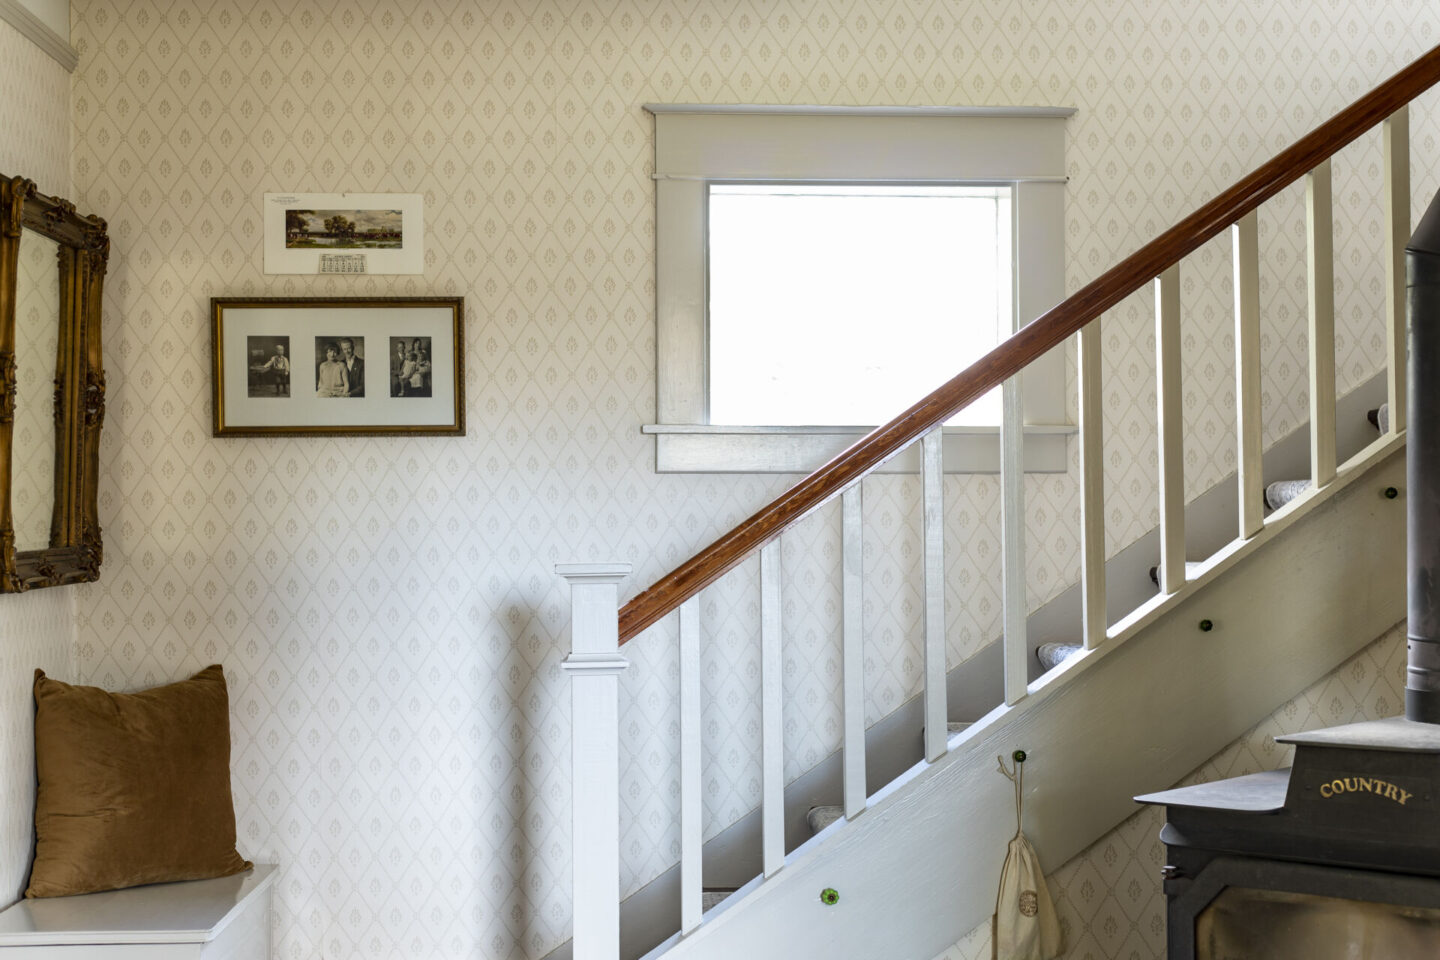
Our 1906 Farmhouse came with original fir floors, which we loved when we purchased our home 12 years ago; but seeing as they’re on the softer side of the woods used for floors, they haven’t worn as nicely as we’d have liked.
We refinished the stairs about 6 years after we moved in, but they haven’t aged well. Here’s how they had been looking:
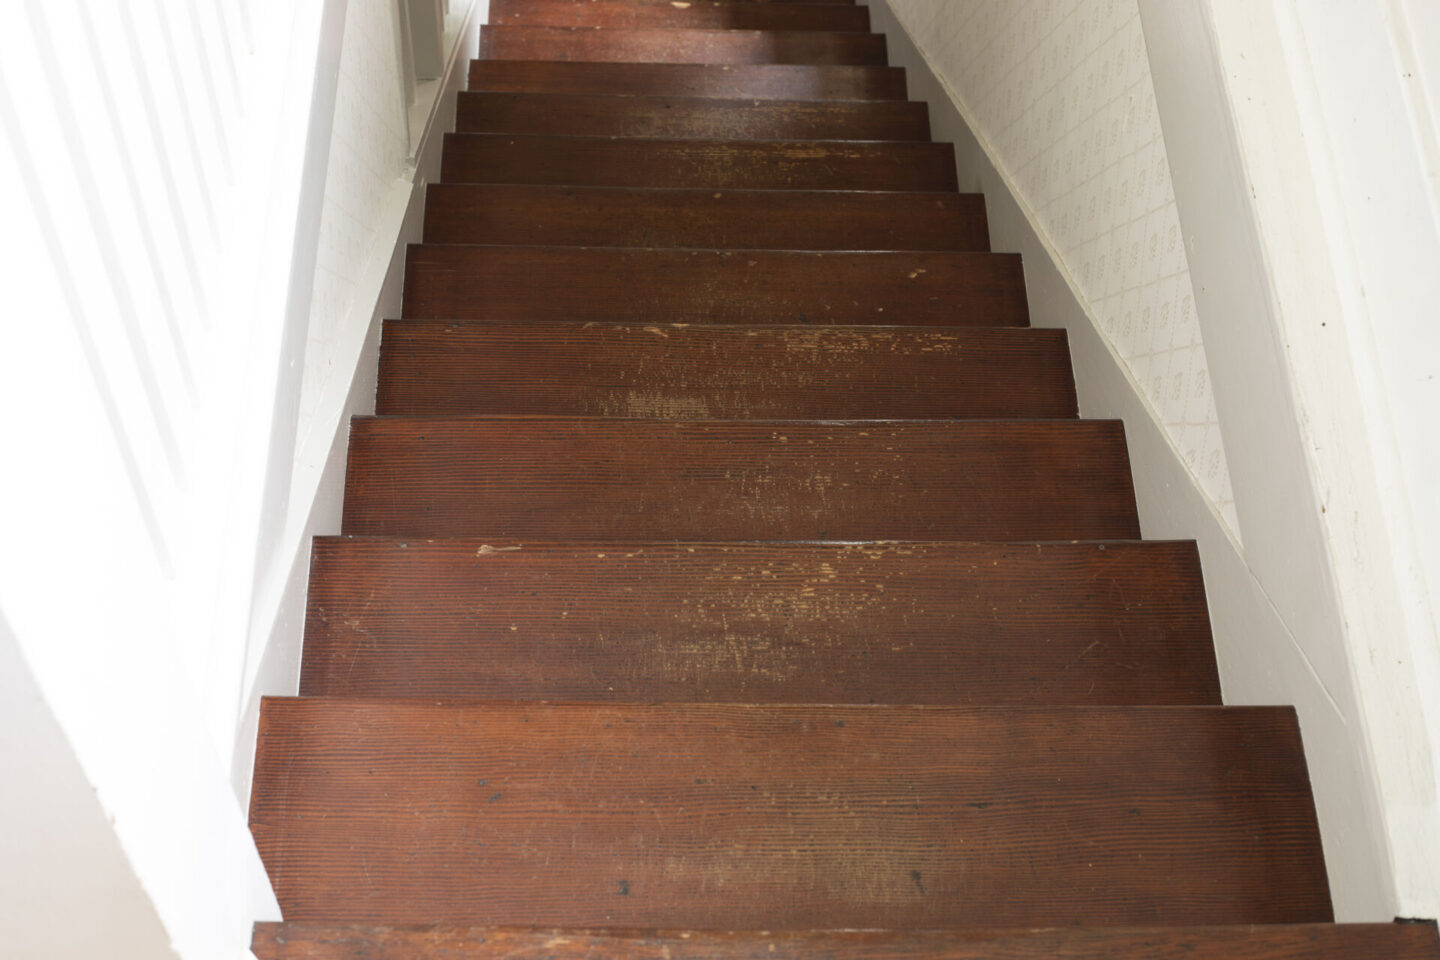
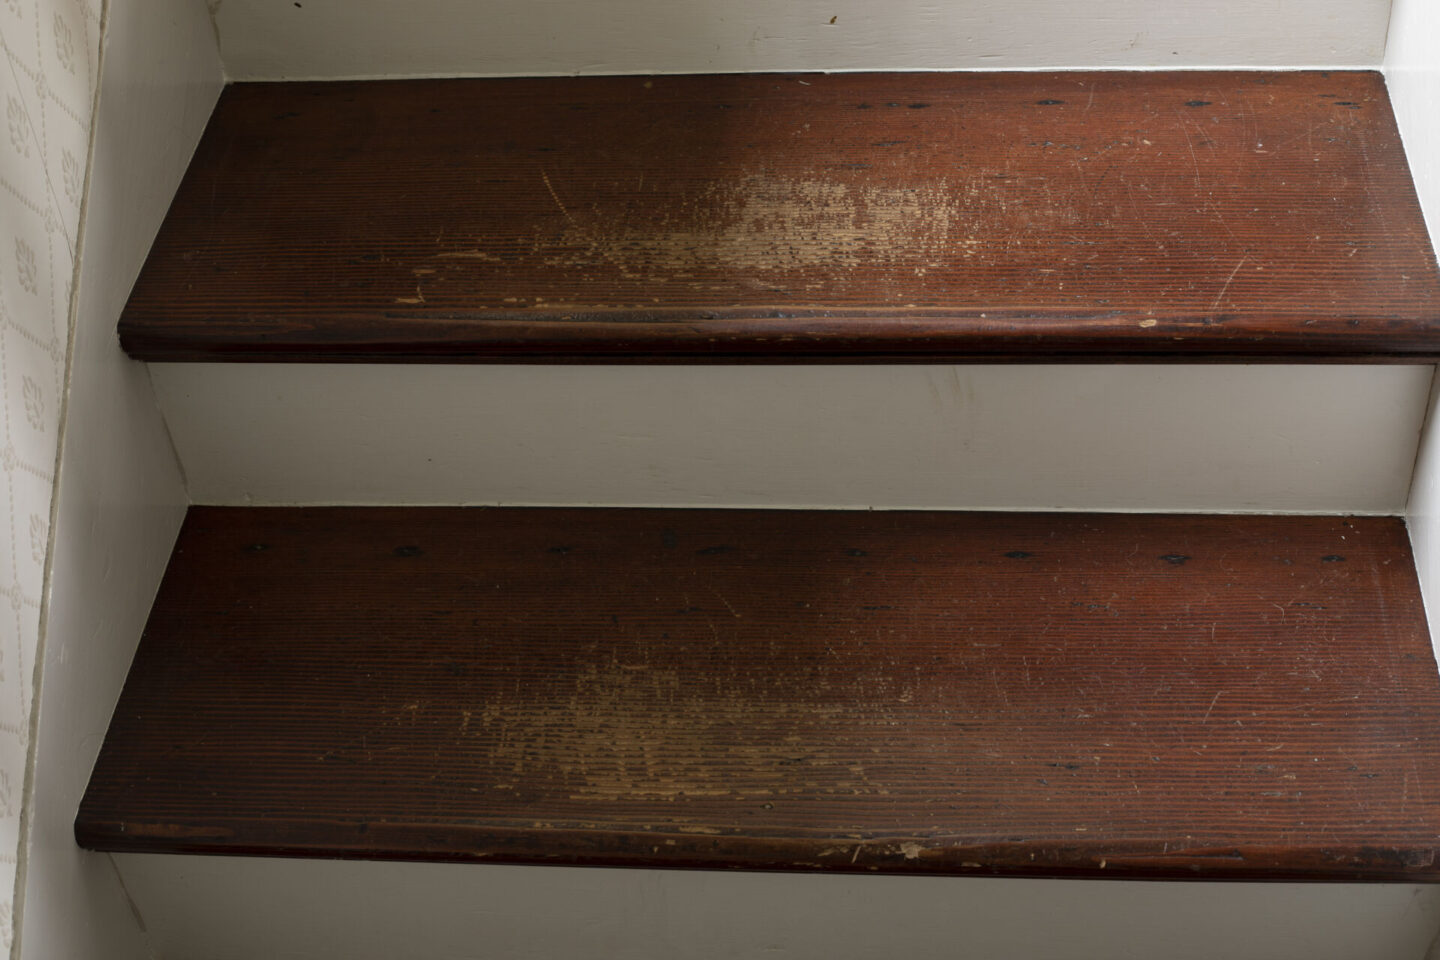
A little rough, right?
I knew a stair runner would solve the problem of needing to refinish them again… but I needed it to be washable to stand up to constant use by 6 adults and multiple pets.
I searched around and didn’t find any great solutions for a washable stair runner, so we came up with our own!
*This post contains affiliate links to products I know &/or love. This post is not sponsored by Ruggable.
Creating a Washable Stair Runner with Ruggable Rugs
First things first, order your rugs!
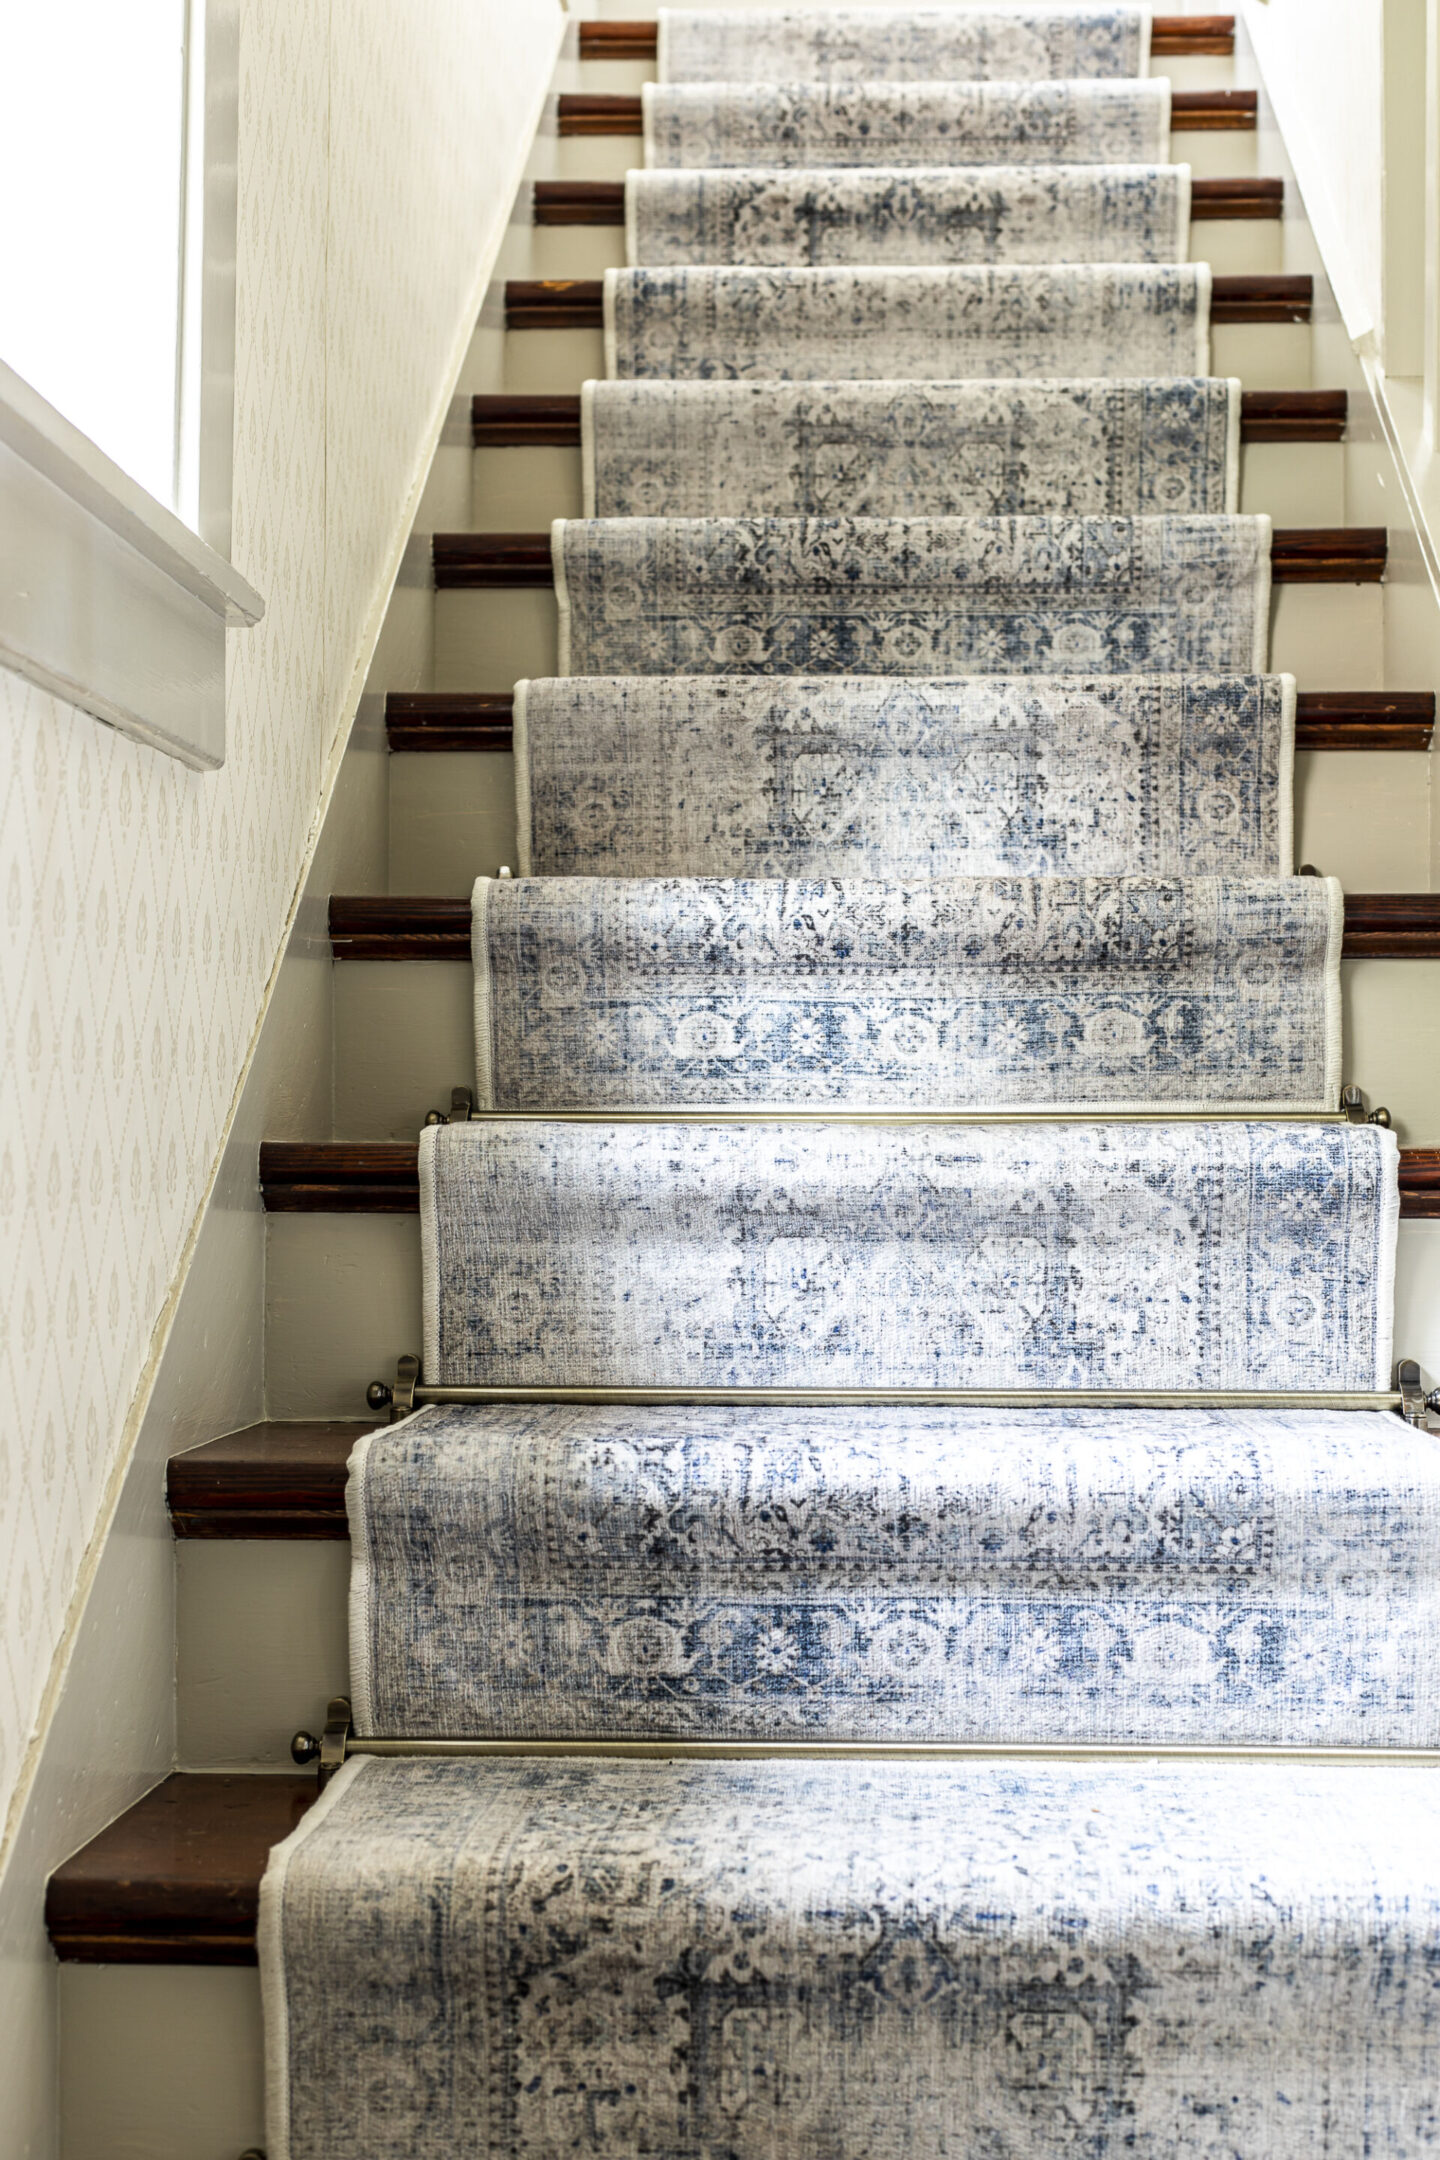
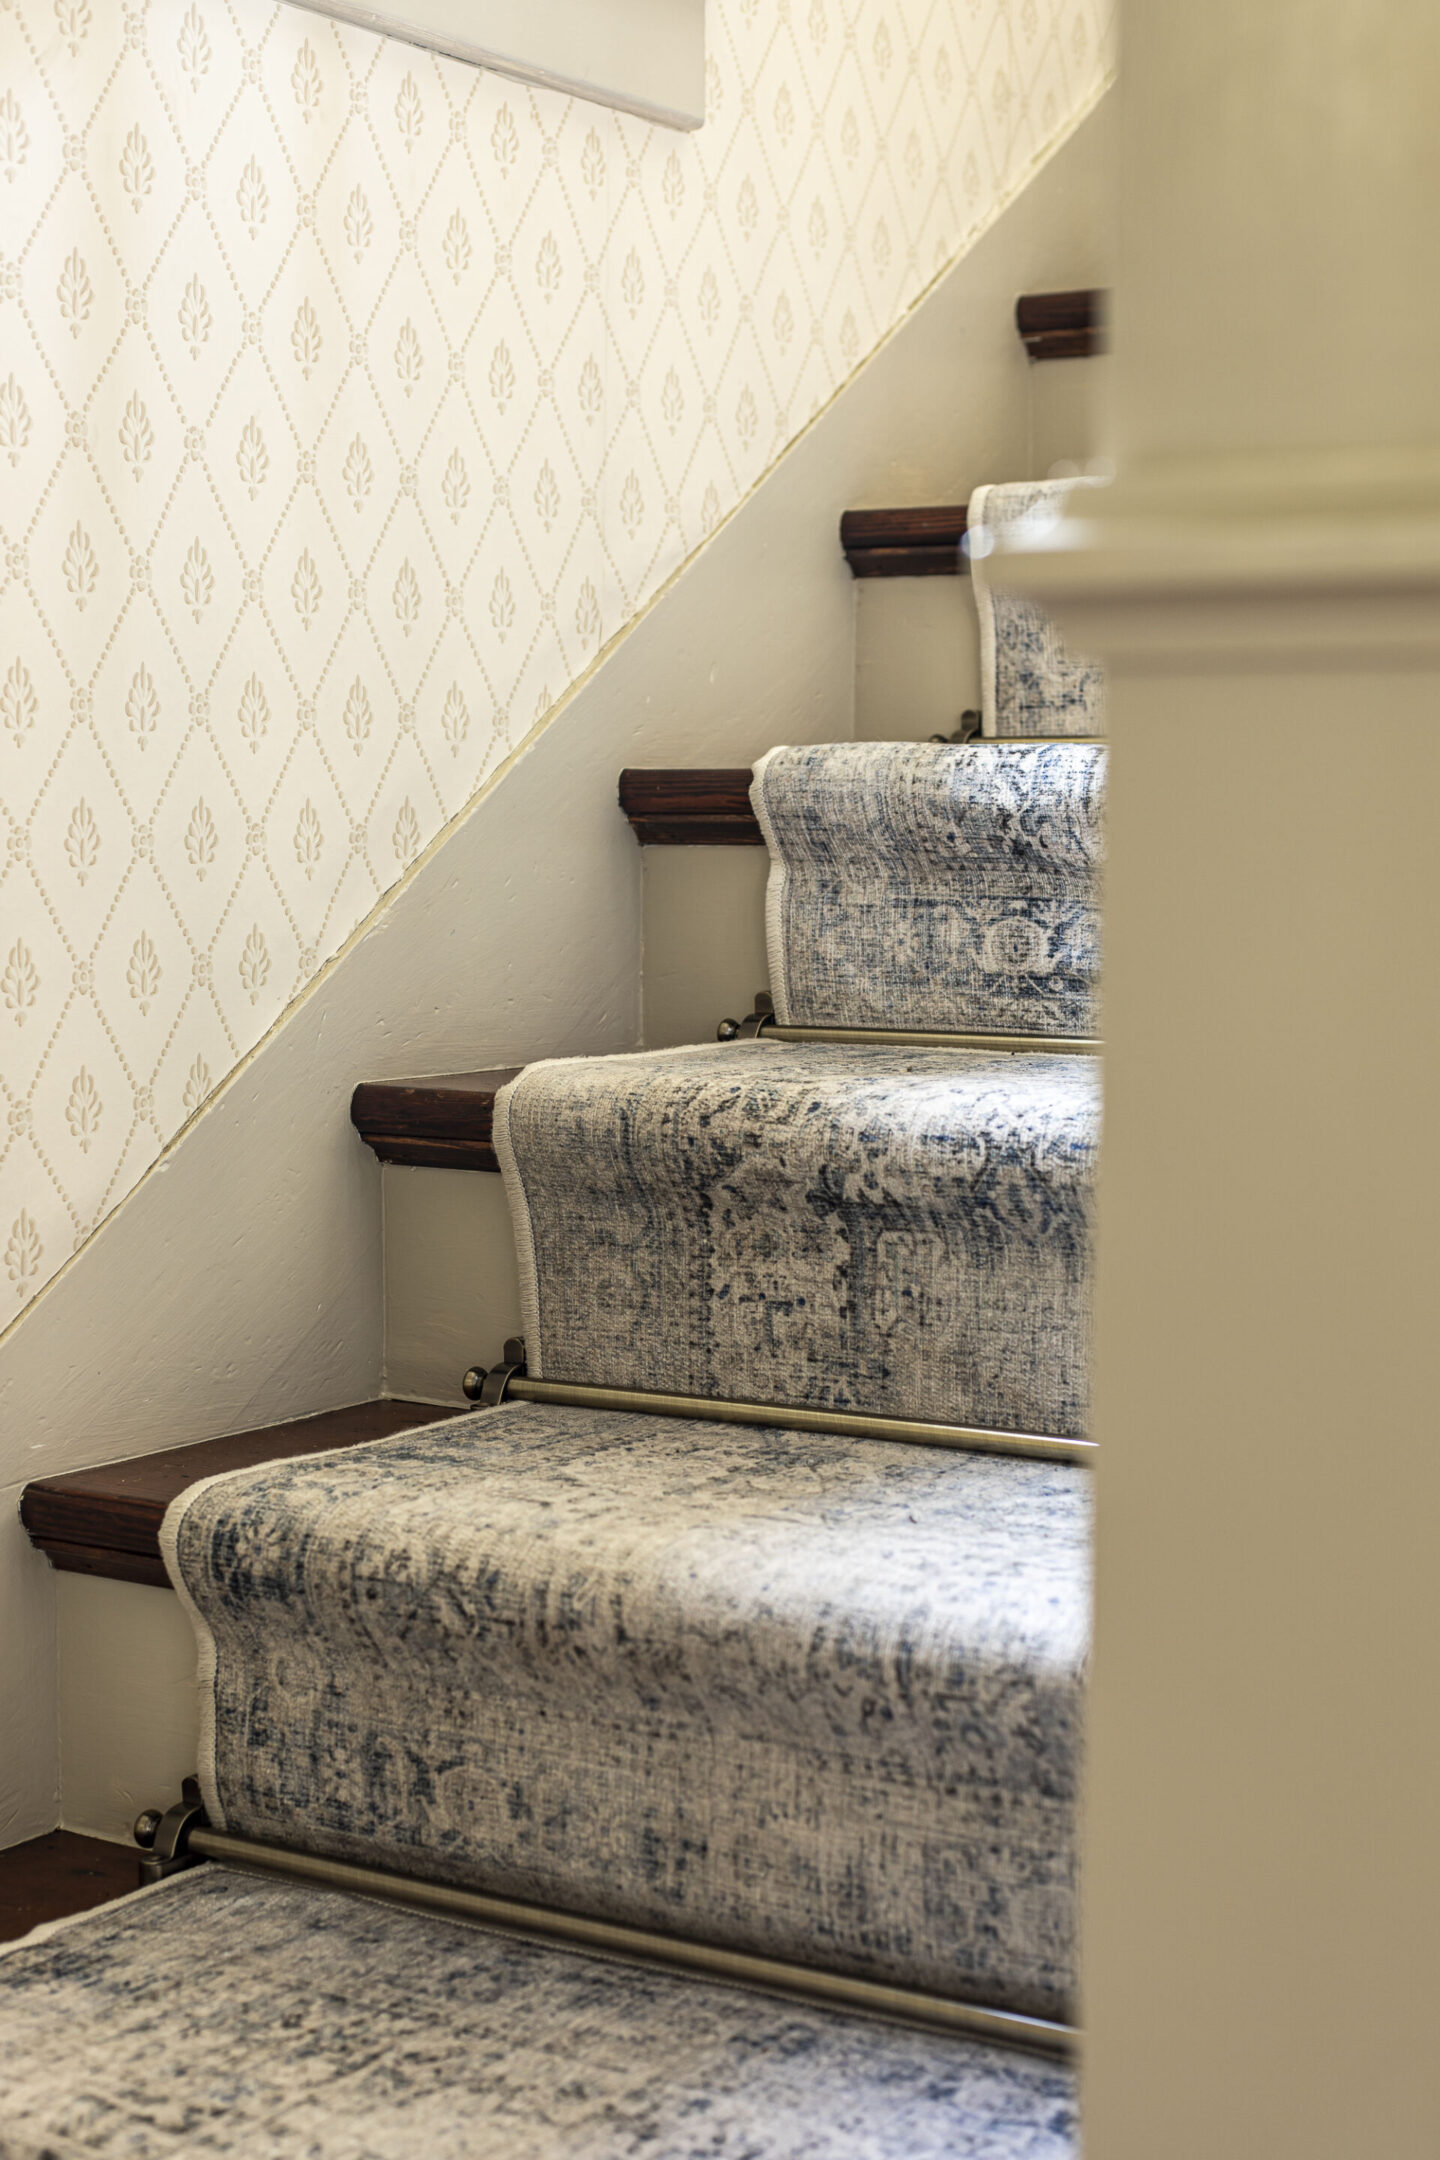
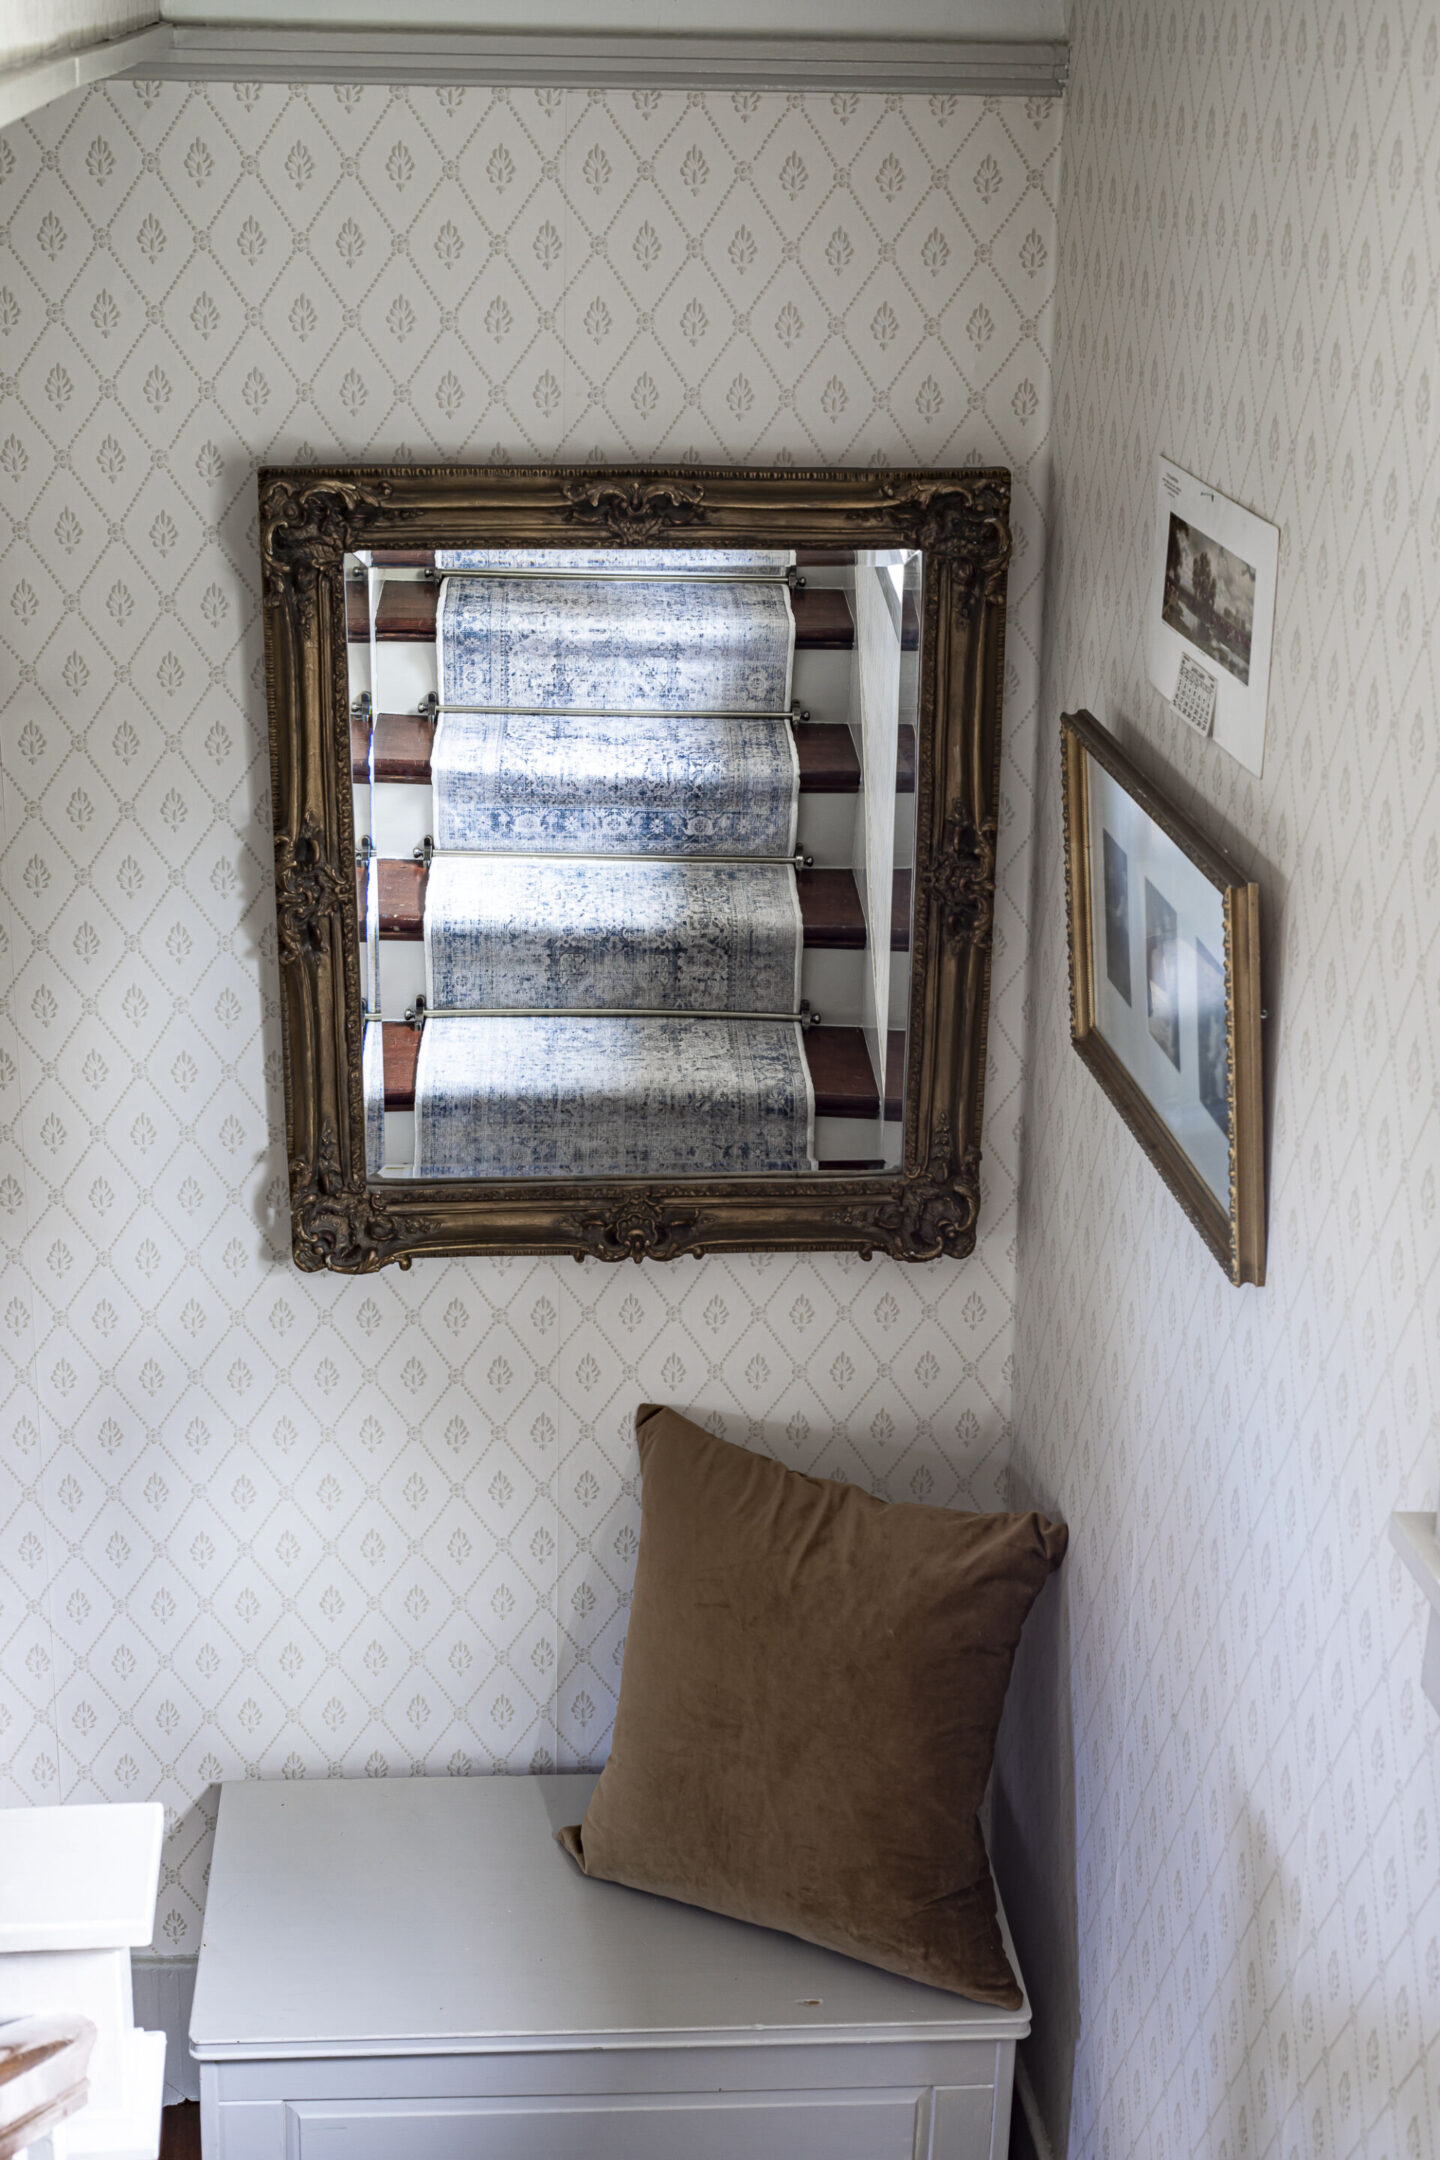
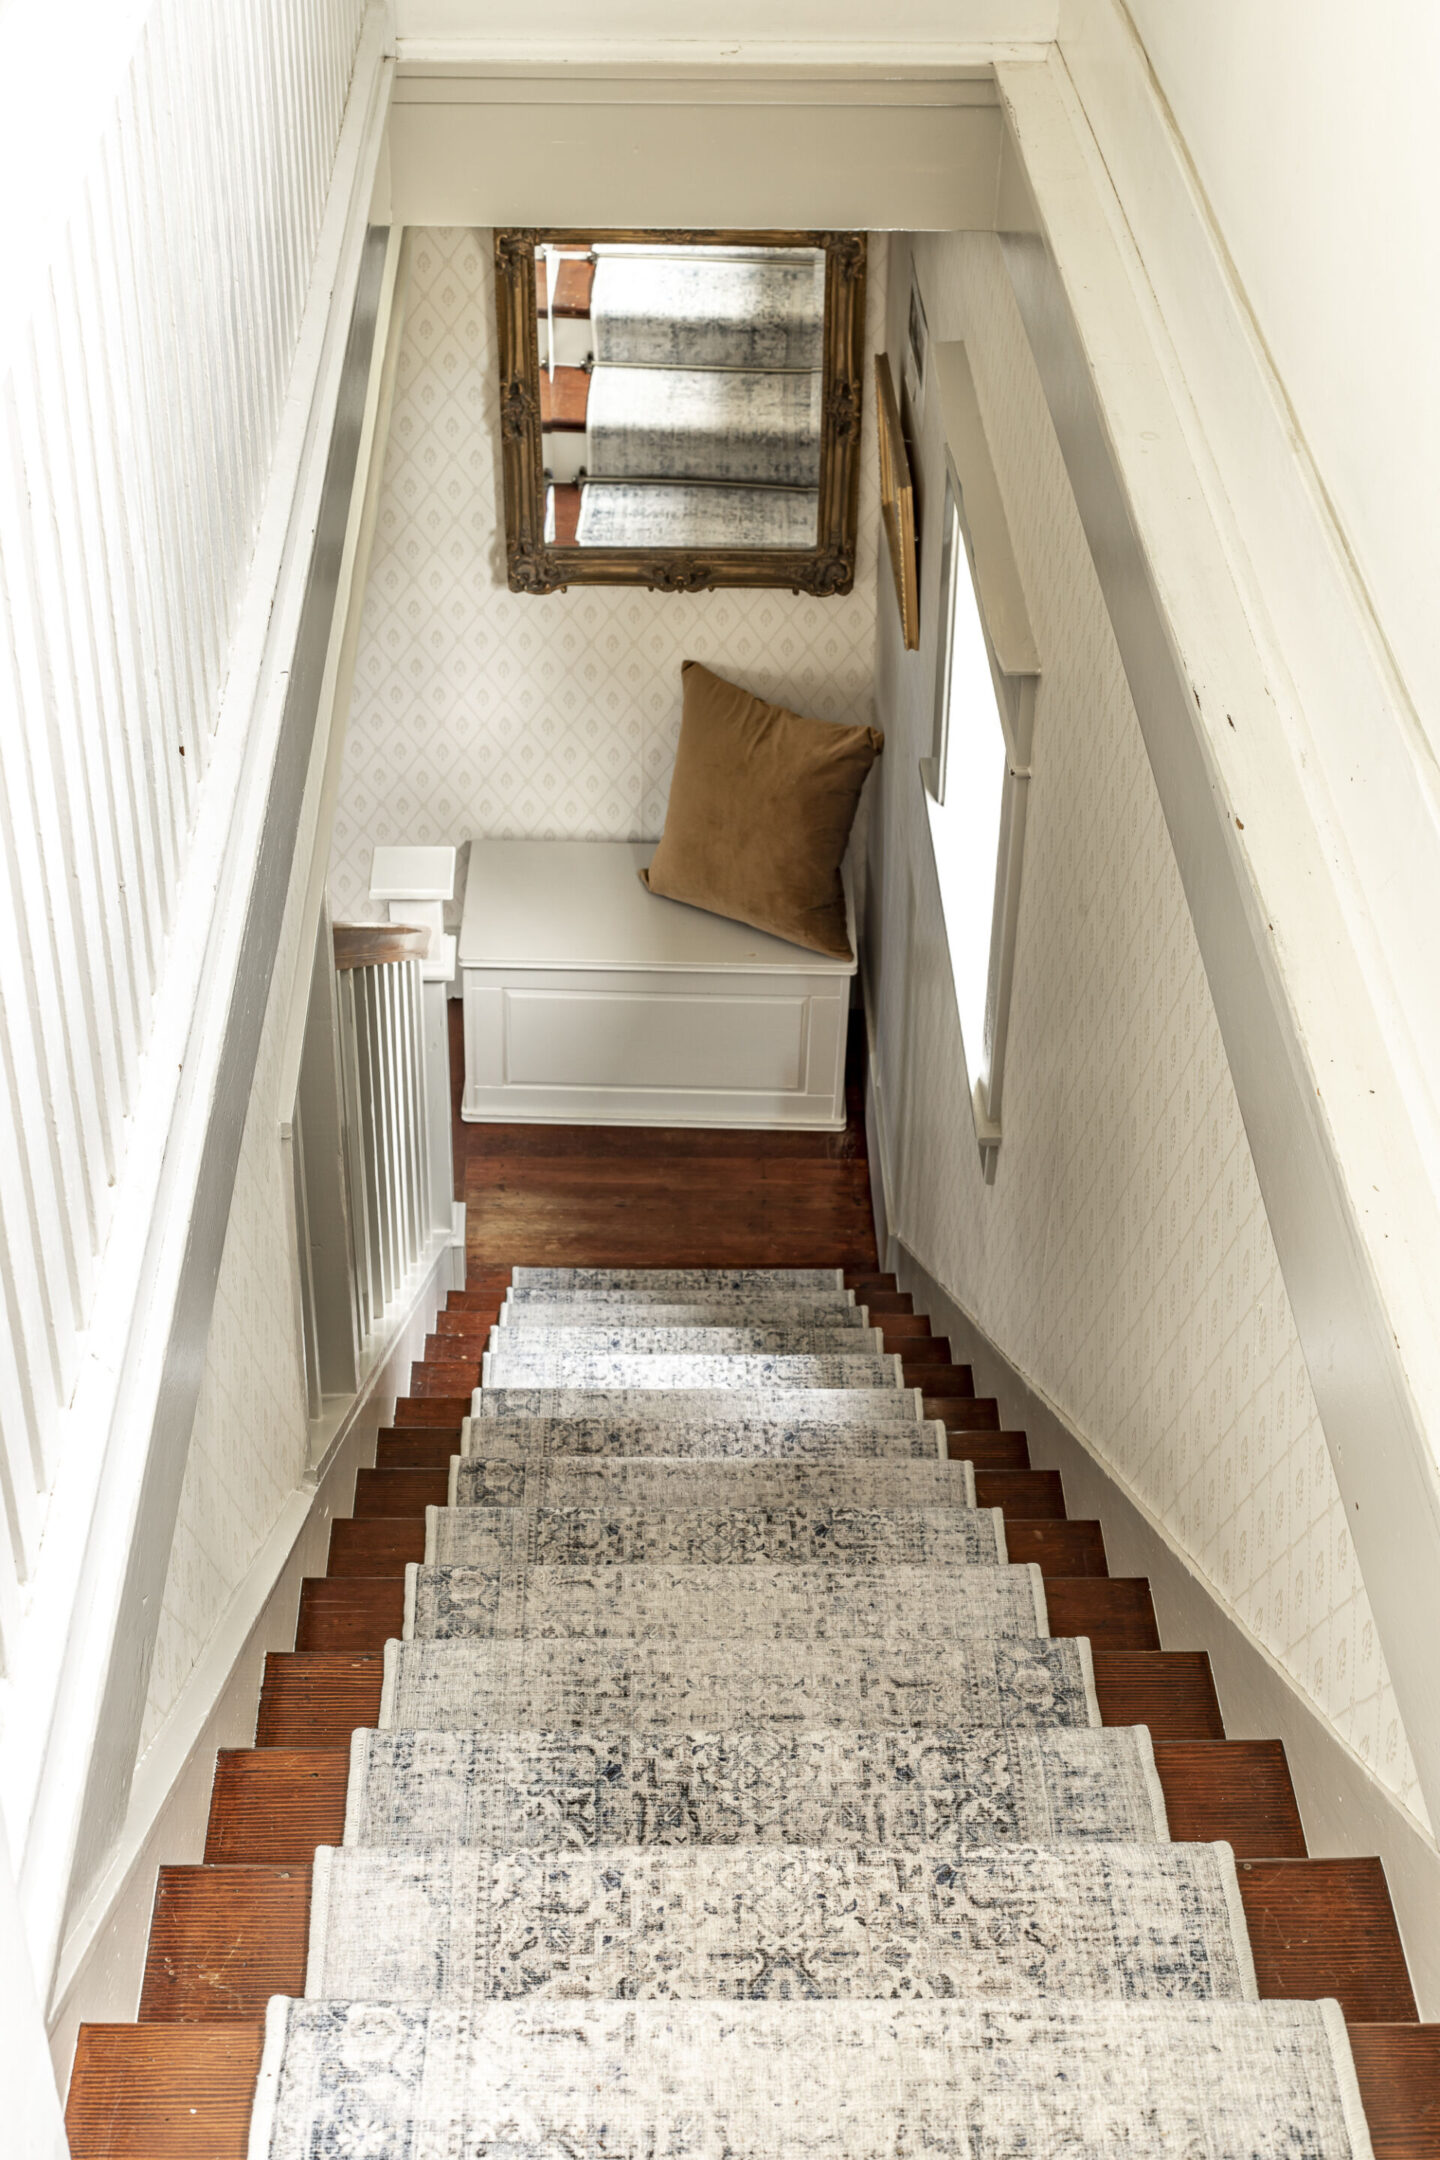
We had purchased the Kamran Blue Quartz rug from Ruggable to use in our Fireside Room, and so I knew I wanted to use the same design on the stairway since they’re so close to one another and you can see both rugs at once.
To begin we ordered just two of the rugs and used them to measure against our staircase to make sure the idea would work! I would not skip this step if you’re wanting to do this as a DIY.
Since all staircases are different sizes, our specific measurements won’t necessarily work for anyone else’s stairs.
Our staircase has 14 stairs, and the 2×3′ Kamran Blue Quarts area rugs fit perfectly on two stairs. If we had an uneven number of stairs it would not have worked out the same way.
Next, order your hardware!
We used these stair rod & hardware sets from Amazon.
They are a bit pricy, and I’ve seen a few comments already in my YouTube video with some more thrifty ideas, and am always happy to hear of others to pass along!
In addition, here are a few more options from Amazon in different styles, finishes & price points:
- Oil Rubbed Bronze – Individual
- Oil Rubbed Bronze – Bulk Pack of 13
- Black
- Polished Brass
- Satin Nickel
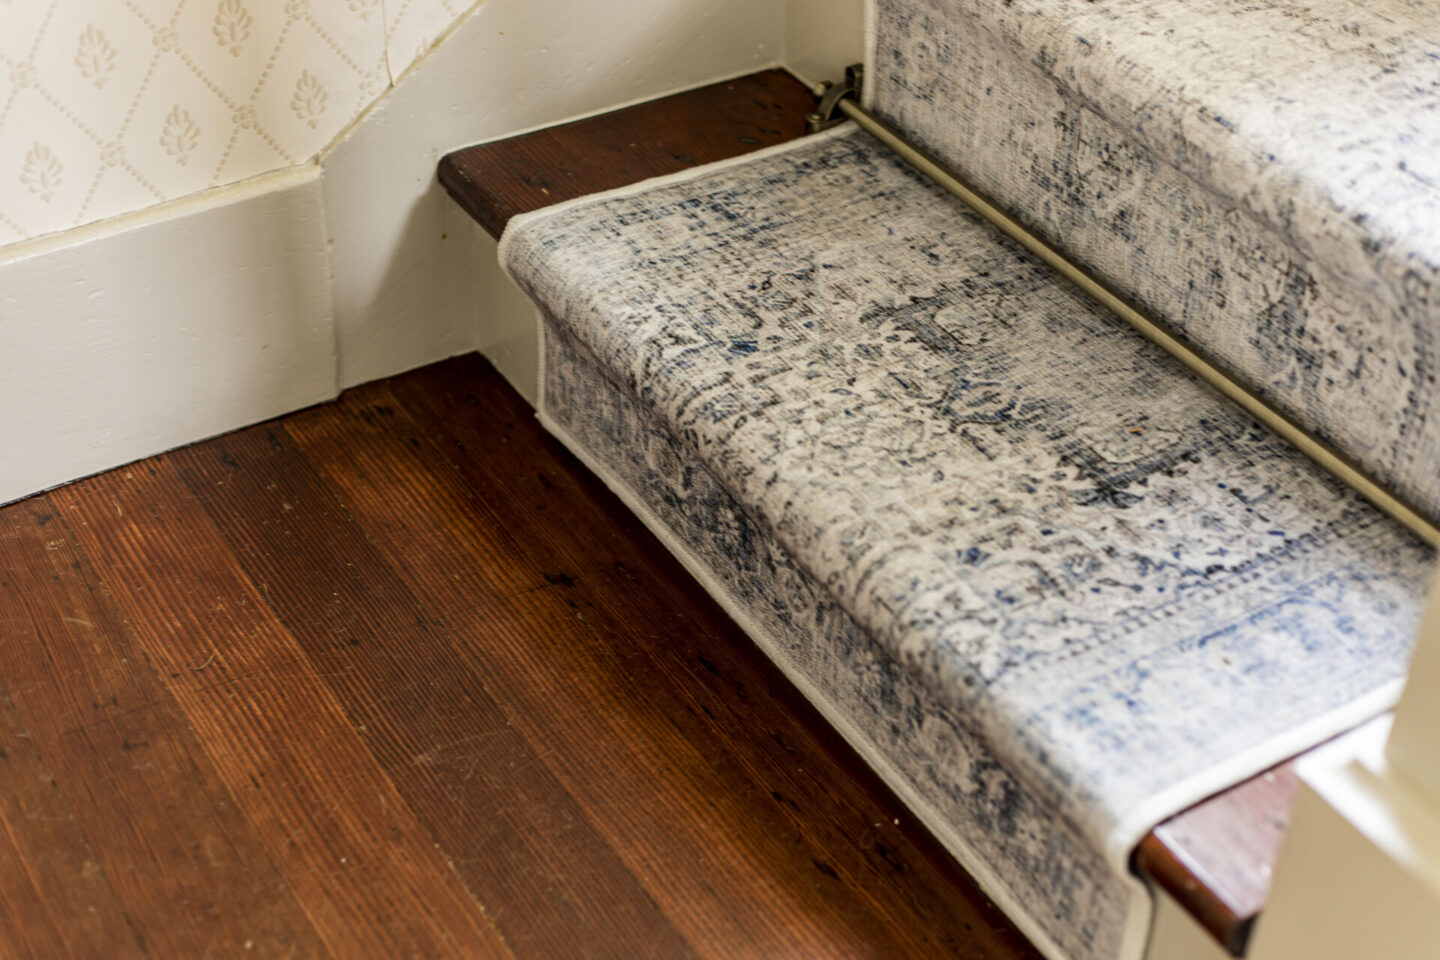
Once you have your carpets & hardware in, it’s time to install!
We used our pneumatic stapler with 7/8″ staples to attach the carpet pad to the stairs.
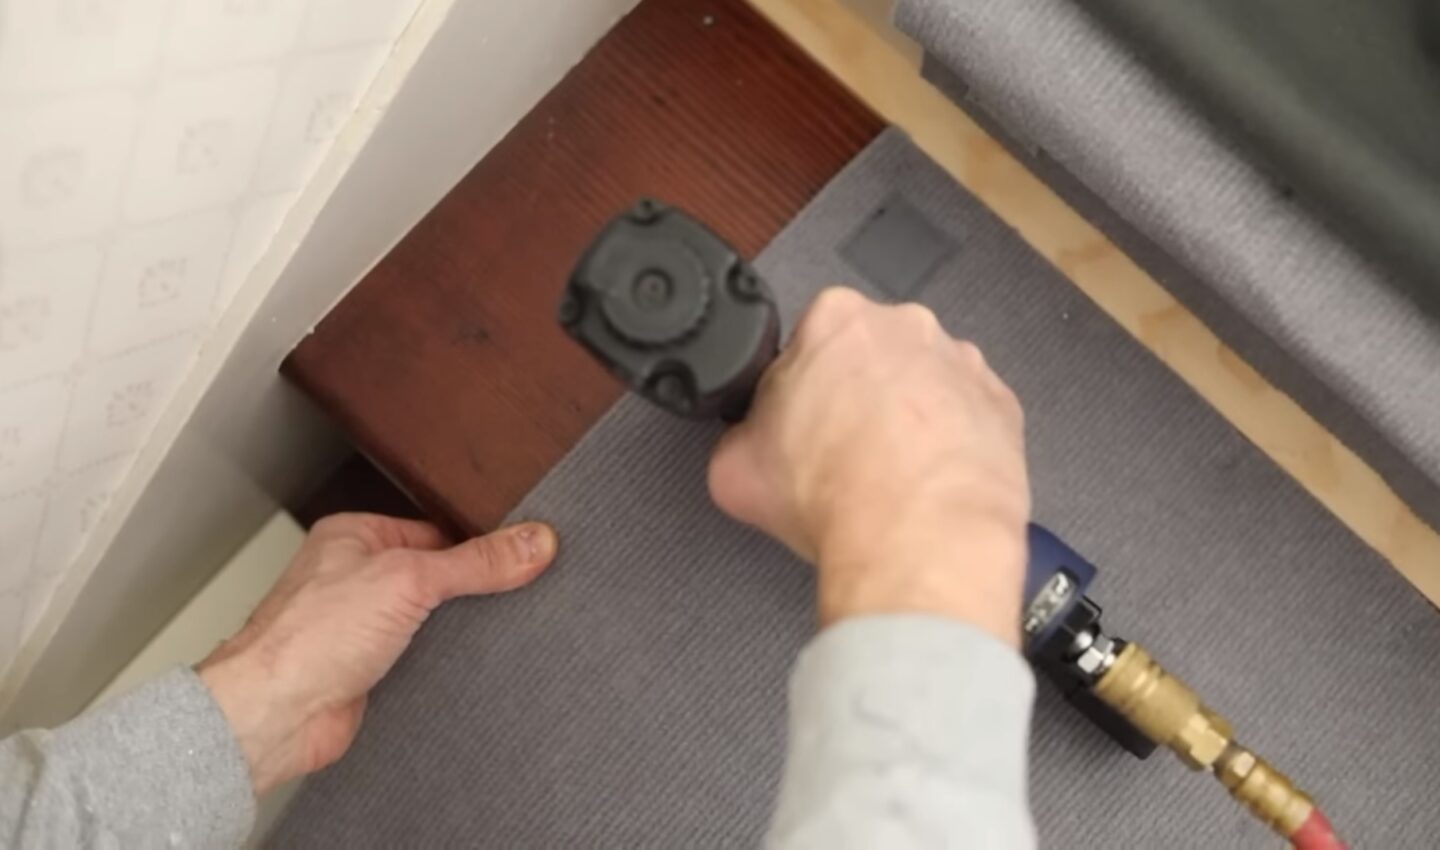
Please note that the carpet pad is slightly smaller than the carpet toppers, and because of that, you’ll need to adjust your positioning for stapling the pad down.
My husband checked the alignment with the two pieces put together, then created 3 spacers/jigs to set the carpet pad against while he stapled them down.
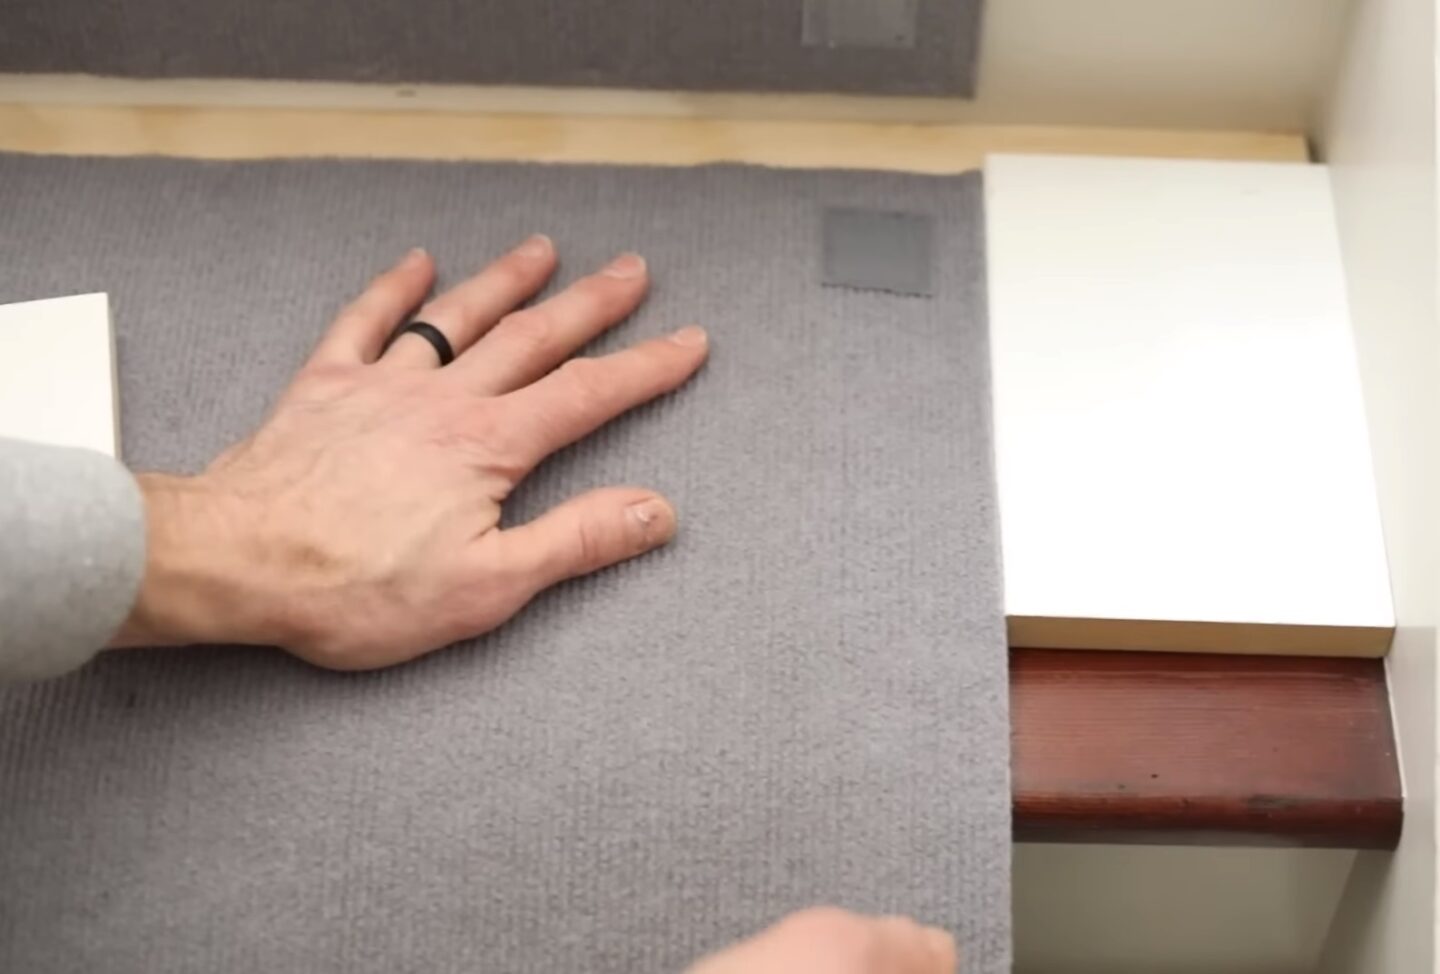
The first piece held the pad the appropriate distance away from the corner where the riser & tread meet. And the remaining two were on either side and kept the pad straight down the middle of the stair.
Pay close attention at the bullnose to avoid any bumps or loose spots in the pad. My husband stapled carefully under the bullnose in addition to a few times within the stair riser to keep the pad in place.
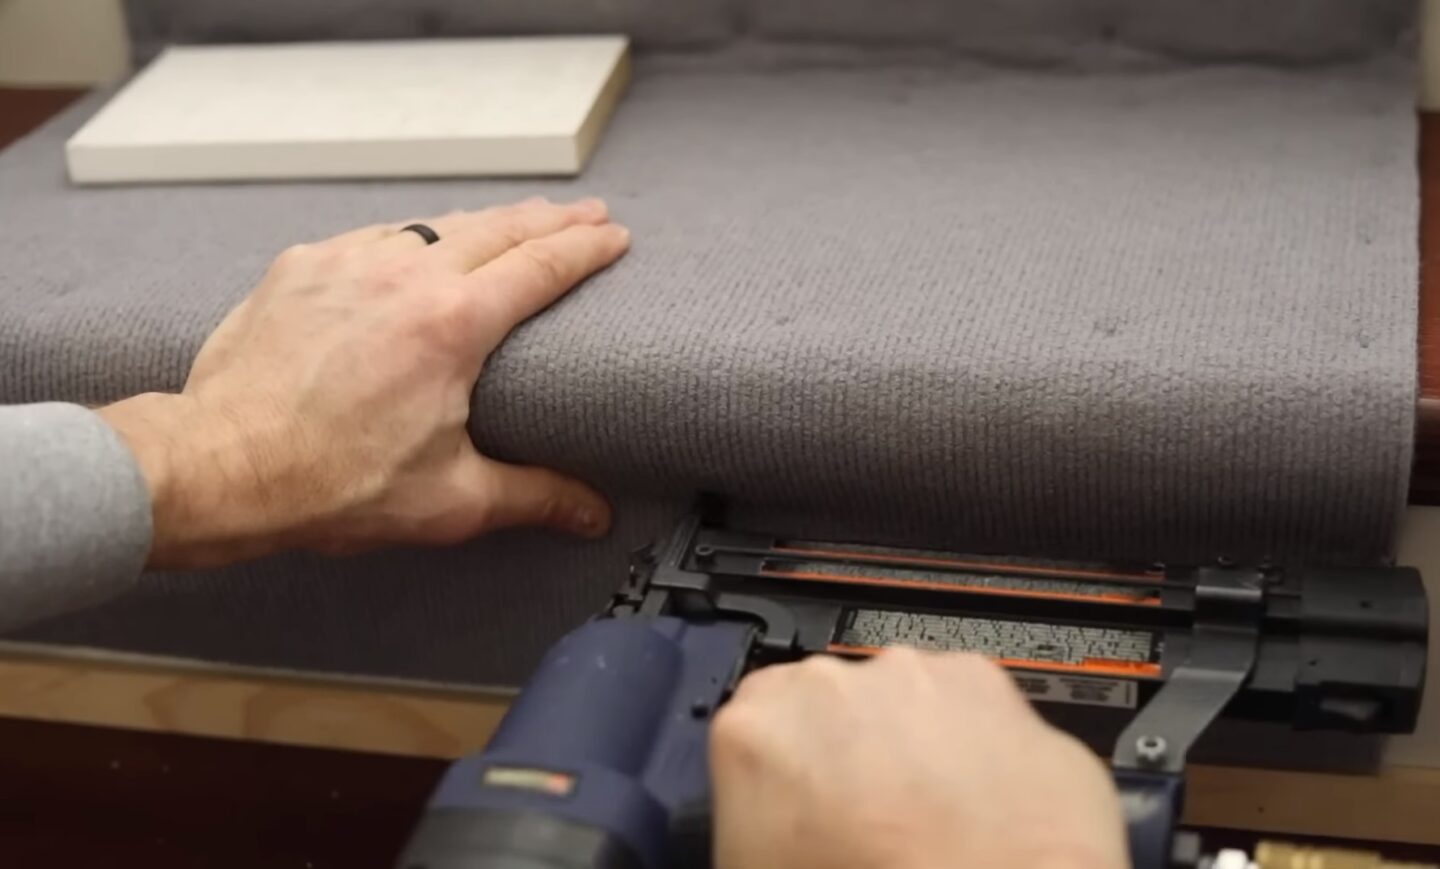
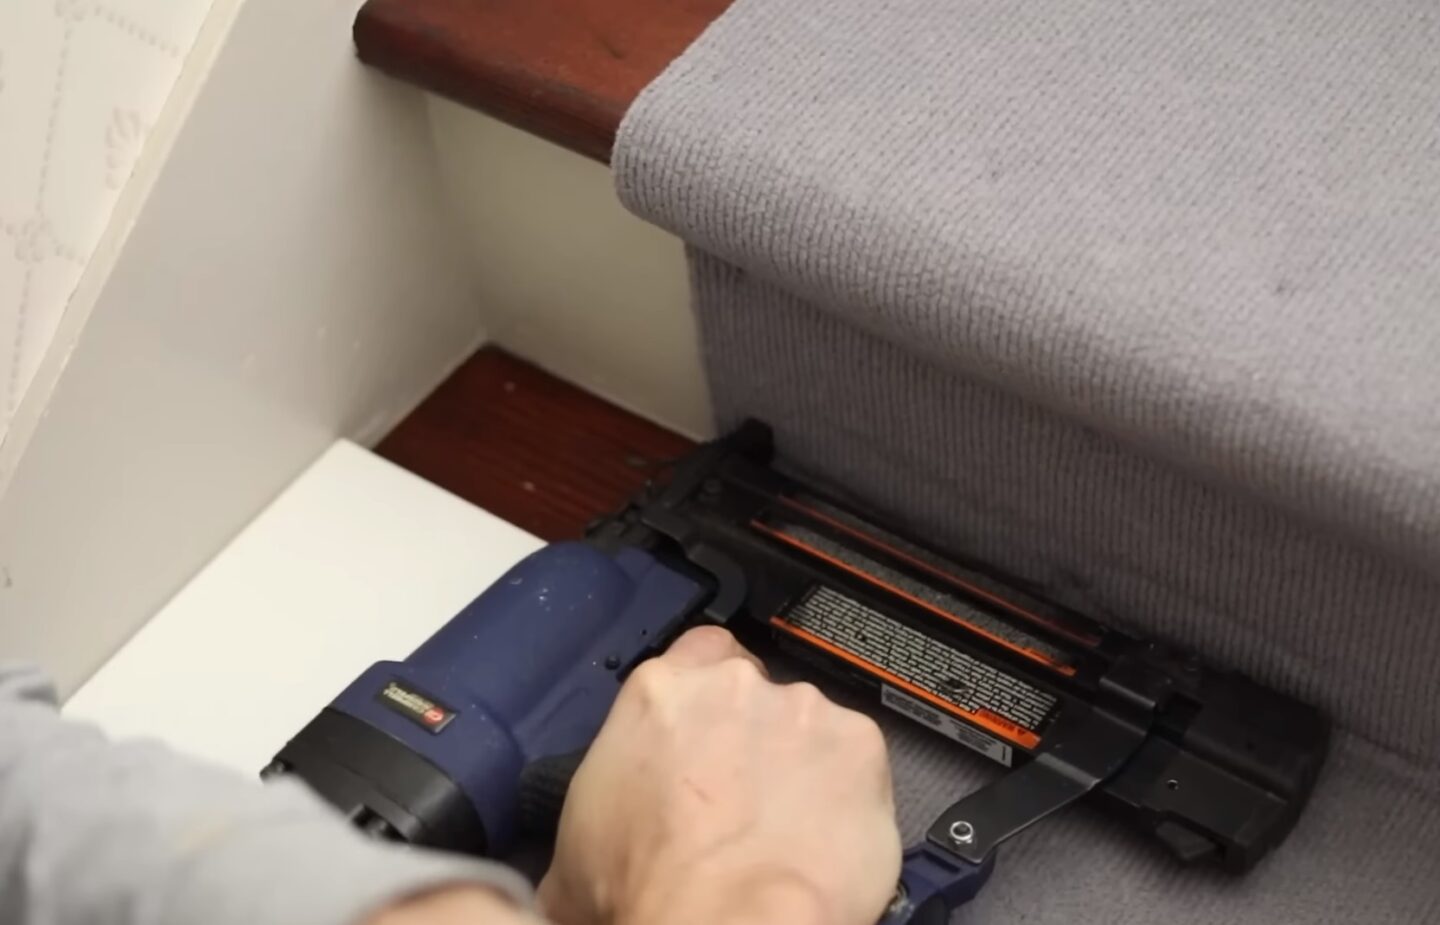
He used about 17 staples on the stair tread as well to ensure all of the edges were secure.
Then we got to install the carpet toppers!
Once the pad is stapled down, it’s really as simple as carefully laying the Ruggable toppers down on top of the pad and smoothing out any bumps!
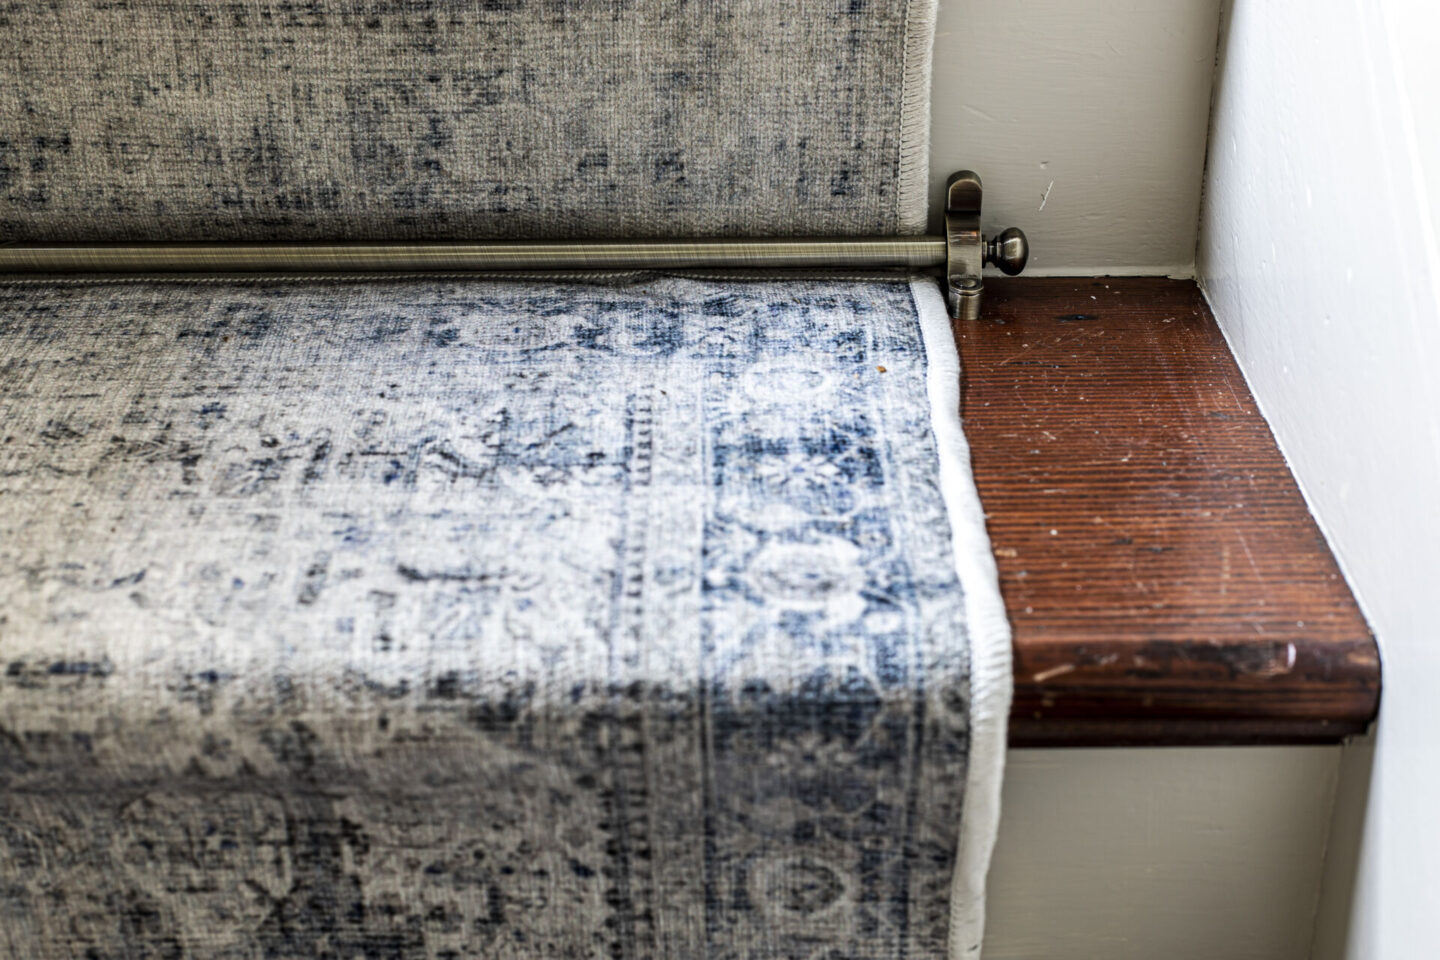
And the last step is to add the hardware.
My husband created another set of spacer/jigs to ensure that he was screwing in the hardware evenly on both sides of the runner.
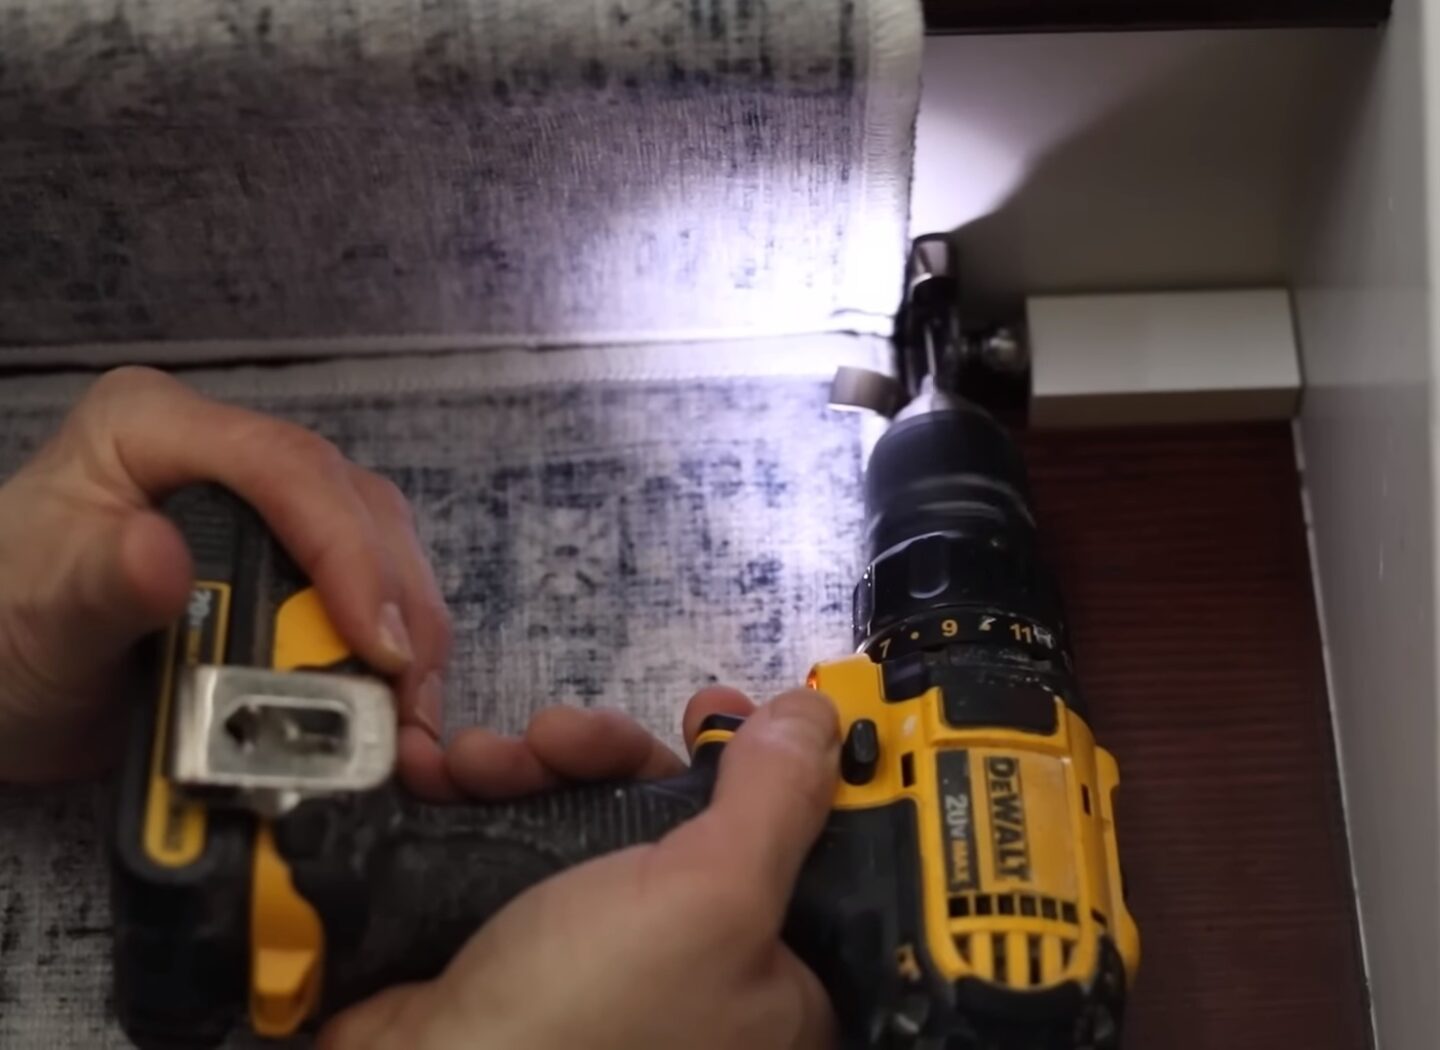
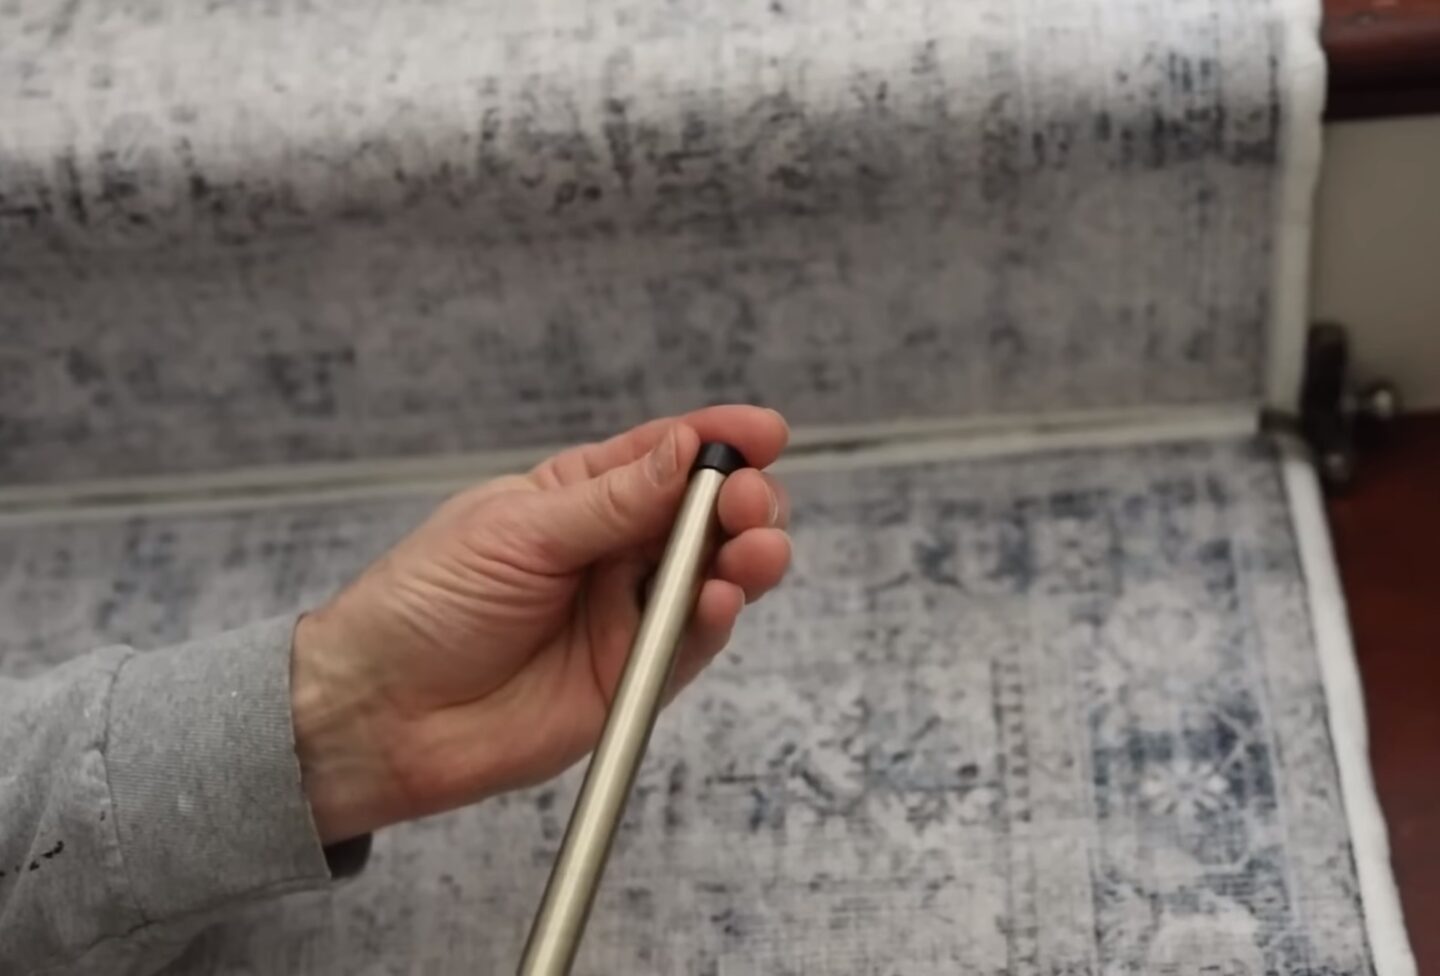
Then we measured the space between and cut our poles down to size using a plumbing pipe cutter tool.
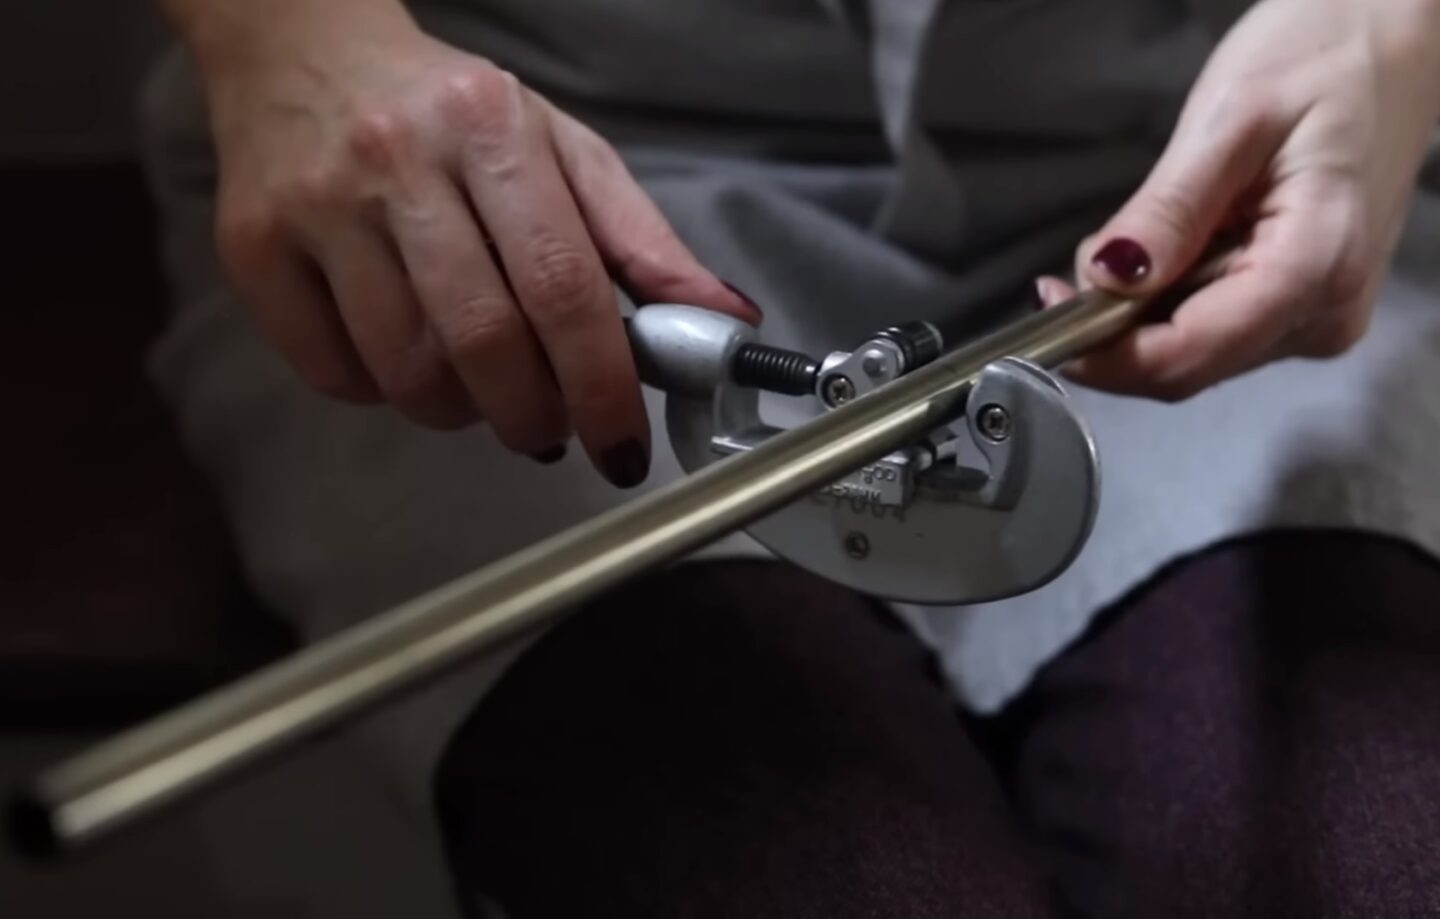
Our pipe & hardware kits came with end caps that we placed on both ends before securing them in the brackets.
After that, we got to step back and admire our work! I’m so glad we finally accomplished it! I look back and wish I had done it sooner!
I hope this inspires and encourages you if you’ve also been looking for a washable stair runner solution!
Pin This Washable Stair Runner Tutorial for Later: