Complete Remodel of a Church’s Nursing Mothers Room
Does your church have a nursing room for Moms with young babies? The dedicated nursing room at our church just got a big makeover, and I’m so excited to reveal all the details and the final look today!
Our church has a large demographic of young families which means lots of mamas and young babies (yay!) and I’ve always had a belief that the nursing mother’s room should be an extension of the sanctuary. Getting to see that dream turned into reality this past weekend was such a blessing!
For a lot of moms, this room IS their church experience for approximately the first year or so of each baby’s life, and being able to make it a place that they can exhale, have privacy and calm, and still be involved in worship and hearing the message each week was a really special task.
I wanted it to feel upscale and high end, so I pulled out all the stops!
I’ll share with you some of my overall design project tips, and then I’ll share the full reveal!

*This post contains affiliate links to products I know &/or love.
First Things First:
When you’re designing a space, at the beginning of your planning stages you need to take a few moments to assess the architecture of your space. Erase everything you can from the space (either by physically moving the items or by imagining the room with them gone) and then hone in on all the good and bad about the space.
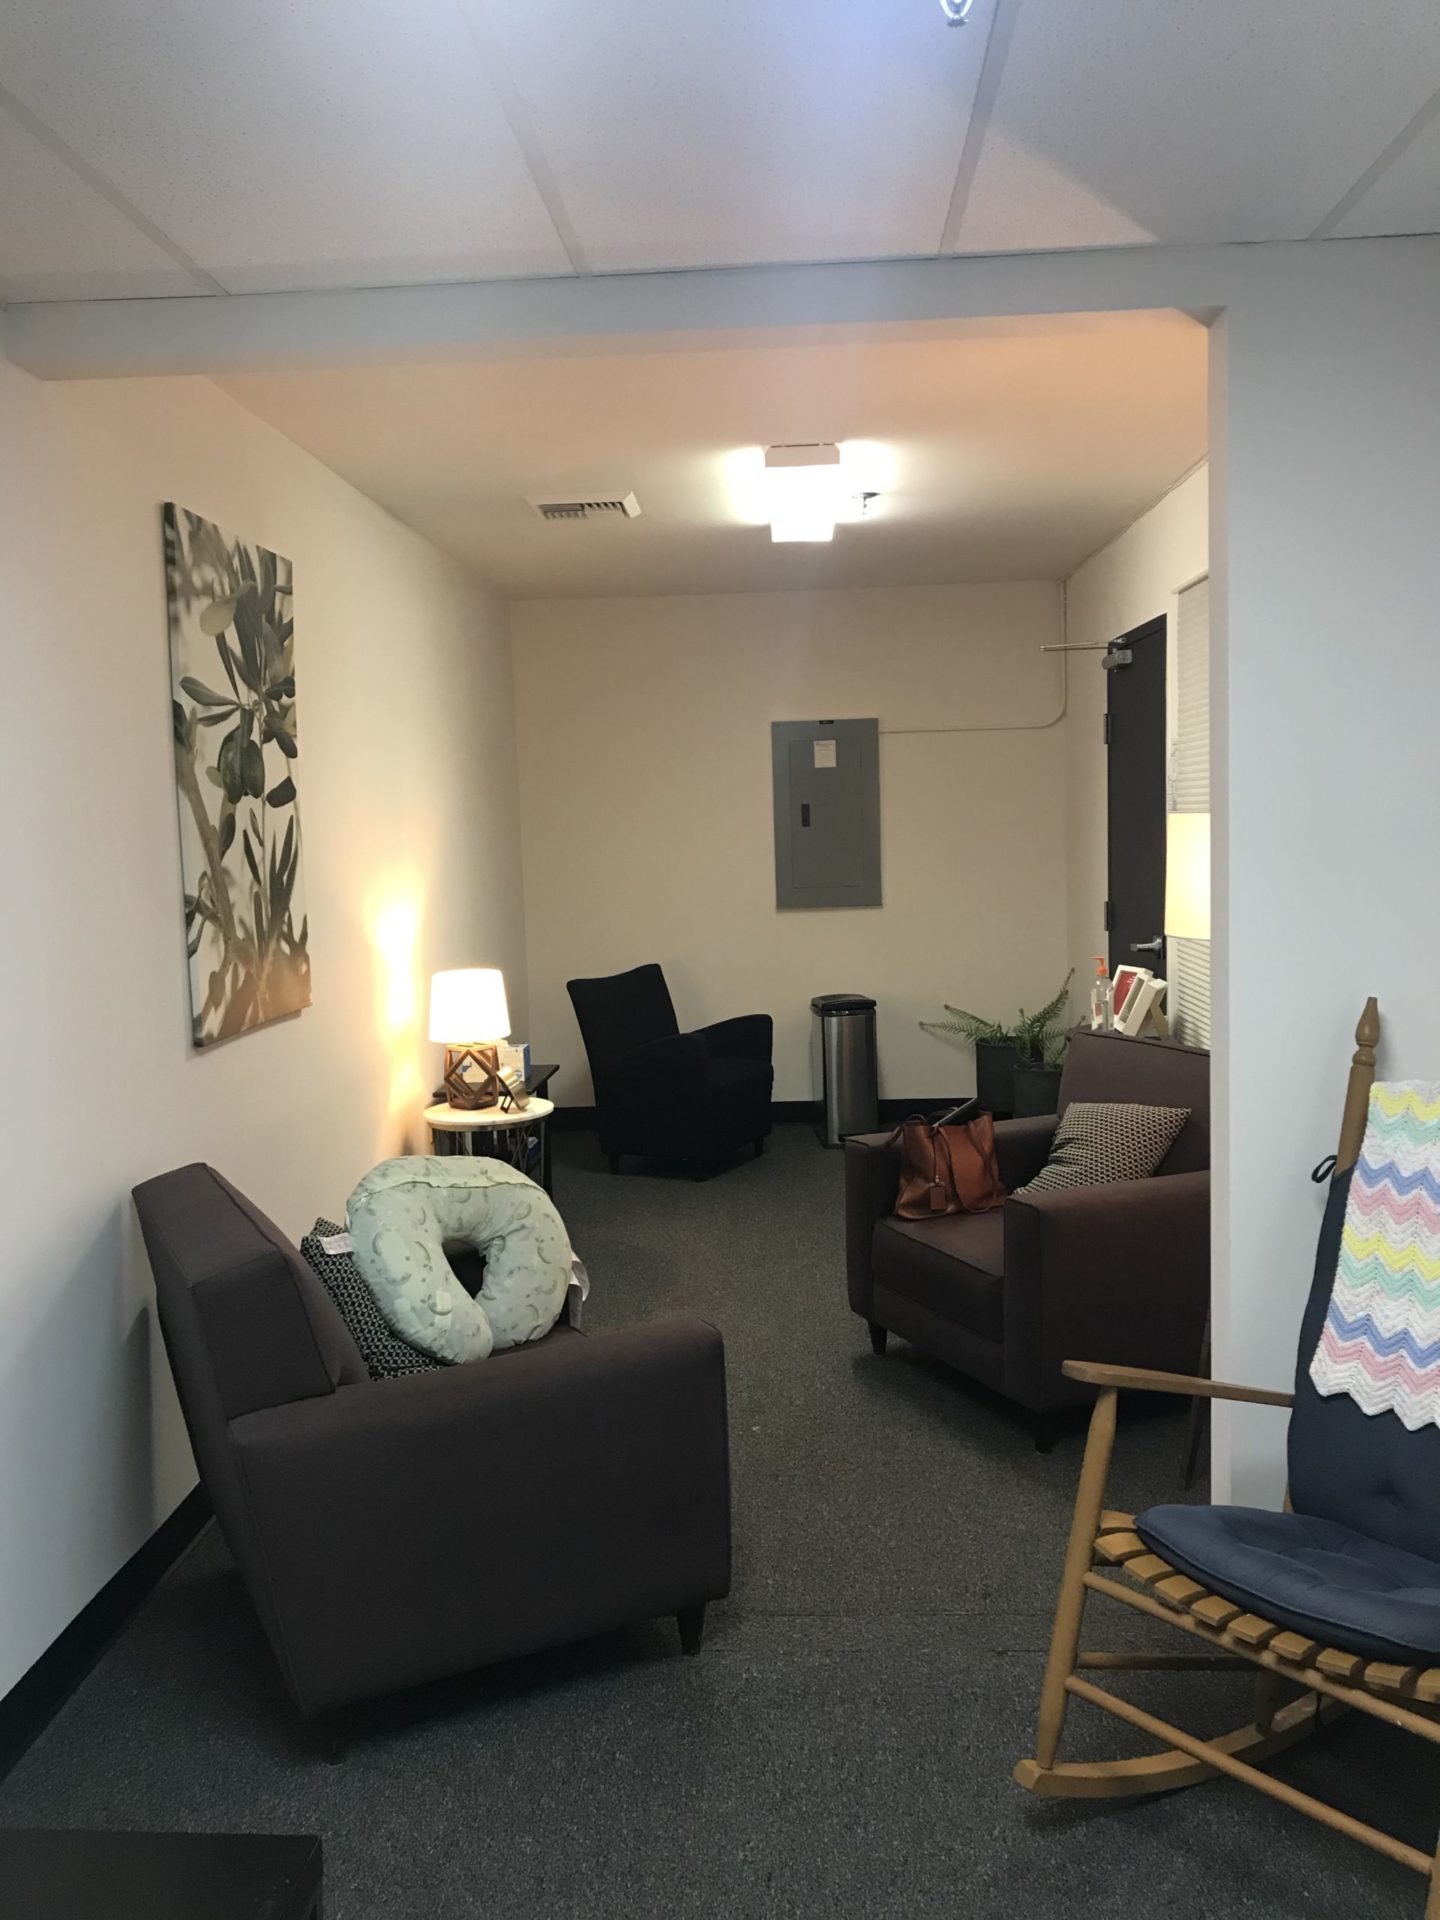
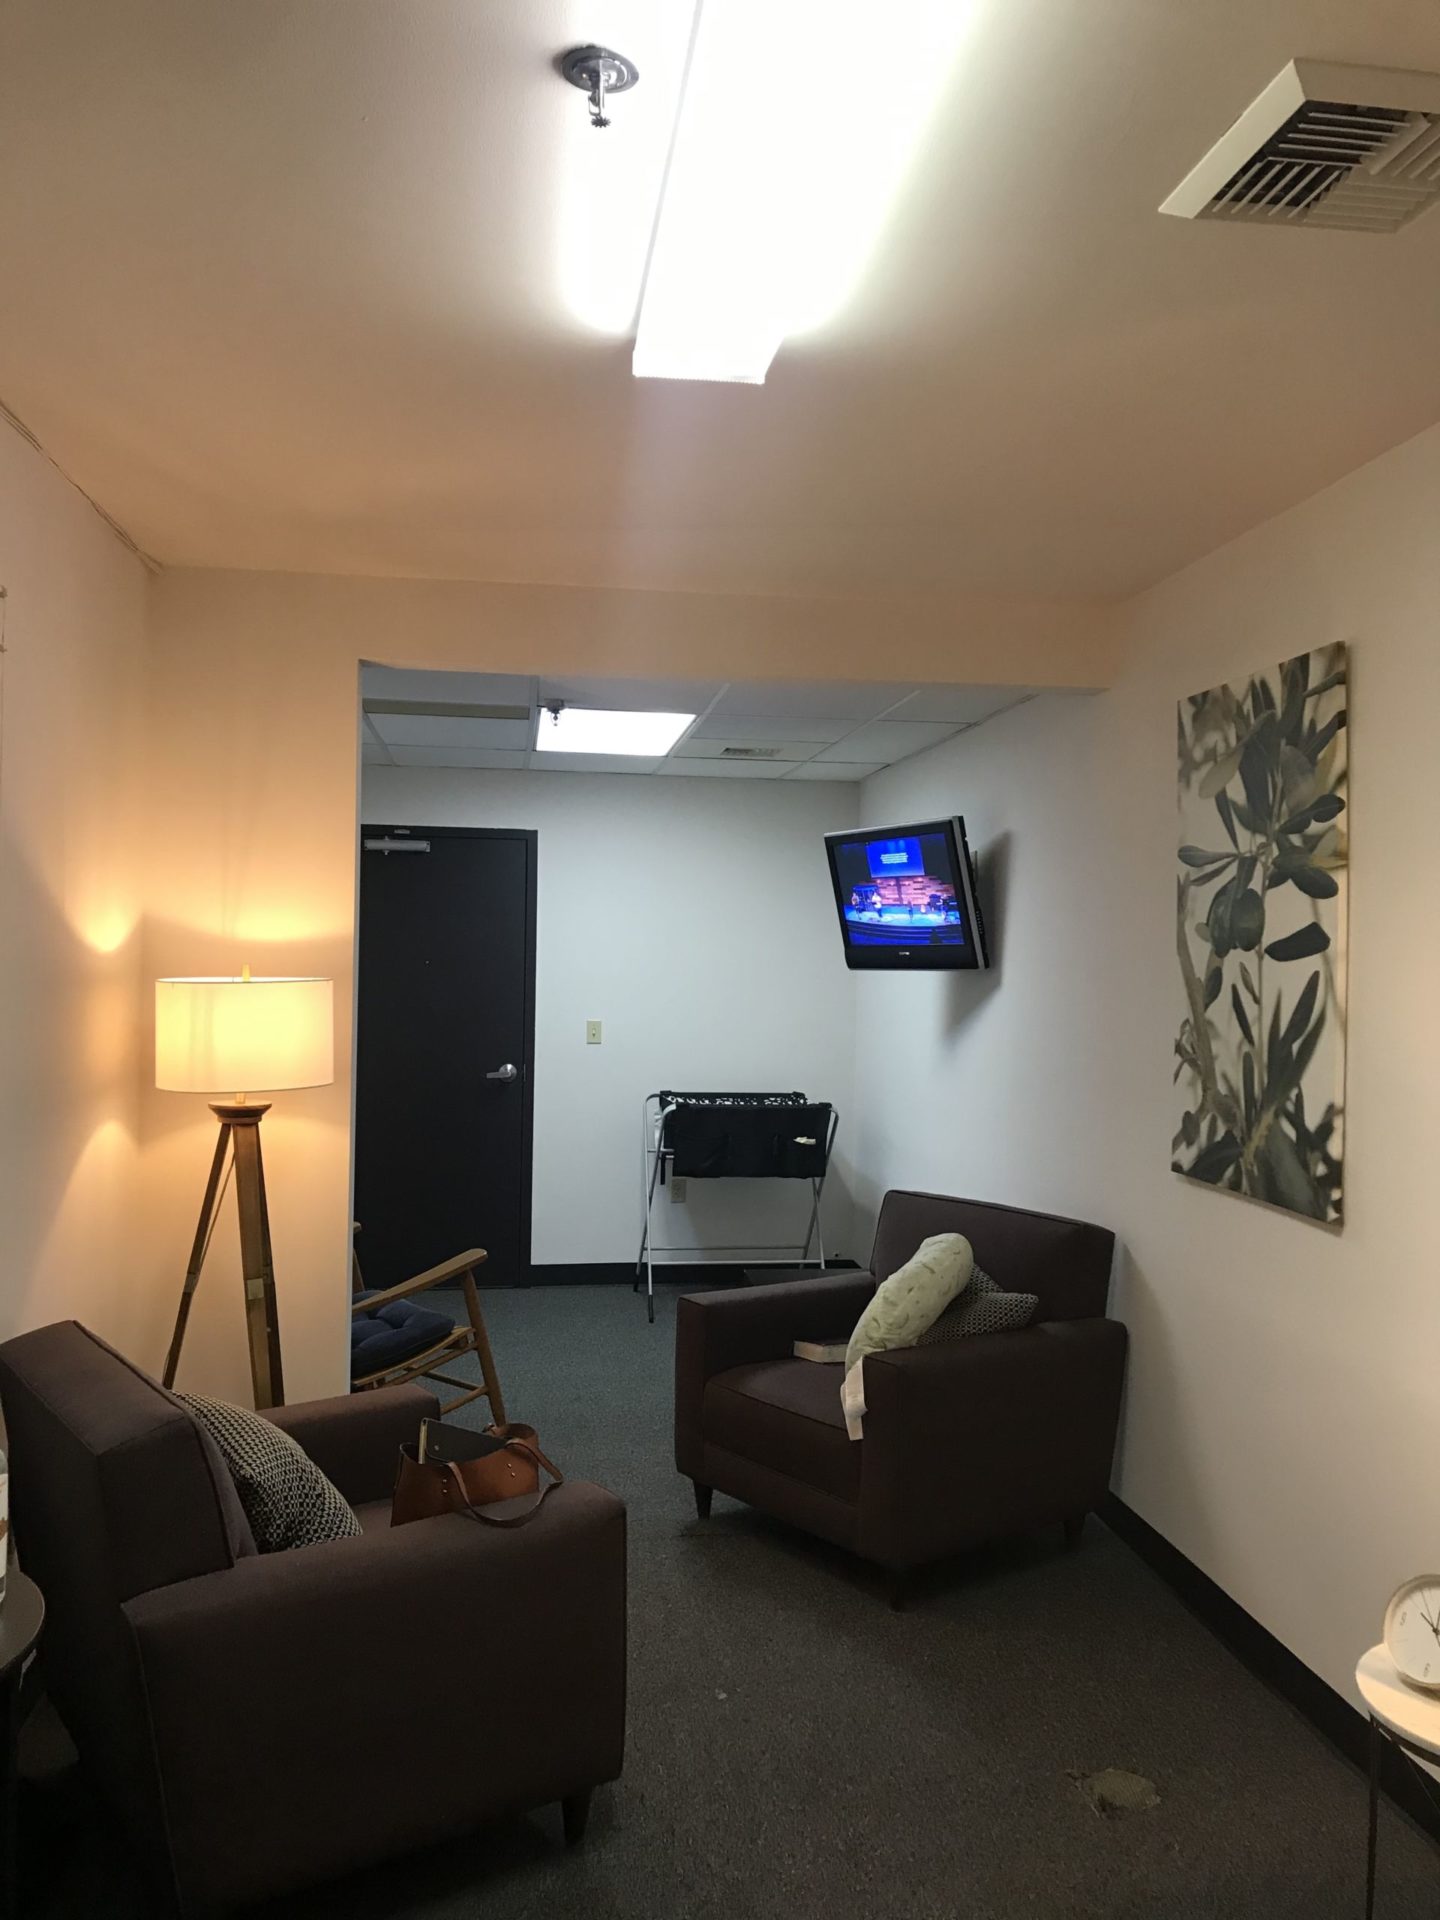
I mentioned some of these details in my Mixing Design Styles : Mid Century Modern & Bohemian blog post, but the room I was working with used to be two separate offices, and the wall between them was partially taken down (leaving just a beam and a partial side wall.) It’s a really long, thin space. 26′ x 10′ – about the size of an RV interior.
The partial side wall was actually one of my favorite elements of the room shape because it gave me two extra corners to work with in my design!

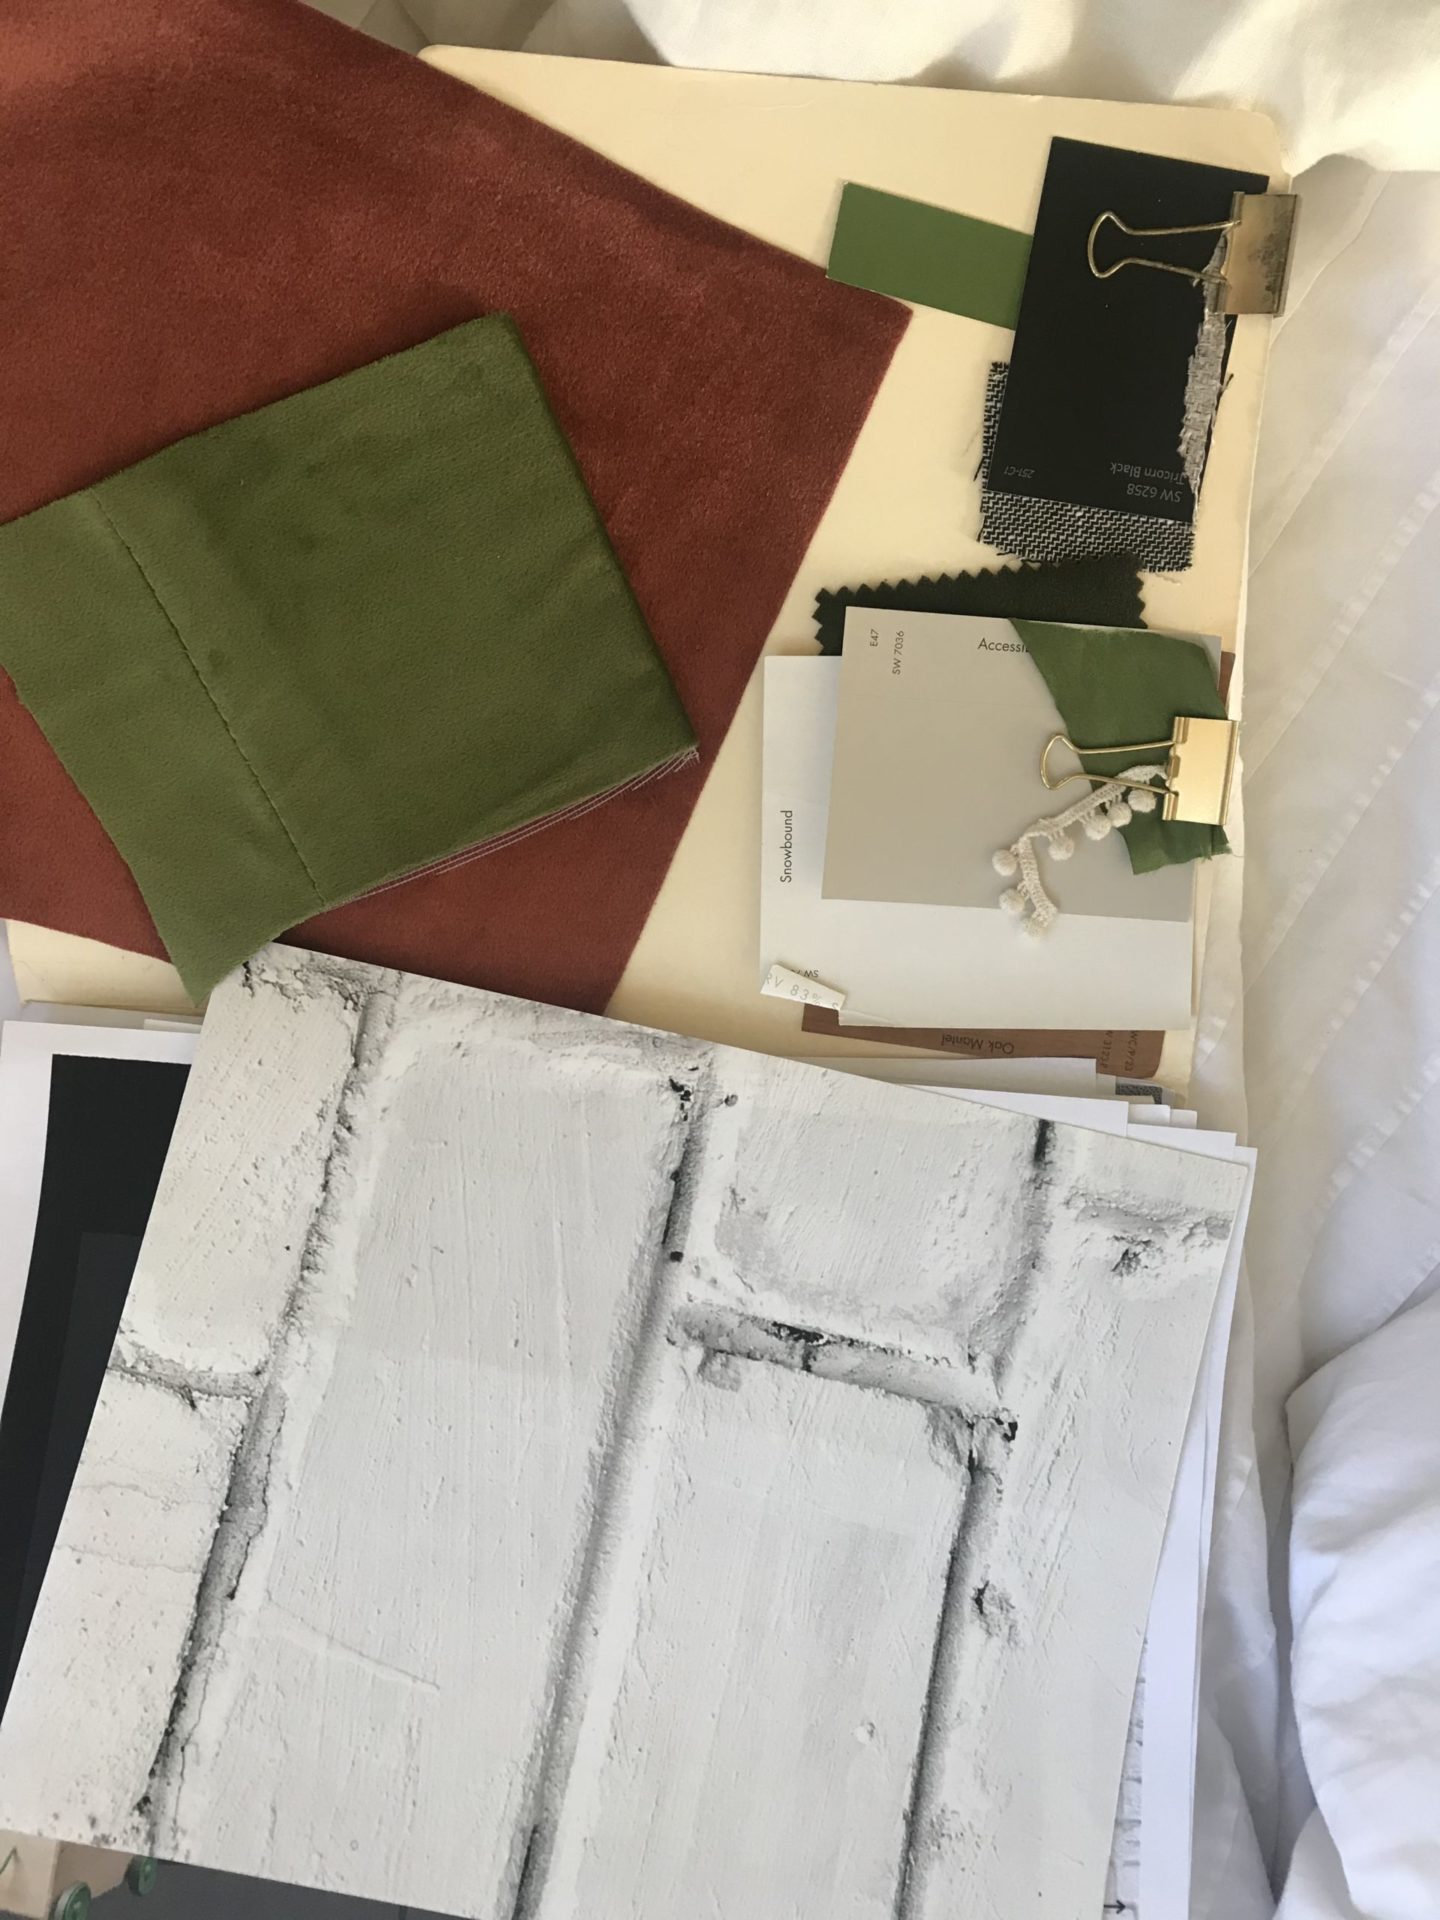
I wanted to make the room feel more square and not quite as long, so I treated both the end walls as accent walls and painted them matte black (Tricorn Black by Sherwin Williams #6258).
We painted the rest of the walls in Snowbound, also by Sherwin Williams (SW 7004). We also removed the old rubber base board and swapped it out for a nice 5″ mdf board trim.
I wanted to add some horizontal lines going up on the long back wall with the TV to create an optical illusion that it’s pushed back a bit further. I didn’t want to do stripes or a board and batten type treatment, so I settled on Milton & King white Clubhouse Brick wallpaper.
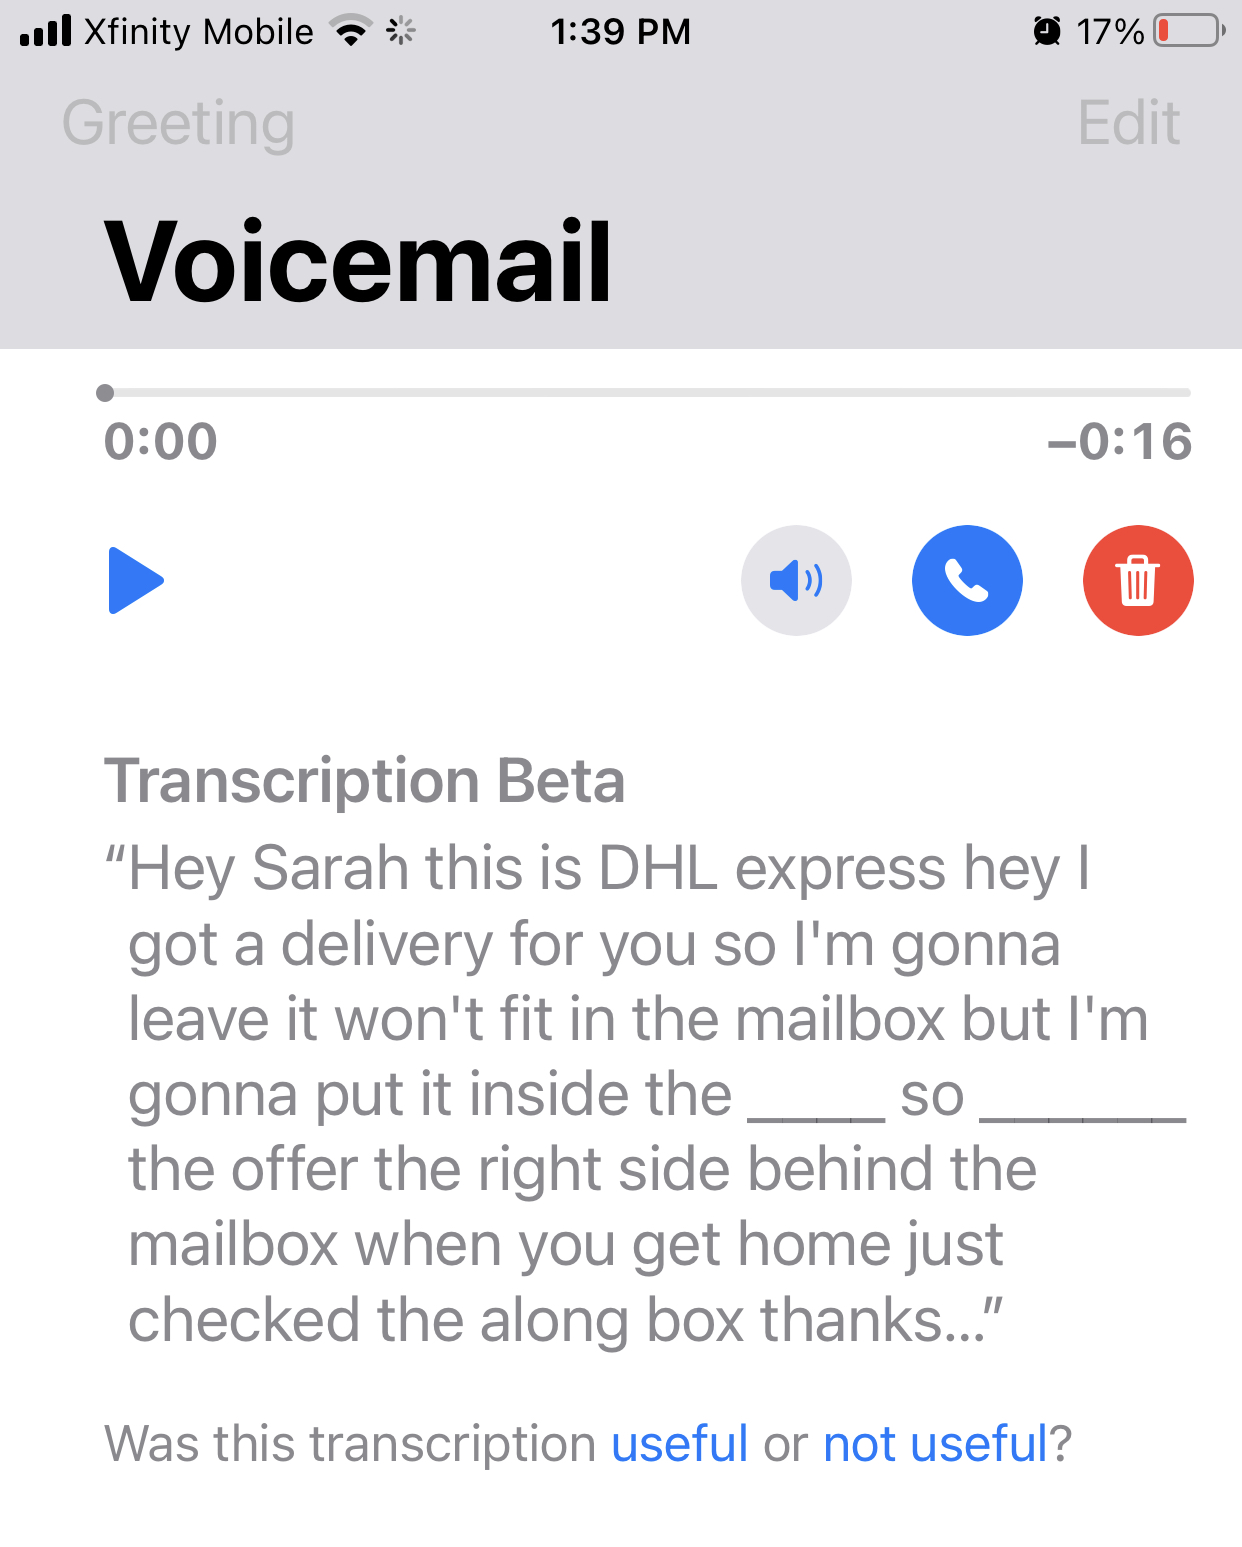
We actually thought it wasn’t going to arrive in time to be included in the installation and reveal for Mother’s Day, and I had resigned myself to that fact, but then at the last minute on the Friday before, as we were setting up I got this voicemail that they were delivering a package to my house- my wall paper! My daughter was able to drive it over to us so we could get it installed that afternoon!
After You’ve Taken Note of Your Architecture:
Once you know which elements in the room you want to enhance or tone down, you can get started on figuring out your furniture placement.
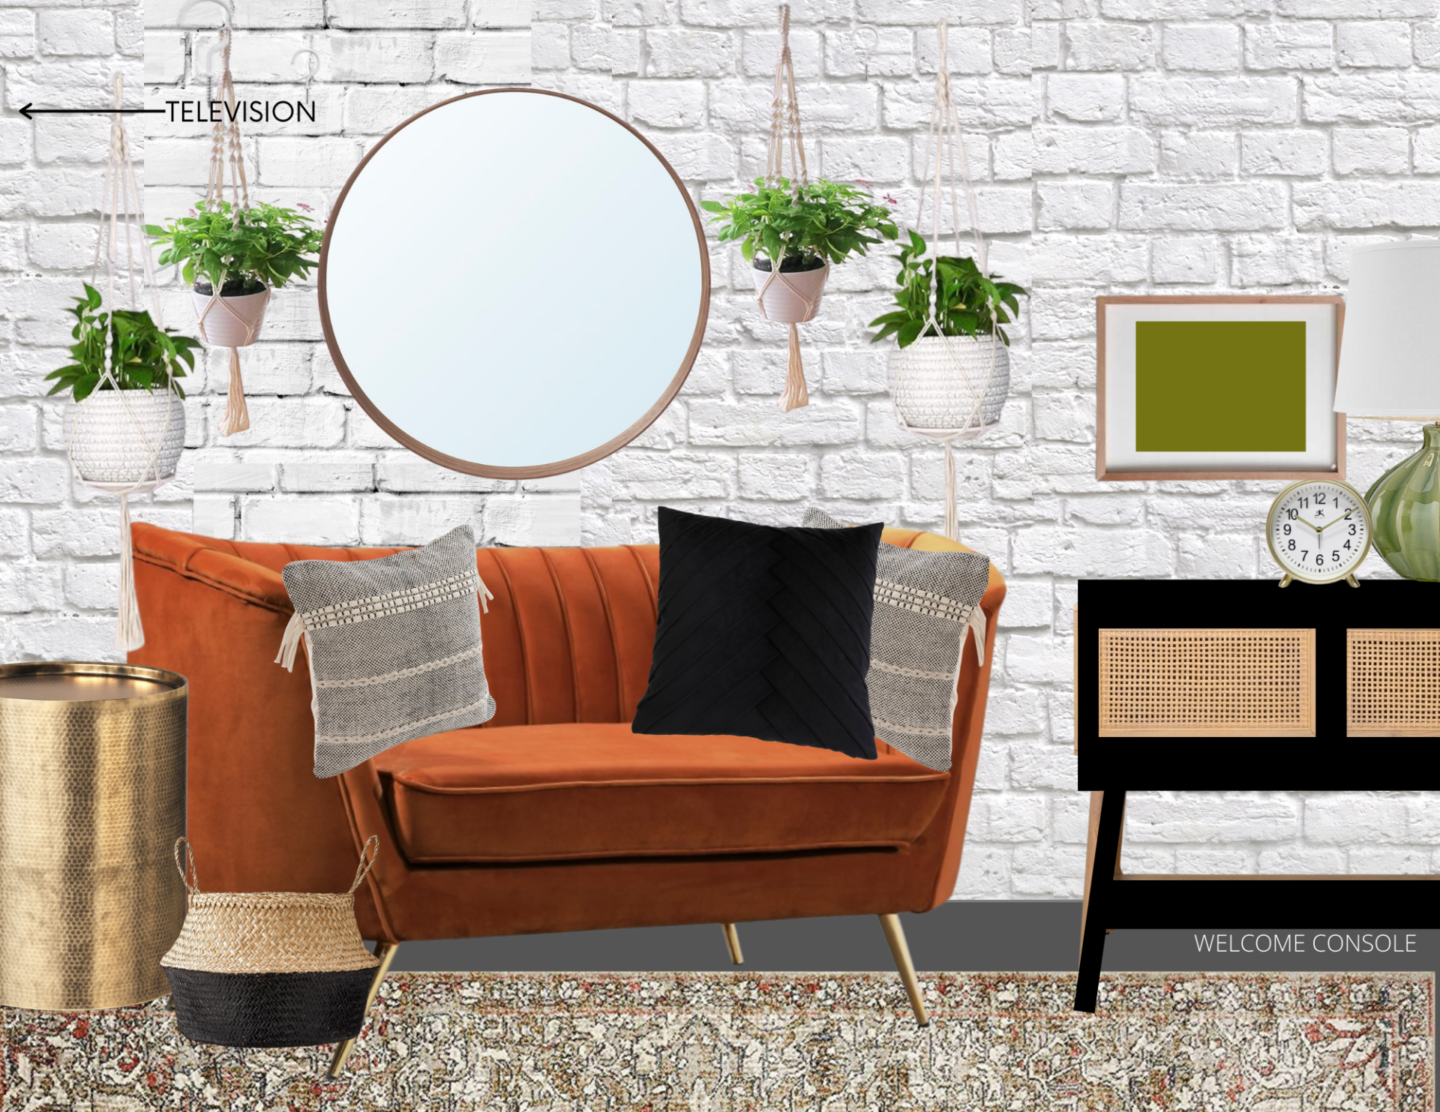
I love using the free Ballard Designs Room Planner to confirm my layout first, and then I create mood boards (or “wall elevations” using Canva. I have an entire blog tutorial on making your own design or mood boards that you can reference if that’s something you’d like to try. There’s a video tutorial that you can access by entering your email address below.
Here are my original plans and dreams for the space:

Personally, I find these design boards invaluable!
Take this church nursing room, for instance. I’m about a 30 minute drive away from the church, and we were setting up as a surprise for a Mother’s day reveal, so I couldn’t realistically be carrying my items back and forth to see them in the physical space.
Instead, I relied heavily on my moodboards to narrow down from the over 100,000 items I looked through down to the final 75 that we used for the room!
Being able to pop the different pieces together into a design board gives me a chance to visualize them in the space and make better informed decisions before I make my choices.
That isn’t to say that I didn’t sometimes still have to make changes after ordering and receiving pieces… To do this process well, you often have to be comfortable with making returns when something doesn’t work out.
When Things Don’t Go Exactly As Planned:
Sometimes, though, you have things that fail the design tests (see my mixing design styles post for more information about the tests your pieces should pass once they arrive) and instead of returning them you’re able to DIY a little magic to make them work. I had a few such instances within this project.
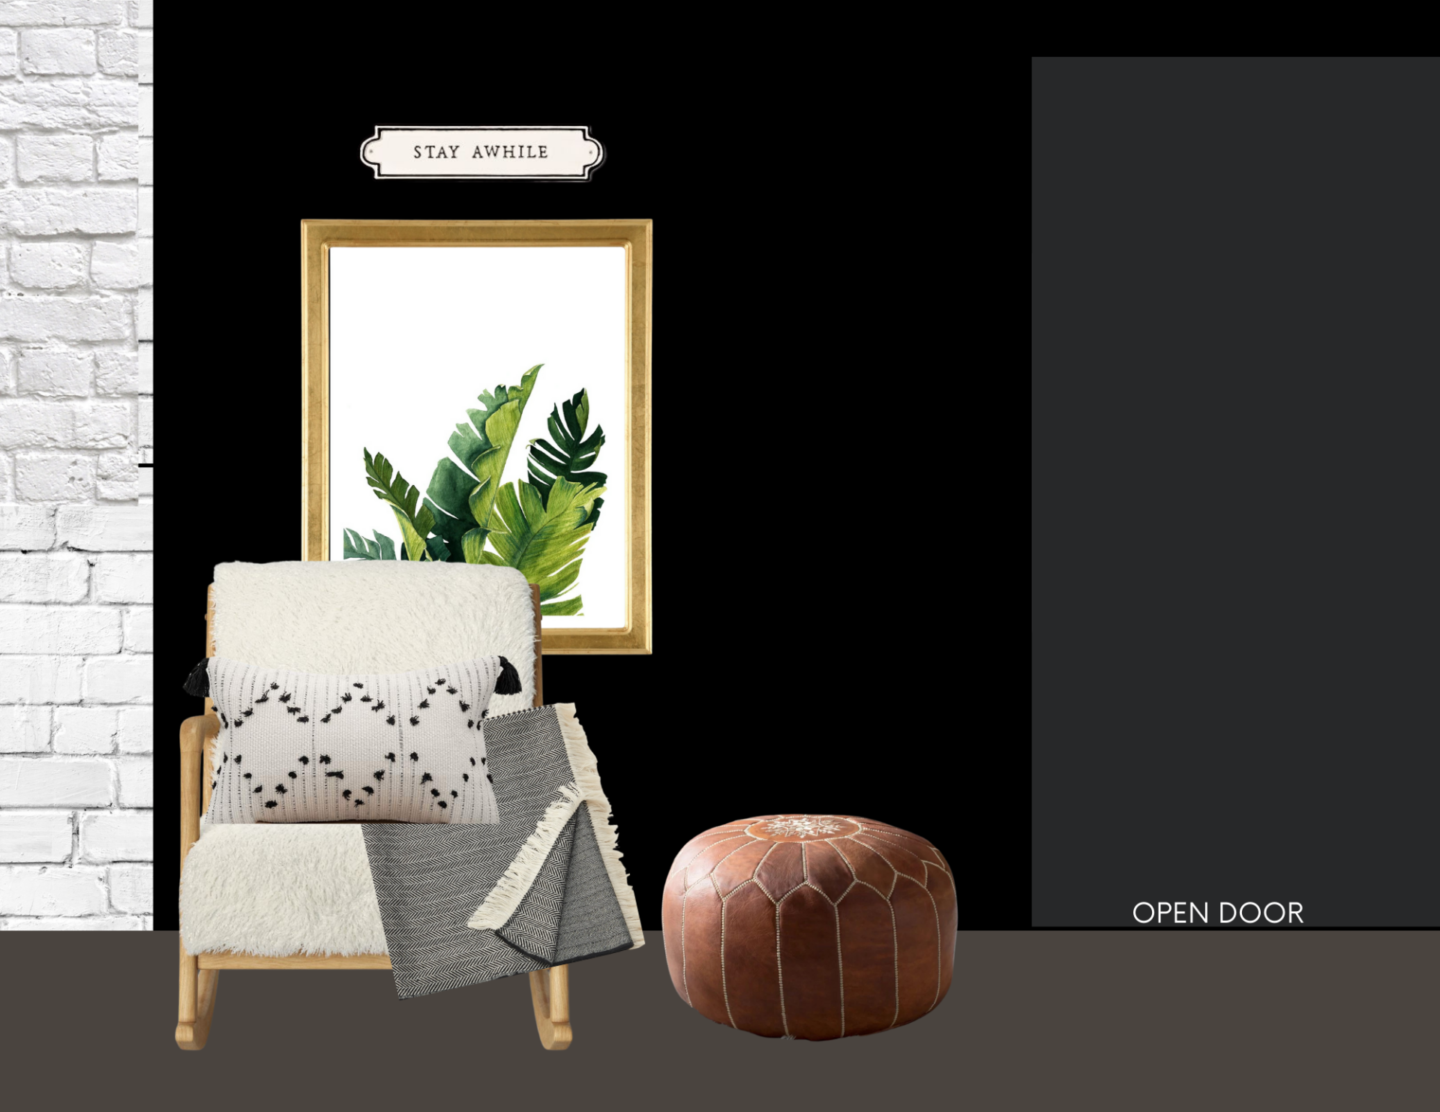
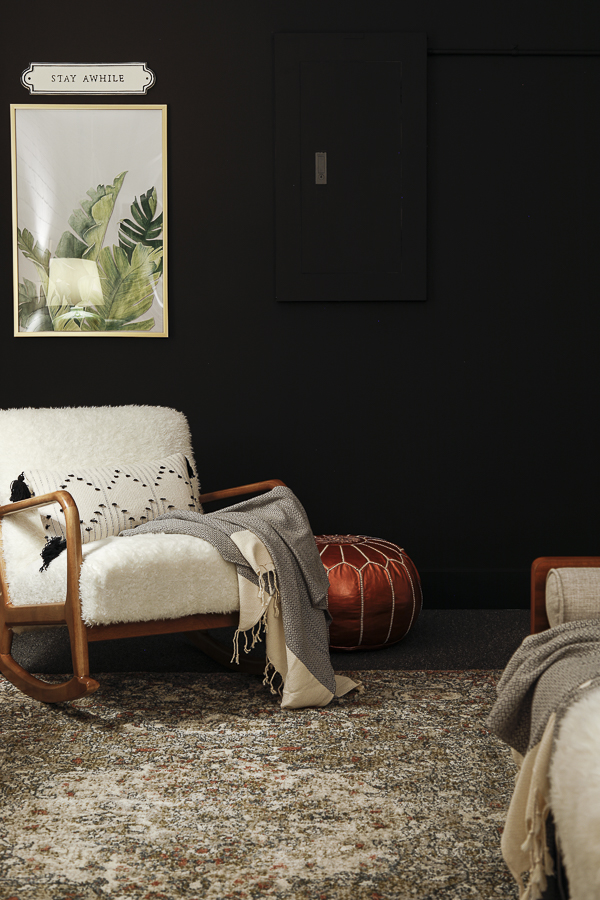
The leather pouf was one of those things. After trying out 9 poufs and not being satisfied with the colors, I decided that we would simply paint one with a custom color matched paint. We used Angelus leather paint, and after about 8 hours had a pouf in the perfect shade.
It was just the accent this corner with the fun white fur mid century modern rocking chair needed.
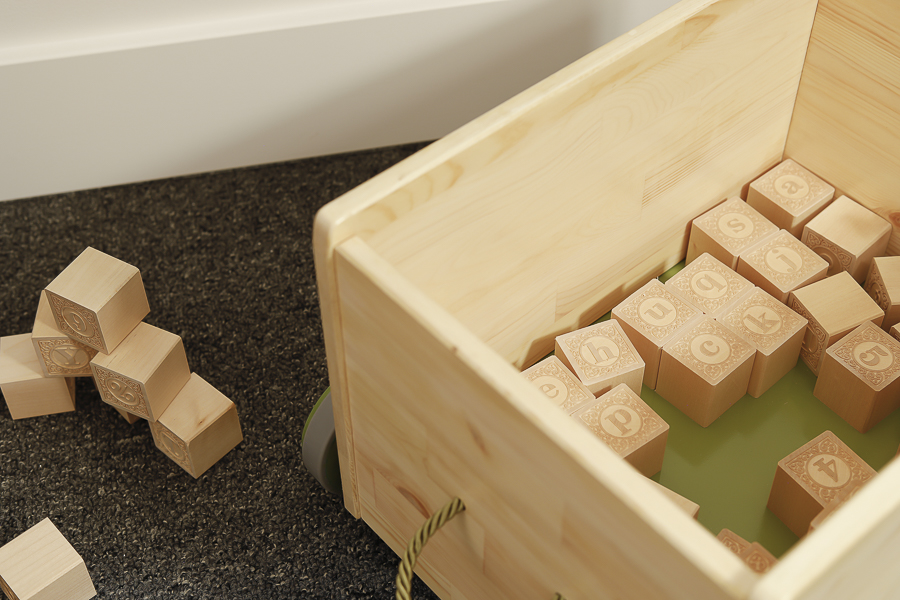
Another item that needed some tweaking once we got it in was the IKEA FLISAT toy storage wagon. I loved the idea of having it for storing our Uncle Goose wooden blocks, but the standard shade of green that it comes in was not a good match for the color of green used throughout our church.
I was able to spray paint the wheels and the base board inside, buy custom cording to replace the pulls, and clearcoat the raw wood to give it some extra protection.
Another big piece of the project that turned out wonderfully, but not at all how I had planned was the settee! I originally found one I loved and included on my mood board that was about $800. (This is a similar, smaller version!) But knowing that I wanted to keep this project within budget, I decided to search craigslist instead, and then simply have it re-upholstered.

After quite a bit of searching and following up on notifications from craigslist, Facebook marketplace and offer up, I found a great settee for only $175! Hooray! Smooth sailing from then on out, right?…Wrong!
If you’ve been following me on Instagram the past few weeks you already know some of the details of this story (I have a whole highlight about this project posted on my profile!)
Once we picked up the settee I started calling around town to find an upholsterer who could change the drab settee into the peachy salmon color of my dreams, and NO ONE had availability within the 6 week timeframe I was working in. And those who could do it in about that time would be charging $2,000. (Makes you want to just order the $800 settee, doesn’t it?!)
Well since I had already spent the $175 and had the settee just waiting at home, I decided to re-upholster it myself. About $50 and a few yards of beautiful salmon rose material later, I was ready to begin!
Sometimes I joke that I know just enough about upholstery to get myself in trouble. Luckily, even though this project did take 21 hours, it turned out quite nicely, and I’m glad for the experience.
I had never done double welting before (the thin accent pieces along the edges), and I had been wishing that the channel tufts (vertical sewn lines down the back of the original settee) were spaced a bit further apart.
Luckily, when you DIY things, you can DIY them in exactly the way you’d prefer them done.
The last of my challenging pieces was my gold end table. It’s the Manila Cylinder Drum accent Table from the project 62 line at Target, but what I realized when I got it in was that the black glazing was really strong and not at all the soft champagne gold I was after.
I shared about it on Instagram, and one of my followers mentioned using Wright’s Copper Cleaner, which worked well! It did still take over 9 hours, but it was well worth it!
The Church Nursing Room Reveal:
Ok, who’s ready to see the entire space?!
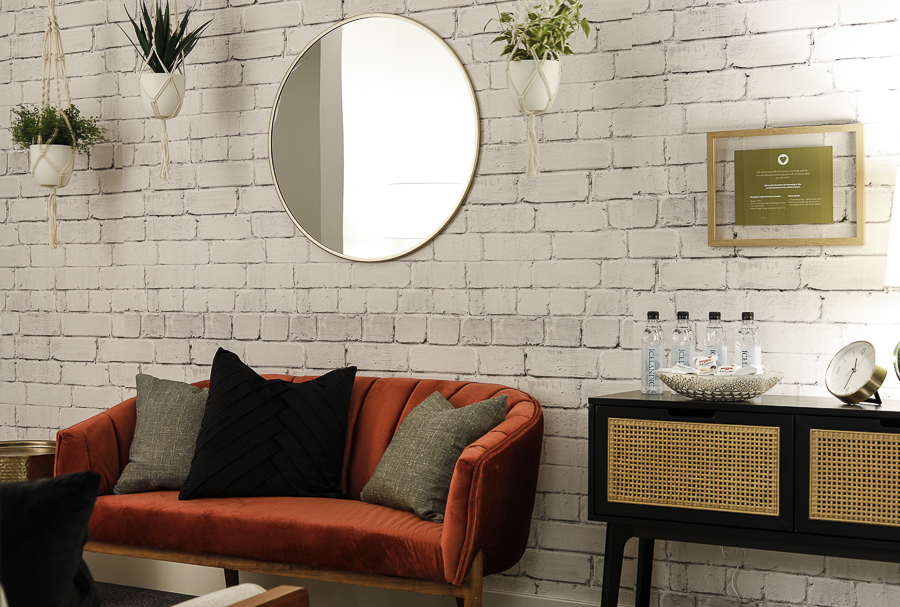
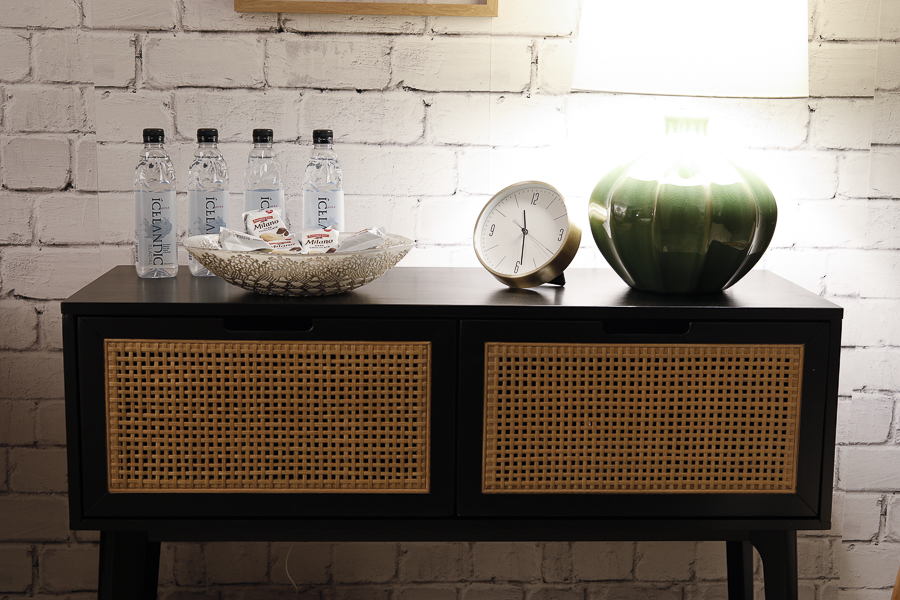
I wanted the mamas to feel really at home when they first walked in the door, so they’re greeted by this welcome table with some drinks and snacks and a welcome sign that shares all the details about how to use the Bluetooth headphones which are stored away in this caned Hearth & Hand console table that we painted black.
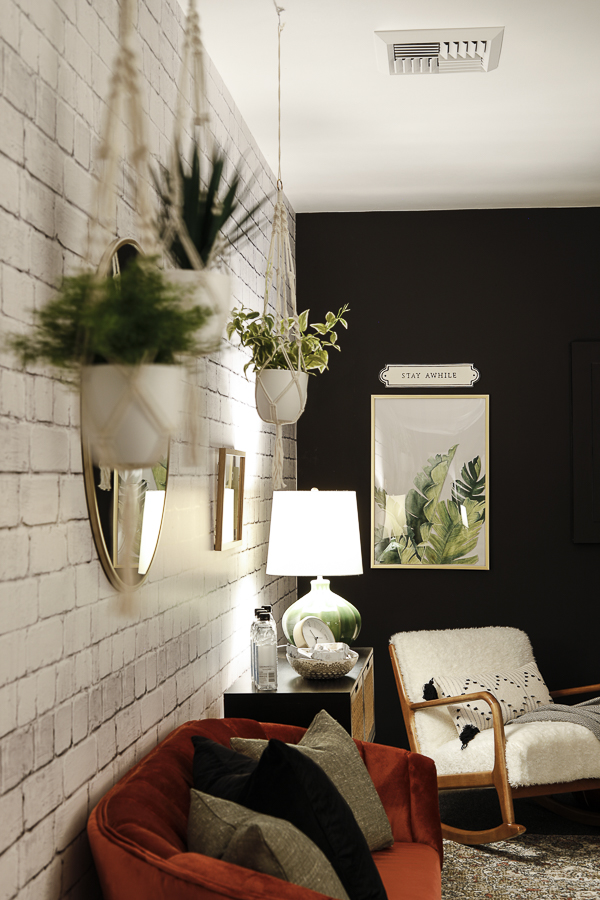
Along that same wall in front of the beautiful white brick wallpaper is the new settee with lots of comfortable velvet and tweed-look pillows.
The round mirror is also from Project 62 at target.
The plants are from Hobby Lobby, in white pots from Amazon and hung up in macramé hangers to make full use of the height of the room.
The gorgeous green gourd shaped lamp is also from Amazon.

Here’s a peak at how the gold side table I mentioned earlier turned out! Isn’t this champagne gold lovely in this space?
My daughter helped me paint the bottom of this IKEA belly basket and we hot glued on a tiny pom pom trim. This will hold soiled linens that need to be washed (from the changing table & boppy pillows).

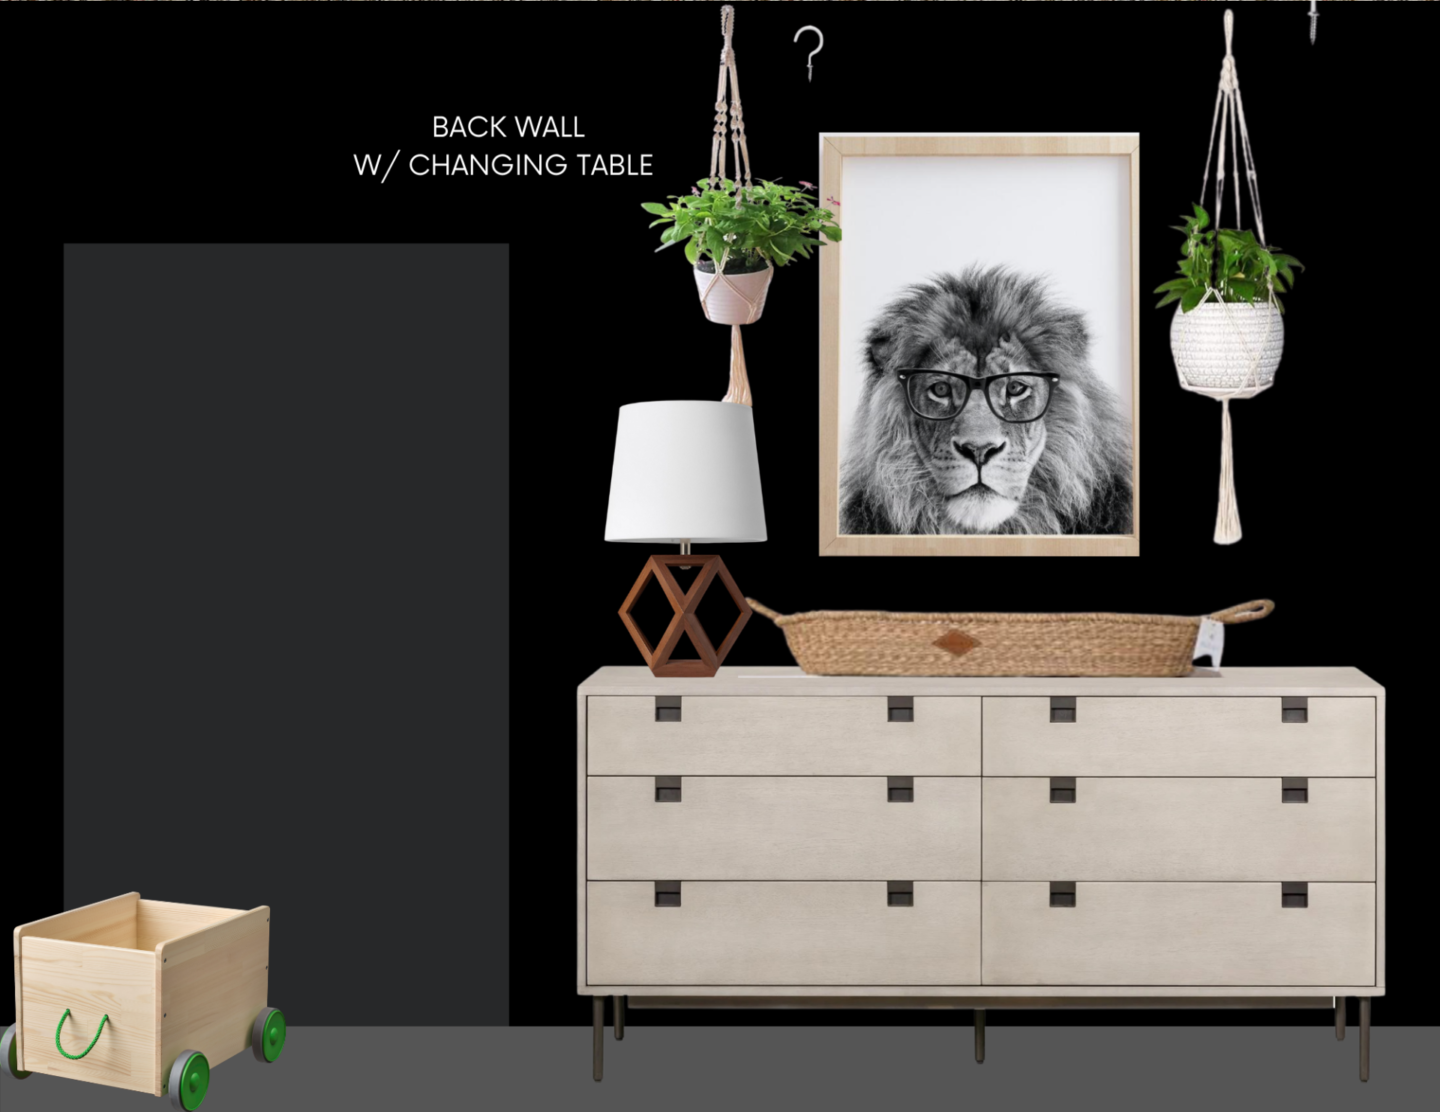
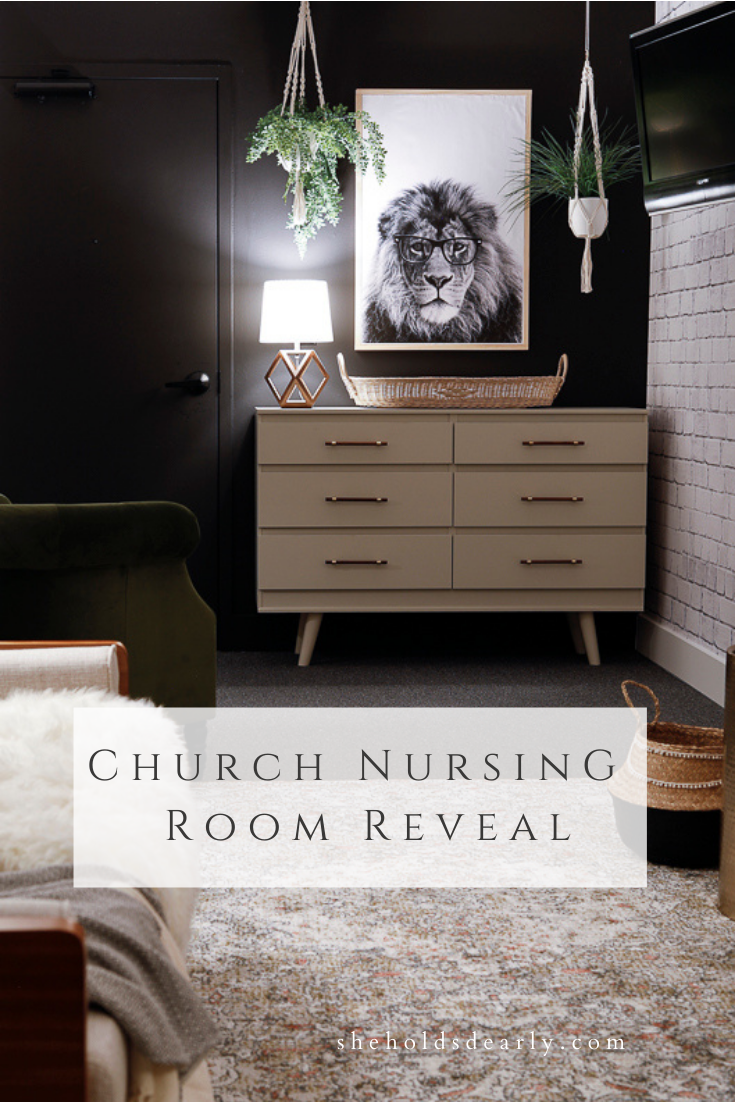
This back corner is for the changing table.
The dresser itself is the KULLEN dresser from IKEA – and this might be my biggest regret about the room. I had been searching for just the right option and felt like I had to settle a little with this. It was $100 from IKEA, but as we were assembling it I was realizing it was truly the cheapest dresser I’ve ever seen.
We added legs to raise it up and give it a more mid-century modern feel, added beautiful wooden pulls, and baby proofed the potential tipping hazard and the drawers. I felt better about it once it was painted and updated with our changes, but I still wish the dresser itself could have been a little better quality.
Sitting on top is this beautiful changing basket by Olliella and a fun geometric lamp that had been previously donated to the nursing mother’s room that fit in perfectly.
Inside the drawers of the changing dresser I included extra changing pad and boppy pillow covers so that we could swap them out to launder them when they’re soiled.
Above the table is this friendly lion with glasses from Etsy. I like the visualization of the “Lion of Judah”, and appreciated that the glasses makes him look a bit more friendly and less intimidating.
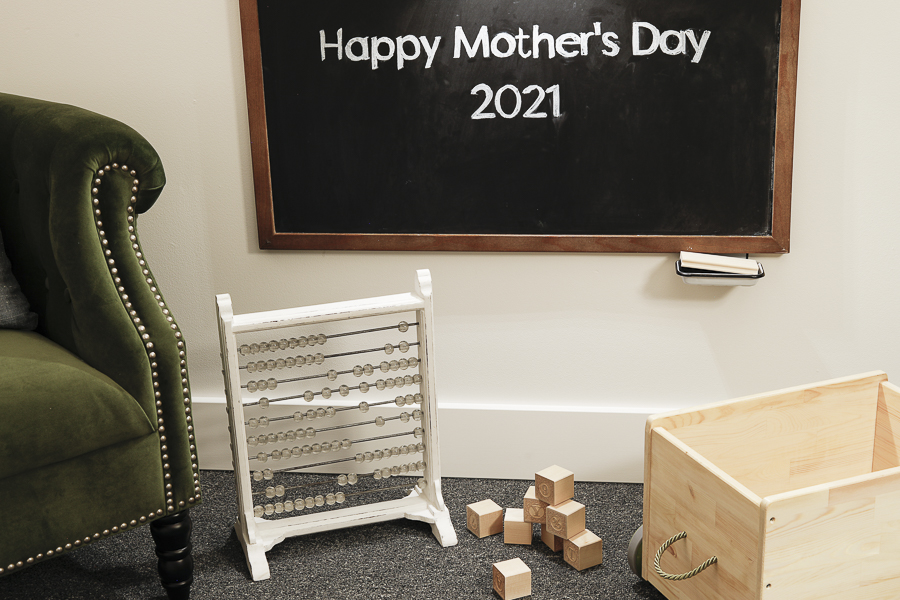
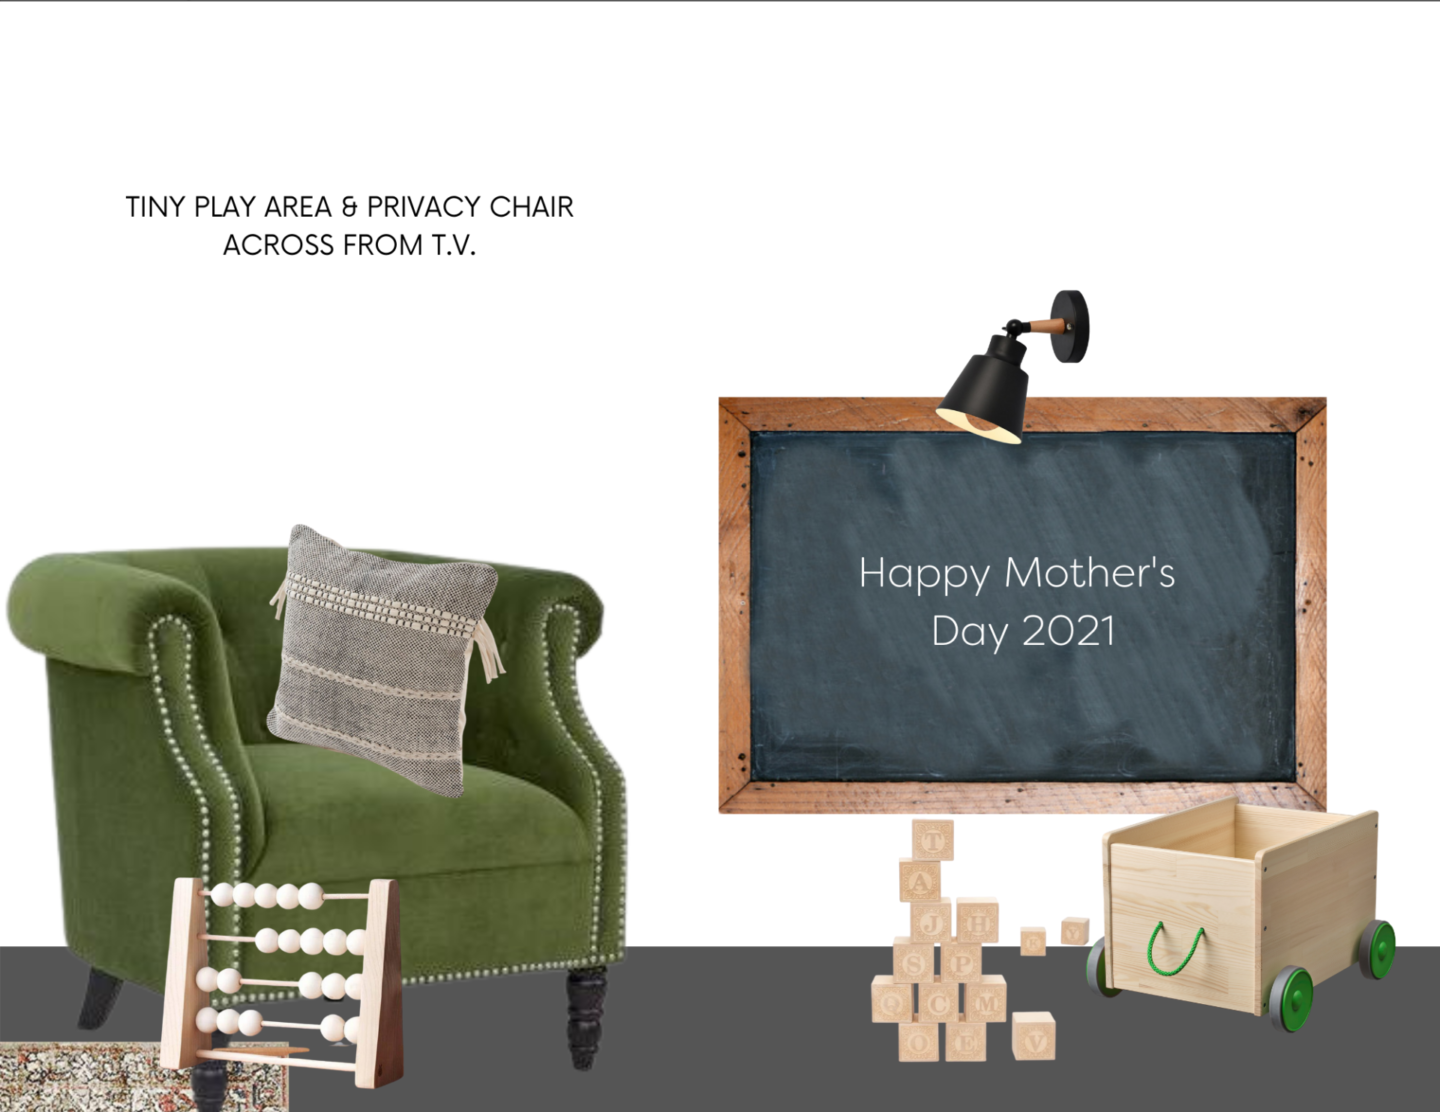
This corner includes a small designated play space for older sibilngs who might come along with mom while she’s feeding the baby and who need a little quiet place with some fun items to help capture their attention.
This short chalk board is just the right height for toddlers and includes extra chalk in an attached soap dish.
The sconce light above the chalk board is lit using the “Magic Light Trick” popularized by Brooke from the Nesting With Grace blog.
This glass abacus was a thrifting find that I had originally thought about keeping for a someday playroom for grand-children, but I figured it would be better for it to be used now instead of being packed away for the next years. (Here’s a similar one.)

The green velvet tufted chair that’s in this corner was set here purposefully for a mom who needed a bit more quiet or privacy while nursing or holding a sleeping baby.
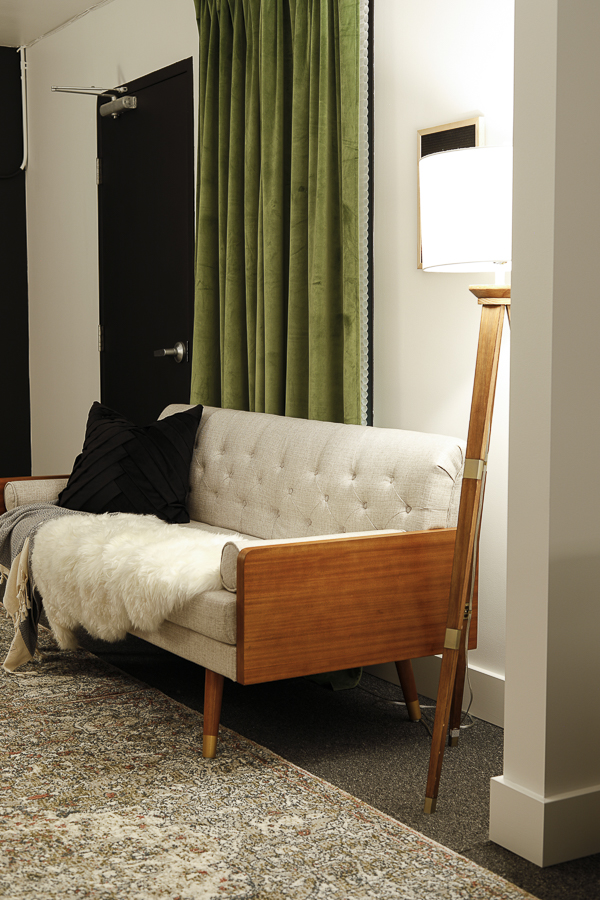
The next area is back around to the immediate left of the entrance door and is part of the more social side of the room. This lovely cream mid-century modern couch by Christopher Knight faces the settee and the rocking chair for mamas who want to be able to visit while they’re here.
These two rugs were some of my favorite finds. The variety of colors in the pattern gave me so many good accent colors to work with.
The tall floor lamp was another lamp that had been previously donated and ended up working perfectly in the design!
I got to add a lovely pinch-pleat detail at the top of these green velour curtain panels (that cover a window that looks out into the main foyer) and I think it gave them such a structured and tailored look.
I added a sheepskin rug and black and cream throw blankets for extra coziness and comfort.

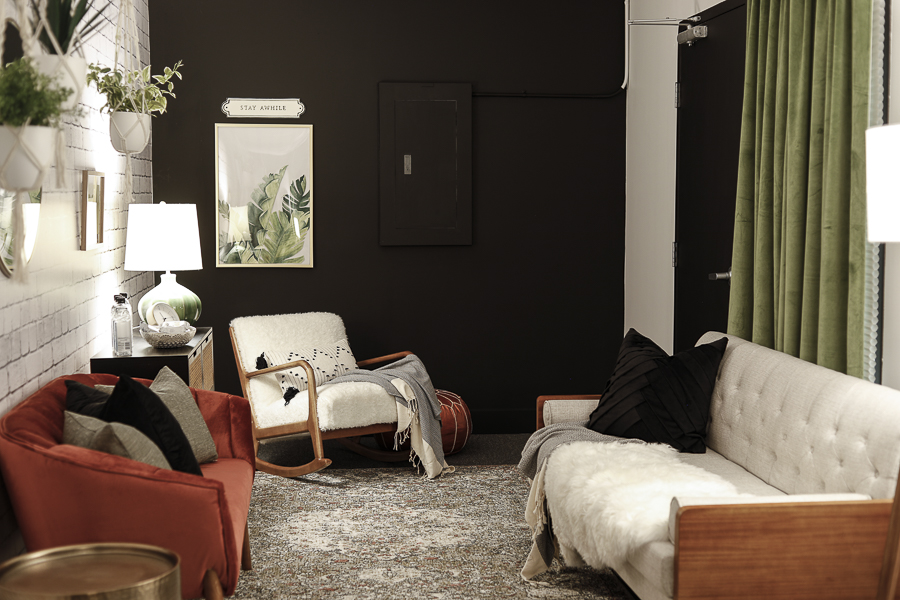
The last corner has this plush white fur mid-century modern rocking chair with another black and cream throw, and a fun accented lumbar pillow.
Above that I added some beautiful green leaf art (there are some stories about this on the Instagram highlight as well), and a fun “Stay Awhile” sign.
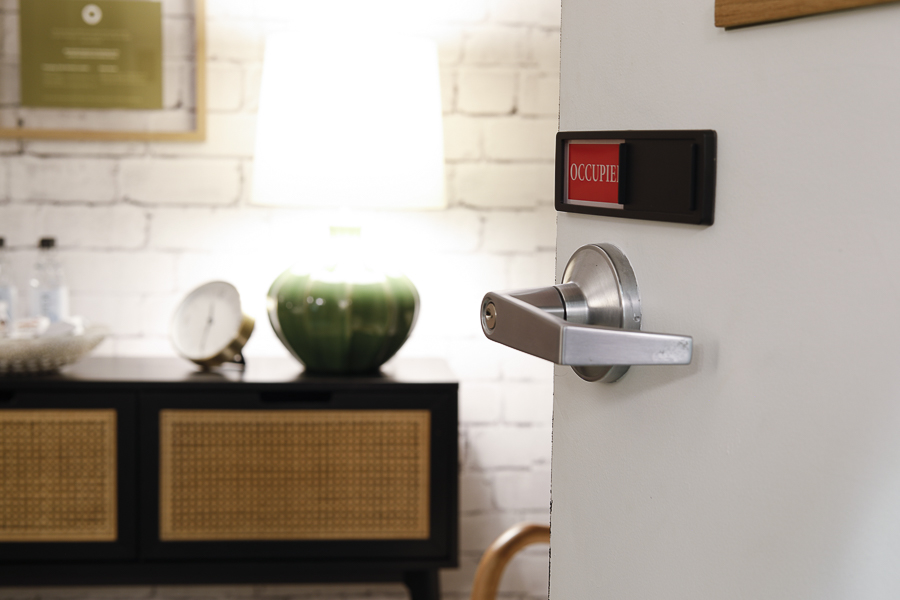
On the outside of the door leading in from the foyer I included a magnetic sliding sign that can show when the room is vacant or when it’s occupied and intended only for moms.
And that is our church nursing room! This has been such an exciting project to work on, and I’ve been glad to have been able to bring you along for the whole process!
The feedback we got on Mother’s Day when we had an open house for the church was all very positive, and I’ve even had some really exciting conversations with other women online who have been inspired to see about upgrading their nursing mother’s rooms to include that space as an extension of their sanctuary as well, and even others who have been wanting to find a way to maybe do some mentoring for younger moms, who realized that being available to visit and fellowship together, and offer an extra set of arms when needed could be just the way to get started.
I would love to answer any questions in the comments, or to hear more about how your church handles the nursing rooms for your moms & babies!
Pin This Church Nursing Room for Later:
Until next time,


